Alle OpenHAB Tutorials
- OpenHAB 3 Camera Binding
- OpenHAB 3 Camera Widget
- OpenHAB 3 in Docker
- OpenHAB 3 MQTT Binding
- OpenHAB Smarthome
- OpenHAB IP Camera Binding
- openHABian on a Raspberry Pi
- INSTAR MQTT - OpenHAB2
All OpenHAB FAQs
- OpenHab MQTT Auto-Discovery
- OpenHab3 IpCamera Binding Alarmserver
- OpenHab3 IpCamera Binding with an WQHD Camera
- Using OpenHab3 in Docker with an WQHD Camera
- OpenHAB v3 Configuration for your WQHD INSTAR MQTTv5 Broker
- OpenHAB v3 filebased Configuration for your WQHD INSTAR MQTTv5 Broker
- OpenHAB v3 Rules for your WQHD INSTAR MQTTv5 Broker
- OpenHAB v3 Blockly Scripts for your WQHD INSTAR MQTTv5 Broker
- OpenHAB v3 Sitemaps for your WQHD INSTAR MQTTv5 Broker
- Debugging the OpenHAB IP Camera Binding
INSTAR MQTT Server with OpenHAB2
OpenHAB Configuration though Paper UI
The Paper UI is a new interface that helps setting up and configuring your openHAB instance. It does not (yet) cover all aspects, so you still need to resort to textual configuration files.
Add-on management: Easily install or uninstall openHAB add-ons:
MQTT Binding
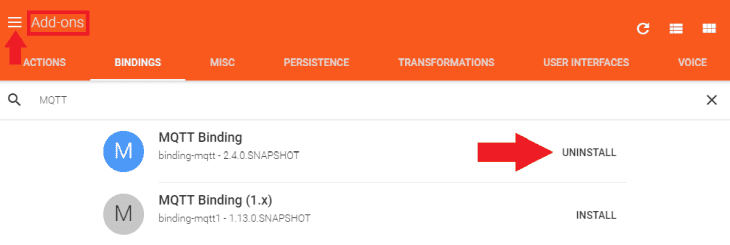
Go to the Add-Ons Menu and click on the Bindings Tab. We are going to use the MQTT protocol to communicate with our INSTAR IP camera from OpenHAB. To be able to connect to the INSTAR MQTT Server we need to install the MQTT Binding - make sure that you choose the Version 2 (at the moment of writing this is the 2.4.0 version).
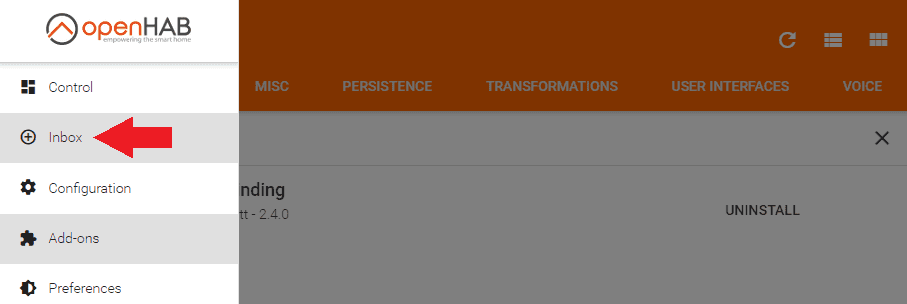
Now switch to your OpenHAB Inbox:
Click on the + icon to add the MQTT Binding:
Find the MQTT Binding inside the list and select it:
Click on Add Manually:
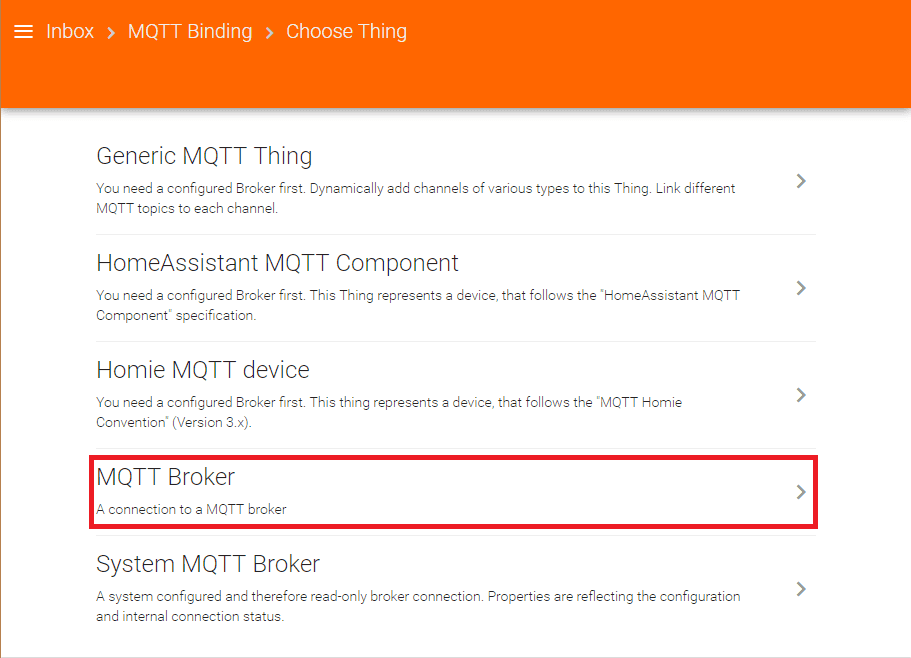
And choose the MQTT Broker:
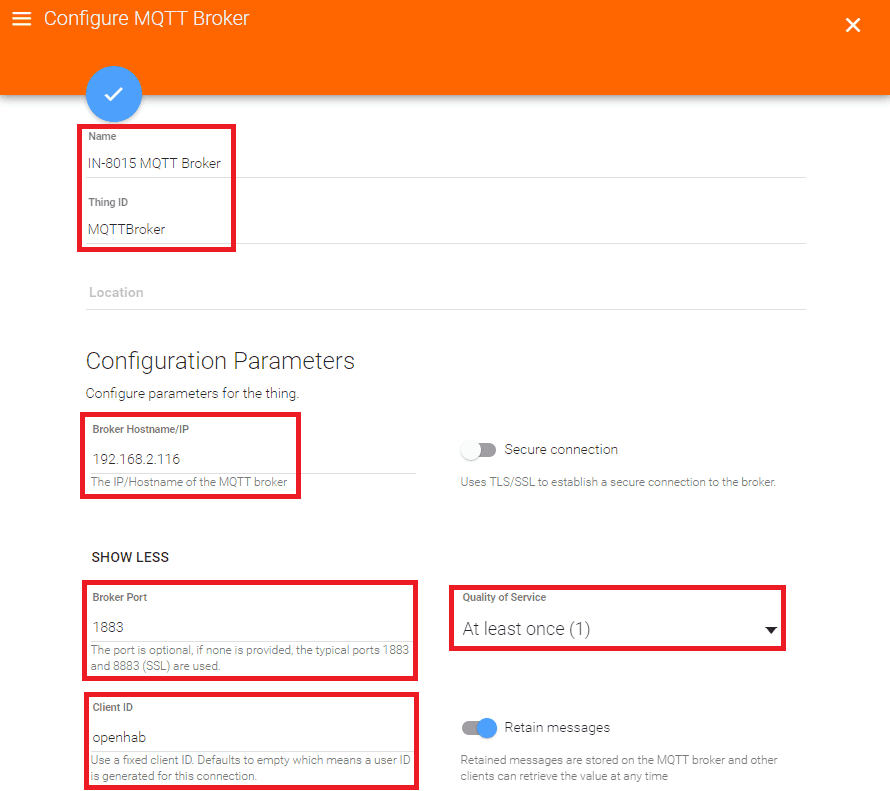
With the newest Firmware for your INSTAR Full HD camera, you can use the camera as MQTT Broker. For older cameras models please install a MQTT broker like Mosquito first. Add your brokers IP address and the broker port - by default this is 1883. Note that we are first not going to use TLS encryption. We can add it once we are able to establish the connection:
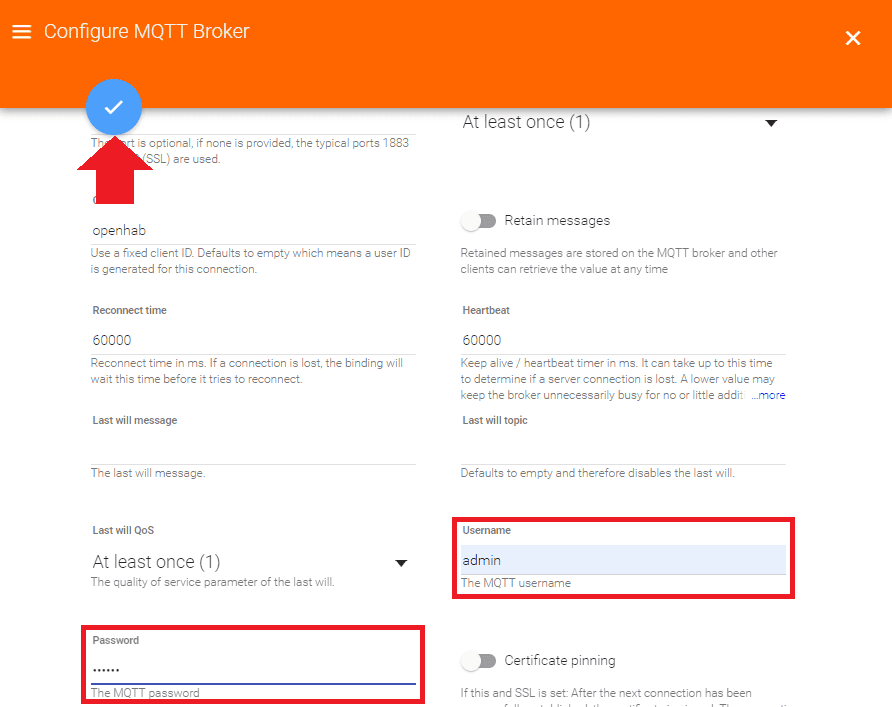
Your INSTAR Full HD cameras MQTT login is the one you added in the MQTT Menu (if you are using Mosquitto, use the password you defined when setting up your server). Then save your setting by clicking on the blue confirmation button:
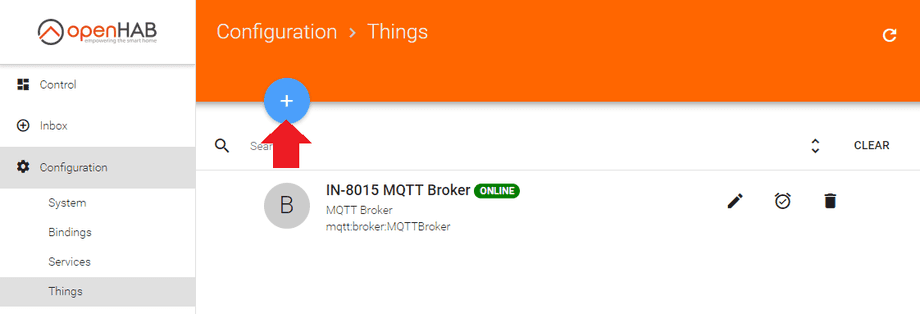
Back in the Things Menu click on + again - this time to add a Thing that we can use for an PaperUI button later on:
Click on MQTT Binding:
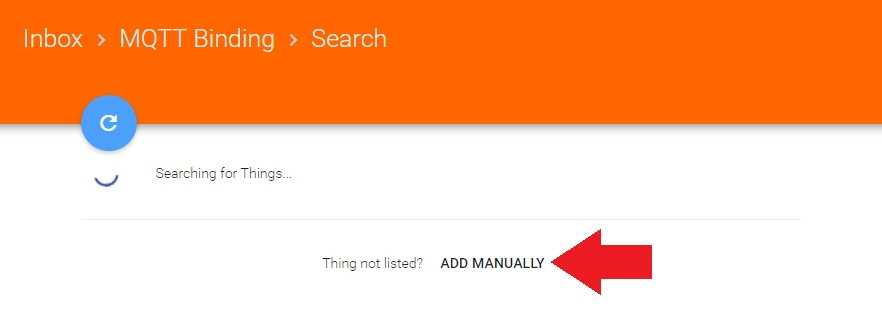
And Add Manually:
This time we need to add a Generic MQTT Thing:
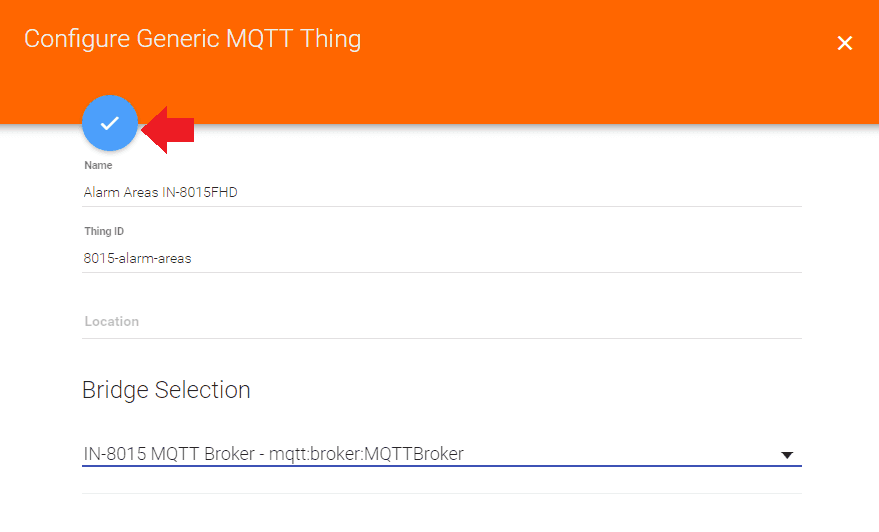
I am going to create switch that activates or deactivates the alarm areas of an INSTAR IN-8015FHD camera. The Thing ID represents the MQTT topic that we will have to address to send the command to the selected camera. As Bridge you need to select the MQTT broker you just created. Click on the blue button to confirm:
Back in the Thing Menu click to edit the Thing you just created:
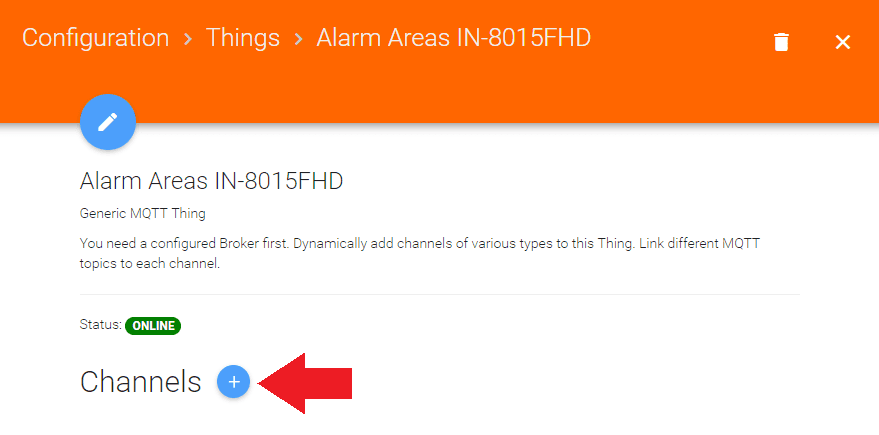
Click on the blue + button to add a Channel to the Thing:
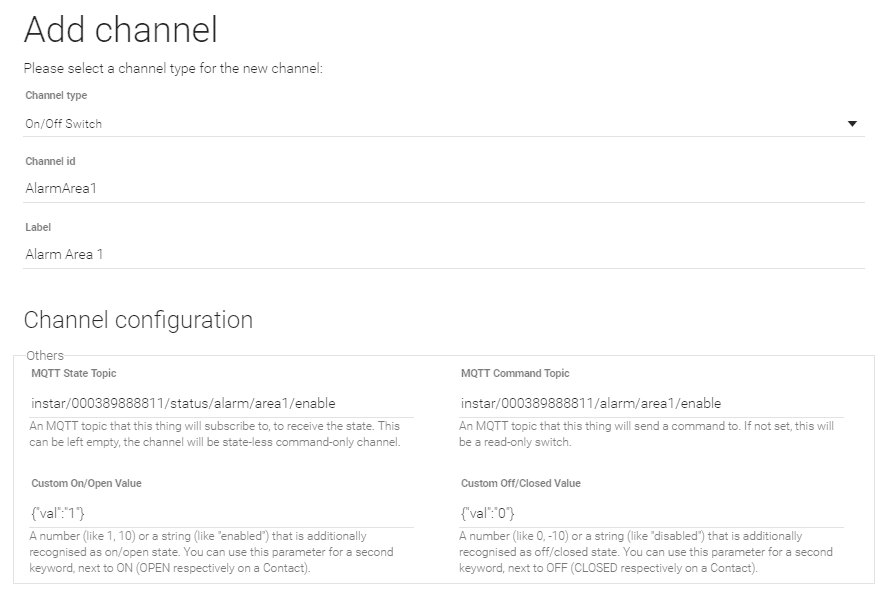
I am going to use an ON/Off Switch. The MQTT topic to go to switch the first alarm area is created by adding the prefix instar and your cameras LAN MAC Address (e.g. 00:03:89:88:88:11 - without the colons) to the corresponding INSTAR MQTT topic alarm/area1/enable -> instar/000389888811/alarm/area1/enable for the COMMAND Topic and as message payload we need to add {"val":"1"} and {"val":"0"} to either switch the area on or off. To set the state of our switch, we can use the STATUS Topic instar/000389888811/status/alarm/area1/enable:
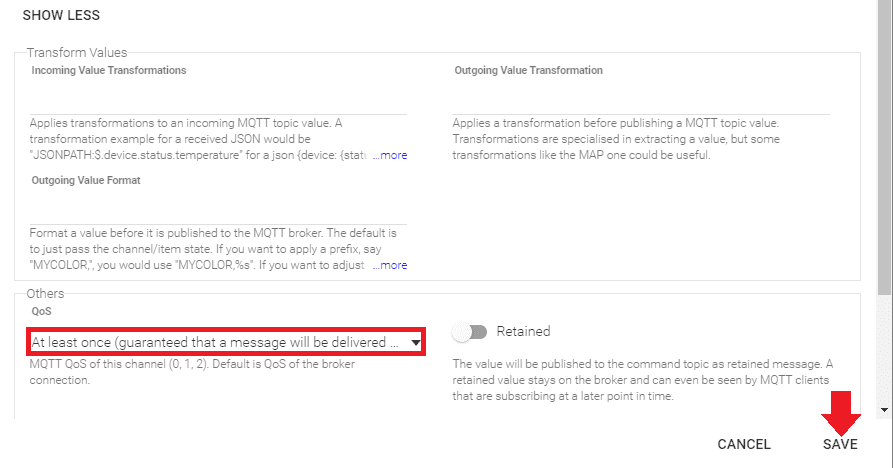
In the expanded settings we have to set up the Quality-of-Service QoS to make sure every update is delivered At-least-once. Now click on Save to continue.
By clicking on the blue icon in front of the created channel we are now able to link it to a switch in the OpenHAB PaperUI:
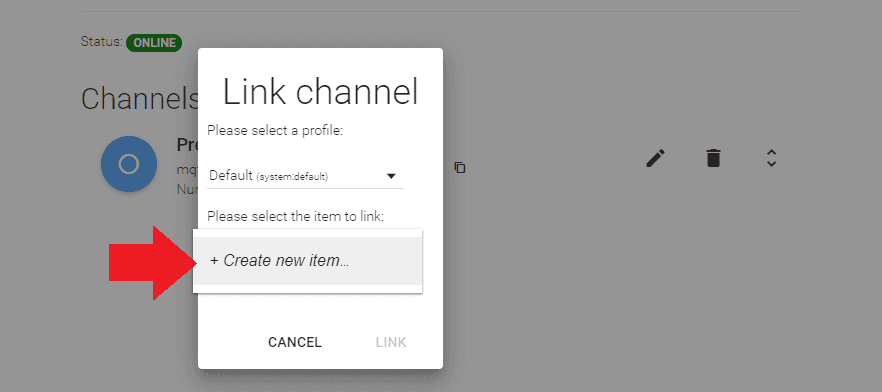
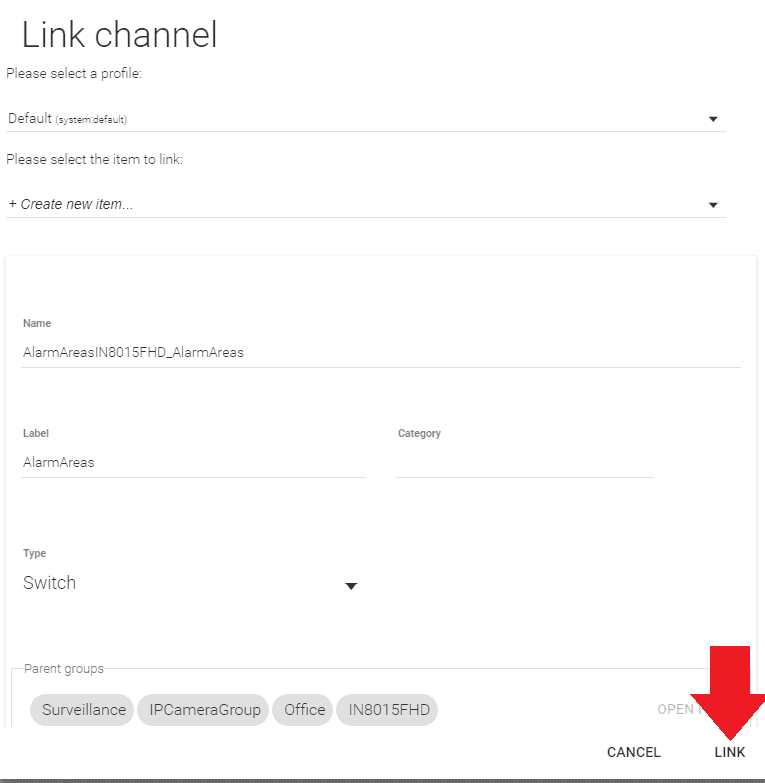
Click on Create new item...:
Click on Link:
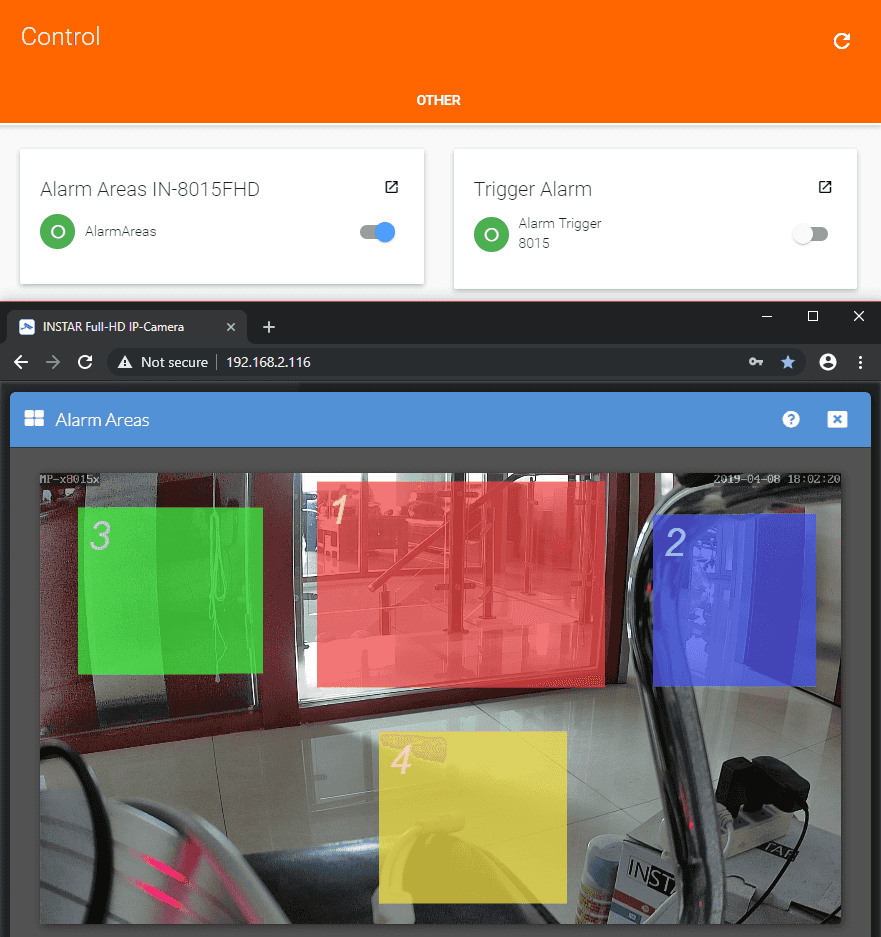
You can now click on Control to open the PaperUI:
Our Alarm Areas can now be switched from the OpenHAB Paper UI. Clicking the switch will send the MQTT message to our MQTT server that is going to notify our camera to either switch area 1 on or off.
All right that's it - the Binding was successfully added and we are now able to control all of our camera functions with the MQTT interface.
