Alle OpenHAB Tutorials
- OpenHAB 3 Camera Binding
- OpenHAB 3 Camera Widget
- OpenHAB 3 in Docker
- OpenHAB 3 MQTT Binding
- OpenHAB Smarthome
- OpenHAB IP Camera Binding
- openHABian on a Raspberry Pi
- INSTAR MQTT - OpenHAB2
All OpenHAB FAQs
- OpenHab3 IpCamera Binding Alarmserver
- OpenHab3 IpCamera Binding with an WQHD Camera
- Using OpenHab3 in Docker with an WQHD Camera
- OpenHAB v3 Configuration for your WQHD INSTAR MQTTv5 Broker
- OpenHAB v3 filebased Configuration for your WQHD INSTAR MQTTv5 Broker
- OpenHAB v3 Rules for your WQHD INSTAR MQTTv5 Broker
- OpenHAB v3 Blockly Scripts for your WQHD INSTAR MQTTv5 Broker
- OpenHAB v3 Sitemaps for your WQHD INSTAR MQTTv5 Broker
- Debugging the OpenHAB IP Camera Binding
OpenHAB with your WQHD INSTAR MQTTv5 Broker Part II
- Part I - MQTT Binding Configuration through the Main UI
- Part II - MQTT Binding Configuration through the Configuration Files
- Part III - MQTT Binding Rules
- Part IV - MQTT Binding Scripts
- Part V - Groups and Sitemaps
File-based Configuration
A: Part 1 of this tutorial installed the OpenHAB MQTT binding and connected it to the internal broker in our INSTAR WQHD camera using the OpenHab 3 Main UI. This Part II will do the same by editing the configuration files of our OpenHab 3 installation.
Depending on where and how you installed OpenHab you will find those configuration files in different locations. I am following the Docker installation which allows me to define a volume mount for the OpenHab configuration on my hosts file system, e.g. /opt/openhab/openhab_conf:
Preparation
groupadd -g 9001 openhab
useradd -g 9001 openhab
usermod -a -G openhab myownuser

mkdir -p /opt/openhab/{openhab_addons,openhab_conf,openhab_userdata}
chmod -R 775 /opt/openhab
Run the Container
docker pull openhab/openhab:latest-alpinedocker run \
--name openhab \
--net=host \
--privileged \
--rm \
-v /etc/localtime:/etc/localtime:ro \
-v /opt/openhab/openhab_addons:/openhab/addons \
-v /opt/openhab/openhab_conf:/openhab/conf \
-v /opt/openhab/openhab_userdata:/openhab/userdata \
-d \
openhab/openhab:latest-alpineThe configuration directory now contains the following files:
ls -la /opt/openhab/openhab_conf

total 56
drwxr-xr-x 14 9001 openhab 4096 Aug 11 17:21 .
drwxrwxr-x  5 root root    4096 Aug 11 17:19 ..
drwxr-xr-x  3 9001 openhab 4096 Aug 11 17:21 automation
drwxr-xr-x  2 9001 openhab 4096 Jun 27 07:38 html
drwxr-xr-x  3 9001 openhab 4096 Jun 27 07:38 icons
drwxr-xr-x  2 9001 openhab 4096 Jun 27 07:38 items
drwxr-xr-x  2 9001 openhab 4096 Jun 27 07:38 persistence
drwxr-xr-x  2 9001 openhab 4096 Jun 27 07:38 rules
drwxr-xr-x  2 9001 openhab 4096 Jun 27 07:38 scripts
drwxr-xr-x  2 9001 openhab 4096 Aug 11 17:21 services
drwxr-xr-x  2 9001 openhab 4096 Jun 27 07:38 sitemaps
drwxr-xr-x  2 9001 openhab 4096 Jun 27 07:38 sounds
drwxr-xr-x  2 9001 openhab 4096 Jun 27 07:38 things
drwxr-xr-x  2 9001 openhab 4096 Jun 27 07:38 transform
Binding Installation
The Binding configuration can be found in /opt/openhab/openhab_conf/addons.cfg. Add all the bindings and transformations you need here:
# A comma-separated list of bindings to install (e.g. "binding = knx,sonos,zwave")
binding = mqtt,ipcamera

# A comma-separated list of transformation services to install (e.g. "transformation = jsonpath,map")
transformation = javascript,regex,jsonpath
Save the file and switch back to the UI. You should see that everything has been installed again.
Configuration
Defining Things
All thing files are located in the things directory, have to have the .things file extension and must follow a special syntax. Here we need to add the same configuration as before to connect the MQTT Binding to our camera:
things/instar_mqtt.things
mqtt:broker:cameraBroker118 [ host="192.168.2.118",secure=false, port=1883, username="admin", password="instar" ]And now we can continue defining a Thing with all the channels we need. But we can add two new features:
- Checking availability: We can use our cameras Last-Will-Topic to verify that the camera is available:
cameras/118/status/testamentcan have the payload{"val": "alive"}or{"val": "dead"}as configured in Part I. - Incoming Value Transformation: Our camera uses the JSAN format for MQTT payloads. Which means that we can use the JSONPath Transformation to extract the value from it.
Add the following Thing configuration below the broker configuration to toggle the Privacy Area 1 of your camera that is controlled by multimedia/privacy/region1/enable:
Thing mqtt:topic:home "Camera 118" (mqtt:broker:cameraBroker118) [ availabilityTopic="cameras/118/status/testament", payloadAvailable="{\"val\":\"alive\"}", payloadNotAvailable="{\"val\":\"dead\"}" ] {
    Channels:
    Type switch    : PrivacyArea1   [ stateTopic="cameras/118/status/multimedia/privacy/region1/enable",
                                    commandTopic="cameras/118/multimedia/privacy/region1/enable",
                                    transformationPattern="JSONPATH:$.val",
                                    formatBeforePublish="{\"val\":\"%s\"}",
                                    on="1",
                                    off="0" ]
}
After saving the configuration file switch back to the OpenHab UI. You should now see both the configured MQTT Broker and the toggle for the privacy area:
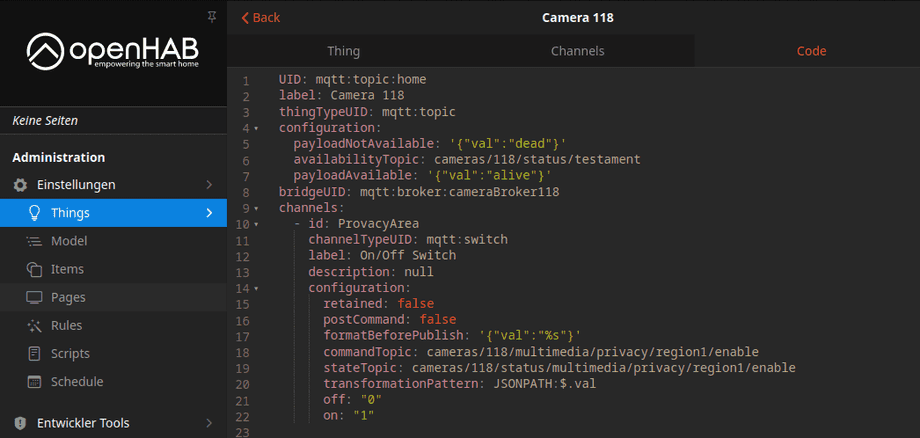
We can also check the code representation of our Thing and see that it is basically the same as we had before - but plus the additional functions we configured above:
Defining Items
We now have the data point or channel but we still need a way to interact with it. This can be done with an Item. Enter the items directory in the OpenHab configuration folder and create a file called mqtt.items. In this file we can now create an item that can interact with the Channel PrivacyArea of Type switch we created above:
/* Privacy Areas */
Switch    PrivacyArea1   "Privacy Area 1"  {channel="mqtt:topic:home:PrivacyArea1"}
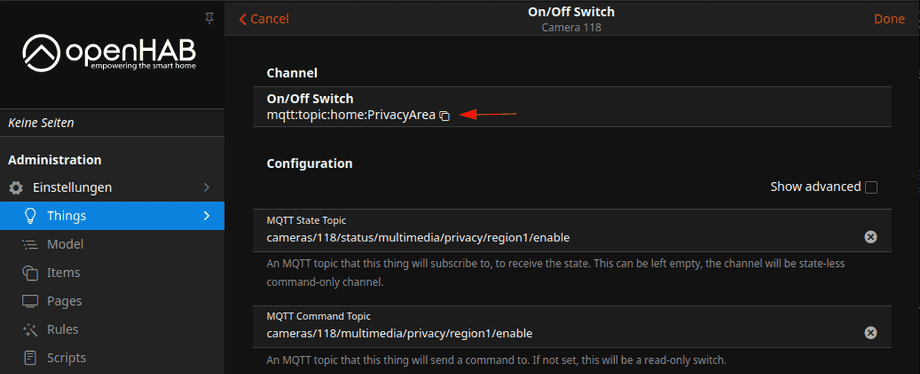
You can find the channel ID mqtt:topic:home:PrivacyArea in the Channel configuration:
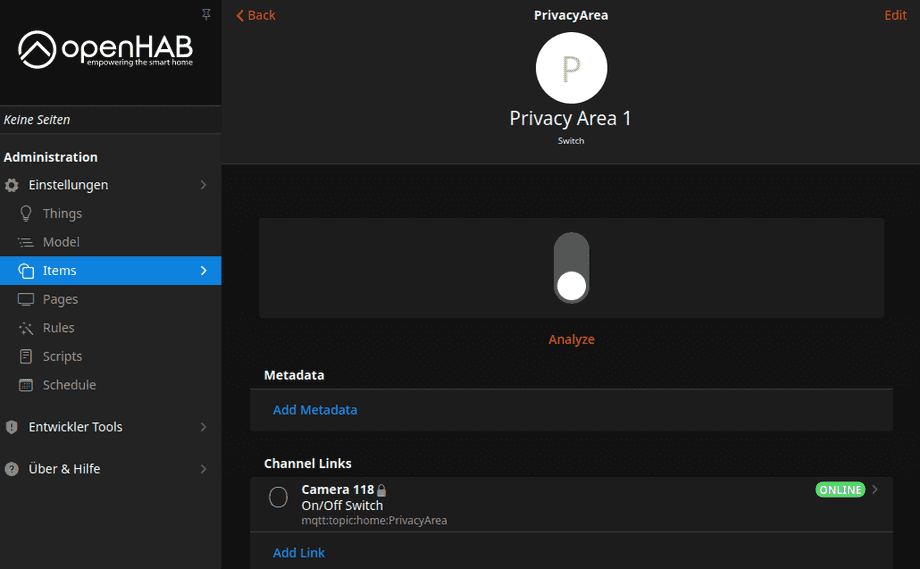
Once you saved the items file the Item should appear in the OpenHab UI. Toggling the state of the switch allows you to turn the Privacy Area 1 on and off:
Code Definition
The definition inside our UI are now as follows:
Broker
UID: mqtt:broker:cameraBroker118
label: MQTT Broker
thingTypeUID: mqtt:broker
configuration:
  lwtQos: 0
  publickeypin: true
  keepAlive: 60
  clientid: 16f924cb-0ea1-44ce-a699-422a6e5b5469
  secure: false
  birthRetain: true
  shutdownRetain: false
  certificatepin: true
  password: instar
  qos: 0
  reconnectTime: 60000
  port: 1883
  host: 192.168.2.118
  lwtRetain: true
  username: admin
  enableDiscovery: true
Camera
UID: mqtt:topic:home
label: Camera 118
thingTypeUID: mqtt:topic
configuration:
  payloadNotAvailable: '{"val":"dead"}'
  availabilityTopic: cameras/118/status/testament
  payloadAvailable: '{"val":"alive"}'
bridgeUID: mqtt:broker:cameraBroker118
channels:
  - id: PrivacyArea1
    channelTypeUID: mqtt:switch
    label: On/Off Switch
    description: null
    configuration:
      retained: false
      postCommand: false
      formatBeforePublish: '{"val":"%s"}'
      commandTopic: cameras/118/multimedia/privacy/region1/enable
      stateTopic: cameras/118/status/multimedia/privacy/region1/enable
      transformationPattern: JSONPATH:$.val
      off: "0"
      on: "1"
Combining Channels
So far we created one Channel based on a single MQTT topic and bound it to a Switch-Item that could update the topic and toggle one of our camera's functions. Now we want to combine several MQTT topics and update all of them with a single trigger.
To do this we first need to define each channel in our Thing configuration file. As an example I want to add all 4 Privacy Areas for now:
things/instar_mqtt.things
mqtt:broker:cameraBroker118 [ host="192.168.2.118",secure=false, port=1883, username="admin", password="instar" ]

Thing mqtt:topic:home "Camera 118" (mqtt:broker:cameraBroker118) [ availabilityTopic="cameras/118/status/testament", payloadAvailable="{\"val\":\"alive\"}", payloadNotAvailable="{\"val\":\"dead\"}" ] {
    Channels:
    Type switch    : PrivacyArea1   [ stateTopic="cameras/118/status/multimedia/privacy/region1/enable",
                                    commandTopic="cameras/118/multimedia/privacy/region1/enable",
                                    transformationPattern="JSONPATH:$.val",
                                    formatBeforePublish="{\"val\":\"%s\"}",
                                    on="1",
                                    off="0" ]
    Type switch    : PrivacyArea2   [ stateTopic="cameras/118/status/multimedia/privacy/region2/enable",
                                    commandTopic="cameras/118/multimedia/privacy/region2/enable",
                                    transformationPattern="JSONPATH:$.val",
                                    formatBeforePublish="{\"val\":\"%s\"}",
                                    on="1",
                                    off="0" ]
    Type switch    : PrivacyArea3   [ stateTopic="cameras/118/status/multimedia/privacy/region3/enable",
                                    commandTopic="cameras/118/multimedia/privacy/region3/enable",
                                    transformationPattern="JSONPATH:$.val",
                                    formatBeforePublish="{\"val\":\"%s\"}",
                                    on="1",
                                    off="0" ]
    Type switch    : PrivacyArea4   [ stateTopic="cameras/118/status/multimedia/privacy/region4/enable",
                                    commandTopic="cameras/118/multimedia/privacy/region4/enable",
                                    transformationPattern="JSONPATH:$.val",
                                    formatBeforePublish="{\"val\":\"%s\"}",
                                    on="1",
                                    off="0" ]
}
With the Channels defined we now can add them all to a single Item:
/* Privacy Areas */
/* Switch    PrivacyArea1   "Privacy Area 1"  {channel="mqtt:topic:home:PrivacyArea1"} */
Switch  PrivacyAreas   "All Privacy Areas" {channel="mqtt:topic:home:PrivacyArea1, mqtt:topic:home:PrivacyArea2,mqtt:topic:home:PrivacyArea3,mqtt:topic:home:PrivacyArea4"}
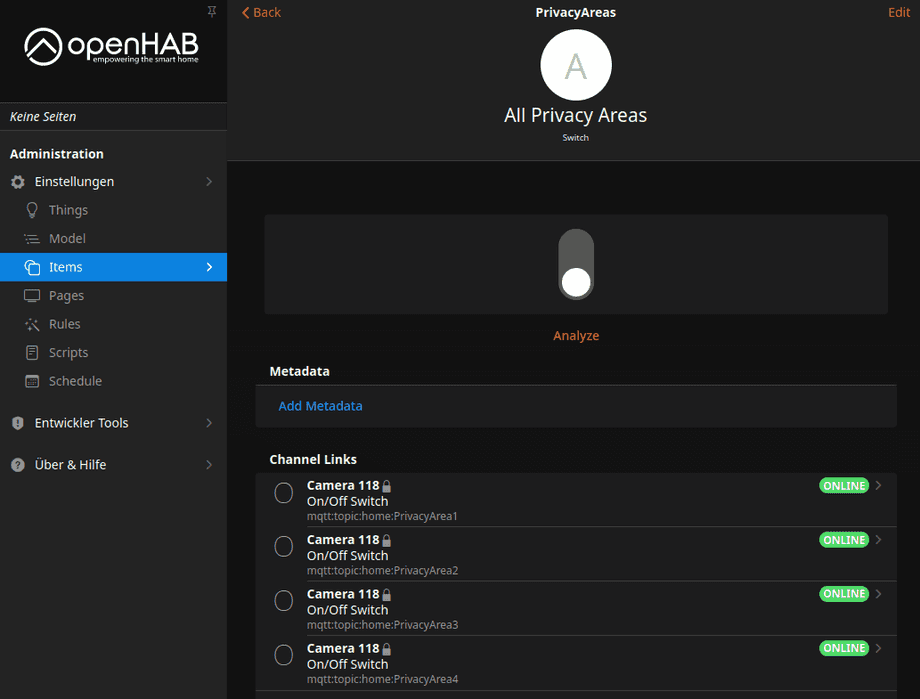
After saving this configuration file we will now have a switch that we can use, to either manually or by an automation script, to toggle all privacy areas at once:
This is just one example on how to use the INSTAR MQTTv5 API to take control over camera through OpenHab. A few examples can be found in our OpenHab Overview


