1080p Web User Interface
Alarm Menu
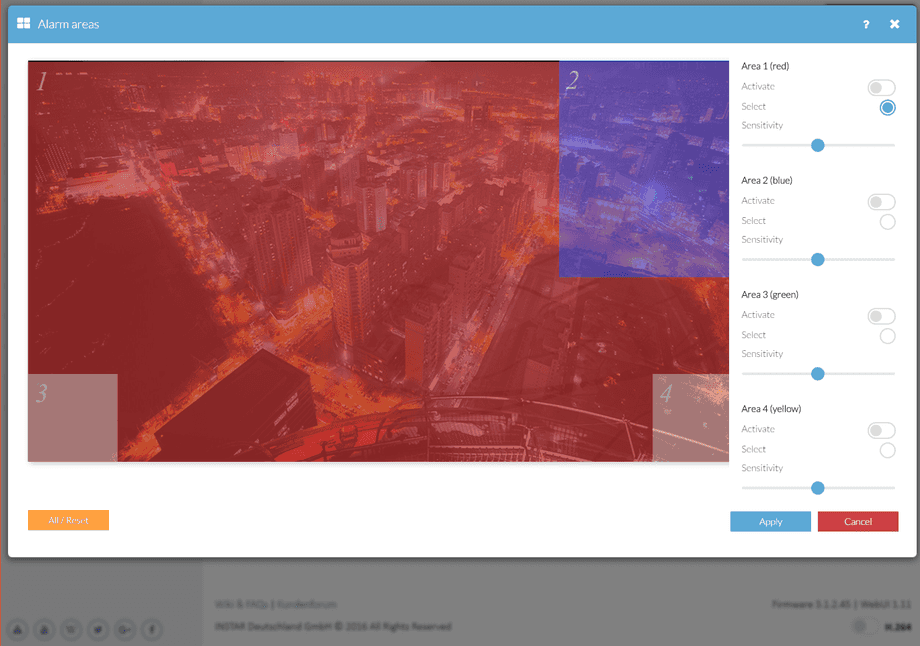
The alarm areas detect motion by a picture analysis that is sensitive to every change inside the video frame instead of employing an infrared or microwave sensor. You can setup up to 4 detection areas - just activate an area and draw its shape onto the image - and adjusts it´s sensitivity to set a threshold for trigger events. Once the motion detection in an area is activated, its sensitivity can be adjusted from very insensitive (value=0) to very sensitive (value=100).
The alarm areas detect motion by a picture analysis that is sensitive to every change inside the video frame instead of employing an infrared or microwave sensor. You can setup up to 4 detection areas - just activate an area and draw its shape onto the image - adjusts it´s sensitivity to set a threshold for trigger events.
Alarm Areas | Description |
|---|---|
| Areas | Select the Area that you want to adjust (1-4) by clicking the Select radio button. Now move your mouse cursor over the image and draw the detection area onto the canvas by holding your left mouse button. To add another area, select the corresponding radio button and repeat the steps above. Those areas tell your camera where to search for motion. Everything that is not covered by an area will be ignored by the motion detection function. |
| Active | Click the Activate button to activate the motion detection for the corresponding area. Inactive areas will be displayed in white. Active areas will be displayed in their corresponding colour - Red, Blue, Green or Yellow. A motion detection inside an active area will trigger all activated Alarm Actions. You can quickly activate / deactivate the motion detection of your camera using our iPhone, iPad, Android or Windows Phone App - just click the button with the burglar symbol (red = active). |
| Sensitivity | Set a threshold for the motion detection function. With a higher sensitivity less pixel inside the video frame have to change to cause an alert and trigger your programmed Alarm Actions. But be aware that the sensitivity also depends on the size of your detection area. A small area is always more sensitive than a big area. Adjust your sensitivity and area size accordingly to prevent false or missed alerts. |
| All | Click on the All button to cover the whole image with your selected area. |
| Reset | Move all areas back to their default corner position. |
Potential Errors
In case the camera's position is prone to rapid light changes, e.g. changes in sun intensity due to cloud movements, you might be confronted with a high number of false alarms. In this case please refer to Actions Menu for employing a PIR motion detector.
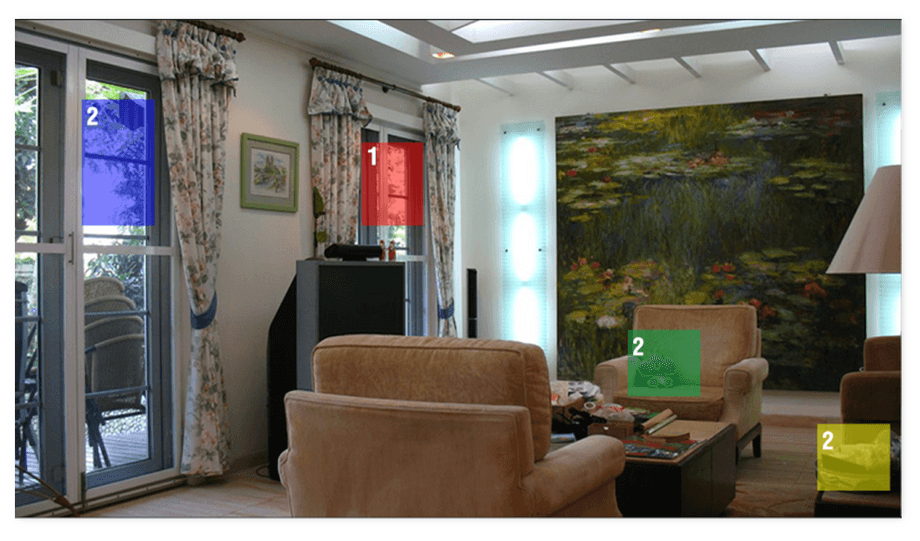
Many small Alarm Areas distributed over the Frame
The smaller an area, the bigger (in percent) a change in the image will be. Small areas are a lot more sensitive and should be used over parts of the image, where you never want to miss someone walking through. But they also lead to a large number of false alerts und should be used sparsely. You will receive a lot of false alarm notifications in the example above.
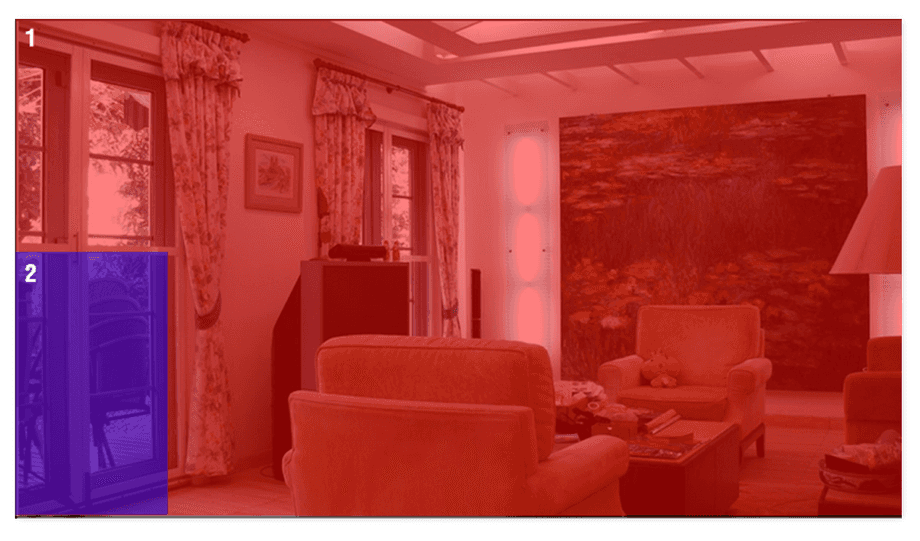
One big Area - small Areas only where they are critical
A big area is - according to the explanation above - much more resistant against false alerts. A big area over the whole image will only trigger an alert when a person comes very close to the camera. You can use a slightly higher sensitivity to compensate.
To prevent that you might loose actual alarm events, add a smaller area where it is critical - e.g. a window or your front door.
The smaller this area is, the higher its sensitivity. To find the optimal setting, keep an eye on your camera´s System Log. If an area causes too many false alerts, make it bigger or decrease it´s sensitivity.


