Alle OpenHAB Tutorials
- OpenHAB 3 Camera Binding
- OpenHAB 3 Camera Widget
- OpenHAB 3 in Docker
- OpenHAB 3 MQTT Binding
- OpenHAB Smarthome
- OpenHAB IP Camera Binding
- openHABian on a Raspberry Pi
- INSTAR MQTT - OpenHAB2
All OpenHAB FAQs
- OpenHab MQTT Auto-Discovery
- OpenHab3 IpCamera Binding Alarmserver
- OpenHab3 IpCamera Binding with an WQHD Camera
- Using OpenHab3 in Docker with an WQHD Camera
- OpenHAB v3 Configuration for your WQHD INSTAR MQTTv5 Broker
- OpenHAB v3 filebased Configuration for your WQHD INSTAR MQTTv5 Broker
- OpenHAB v3 Rules for your WQHD INSTAR MQTTv5 Broker
- OpenHAB v3 Blockly Scripts for your WQHD INSTAR MQTTv5 Broker
- OpenHAB v3 Sitemaps for your WQHD INSTAR MQTTv5 Broker
- Debugging the OpenHAB IP Camera Binding
OpenHAB 2 Home Automation
- Camera API to Node-RED to OpenHAB
- OpenHAB Installation on Windows
- OpenHAB2 Configuration
- Access your SmartHome Remotely
- OpenHAB & Node-RED Tutorials
Make your camera the heart of your smart home
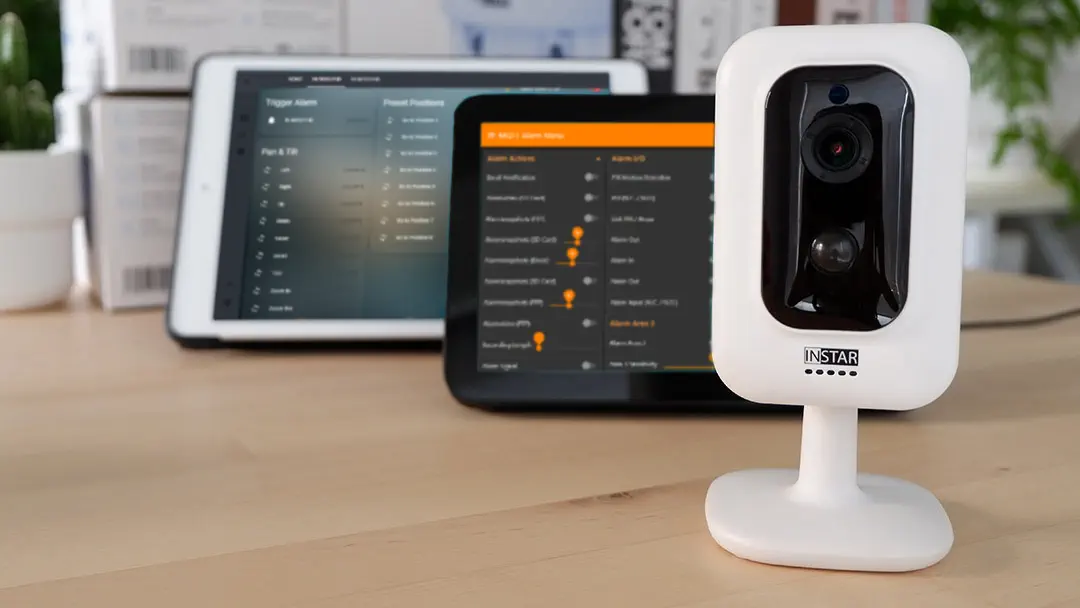
Using the MQTT interface of your INSTAR Full HD cameras you can connect them to an existing smarthome system (Home Assistant, OpenHAB, Node-RED, Athom Homey, Homematic, ioBroker, Loxone, homee) can be added. Or even make it the main broker for your MQTT sensors. MQTT allows you to automate ALL functions of your camera and link them to other services in your smarthome.
Control your camera via the IFTTT online service
On the IFTTT platform, we provided a service called INSTAR. The INSTAR applets provide you with the ability to control some settings of your INSTAR camera or INSTAR Cloud with IFTTT. You can connect INSTAR with triggers for location (Geo Location) and date & time, send notifications and much more. For example, you can connect INSTAR applets to the IFTTT location service and automatically disable the alarm when you arrive home. You can also use the INSTAR applets to create your own automation and connect them to other third-party applets.
Camera API to Node-RED to OpenHAB
In our previous tutorial we already mapped our INSTAR REST API to MQTT with Node-RED. That means, that we are now able to publish a message via the MQTT protocol and trigger Node-RED to send a CGI Command to our camera. We will later use MQTT.fx to send those messages or build a Dashboard in Node-RED to publish messages with a press of a button.
But the MQTT protocol is an IoT (Internet of Things) standard that makes you camera compatible to a wide range of IoT hardware and software home automation systems. Let us take a look how we can level this new power to integrate our IP camera into an existing smart home. If you are not familiar with the openHAB 2 system, follow the instructions below to set it up on your Windows PC. For advanced users, you might want to skip ahead to the Instruction part or straight to the Node-RED & openHAB Projects page.
OpenHAB Installation on Windows
OpenHAB2 Configuration
The configuration files for open hub can be found in the ./conf directory of the installation dir. First we want to configure the MQTT service to connect to our MQTT Server.
Connect the MQTT Server to openHab2
Go back to http://localhost:8080 and select the PaperUI, go to Add-ons and search for MQTT-bindings inside the Bindings tab - in my case this was already installed, if not, hit install:
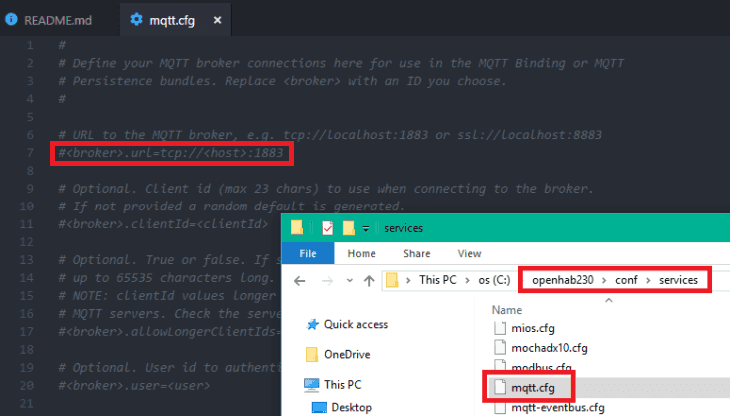
Now go to the openHAB2 install dir - if you followed this guide, this will be C:\openhab230\conf\services and open the mqtt.cfg:
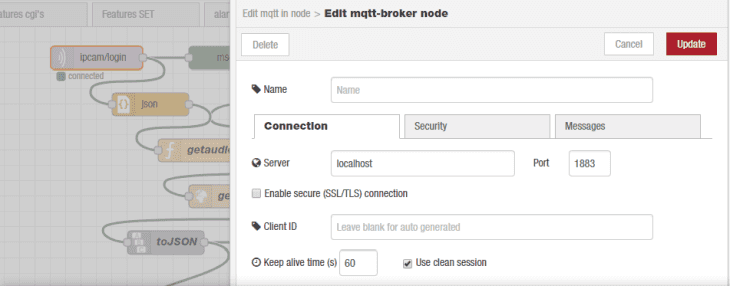
Add the MQTT URL as follows: mosquitto.url=tcp://localhost:1883 (The broker name - in our case we choose mosquitto - can be chosen freely). Make sure that you set all MQTT Server variables according to your MQTT Server configuration in Node-RED - e.g.:
mosquitto.url=tcp://localhost:1883
mosquitto.clientId=openhab2
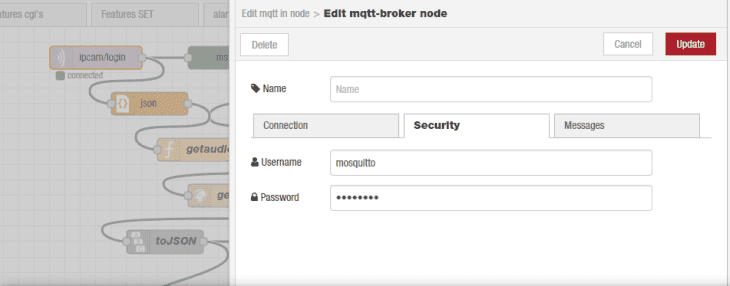
mosquitto.user=mosquitto
mosquitto.pwd=asolidpassword
mosquitto.qos=1
mosquitto.retain=false
mosquitto.async=true
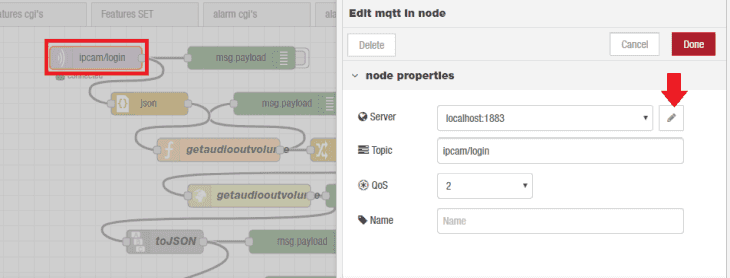
You can double-click a MQTT-Node in your Node-RED flows to check and edit your configuration:
Add Items
Go to C:\openhab230\conf\services to create a configuration file named office.things and add the following declaration //This is the Things file. Eventually we will populate this file with devices that require a thing declaration, keep in mind that not all devices need it.
To be able to access things - such as a light switch - we need to add them to an items file office.items in C:\openhab230\conf\items. For demo purposes we can add a Switch Item:
// This is the Items File

//Demo items
Switch MyFirstSwitch "Demo Switch"
In this case Switch will be the type of item we add, MyFirstSwitch is its name and Demo Switch will be used as it's label.
Now we have to add the switch to our user interface, by adding a office.sitemap file in C:\openhab230\conf\sitemap. The sitemap file is how you interact with the devices or the user interface:
sitemap home label="INSTAR - SmartOffice"
{
       Frame label="Demo"
       {
               Switch item=MyFirstSwitch
       }
}
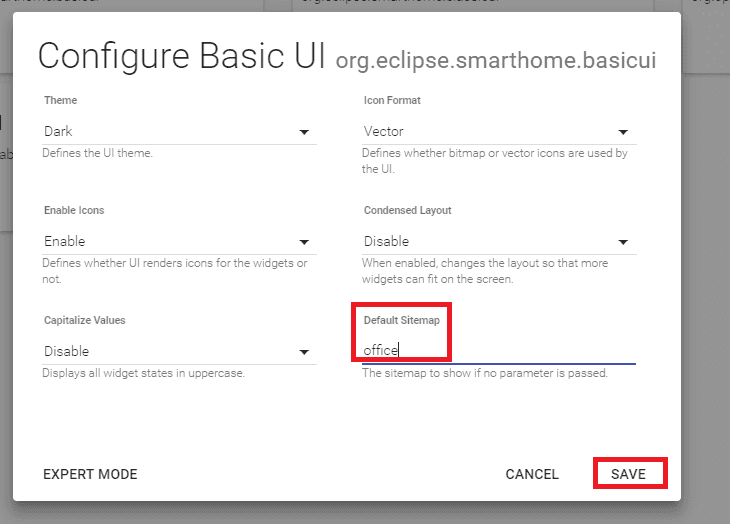
To activate the sitemap, go to Configuration and Services, choose UI and select to configure the Basic UI:
Type in the name of your sitemap - we used office - and click Save. You can then repeat this step with the Classic UI:
You can now open the Basic UI in a new tab http://localhost:8080/basicui/app and see the switch we just created:
To add functionality to our switch, we need to add a office.rules file in C:\openhab230\conf\rules. This is the file that does all the automation.
Access your SmartHome Remotely
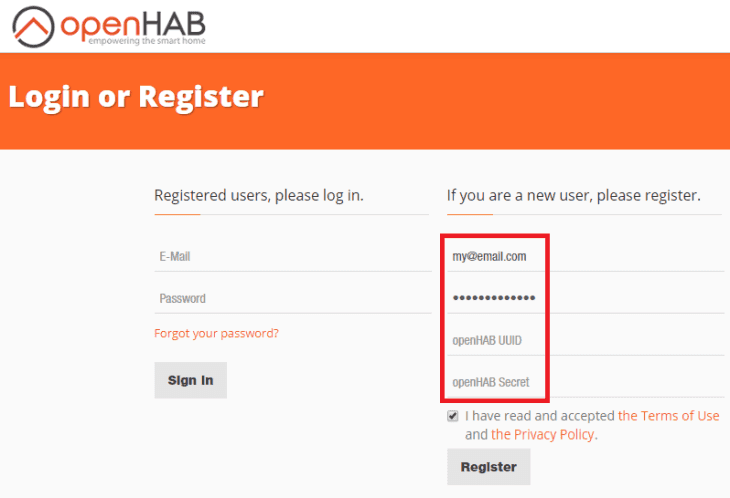
You can use the OpenHAB Cloud to access your Smarthome over the internet.
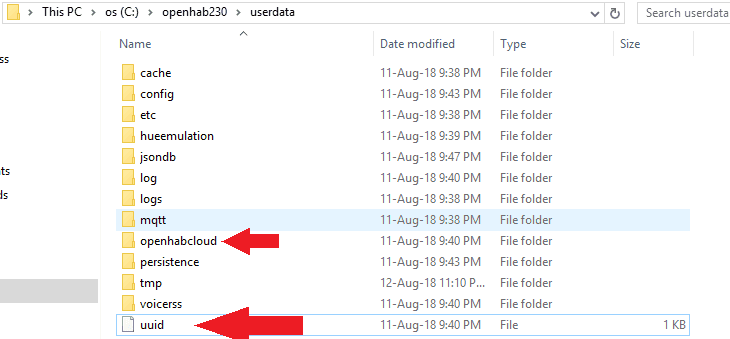
Just use your Email Address and Password + UUID and Secret of your OpenHAB installation - the latter can be found under ./userdata/uuid and ./userdata/openhabcloud/secret.
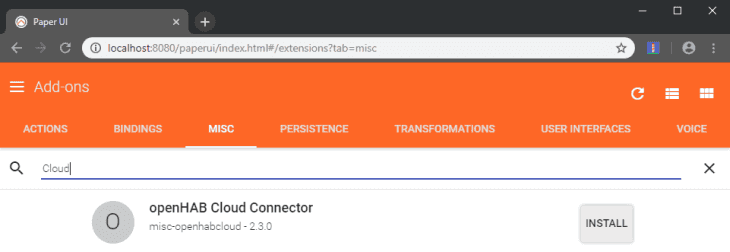
If you cannot find those files, make sure that the openHAB CLoud Connector is installed by going to http://localhost:8080/paperui, choose Addons and Misc. Search for Cloud to find the Addon and install it:
Go back to to MyOpenHAB, make sure that you are logged in, and you will see a Online notification on the top right - if not, stop and restart the OpenHAB service from your console and refresh the webpage.
You will see the familiar UI when you navigate to https://home.myopenhab.org/start/index. You can use this login on the web, on Android, iOS and Window Phone / Metro.

