Alle ioBroker Tutorials
- ioBroker with Docker (Updated 08.04.2024)
- ioBroker on a Raspberry Pi (deprecated)
- INSTAR MQTT - ioBroker
All ioBroker FAQs
- ioBroker v9.1.2 as MQTTv5 Client for your WQHD INSTAR IP Camera
- ioBroker as MQTT Broker for your WQHD Camera
- ioBroker MQTT Alarmserver for your WQHD Camera
- ioBroker REST API with your WQHD Camera
- Using ioBroker with your WQHD Camera
- ioBroker v7 with your WQHD INSTAR MQTTv5 Broker
- Camera Vis with Node-RED
- Live Video and ioBroker VIS
- INSTAR MQTT Alarmserver ioBroker
- ioBroker and INSTAR Alarmserver
- ioBroker MQTT Broker vs Client
- ioBroker as MQTT Broker for your Kamera
- ioBroker MQTT Overwrites Camera Settings
- ioBroker and MotionEye Webhooks
- ioBroker w/o MQTT
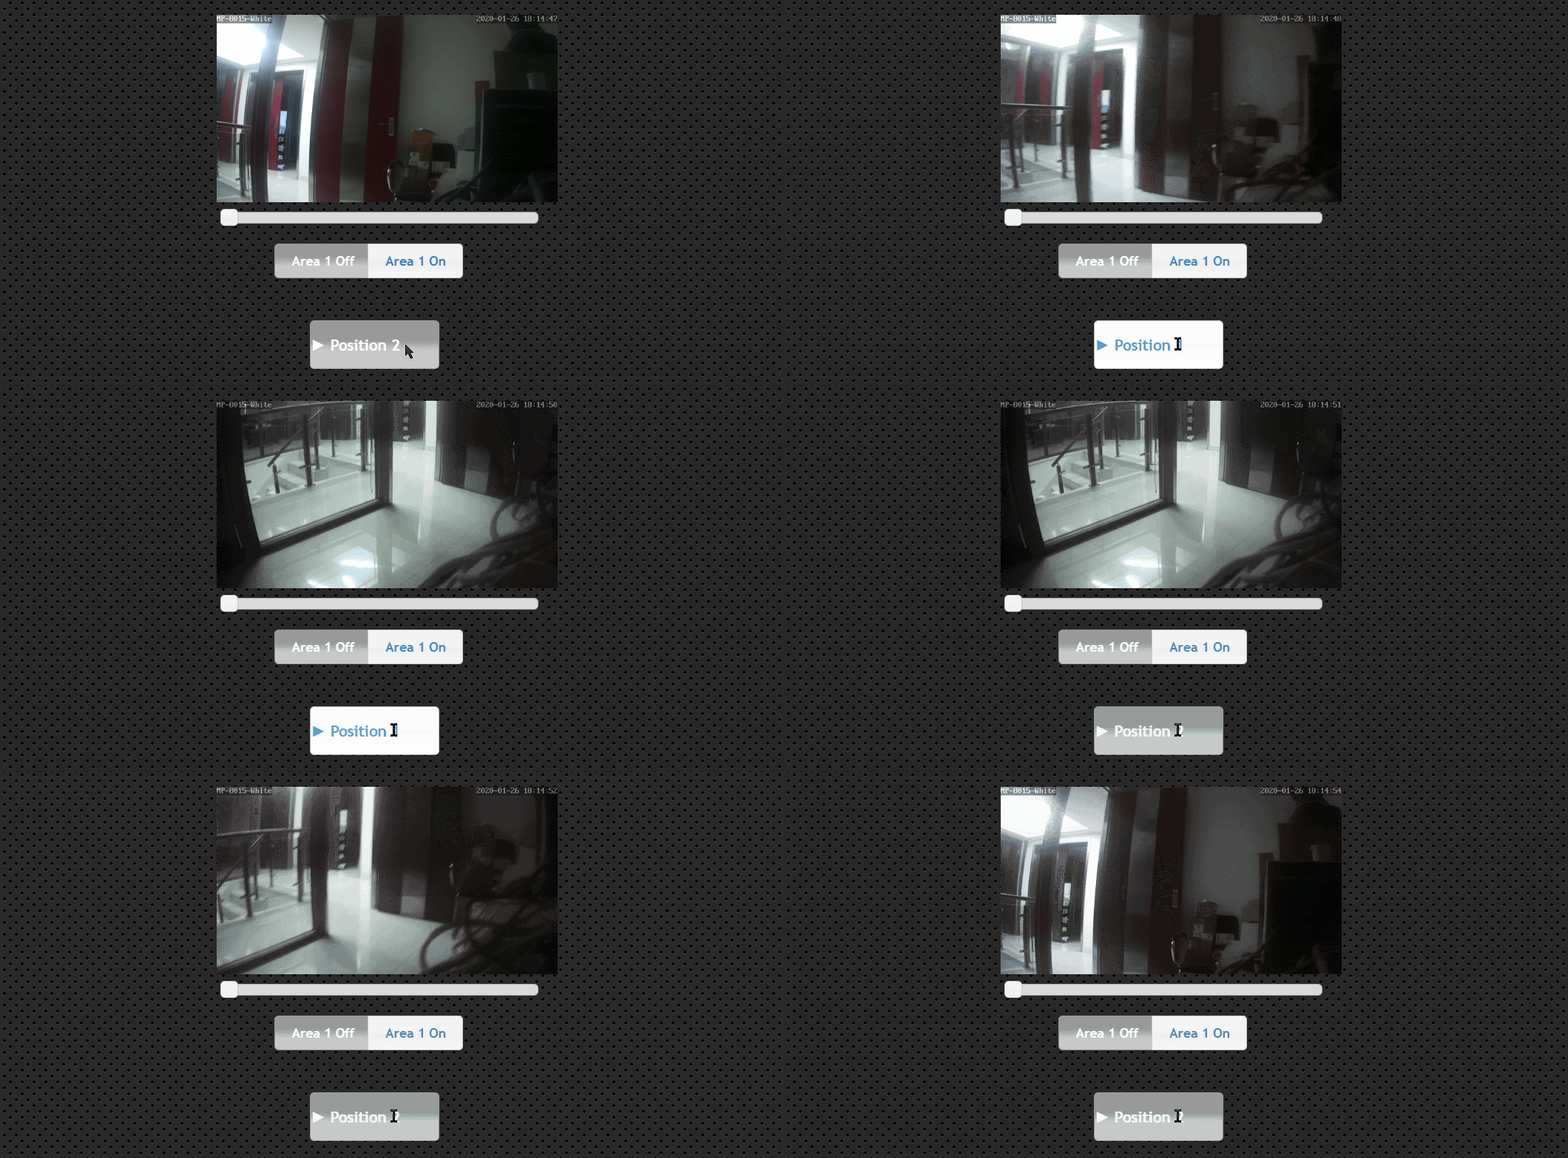
Q: Hello, I have seen your very extensive documentation for IoBroker. But I am still unable to display the live stream of the IN-7011-HD and the IN-5905-HD. Furthermore I want to set up two buttons that allow me to pan&tilt my cameras between preset positions.
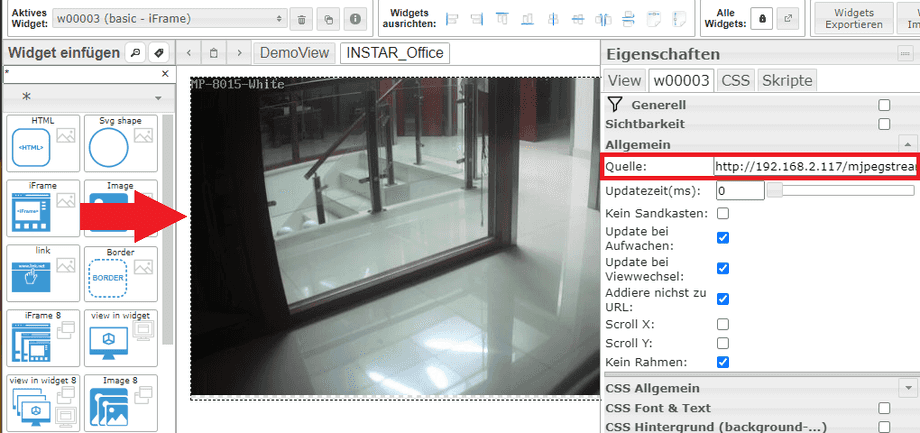
A: This part of the ioBroker manual is actually only for Full HD cameras as it requires an MQTT Broker. But the integration of the camera livestream also works with your 7011 and 5905:
The video can be embedded directly via the snapshot or MJPEG stream path - it is recommended to use the middle, medium resolution (/12 or auto) stream:
MJPEG Stream URL
http://IP-Address:Port/mjpegstream.cgi?-chn=11&-usr=admin&-pwd=instar
http://IP-Address:Port/mjpegstream.cgi?-chn=12&-usr=admin&-pwd=instar
http://IP-Address:Port/mjpegstream.cgi?-chn=13&-usr=admin&-pwd=instar
JPG URL
http://IP-Address:Port/tmpfs/snap.jpg?usr=admin&pwd=instar
http://IP-Address:Port/tmpfs/auto.jpg?usr=admin&pwd=instar
http://IP-Address:Port/tmpfs/auto2.jpg?usr=admin&pwd=instar
To pan between preset positions you have to send the corresponding CGI commands to the camera:
To control your camera with CGI command, we need to be able to trigger a HTTP GET request in ioBroker. One way to do this is with the Javascript Engine and Blockly.
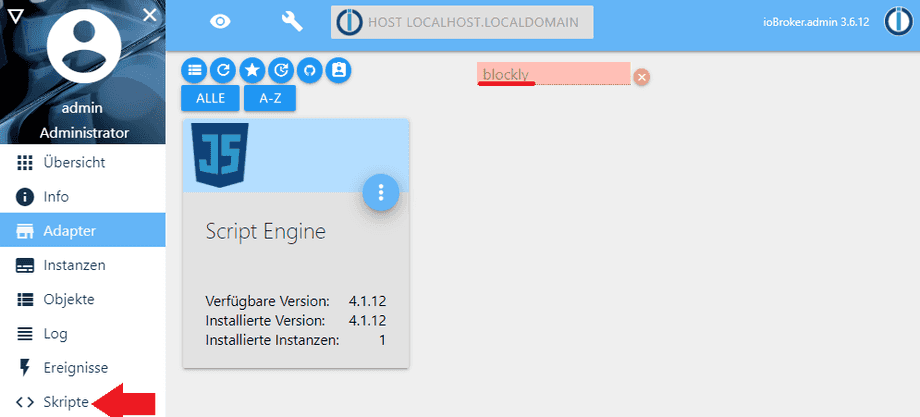
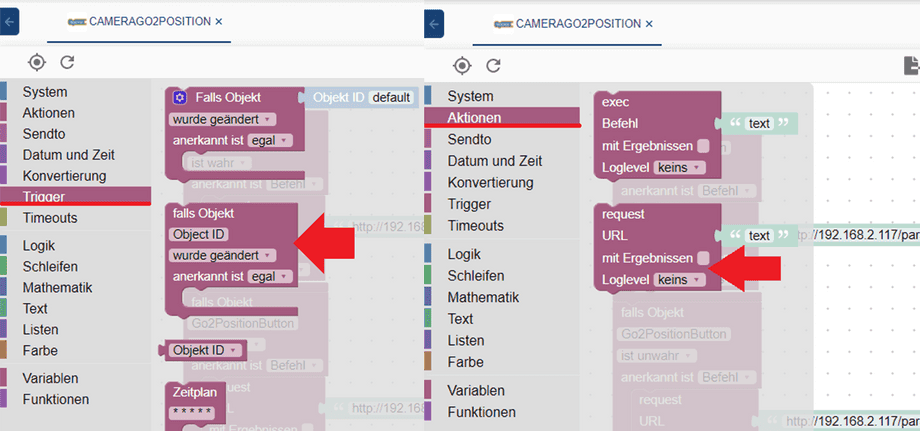
After you have installed the Blockly Adapter, click on Scripts in the lower left corner. In the following window you can add a new script with the + symbol - select Blockly here:
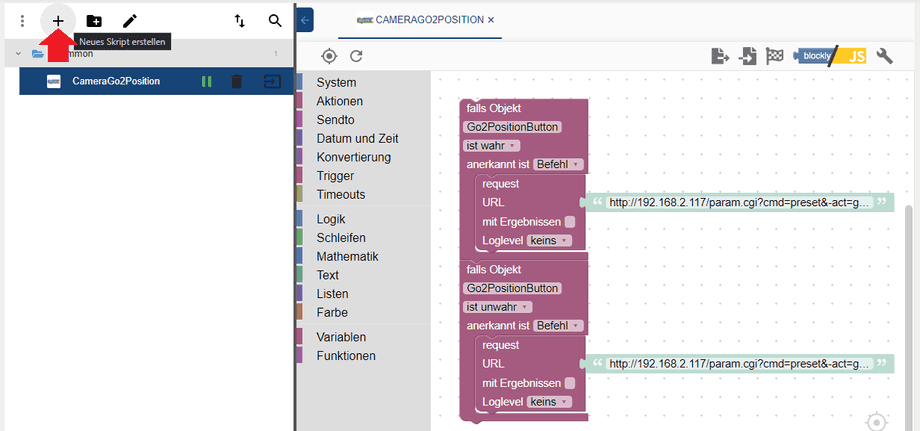
In the screenshot above you can already see the complete script on the right. It consists of 2 blocks for each command you want to send to the camera: a trigger block (this is the object that we can address with a button from the visualization - or automate using another script). And an action block that triggers the HTTP request to send the CGI command to the camera:
The two commands needed to pan the camera between position 1 and 2 are:
http://192.168.2.117:80/param.cgi?cmd=preset&-act=goto&-number=0&-usr=admin&-pwd=instar
http://192.168.2.117:80/param.cgi?cmd=preset&-act=goto&-number=1&-usr=admin&-pwd=instar
for a camera with the IP address 192.168.2.117, the HTTP port 80 and an admin login admin/instar.
What we are still missing, however, is the object that we want to switch via our Vis button and use it as a trigger to send the command:
{
  "from": "system.adapter.admin.0",
  "user": "system.user.admin",
  "ts": 1580028887973,
  "common": {
    "name": "Go2PositionButton",
    "role": "Fahre Kamera auf Position",
    "type": "boolean",
    "desc": "Manuell erzeugt",
    "states": "false:no;true:yes",
    "read": true,
    "write": true,
    "def": false
  },
  "native": {},
  "acl": {
    "object": 1638,
    "owner": "system.user.admin",
    "ownerGroup": "system.group.administrator",
    "state": 1638
  },
  "_id": "javascript.0.scriptEnabled.common.Go2Position",
  "type": "state"
}
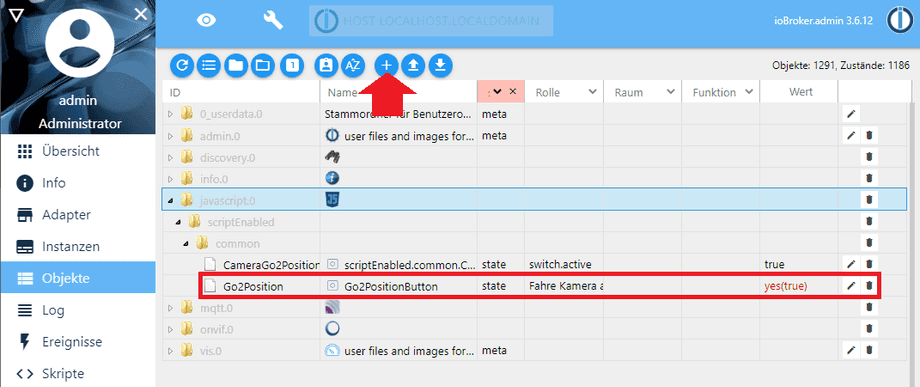
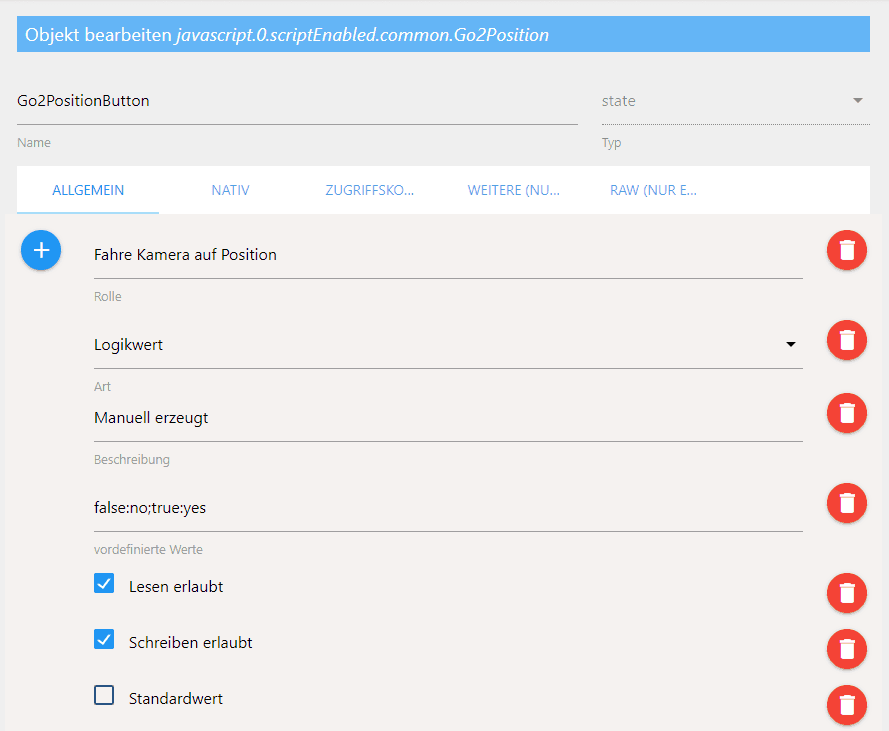
To do this, go to javascript.0 / scriptEnabled / common in the ioBroker object tree and click on the + symbol at the top to add a new object - in the screenshot we named it Go2PositionButton:
Back in Blockly we can now add the object as a trigger in the trigger block (see screenshot above):
If object Go2PositionButton is true and if object Go2PositionButton is false.
You can also import the entire Blockly script directly into Blockly using this XML code:
<xml xmlns="http://www.w3.org/1999/xhtml">
<block type="on" id="}sZ[Gu6.@+**i9RtTMF~" x="38" y="38">
<field name="OID">javascript.0.scriptEnabled.common.Go2Position</field>
<field name="CONDITION">true</field>
<field name="ACK_CONDITION">false</field>
<statement name="STATEMENT">
<block type="request" id="HTcoI.2lpt8Uk~uHupVd">
<mutation with_statement="false"></mutation>
<field name="WITH_STATEMENT">FALSE</field>
<field name="LOG"></field>
<value name="URL">
<shadow type="text" id="3L#W^a!.54;zZ11x9V`$">
<field name="TEXT">http://192.168.2.117/param.cgi?cmd=preset&-act=goto&-number=1&-usr=admin&-pwd=instar</field>
</shadow>
</value>
</block>
</statement>
<next>
<block type="on" id="W?n?{EVM(%1@~l6@8a7e">
<field name="OID">javascript.0.scriptEnabled.common.Go2Position</field>
<field name="CONDITION">false</field>
<field name="ACK_CONDITION">false</field>
<statement name="STATEMENT">
<block type="request" id="DGrS#qU8NTPeE9dE?AWI">
<mutation with_statement="false"></mutation>
<field name="WITH_STATEMENT">FALSE</field>
<field name="LOG"></field>
<value name="URL">
<shadow type="text" id="nPN(_waF.y?1I`,u8Qu]">
<field name="TEXT">http://192.168.2.117/param.cgi?cmd=preset&-act=goto&-number=0&-usr=admin&-pwd=instar</field>
</shadow>
</value>
</block>
</statement>
</block>
</next>
</block>
</xml>In the ioBroker Vis you can now define a HTML Bool button for the object you created and add text the button should show when the value of the object is set to true or false:
