Alle ioBroker Tutorials
- ioBroker with Docker (Updated 08.04.2024)
- ioBroker on a Raspberry Pi (deprecated)
- INSTAR MQTT - ioBroker
All ioBroker FAQs
- ioBroker v9.1.2 as MQTTv5 Client for your WQHD INSTAR IP Camera
- ioBroker as MQTT Broker for your WQHD Camera
- ioBroker MQTT Alarmserver for your WQHD Camera
- ioBroker REST API with your WQHD Camera
- Using ioBroker with your WQHD Camera
- ioBroker v7 with your WQHD INSTAR MQTTv5 Broker
- Camera Vis with Node-RED
- Live Video and ioBroker VIS
- INSTAR MQTT Alarmserver ioBroker
- ioBroker and INSTAR Alarmserver
- ioBroker MQTT Broker vs Client
- ioBroker as MQTT Broker for your Kamera
- ioBroker MQTT Overwrites Camera Settings
- ioBroker and MotionEye Webhooks
- ioBroker w/o MQTT
ioBroker MQTT Alarmserver for your WQHD Camera
Q: How can I use the the ioBroker MQTT Adapter as the Alarmserver of my WQHD 2k+ Camera?
A: Start by installing the MQTT Client or Broker/Client Adapter:
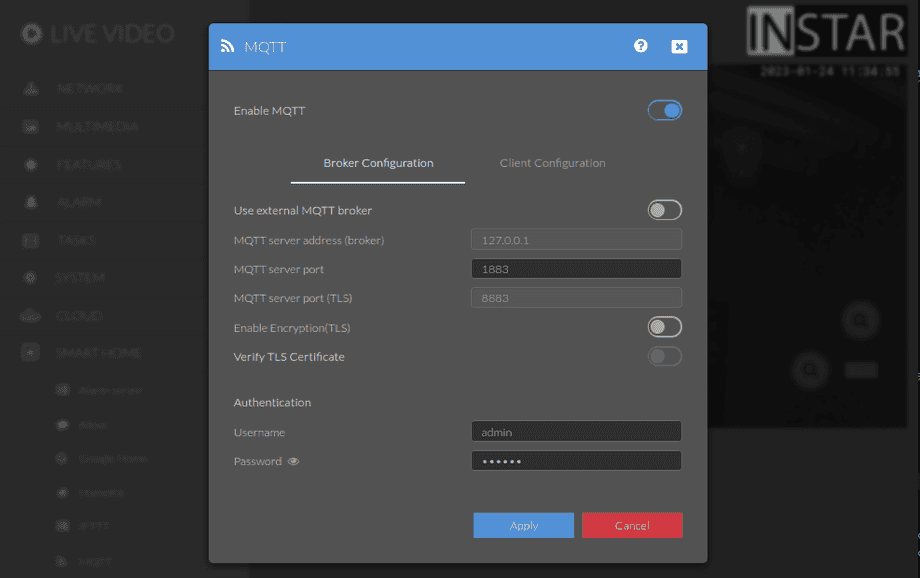
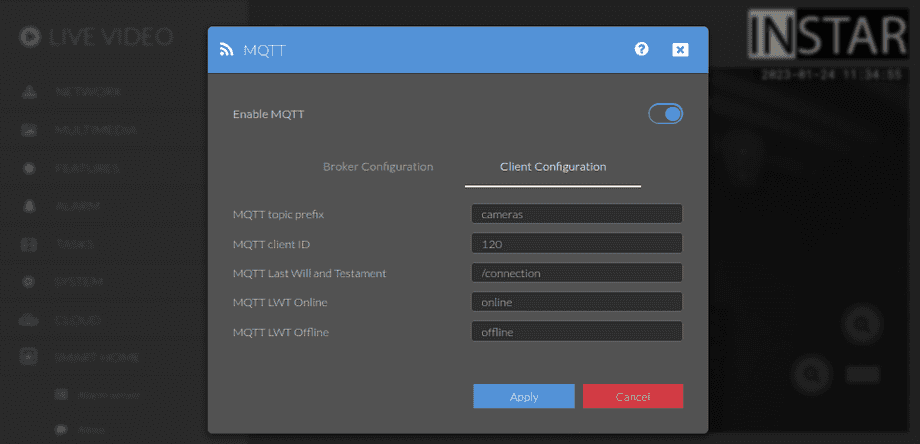
Configure your camera's MQTT Broker:
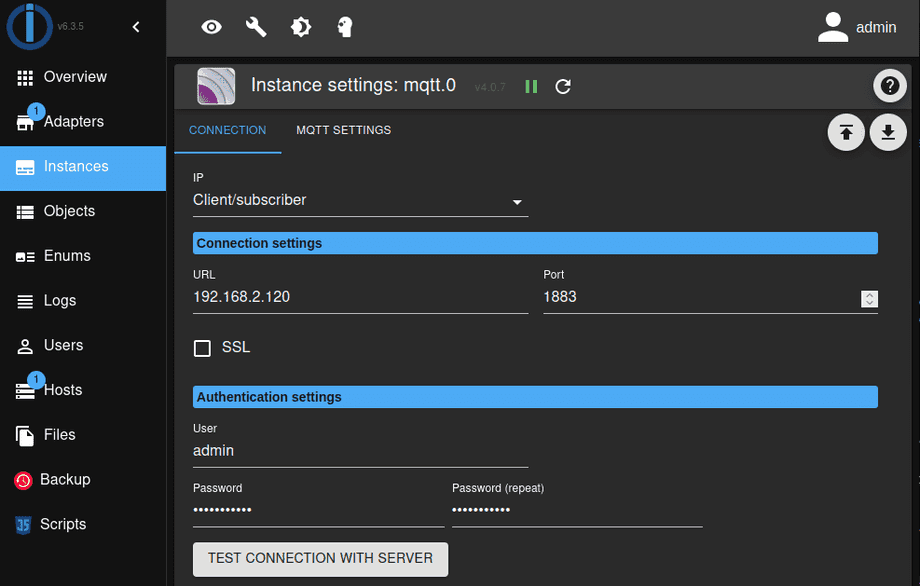
Back in ioBroker configure the MQTT Adapter in Client Mode and add your cameras IP and the MQTT port and login you configured in the previous step:
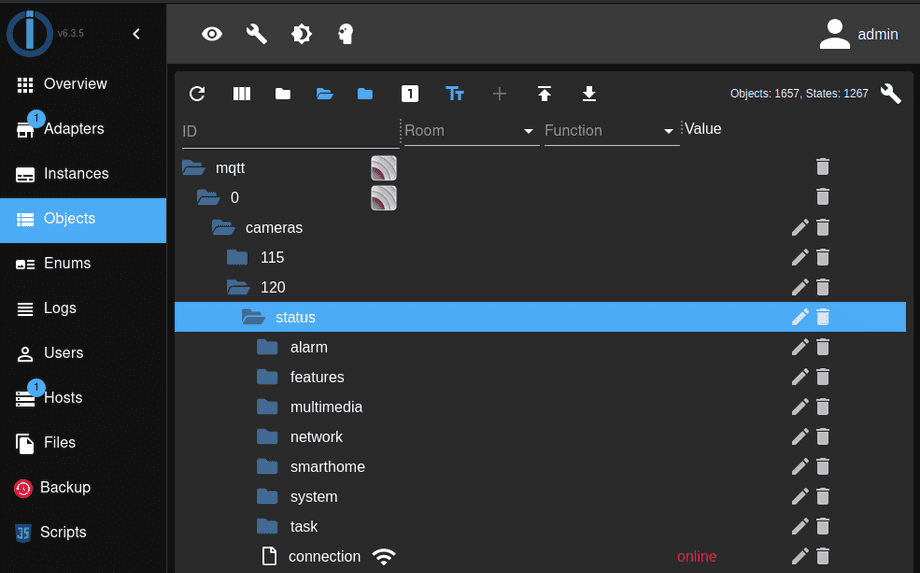
When you connect ioBroker to your camera's MQTT broker all it's state data points will automatically be registered in ioBroker's object tree (Note that you have to use the Command Topics and not the State Topics if you want to update your camera's state):
Now that your camera is connected we can start Testing the MQTT Alarmserver. Whenever an alarm is triggered on your camera both the trigger as well - if the Object Detection is activated - as the detected object will be published by the MQTT service.
Alarm Trigger
MQTT Topic: alarm/triggered
- Alarm Area 1 triggered: &active=1 ->
{"val":"1"} - Alarm Area 2 triggered: &active=2 ->
{"val":"2"} - Alarm Area 3 triggered: &active=3 ->
{"val":"3"} - Alarm Area 4 triggered: &active=4 ->
{"val":"4"} - Alarm-In / PIR triggered: &active=5 ->
{"val":"5"} - Audio Alarm triggered: &active=6 ->
{"val":"6"} - PIR triggered & Alarm Area 1 triggered: &active=7 ->
{"val":"7"} - PIR triggered & Alarm Area 2 triggered: &active=8 ->
{"val":"8"} - PIR triggered & Alarm Area 3 triggered: &active=9 ->
{"val":"9"} - PIR triggered & Alarm Area 4 triggered: &active=10 ->
{"val":"10"} - Manual trigger (cmd=pushhostalarm): &active=99 ->
{"val":"99"}
Detected Object
MQTT Topic: alarm/triggered/object
- Person: &object=1 ->
{"val":"1"} - Vehicles: &object=2 ->
{"val":"2"} - Person + Vehicles: &object=3 ->
{"val":"3"} - Animals: &object=4 ->
{"val":"4"} - Person + Animals: &object=5 ->
{"val":"5"} - Person + Vehicles: &object=6 ->
{"val":"6"}
You can test this service by walking in front of your camera. Or, more conveniently, by using the MQTT Alarmserver Testing Command. For example if you want to simulate Alarm Area 3 triggering and you camera detecting both a person and a car you can use the following CGI command:
/param.cgi?cmd=testmqtt&active=4&object=3&user=admin&pwd=instar
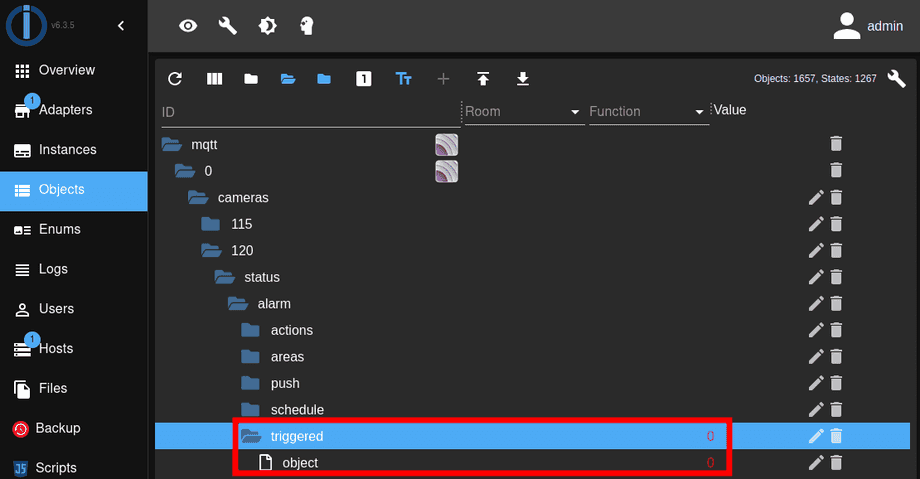
Before sending the command both alarm/triggered topics will have the value 0. Meaning the MQTT Alarmserver is idle:
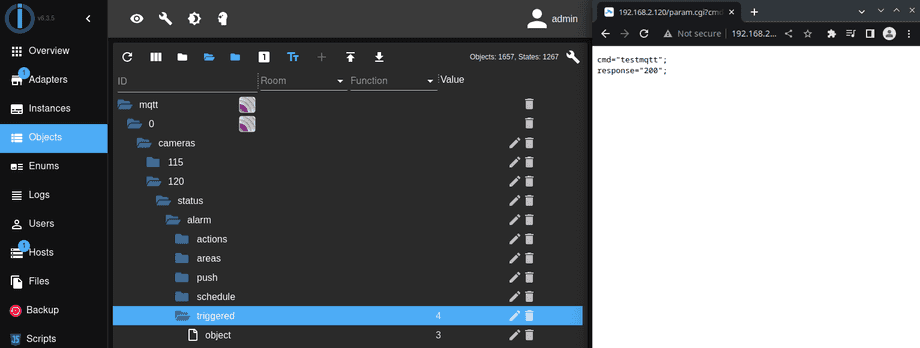
Once you send the command above the values will switch to represent the cause of the alarm trigger:

