1440p Web User Interface
Alarm Menu
The alarm areas detect motion by an image analysis that is sensitive to changing pixels inside the video frame instead of employing an infrared or microwave motion sensor. You can setup up to 4 detection areas - just activate an area and draw its shape onto the image - and adjusts it´s sensitivity to set a threshold for trigger events. Once the motion detection in an area is activated, its sensitivity can be adjusted from very insensitive (value=0) to very sensitive (value=100).
Your camera provides a fine-grained access rights system that allows you to restrict access to certain menus of the web user interface and its underlying CGI commands. The minimum permission to access this menu is:
- User Permissions:
Alarm Settings,Live Stream
User permissions can be modified in the user menu.
Alarm Areas | Description |
|---|---|
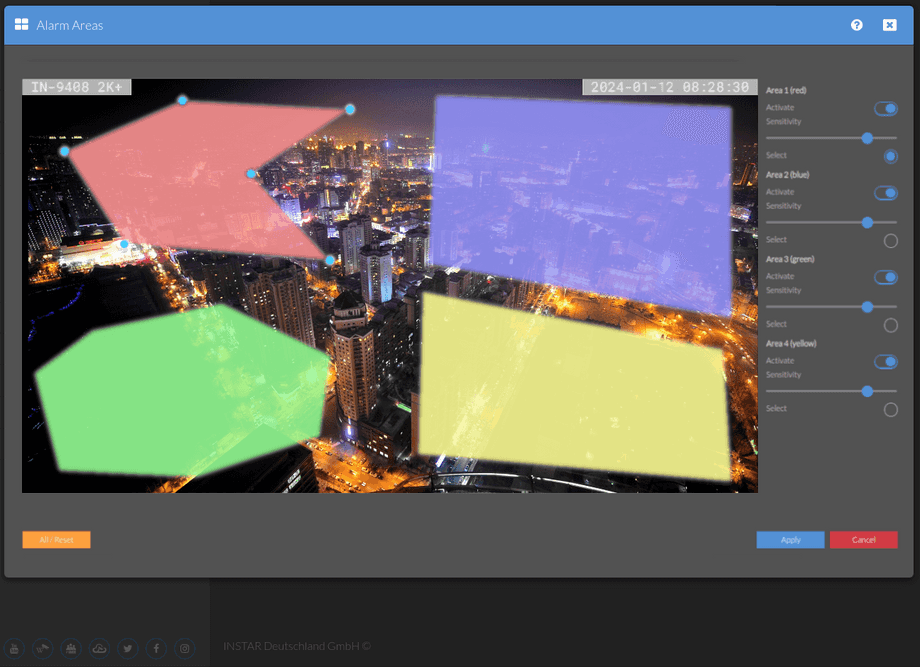
| Areas | Select the Area that you want to adjust (1-4) by clicking the Select radio button. Now move your mouse cursor over the image and draw the detection area onto the canvas by holding your left mouse button. To add another area, select the corresponding radio button and repeat the steps above. Those areas tell your camera where to search for motion. Everything that is not covered by an area will be ignored by the motion detection function. |
| Active | Click the Activate button to activate the motion detection for the corresponding area. Inactive areas will be displayed in white. Active areas will be displayed in their corresponding colour - Red, Blue, Green or Yellow. A motion detection inside an active area will trigger all activated Alarm Actions. You can quickly activate / deactivate the motion detection of your camera using our iPhone, iPad, Android or Windows Phone App - just click the button with the burglar symbol (red = active). |
| Sensitivity | Set a threshold for the motion detection function. With a higher sensitivity less pixel inside the video frame have to change to cause an alert and trigger your programmed Alarm Actions. But be aware that the sensitivity also depends on the size of your detection area. A small area is always more sensitive than a big area. Adjust your sensitivity and area size accordingly to prevent false or missed alerts. |
| All | Click on the All button to cover the whole image with your selected area. |
| Reset | Move all areas back to their default corner position. |
INSTAR 2K+ Motion Detection Mastery | Custom Zones, PIR Integration, and Object Detection!
Desktop View
- Moving Nodes: Click on an existing node, hold and move your mouse to change it's position.
- Adding Nodes: Hold the SHIFT key and click on the connecting line between two nodes to add up to a total of 32 nodes in-between.
- Removing Nodes: Hold the SHIFT key and click on an existing node to remove it.
Mobile View
- Moving Nodes: Touch an existing node and move it to change it's position. If you activated the + or - button (see below) you first have to toggle it back into normal mode.
- Adding Nodes: Activate the `+` button underneath the snapshot and swipe into the active area crossing the connecting line between two nodes to add another node in-between.
- Removing Nodes: Activate the - button underneath the snapshot, touch an existing node and drag it to the edge of the canvas to remove it.
Time Controlled Area Activation
You want to activate different areas with different sensitivities at certain times of the day? See Alarm/Alarm Schedule for a description of the time-controlled zone setting.
Alarm Area Adjustments
Sensitivity, Size and Position
A big area is much more resistant against false alerts. A big area over the whole image will only trigger an alert when a person comes very close to the camera. You can use a slightly higher sensitivity to compensate.
To prevent that you might loose actual alarm events, add a smaller area where it is critical - e.g. a window or your front door.
The smaller this area is, the higher its sensitivity. To find the optimal setting, keep an eye on your camera´s System Log. If an area causes too many false alerts, make it bigger or decrease it´s sensitivity.
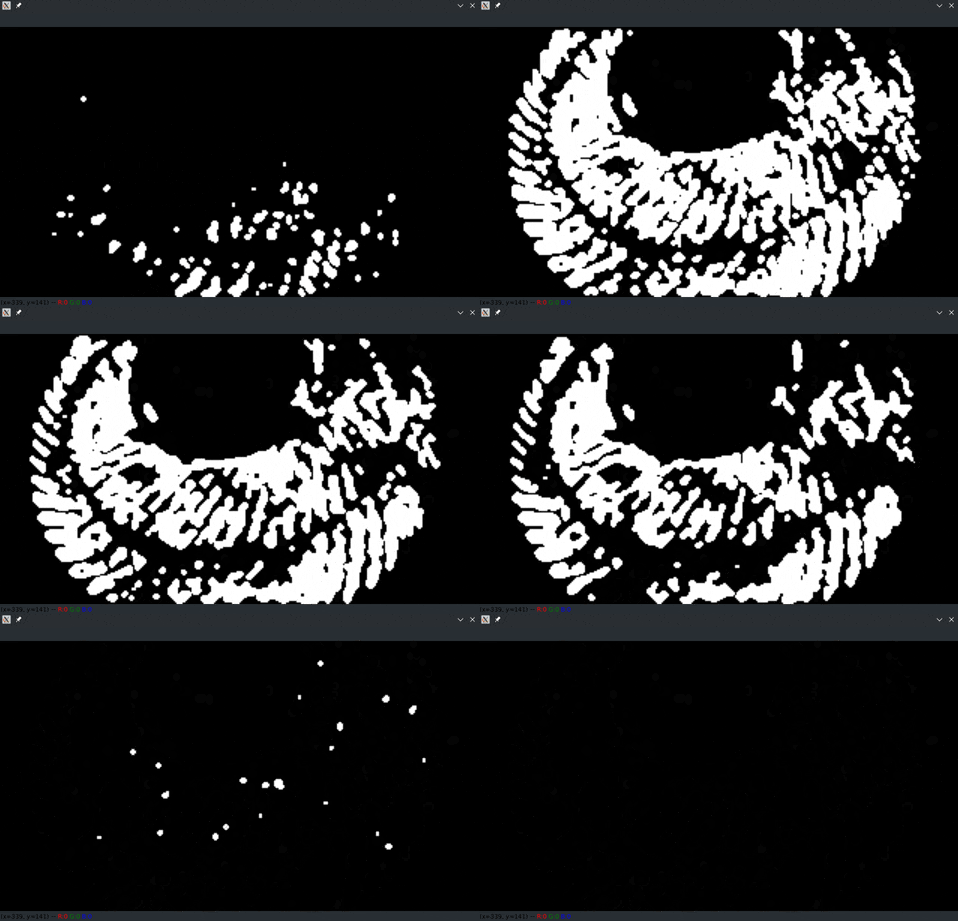
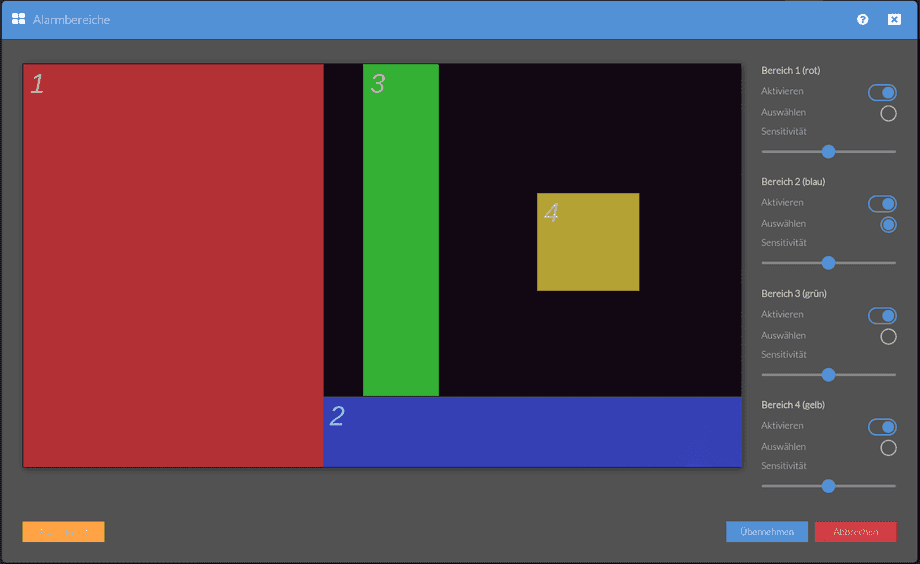
In the example (above) all 4 alarm areas are activated - each with a sensitivity of 50%. In the image below you can see a visualization of the camera's motion detection when you move an object through the field of view:

All black pixels are recognized as background and thus ignored. White pixels are pixels in which a change in brightness and/or color has been detected. With the given settings, at least 50% of the pixels in an area must become white before an alarm is triggered. The larger the area, the larger the movement in front of the camera must be to trigger an alarm.
The higher the sensitivity AND the smaller the area of an area, the faster an alarm will be triggered. Thus, in addition to reducing the sensitivity, increasing the areas can also limit false alarms.
As expected, the condition - min. 50% of the pixels within an area must change - is only fulfilled for areas 3 and 4. Area 1 and 2 therefore do not trigger an alarm.
In a second test run, the sensitivity of all areas is increased to 75%. The position and size are retained. Due to the higher sensitivity, it is now already sufficient if only a quarter of an area sees a movement:

With this setting, all areas now trigger:
Background Compensation
Movements in the background - e.g. trees with leaves moving in the wind - are a common reason for false alarms. The WQHD cameras have an algorithm that detects such continuous movements and helps the camera to filter them out. In the following example, we have pointed our camera at a fan.

When starting the fan, the movement is detected and would trigger an alarm. After a short time, however, the background detection jumps in and suppresses the signal - the fan thus falls into the background and the image turns black. When the fan is switched off, the frequency with which the rotor moves changes and the fan "falls" out of the background again.
This function suppresses false alarms. But it can also suppress "real" alarms. For example, if a person stays in front of the camera for a long time - in this case you often get an alarm only when entering and leaving.


