Side Navigation - Camera List
The camera list displays all added cameras for an easy configuration. Besides network IP camera, you can also add USB webcams and remote instances of the InstarVision Surveillance System. Just click on the + button at the bottom or right-click on Camera to open the Add Camera dialogue:
Add INSTAR IP Cameras
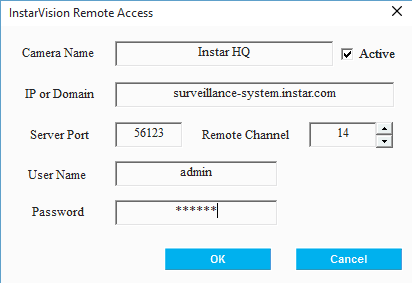
The Add Camera menu allows you to add three different types of cameras. A USB camera can be the camera on the laptop the Surveillance Center is installed on, or Webcams connected to your servers USB interface. Network Cameras are IP cameras on your local network (e.g. local IP´s like 192.168.1.101) as well as cameras you want to connect to over the internet (e.g. DDNS addresses like abcd12.ddns-instar.de). The InstarVision Remote Access refers to a function of the Surveillance Center that enables you to connect to a second remote InstarVision installation. The list order defines the camera viewport arrangement on the video canvas.
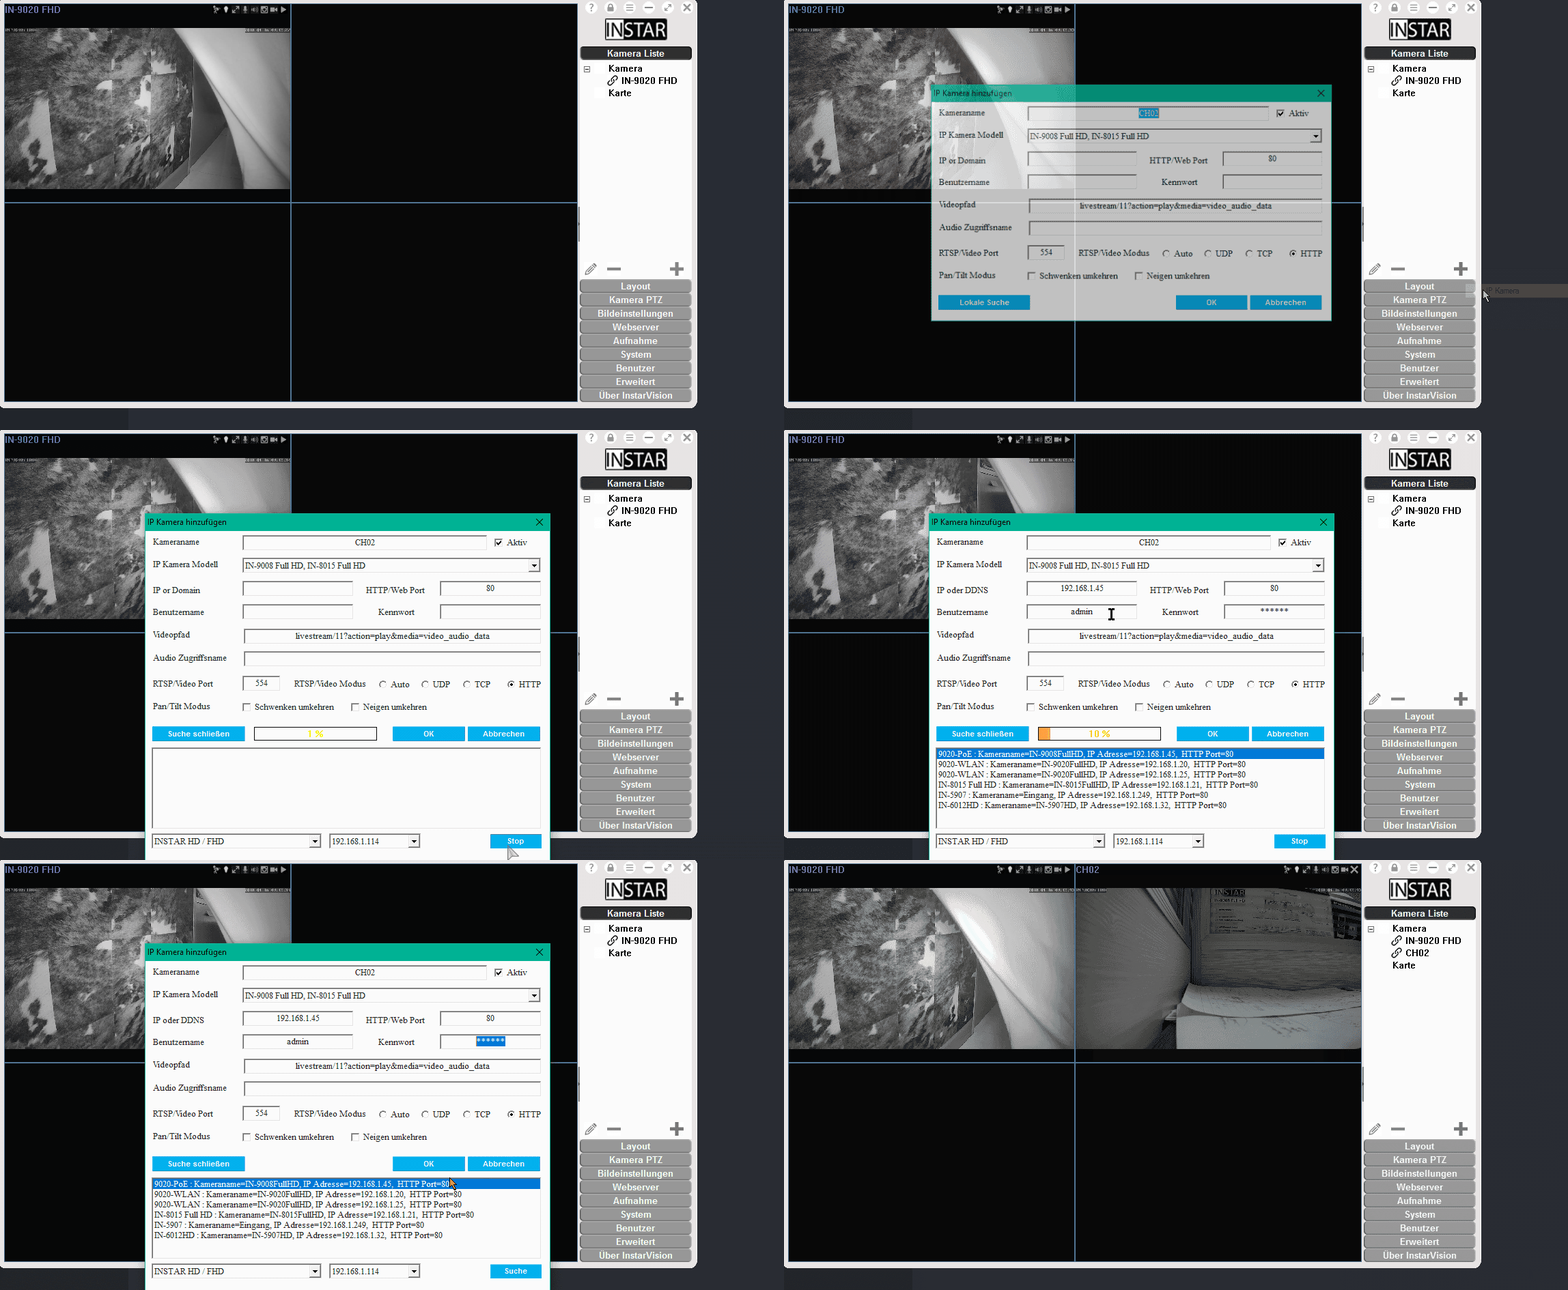
Just click on the + button or right-click Camera in the Camera List.
Right-click a camera to edit your camera settings and setup. Or delete / duplicate your camera.
Left-click a camera twice to rename it. Or right-click it and change the name inside the Properties menu.
Right-Click an added camera in the list to deactivate, delete or duplicate it. The properties option allows you to adjust its network and video parameters, which were set when you added the camera. Under Bitrate you can adjust the quality of the video stream that is retrieved from the camera. Please be aware that high quality settings result in high bandwidth requirements - as well as high demands on your computers CPU.
Add INSTAR P2P Cameras
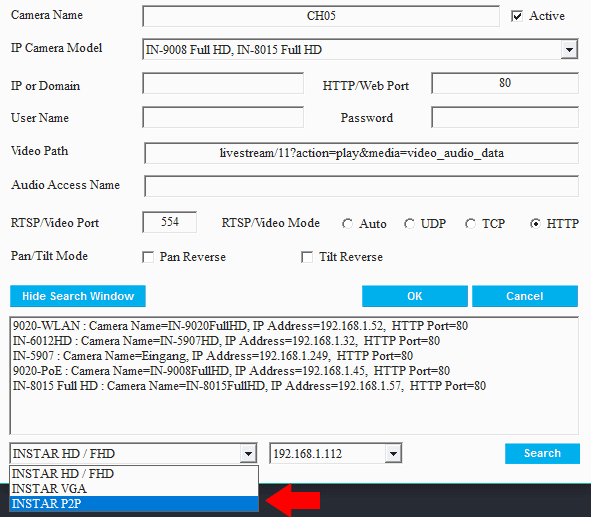
To add a camera via it's P2P UID, you can follow the steps above, just switch the search mode to P2P, select your camera from the result list, type in your login and confirm.
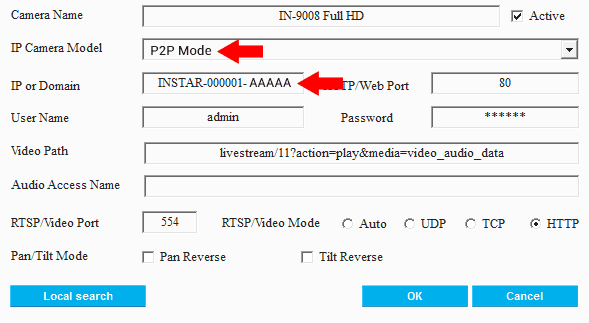
If your camera is not inside the same network, you can manually switch the Camera Model to the P2P Mode, type in your P2P UID (1080p Models / 720p Models) and login and confirm to add your camera:
Also check out our free mobile app InstarVision - here you can use the network scanner to find cameras on your local network. Or open the P2P menu (1080p Series / 720p Series) to scan your camera´s QRcode for the easiest way to add your camera via it's P2P UID:
Add USB Webcams
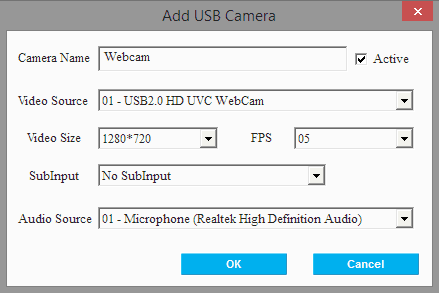
The InstarVision Surveillance Center automatically detects cameras attached to the PC or laptop. Just select the video and audio source from the list and click OK, to add it to your Camera List. If you are using video capture cards, please install a WDM driver for it to live stream the video. In case of camcorders or external USB Webcams, please attach them to your PC´s USB interface and restart your PC to make them available as a video source.
The video source you add here, will be available for all advanced features of the Surveillance Center - turning your laptop camera into a full-fledged Surveillance System. You want to know if someone uses your Laptop or enters your office without permission? The InstarVision Surveillance Center is the solution for your peace of mind.
Add Network IP Cameras
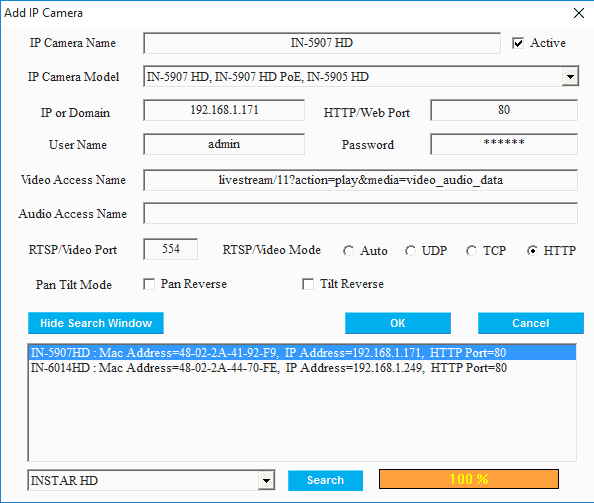
The InstarVision Surveillance Center automatically detects INSTAR Full HD, HD and VGA cameras on your local network. Open the Search window, select your camera type (FullHD, HD or VGA) and click on search. Selecting a camera from the list automatically fills out the needed parameters above. Please adjust your private camera login - you don´t have to change the Video/Audio Access or Ports anymore. Then click OK to add the camera to your Camera List.
If you want to add a camera that is not on your local network, it is best practice to simply add a local camera first, duplicate it in the camera list and then change the IP address to the Internet Address (DDNS) of your remote camera and adjust the Port and Login.
The default Video Path for INSTAR IP cameras is livestream/11?action=play&media=video_audio_data for FullHD and HD and videostream.cgi for VGA cameras.
If you want to add a third-party camera, please adjust the video and audio path according to your manufactures documentation. The Search function might work - if your third-party camera uses the same chipset as an INSTAR camera. But it is more likely that you have to type in the parameters manually. You can also check the iSpy Database for the most common third-party camera models.
Add a Remote Instance
The InstarVision Surveillance Center allows you to stream videos to the internet. You can use this function to stream video from one installation of the Software to another and add those streams as remote cameras.
This enables you to stream all your cameras from site A to site B through one open TCP port in your firewall - if you would connect each camera directly via it´s DDNS address, each camera needs a unique port forwarded to its IP address. This also helps you to manage your network resources more efficient and secure by letting your local Surveillance Center access your local cameras. While your camera limits the amount of simultaneous streams to 3, the server you use to run the Surveillance Center will not confront you with such strong restrictions. Remember that you can use the DDNS address of one of the remote camera to connect to the remote Surveillance Center. Just type in the camera´s DDNS address and add the port that you forwarded to the server IP address in the remote network. You can change the Surveillance Centers Server port in the System settings.
Camera Viewport
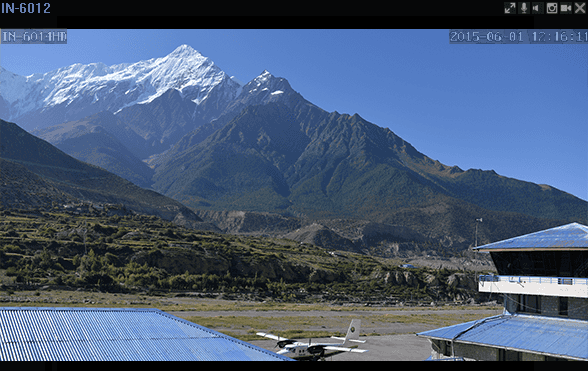
The viewport on-screen display shows you the name of the channel and six channel status buttons.
You can add up to 64 cameras to the InstarVision Surveillance Center (depending on your license type). Each camera will be displayed in its own viewport on the left of the side navigation. The amount of cameras displayed can be adjusted in the Layout menu. Each viewport offers you a couple of functions to control your camera.
You can double-click the video with left mouse to maximize the camera´s viewport or restore it back to the multi view. A right mouse click opens the viewport layout in a full screen mode - or restores it. Your mouse wheel allows you to digitally zoom in or out of the camera view. While zoomed-in, you are able to drag the image with your left mouse button to pan or tilt your camera virtually. The "virtual Zoom Factor" will be displayed above the live video, once the Zoom is active. The viewport further offers you the following control elements in the onscreen display.
IR LEDs: Switch your camera´s nightvision LED´s on and off. The "On" function refers to the automatic mode, in which the LEDs are automatically switched on when it is getting dark.
Maximize Viewport: This button maximizes viewport for the selected camera or restores the video to normal. The function is can also be triggered by double-clicking the video area with left mouse.
Microphone: This button activates the microphone on your PC/Laptop. Use this function to send an audio stream to your camera´s internal or external loudspeaker - if available.
Audio: The audio button enables or disables this channels audio stream. When activated, the audio is of the channel is played when the cameras viewport is selected.
Snapshot: The button takes a snapshot of the current video stream and saves it as a JPG file. The file is placed in the current record directory inside the "Snapshot" folder.
Recording: This button starts or stops a manual recording of the camera´s video stream. The colours green, blue and red display the current recording status of this channel.
Once the recording function is started, this icon will flash every second. The colour green signals a manual recording, which can be stopped by clicking the icon again. The blue stands for a scheduled recording that can be configured in the recording menu under Permanent Recording. A red symbol means that the motion detection for this channel is active and triggered an alarm recording. The Alarm recording is configured in the Recording menu under Alarm.
Disconnect: This button stops or starts the video stream of the selected camera. Use this function to deactivate streams and reduce network traffic.
Overview Map
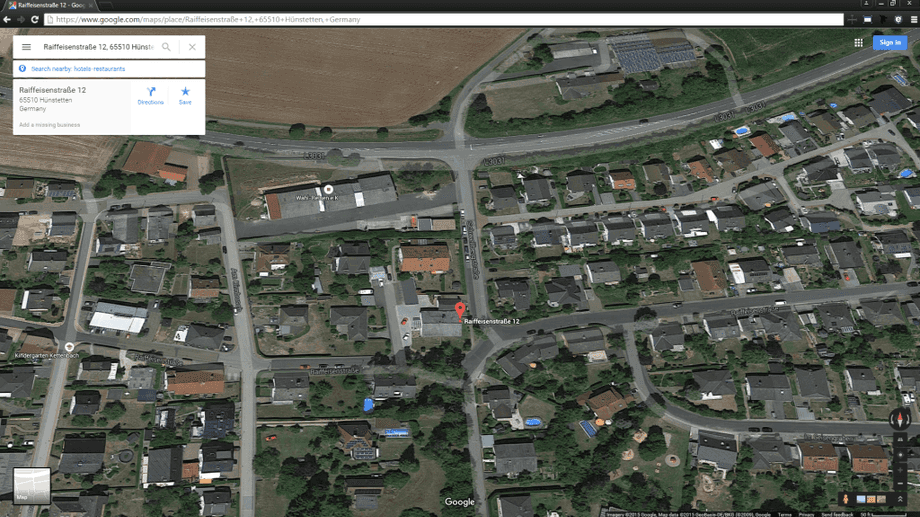
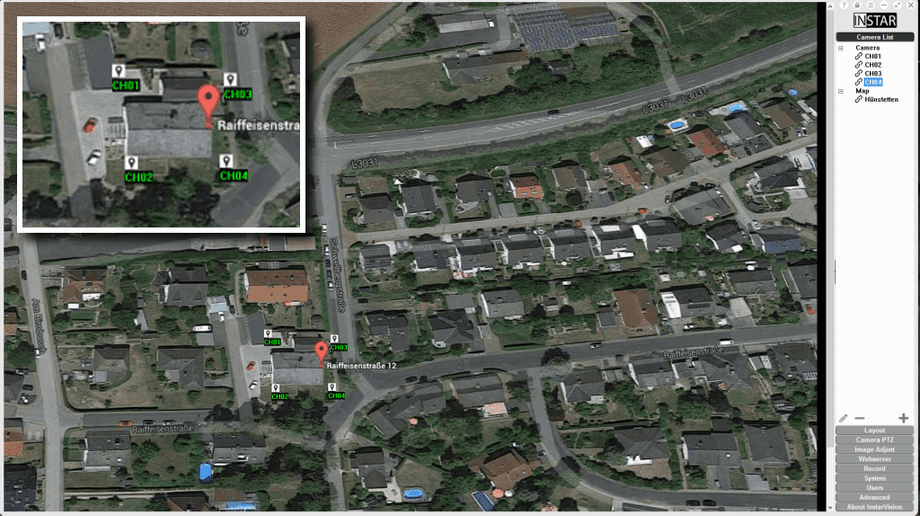
Use an architectural drawing of your property or a snapshot from Google Maps as a location map for your surveillance. Load the image (jpg, png, etc.) file by right-clicking "Map" in the Camera List and choose "Add Map".
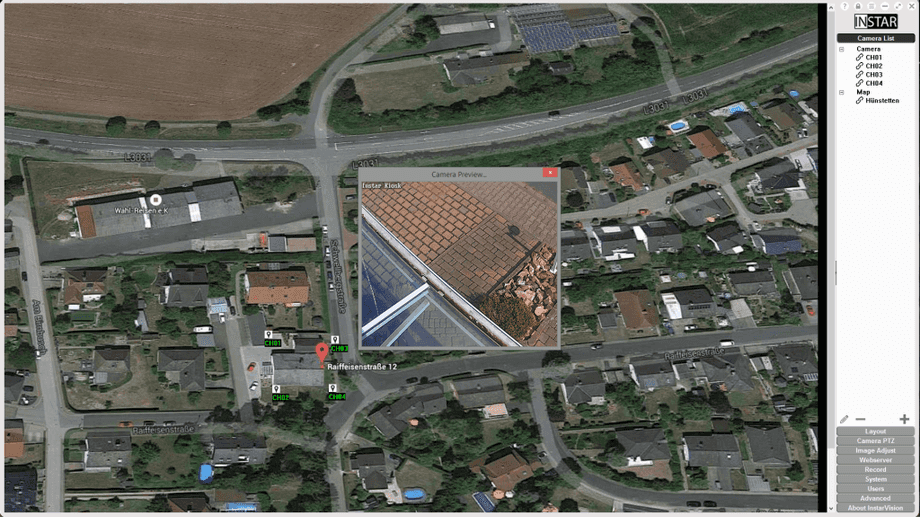
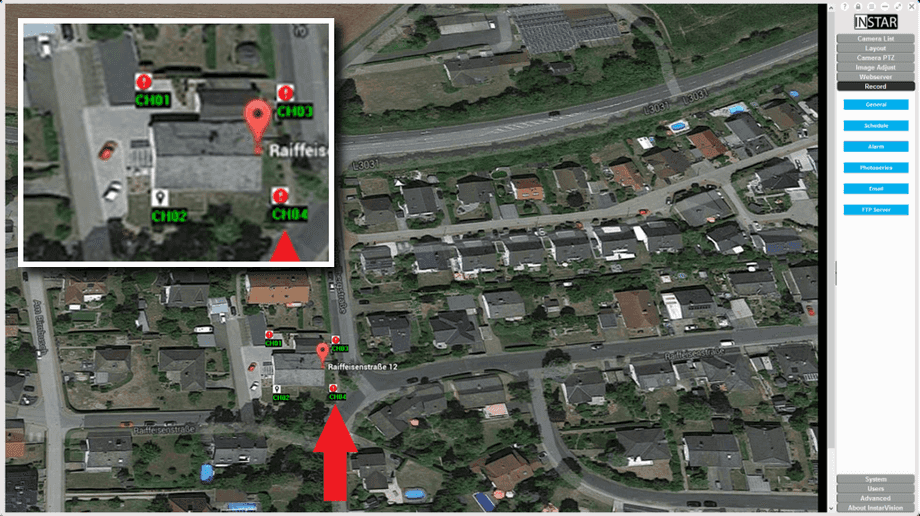
You can rename your map by clicking on it with your left mouse button or delete it again by right-clicking it and choosing "Delete Map". Double-clicking the map opens it in place of the video canvas. Drag & drop cameras from your Camera List onto the map. The camera location pointer will change its appearance if the camera triggered a motion alert or if the software lost connection to the camera. Right-clicking the pointer gives you direct access to the camera´s live stream. You can go back to the video canvas by double-clicking any of your cameras in the Camera List.
Add a map by right-clicking and choose Add Map.
Delete a map by right-clicking and choose Delete.
Click twice to rename - Double-click it to open the Map View.
Drop cameras on your map from the Camera List.
How to use the Map Function?
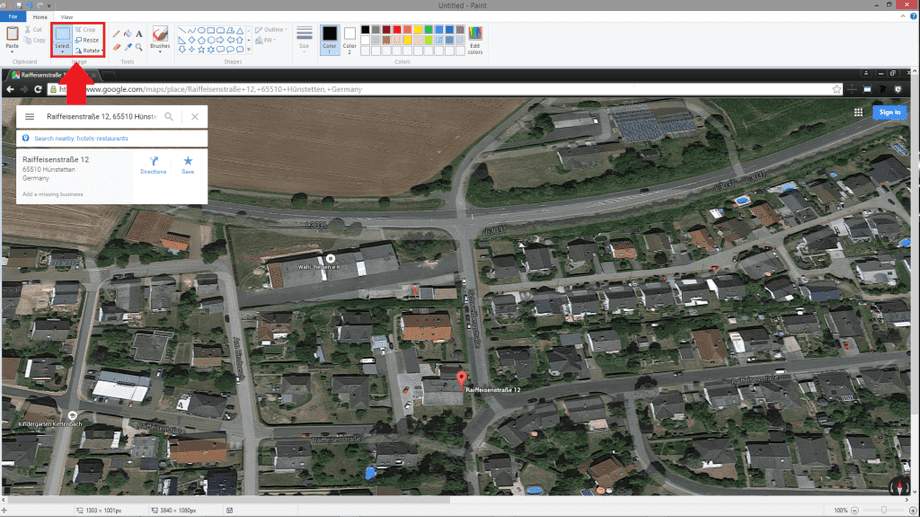
1 - Browse the web for a map of your surveillance area. Click the Print Screen button on your keyboard to save the image to your clipboard.
2 - Open MS Paint (or similar) and click Ctrl + V at the same time to copy the image to the program. Use the cropping tools to adjust the image. After saving the image, you can add the image file as a map to the InstarVision Surveillance Center.
3 - Drag and drop your cameras from the camera list onto the map. Position them according to their installation location.
4 - Double-click the white camera icon to open a window with the camera´s live video feed. Close the feed by pressing Esc.
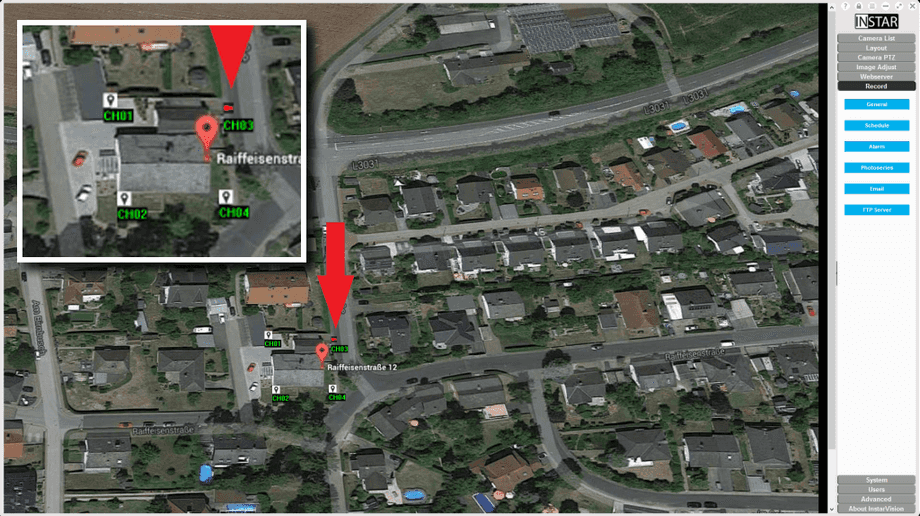
5 - The camera icon will start to flash red, whenever an alarm is triggered. Double-click the camera name inside the Camera List to get back the Video Canvas.
6 - If the camera icon turns into a red, blinking exclamation point, the software has lost the connection to the camera.

