UltraHD Series (2K+ 1440p & 4K 2160p) Web User Interface
Multimedia Menu
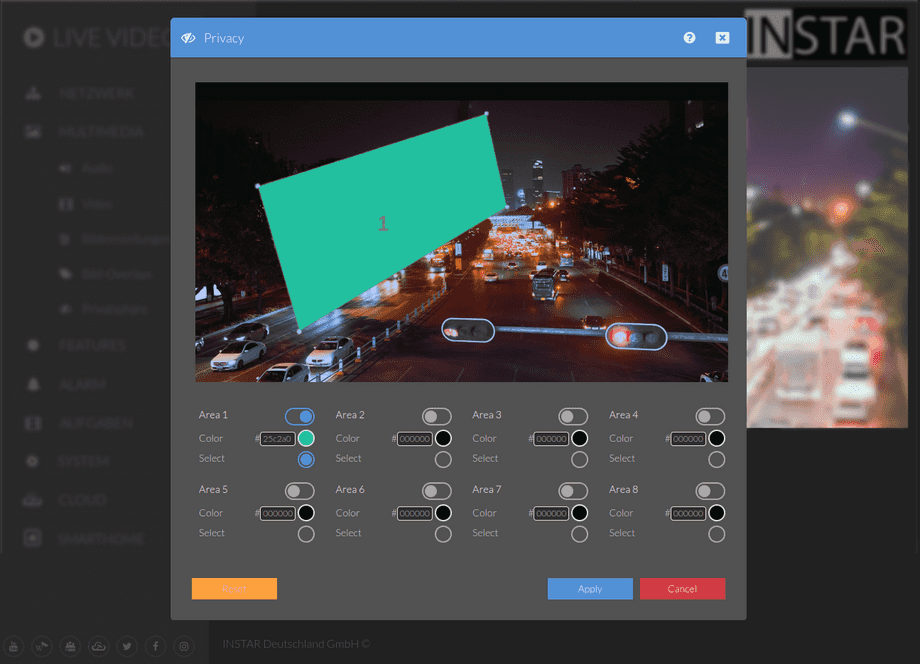
The Privacy Mask Menu allows you to black out areas from your surveillance. E.g. you can still see a part of the public street in front of your house on your surveillance videos. But you cannot adjust the camera angle any more. Now you can setup up to 4 masks to prevent the street from showing up in your surveillance footage.
Your camera provides a fine-grained access rights system that allows you to restrict access to certain menus of the web user interface and its underlying CGI commands. The minimum permission to access this menu is:
- User Permissions:
Multimedia Settings,Live Stream
User permissions can be modified in the user menu.
Privacy Mask Settings | Description |
|---|---|
| Areas | Click the radio button behind the area (1-4) that you want to edit. Move your mouse pointer over the image hold the left mouse button to draw your privacy mask. To draw a second mask, activate area 2 and repeat the step. |
| Active | Check the Active box to activate the corresponding Area. The area will be masked inside the live video, video recordings as well as in snapshots. |
| Full Area | Maximize the selected area to the full size of the frame. |
| Reset | Return all areas to their default positions. |
Black out Areas from your Surveillance
The Privacy Mask Menu allows you to black out areas from your surveillance. E.g. you can still see a part of the public street in front of your house on your surveillance videos. But you cannot adjust the camera angle any more. Now you can setup up to 4 masks to prevent the street from showing up in your surveillance footage - just activate an area and draw its shape onto the image.
Tip: You can use the privacy mask to hide from the Motion Detection Areas to avoid false triggers.
