1080p Web User Interface
Multimedia Menu
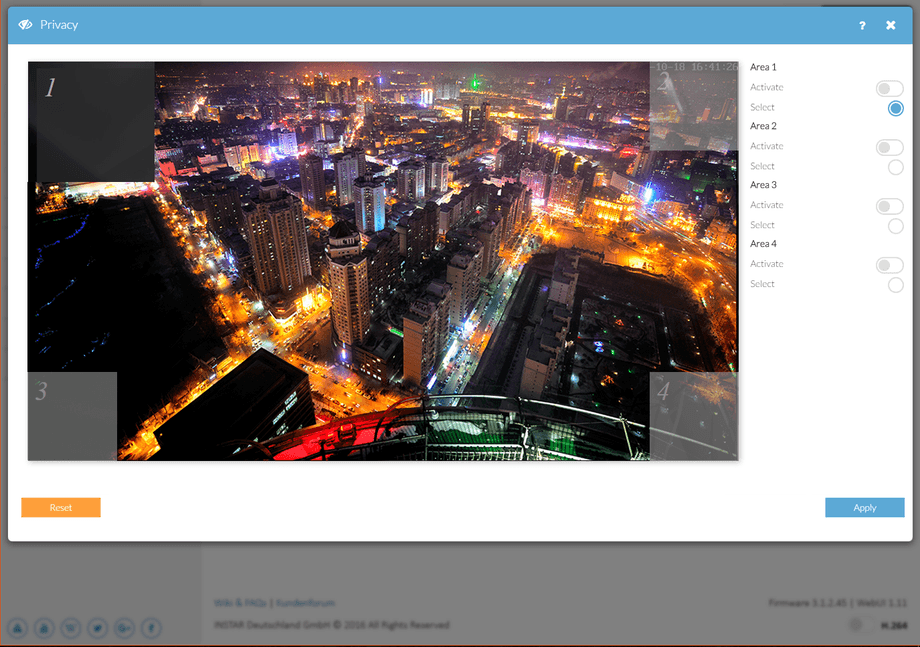
The Privacy Mask Menu allows you to black out areas from your surveillance. E.g. you can still see a part of the public street in front of your house on your surveillance videos. But you cannot adjust the camera angle any more. Now you can setup up to 4 masks to prevent the street from showing up in your surveillance footage.
Privacy Mask Settings | Description |
|---|---|
| Areas | Click the radio button behind the area (1-4) that you want to edit. Move your mouse pointer over the image hold the left mouse button to draw your privacy mask. To draw a second mask, activate area 2 and repeat the step. |
| Active | Check the Active box to activate the corresponding Area. The area will be masked inside the live video, video recordings as well as in snapshots. |
| Full Area | Maximize the selected area to the full size of the frame. |
| Reset | Return all areas to their default positions. |
Black out Areas from your Surveillance
The Privacy Mask Menu allows you to black out areas from your surveillance. E.g. you can still see a part of the public street in front of your house on your surveillance videos. But you cannot adjust the camera angle any more. Now you can setup up to 4 masks to prevent the street from showing up in your surveillance footage - just activate an area and draw its shape onto the image.
Tip: You can use the privacy mask to hide from the Motion Detection Areas to avoid false triggers.
