Software
Windows
iSpy Connect
iSpy uses your cameras, web cams, IP cams and microphones to detect and record movement or sound. Captured media is compressed to flash video or mp4 and streamed securely over the web and local network. iSpy can run on multiple computers simultaneously and has full Email, SMS and Twitter alerting functions and remote viewing. Some key features are: Unlimited Cameras and Microphones (including IP and USB cameras), Motion Detection (3 types), Motion Processing (4 types), Record on Detection, Record on Schedule, Record with Audio, Remote Access, Network Audio Broadcasting (via iSpy Server), Password Protection, Desktop Recording, YouTube Uploading, SMS, Twitter and Email alerts.
In order to integrate your INSTAR IP camera in iSpy from iSpy Connect we recommend you to download the latest version from here.
Add an INSTAR HD Camera
After you installed the newest version of iSpy please open the program.
Step 1
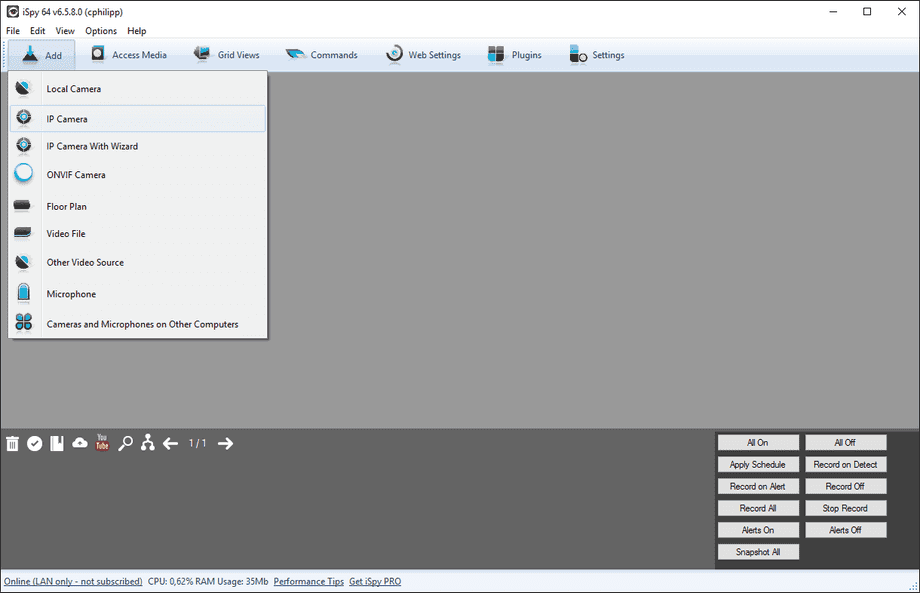
Click the Add button and choose IP Camera to add your INSTAR HD camera.
Step 2
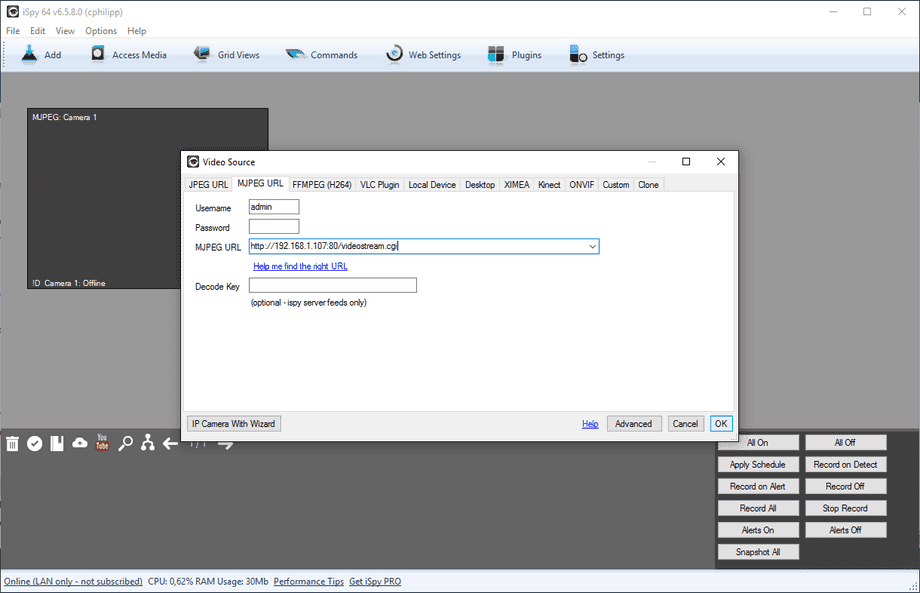
If want to use the MPEG-Stream then type username and password into the given text fields. Type the complete url into the MPEG-URL field. The url should have the following pattern: http://[Camera-IP]:[Camera-Port]/videostream.cgi?[Parameters]. Then press Ok.
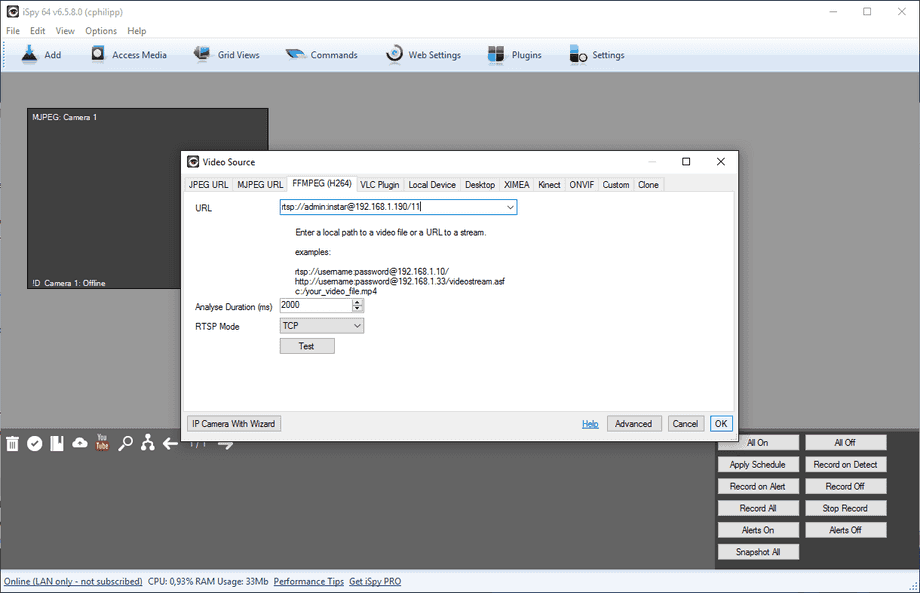
If want to use the H.264-Stream then type the complete rtsp url into the URL field. The url should have the following pattern: rtsp://[username]:[password]@[Camera-IP]/11?[Parameters]. Then press Ok.
Step 3
Type a name for the new added camera into the name text field. Then press Finish.
Advanced Settings
iSpy comes with a wealth of feature that cannot be covered in detail here. Please refer to the iSpy User Guide for a more in-depth tutorial. Also note that iSpy supports PLUGINS for added features like License Plate Recognition, Face Recognition, Barcode Scanners, Text Overlays, etc. You can also use the software to make your IP camera available for video chat programs like SKYPE.
The following section is supposed to give you an overview over the advanced features you might want to use with your INSTAR IP camera. You can enter the advanced camera setting by hovering your mouse over the camera video and clicking on the Cog symbol in the context menu.
Camera Settings
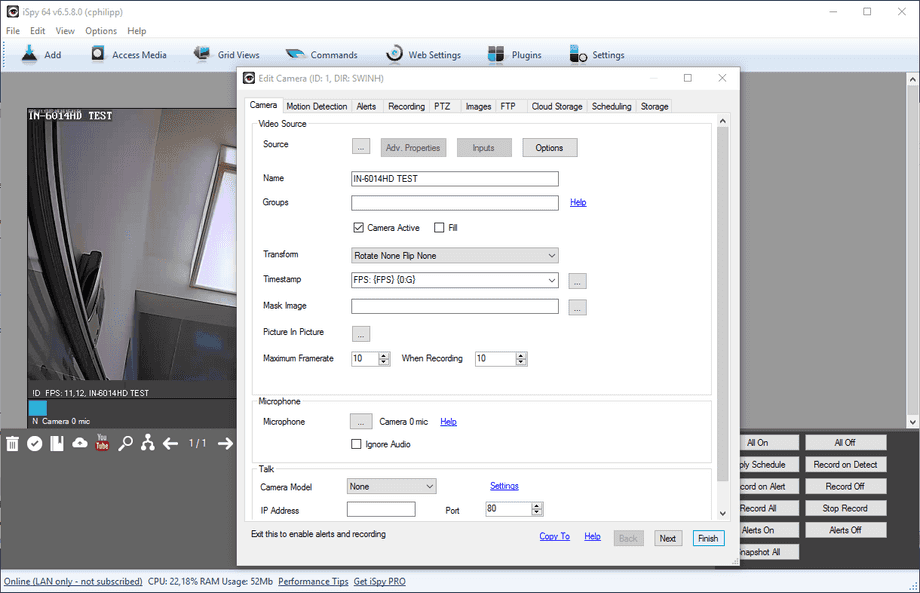
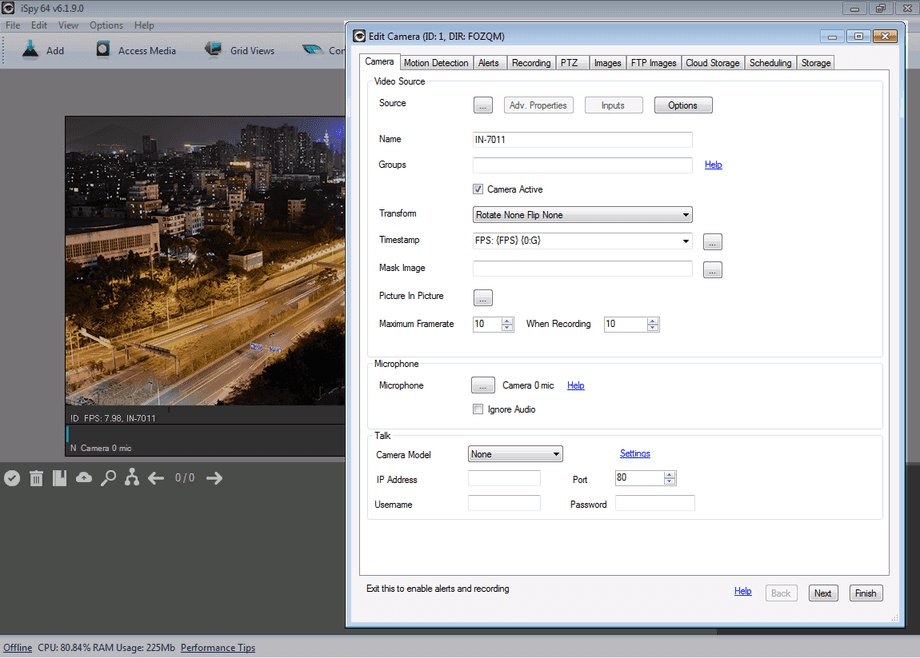
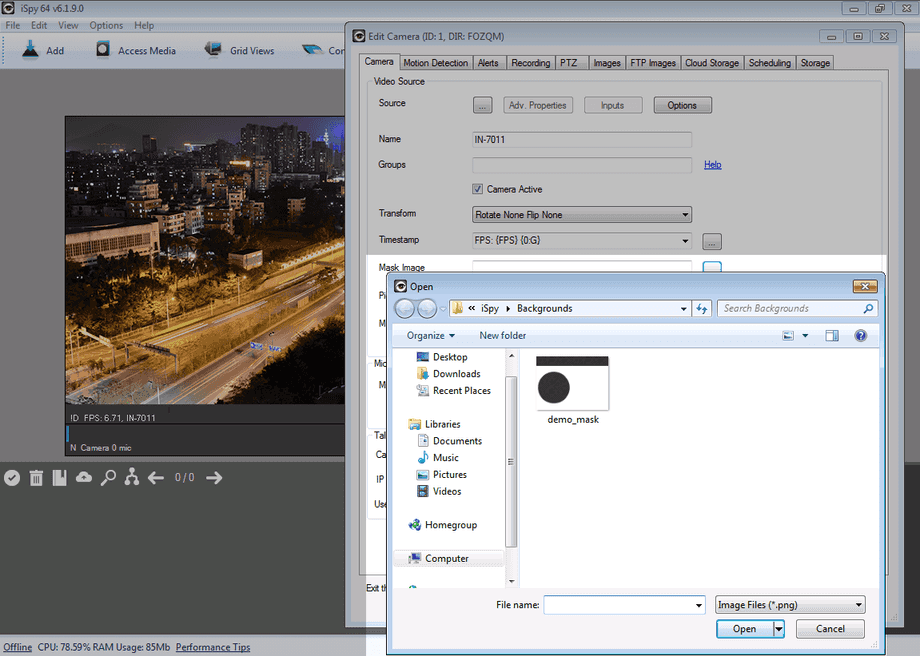
The Camera Settings tab allows you to change basic video options like the frame rate and text overlays. You can also edit the video source if the camera address or login was changed. Add a privacy mask to the video image or activate the microphone function if not activated automatically.
Edit basic video and audio option of your camera.
Add a black&white image file to the camera to mask areas of the video where privacy is concerned.
Motion Detection
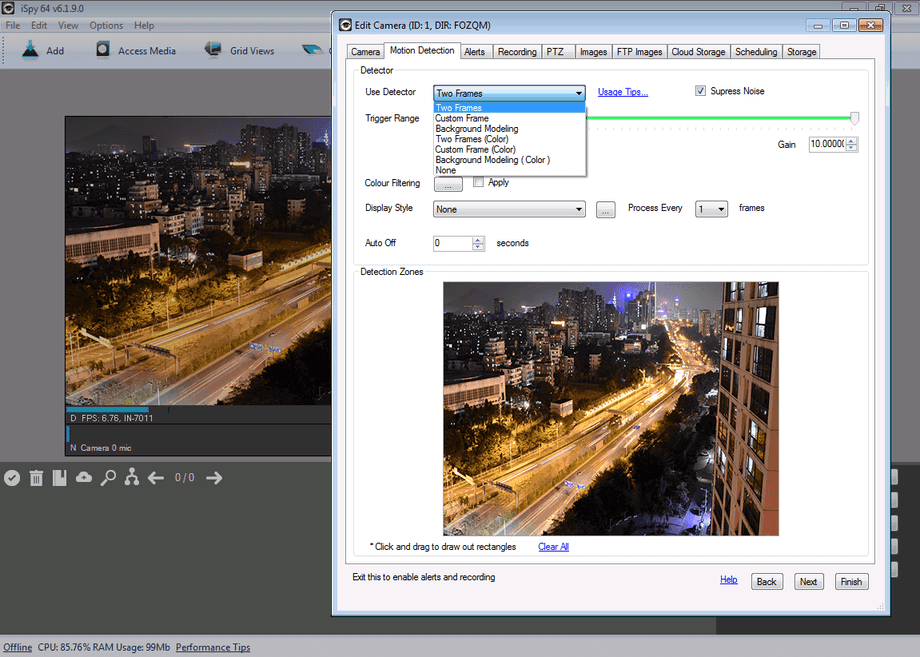
iSpy comes with a range of different motion detection algorithm built in. Each motion detector has different performance impacts and is suited to different purposes.
| Two Frames: | Probably the most common type you would use. iSpy just compares the last frame to the current frame. |
| Custom Frame: | iSpy stores one frame in memory and compares subsequent frames to this - good for detecting if things change - say someone takes a bag out of the scene. |
| Background Modelling: | iSpy takes a custom frame but adjusts it over time to morph it towards the current frame. This is good when you have something in your scene that is constantly moving - iSpy will learn to ignore it. |
Experiment with different motion detection algorithm to find the one that works best for your surveillance.
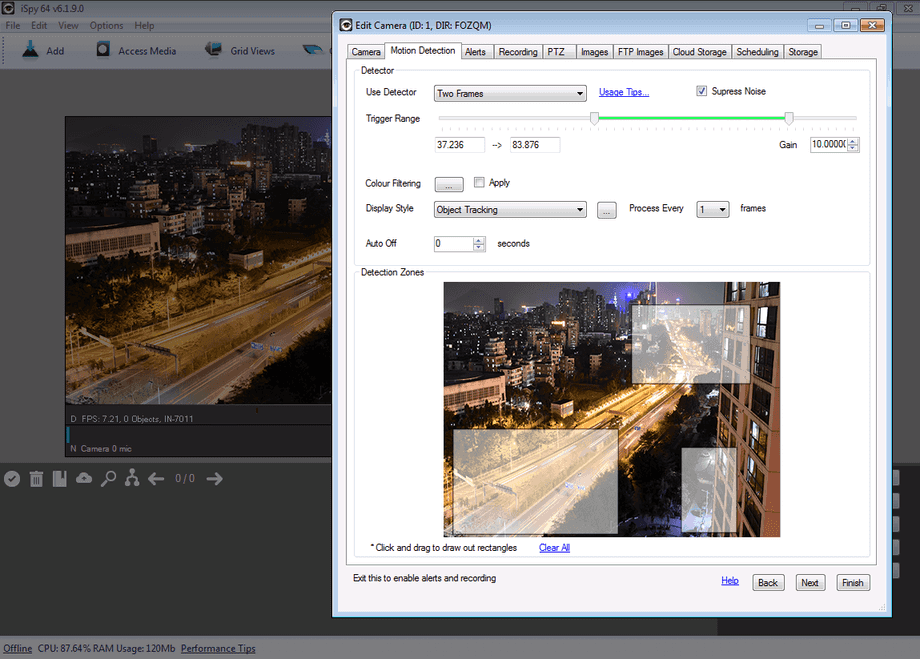
The sensitivity can be set in a Trigger Range, allowing you to set a minimum and maximum level of motion detection. The cut-off function for high detection levels allows you to minimize false alerts due to e.g. changes in lighting conditions (passing cloud during the day or passing car during the night). All changes that effect the whole video image can easily be removed as an alarm trigger by the set upper detection level. The lower level defines the minimum amount of motion that has to occur to trigger an alert.
Set an upper and lower detection level cut-off to minimize false alerts.
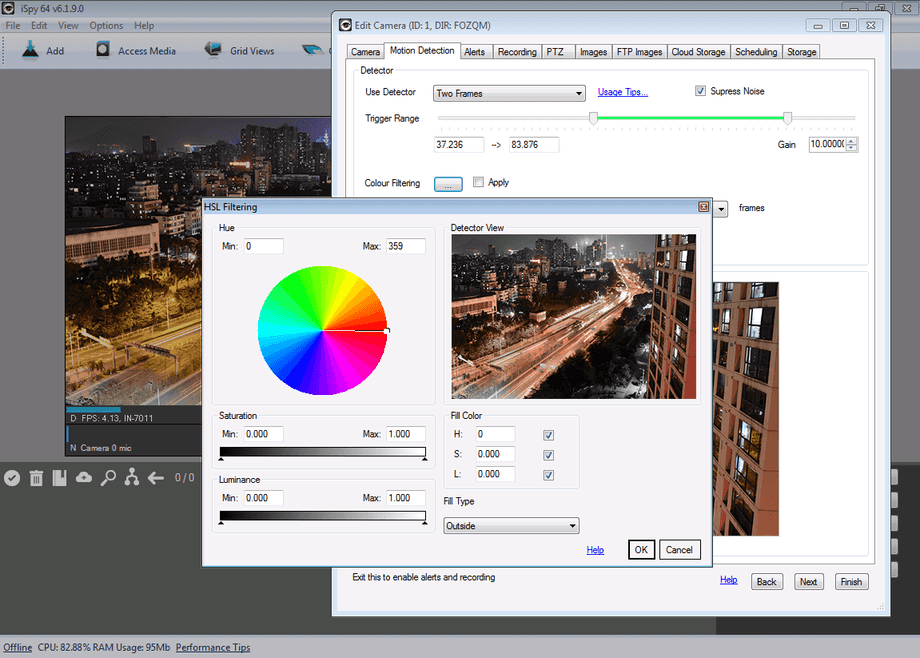
The HSL Filter tells iSpy to ignore certain colours or luminosity ranges when looking for motion. There are many ways this can be useful, for example ignoring constantly moving objects (like trees or clouds) or Tracking objects of a specific colour (like your red car in a parking lot). Use the colour wheel on the left to select a range of colours to either ignore, or track (depending on the drop down selection for "Fill type"). You can then specify the minimum and maximum levels for saturation and luminance. A live preview of what the motion detector is seeing is provided on the top right. Here you can see that the detector is set to only look for red colours and ignore everything else - this means that it will only record and alert if something red enters the frame.
The HSL Filter allows you to let iSpy either ignore colours or only react to a specific colour in the video frame.
iSpy can monitor specific areas of the camera view and ignore others. You can add as many rectangular detection zones as you like (iSpy will only monitor the area within the zones). To add a zone, click and drag out a translucent rectangle. To clear all zones click "Clear Zones". Note that with no zones, defined iSpy will monitor the entire camera view.
Limit the detection zone by drawing rectangular shapes on the video frame. Only motions inside a drawn zone will be detected to reduce false alerts.
Alerts
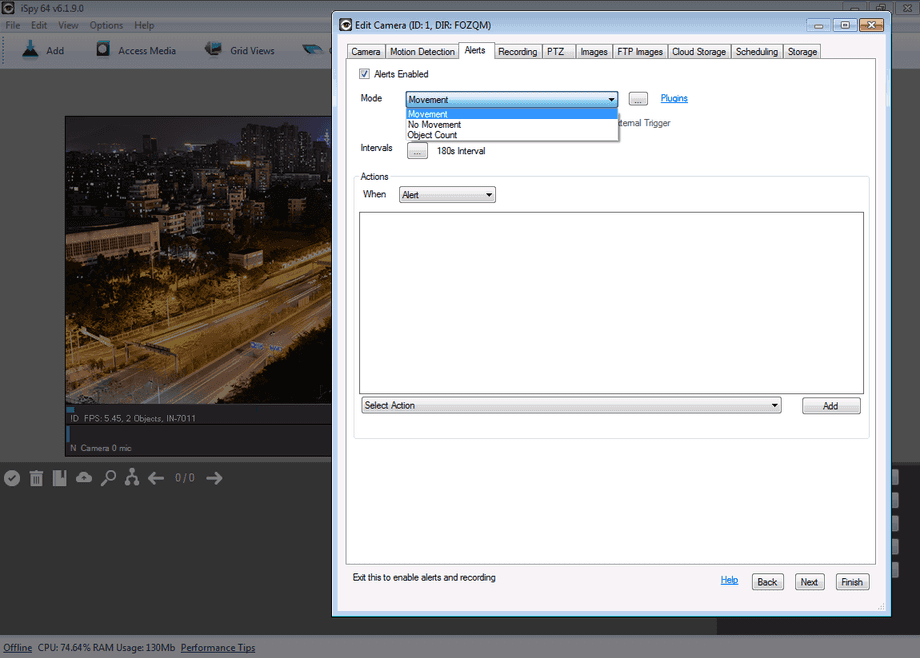
iSpy raises alerts for cameras and microphones when it detects movement or sound (you can also raise alerts for no movement or no sound).
| Mode: | Choose between movement/ no movement or plugin modes. Click the "..." button to configure various settings. |
| Continuous/ When Motion Detected/ External Trigger: | These options apply to plugins only. For example, you may only want to perform license plate recognition (using the plugin) when motion is detected. |
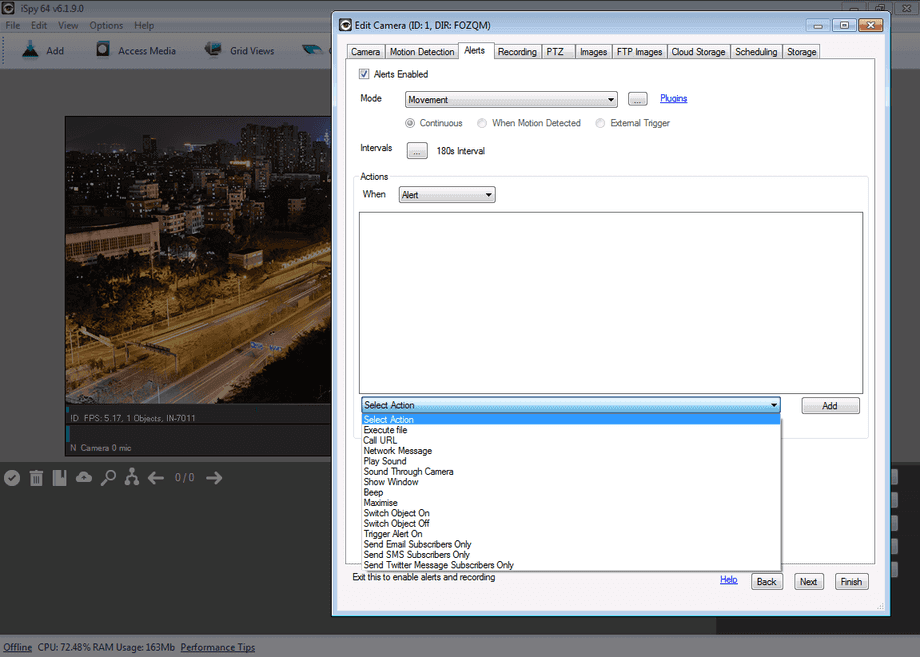
| Actions: | Actions to perform on alert - You can add as many actions here as you like. |
Define a criterion that is used to trigger an alert - the default is to detect movements in the video frame.
Define an action that is triggered by a detection - you can add as many actions as you want.
Recording
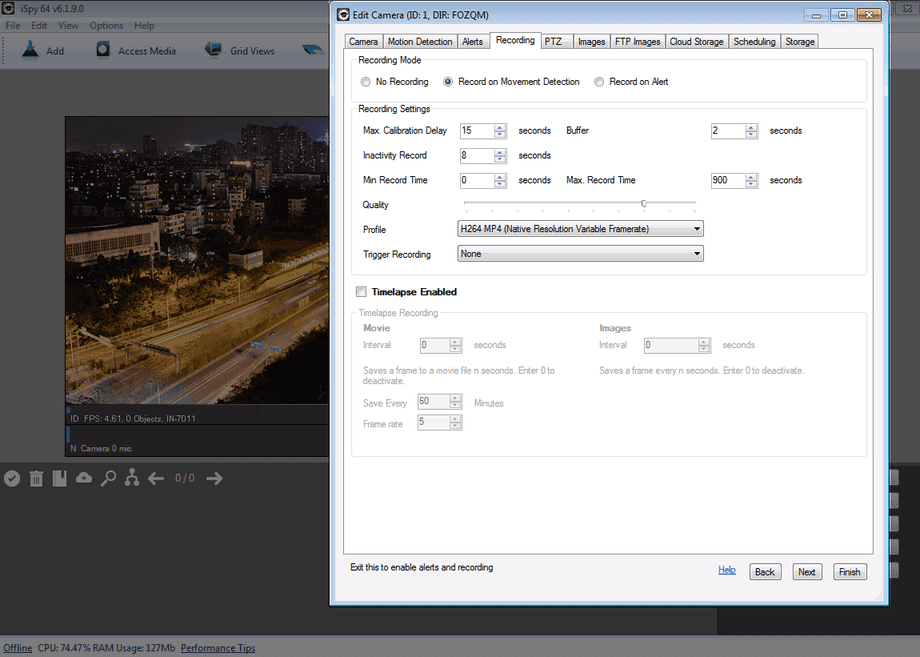
iSpy has 4 types of recording mode:
| No Recording: | Triggered manually - either by right-clicking on the camera in iSpy and clicking "Record" or by clicking "Record" in iSpyConnect. |
| Record on Detect: | Starts recording as soon as motion is detected, regardless of how long the motion has been detected for. |
| Record on Alert: | This is very useful for cutting down on the number of recordings if you have set a sensitive motion detect trigger point. |
| Timelapse Recording: | iSpy saves a frame on the interval you choose and convert the images to a movie file. Record on detect means record as soon as ispy detects movement. Record on alert means record when ispy generates an alert - alerts can be generated by plugins like face detection or number plate recognition or whatever. |
Adjust the recording settings for your camera.
PTZ Control
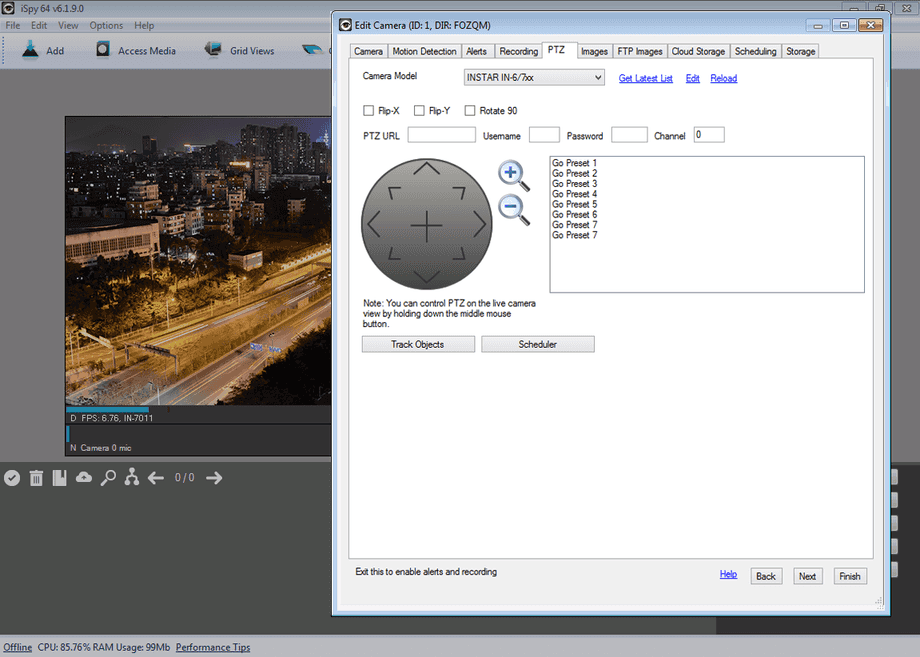
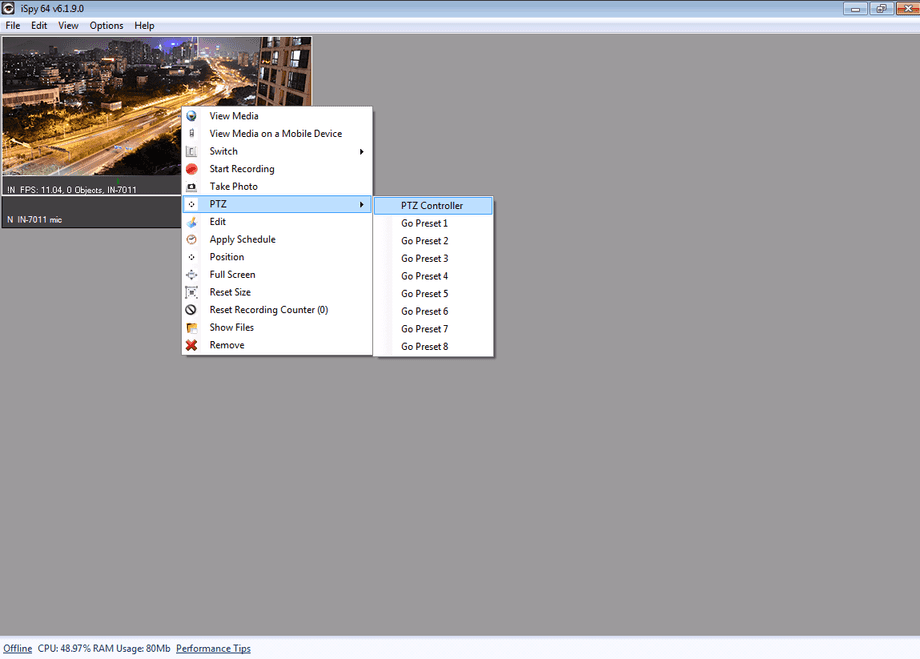
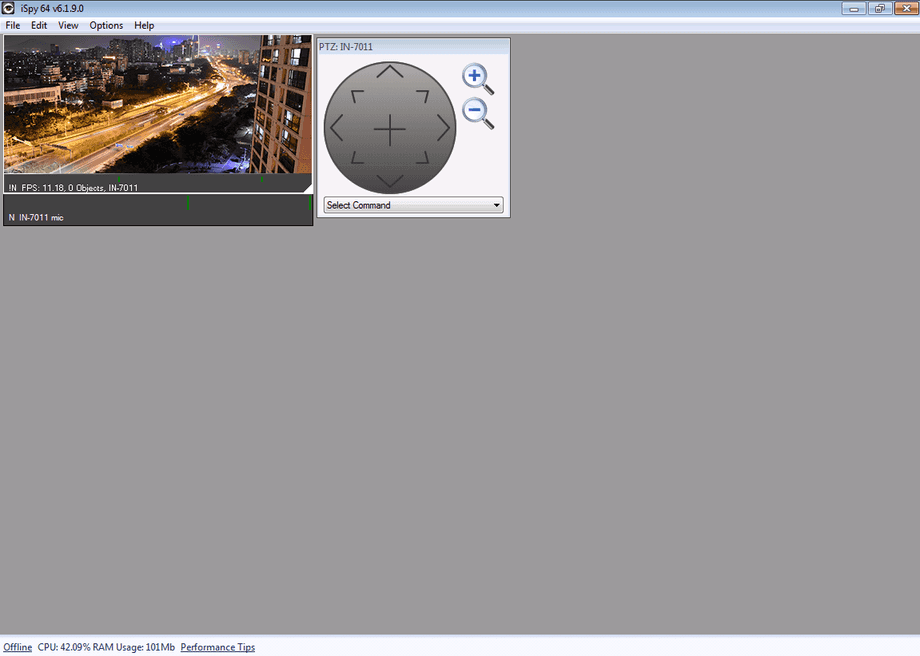
iSpy includes an XML definition file for controlling PTZ cameras. You can control PTZ for your camera from this panel, or you can control PTZ within iSpy by holding down the middle mouse button on the camera or from the context menu (for advanced commands like turning on/off the IR light). If your camera has zoom controls, you can use the mouse wheel on the camera to zoom in or out.
The PTZ Settings.
The PTZ Menu.
The PTZ Controller.
Discuss this article on the INSTAR Forum !
