Software
Windows
Logiware go1984
go1984 is software designed for professional and hassle-free monitoring of IP / CCTV cameras. The software works as a so-called hybrid system, which means it is capable of processing digital network cameras as well as analog video sources via video encoders. Companies with analog video technology can use the software to assist the "smart transition" to the digital world while integrating their existing hardware. go1984 thus makes an important contribution to protecting your investments. go1984 supports the hardware of many well-known manufacturers such as, for instance: INSTAR, Axis, Sony, Allnet, Abus, Panasonic, Mobotix, Bosch, Siemens, Basler, Samsung, Grundig and many others. go1984 is available in various editions and features everything you'll ever need to carry out professional camera surveillance, including:
- Live monitoring
- Recording (timer-controlled, motion-triggered or permanent)
- Calendar functions
- Control of PTZ cameras
- Remote access via the network or Internet via Windows PC, Apple Mac, iOS, Android or Windows Phone device
- Notification options: acoustic, by e-mail, by voice call via ISDN or by push-notification
Add an INSTAR IP Camera
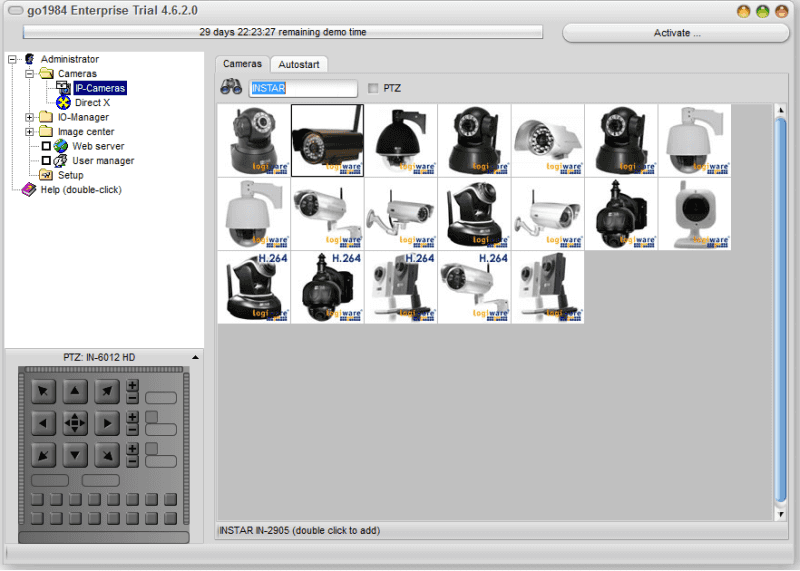
To add an IP camera, select the entry IP cameras in the go1984 explorer. A list is displayed showing you pictures of all the available cameras, arranged in alphabetical order. You can use a filter to conveniently restrict the search for the model you want. You can use characters and numbers in any combination. For instance, the text INSTAR will list all the cameras that include this combination of letters in their name.
Choose your Camera Model and then double-click on the picture of the camera model you want to add.
Add an HD Camera (h.264)
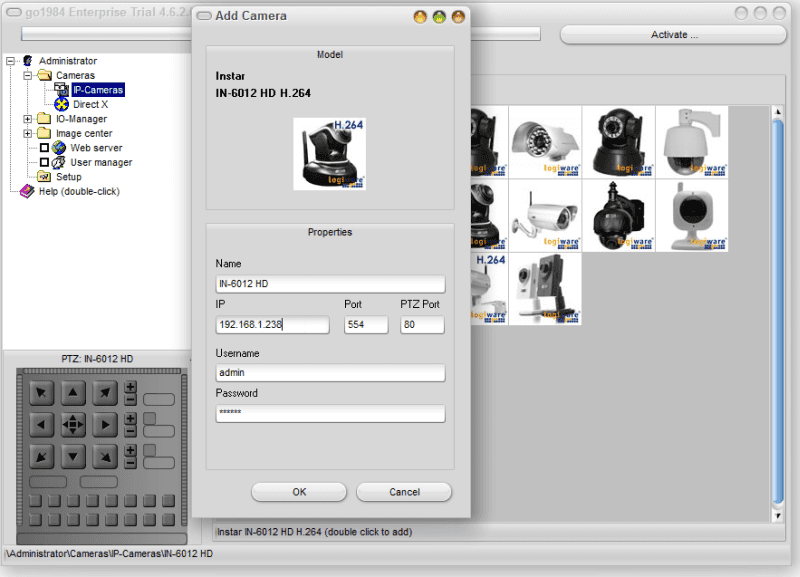
Add a HD Camera - h.264 Stream.
You should set the following parameters in it:
- Name: Give the camera a unique nickname which can be used for it in go1984.
- IP: Enter the camera’s IP address or host name here - e.g. 192.168.1.106 or abcd12.ddns-instar.de.
- Port: If a camera port other than the default port "554" (check Network/IP Configuration inside the cameras web user interface for its RTSP port) is being used, you can change this here.
- PTZ Port: If the selected IP camera is a PTZ camera, you can adjust the port here for camera control - you don´t have to change it for your INSTAR camera.
- Username: If authentication is required to access the camera, enter your username here. The default for INSTAR cameras is admin
- Password: Enter your password here for the authentication process mentioned above. Refer to your camera manual for details of the default passwords. The default for INSTAR HD cameras is instar.
Finally, click on OK to confirm your details.
The camera will be added via it´s RTSP video stream.
The camera you've added will now appear in the branch "IP cameras" of the go1984 explorer. The basic setup of the camera has now been concluded. go1984 has automatically activated motion detection and recording for this image source. As standard, cameras only record when there is a detected motion. If you want to record images permanently, simply deactivate the motion detection option by clicking on the "Motion detection" option box.
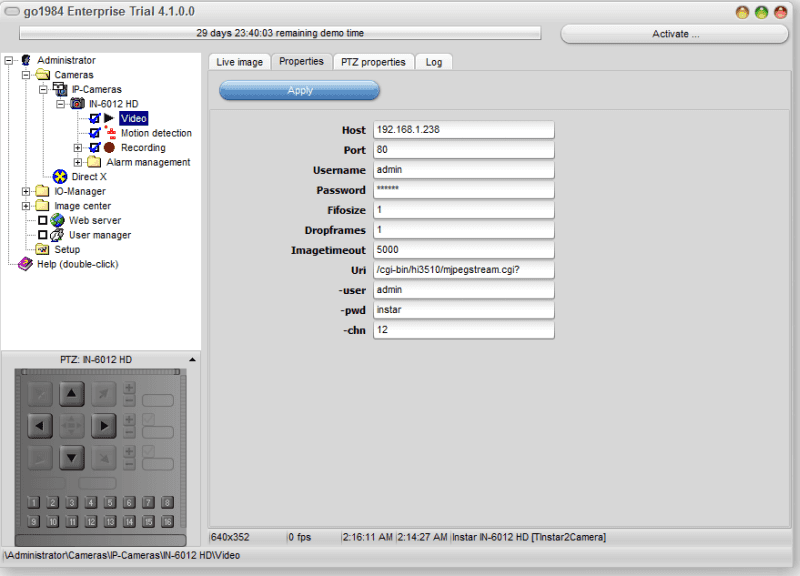
Add an HD Camera (MJPEG)
Add a HD Camera - MJPEG Stream
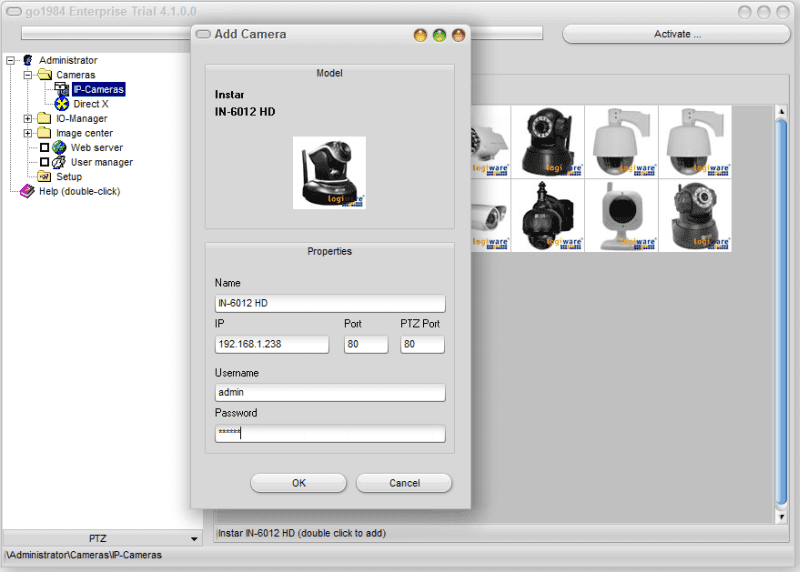
You should set the following parameters in it:
- Name: Give the camera a unique nickname which can be used for it in go1984.
- IP: Enter the camera’s IP address or host name here - e.g. 192.168.1.106 or abcd12.ddns-instar.de.
- Port: If a camera port other than the default port "80" (check Network/IP Configuration inside the cameras web user interface for its web port) is being used, you can change this here.
- PTZ Port: If the selected IP camera is a PTZ camera, you can adjust the port here for camera control - you don´t have to change it for your INSTAR camera.
- Username: If authentication is required to access the camera, enter your username here. The default for INSTAR cameras is admin
- Password: Enter your password here for the authentication process mentioned above. Refer to your camera manual for details of the default passwords. The default for INSTAR VGA cameras is instar.
Finally, click on "OK" to confirm your details.
The camera will be added via it´s MJPEG video stream.
The camera you've added will now appear in the branch "IP cameras" of the go1984 explorer. The basic setup of the camera has now been concluded. go1984 has automatically activated motion detection and recording for this image source. As standard, cameras only record when there is a detected motion. If you want to record images permanently, simply deactivate the motion detection option by clicking on the "Motion detection" option box.
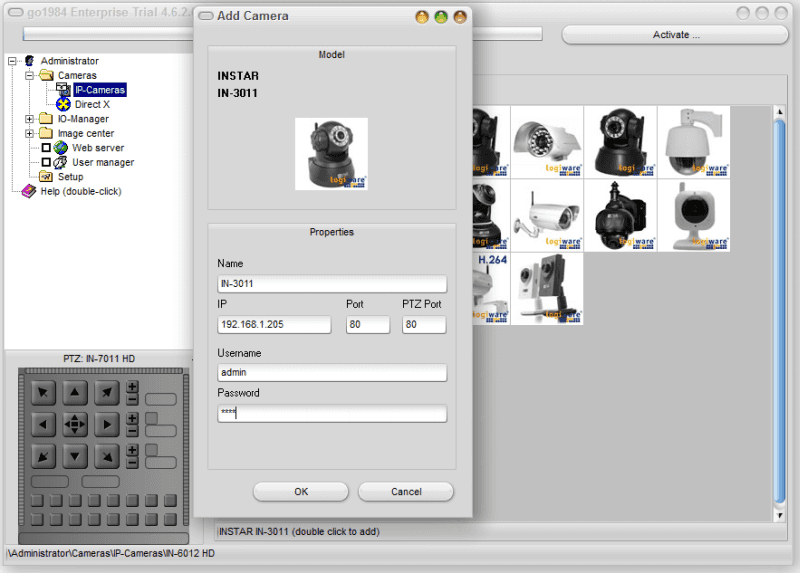
Add an VGA Camera (MJPEG)
You should set the following parameters in it:
- Name: Give the camera a unique nickname which can be used for it in go1984.
- IP: Enter the camera’s IP address or host name here - e.g. 192.168.1.106 or abcd12.ddns-instar.de.
- Port: If a camera port other than the default port "80" (check Network/IP Configuration inside the cameras web user interface for its web port) is being used, you can change this here.
- PTZ Port: If the selected IP camera is a PTZ camera, you can adjust the port here for camera control - you don´t have to change it for your INSTAR camera.
- Username: If authentication is required to access the camera, enter your username here. The default for INSTAR cameras is admin
- Password: Enter your password here for the authentication process mentioned above. Refer to your camera manual for details of the default passwords. The default for INSTAR VGA cameras is «none».
Finally, click on "OK" to confirm your details.
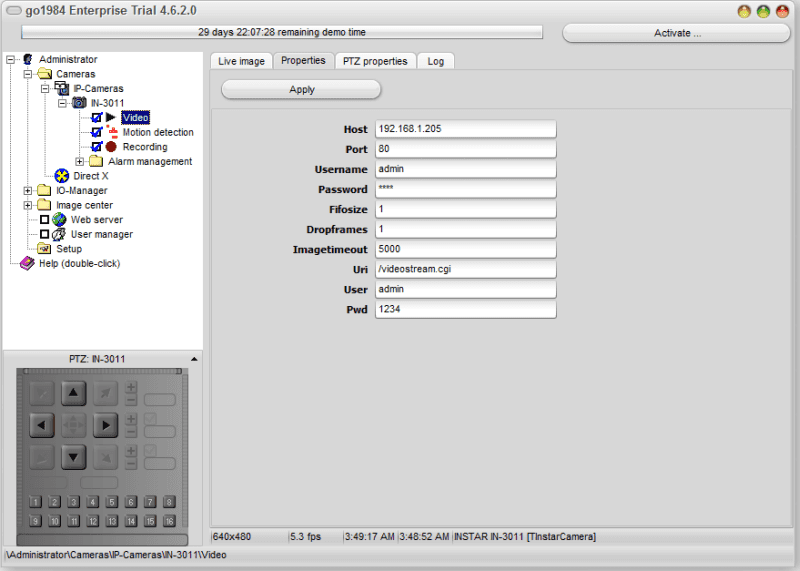
The camera you've added will now appear in the branch "IP cameras" of the go1984 explorer. The basic setup of the camera has now been concluded. go1984 has automatically activated motion detection and recording for this image source. As standard, cameras only record when there is a detected motion. If you want to record images permanently, simply deactivate the motion detection option by clicking on the "Motion detection" option box.
Live Video
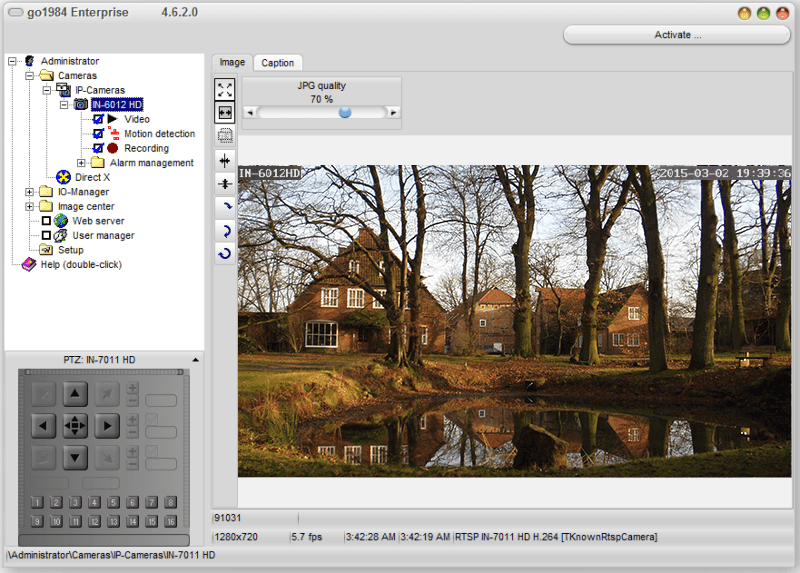
Check your cameras live video and control it´s pan & tilt movement.
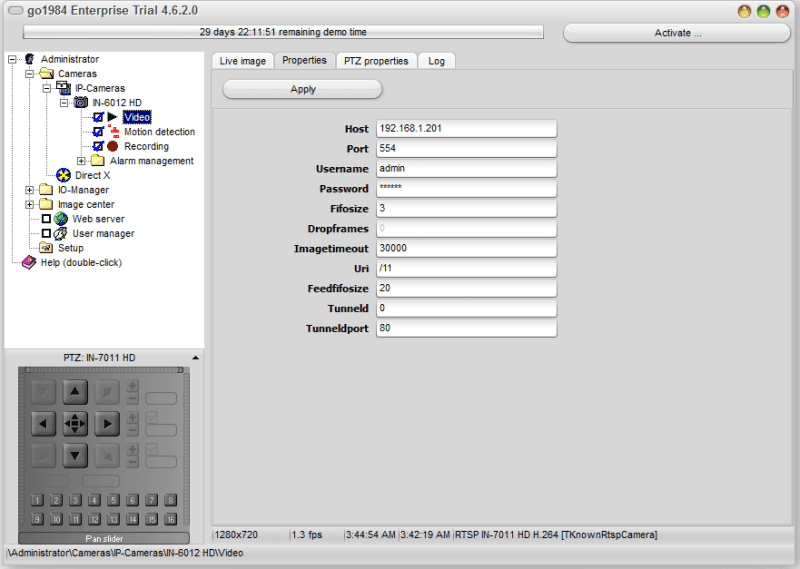
You can check the cameras live Video by selecting the camera from the side menu. If you experience problems with the frame rate or the stream breaks up - please adjust the video quality of your camera for lower bandwidths. Go to Video/Properties (see Screenshots in the chapter above) to select a stream appropriated for your network environment. E.g. for HD cameras set the parameter Uri from 11 (high quality) to 12 (medium quality) or 13 (low bandwidth). If you are using the MJPEG stream of your HD camera, set it´s -chn from 11 to 12 or 13 respectively. You can also adjust the video parameter inside the camera´s web user interface to fit your needs.
Motion Detection
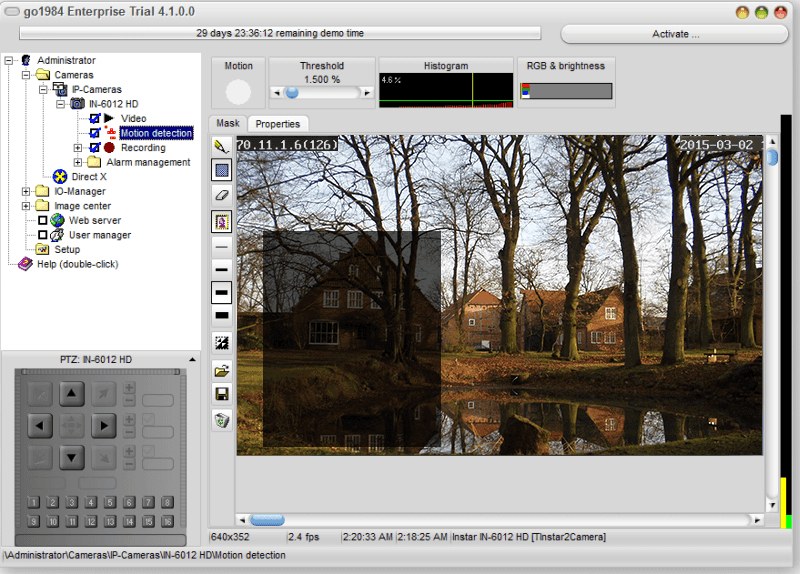
go1984 includes high-performance motion detection based on an optimized image difference process. When motion detection is triggered, the so-called "Motion" signal is activated for this camera. This signal can be used, for instance, to begin recording, to launch an FTP upload or to trigger an alarm. Motion areas are highlighted in the live image with red squares. As soon as the actual value exceeds the specified threshold, the motion signal is triggered. The specified threshold (yellow) and current actual value (green or red) are graphically represented by two coloured bars in the program to make adjustments easier for you. The actual value bar changes from green to red if a motion has been detected. The circle in the "Motion" field also turns red.
You'll be shown the live image from the camera, with motion areas being marked by red rectangles. As soon as the actual value surpasses the specified limit value, the motion signal is triggered. The specified limit value (yellow) and the current actual value (green or red) are graphically represented by two coloured bars in the program in order to make adjustment easier for you. The actual value bar changes from green to red if a motion has been detected. The circle in the "Motion" field also lights up in red.
It often makes sense to exclude certain areas of the camera image from motion detection. In order to do so, you can draw any kind of mask over the image. Various tools are available for doing so. The mask is displayed on the screen transparently for control purposes. Greyed out areas will be excluded from now on.
For normal purposes, motion detection settings do not need to be adjusted more than described above. If the default values don't work perfectly for your needs, you'll find additional setup options on the "Properties" tab. Please check your go1984 user manual for more details.
Storage Management
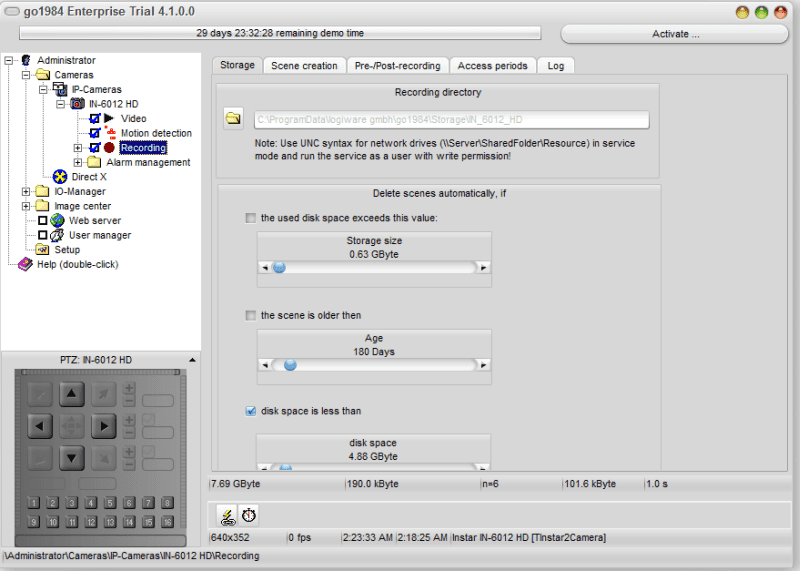
go1984 includes efficient ring storage. This enables you to optimize available hard-drive space allocation to the cameras, thereby ensuring that there is always enough memory space available for new recordings. go1984 is able to delete the oldest recordings automatically after the allotted memory has been used up. You can also select an individual recording directory by clicking on the folder icon in the Storage tab under Recording directory.
Email Notification
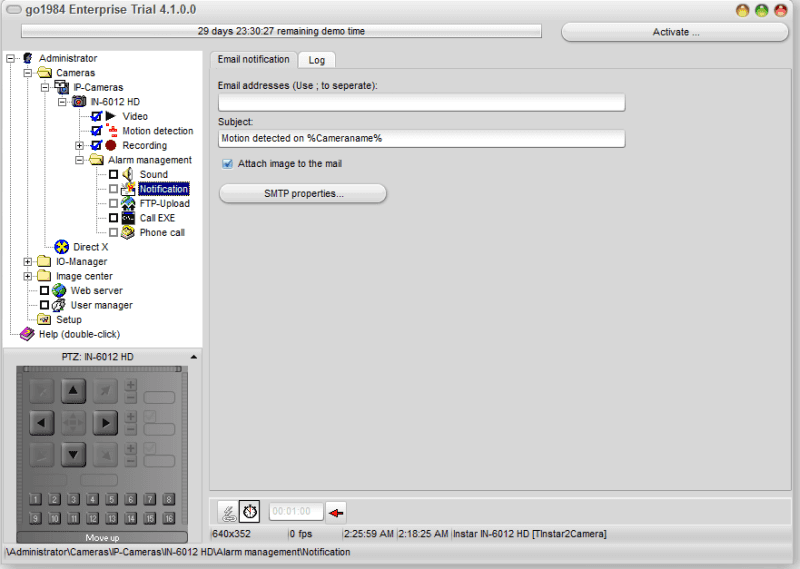
Select the entry "Notification" in the go1984 explorer. You can now enter one or several recipients (separated by semicolons) into the field E-mail address. Adjust the subject line if you wish. The variable "%cameraname%" is automatically replaced by the name of the camera triggering the alarm when an e-mail is sent. You have the option to set a rest period which must elapse between sending two e-mails, by clicking on the clock icon. Simply click on the clock icon and then set the rest period you want.
FTP Upload
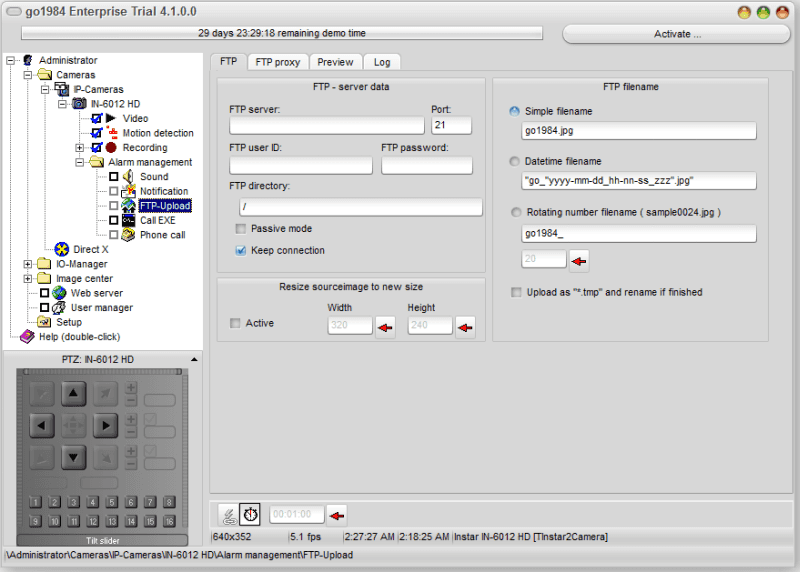
If you wish the images from a camera to be sent to an FTP server in addition to being stored locally, complete the following dialogue. First, enter the login data for your FTP server:
- FTP Server: Domain name or IP of your FTP server, e.g. ftp.online.com
- Port: FTP port, almost always "21"
- FTP user ID: Username for logging on to the FTP server
- FTP password: Password for logging on to the FTP server
- FTP directory: FTP server subdirectory where you want the images to be saved
- Passive mode: If your FTP server cannot be run in the active mode, select this option
- Keep connection: After uploading an image, the connection to the FTP server is kept open. If you prefer the connection to be shut, deactivate this option.
You can also choose to resize images before saving them on the FTP server. Activate this option and define the new size of the image using the corresponding fields.
Discuss this article on the INSTAR Forum !
