Software
Other
IP Symcon
The IP-Symcon software is the complete solution in the field of home automation. Combine products of all renowned manufacturers, realize your wishes, and allow your home to think for itself. A multitude of assistants and tools allow a comfortable configuration with a focus on clarity and security. Needless to say, privacy is a must with the optional Cloud connection.
The IP Symcon Software can be used on the proprietary Hardware called SymBox Neo. The SymBox Neo is the complete solution with the integrated SymOS specially developed for IP-Symcon.
Alternatively, start by downloading and installing the IP-Symcon Software version 5.x on Windows, macOS, Linux (Debian), Raspberry Pi, QNAP or Synology.
Example: Installation on a RaspberryPi
We will be using the INSTAR Module to connect the IP Symcon installation with an INSTAR IP camera.
Features
The INSTAR Module can send commands to an INSTAR HD or Full HD camera and alarm events on the INSTAR camera can be used to trigger events in the IP-Symcon software (version 5 or higher).
Send commands to INSTAR:
- Control (up, down, left, right, stop)
- Set position and start
- Camera settings (contrast, brightness, color)
Status feedback:
- Display a live image
- The INSTAR camera can send notifications to the IP-Symcon software
- Email notification for events
Requirements
Installation
Loading the module
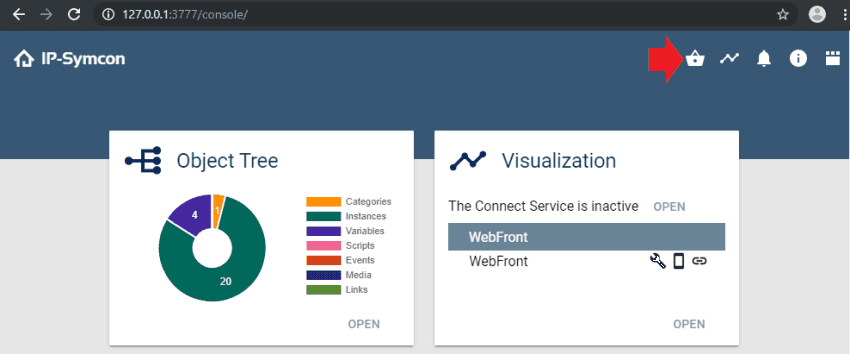
Open the IP Symcon web console inside your web browser with http://\<IP-Symcon IP>:3777/console/. Then click on the module store icon (IP-Symcon > 5.1) in the upper right corner:
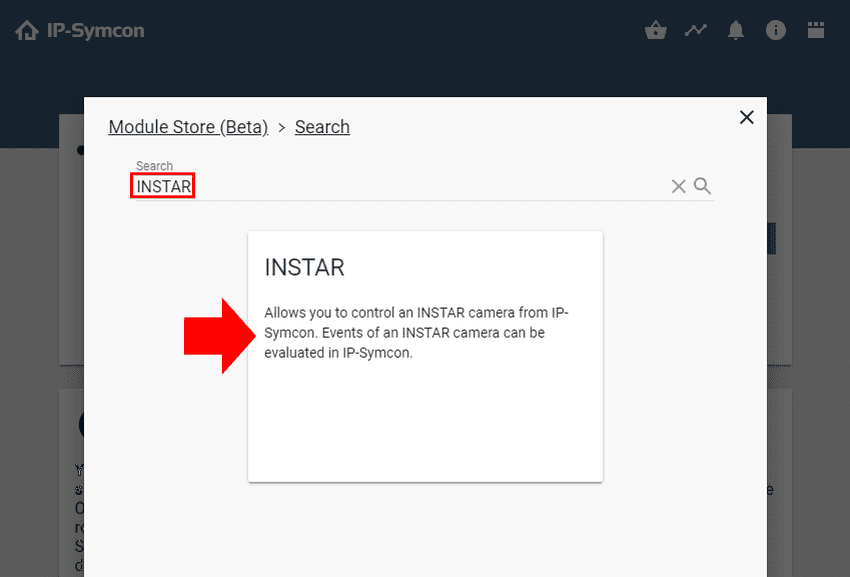
In the search field type INSTAR, press Enter and click on the INSTAR module:
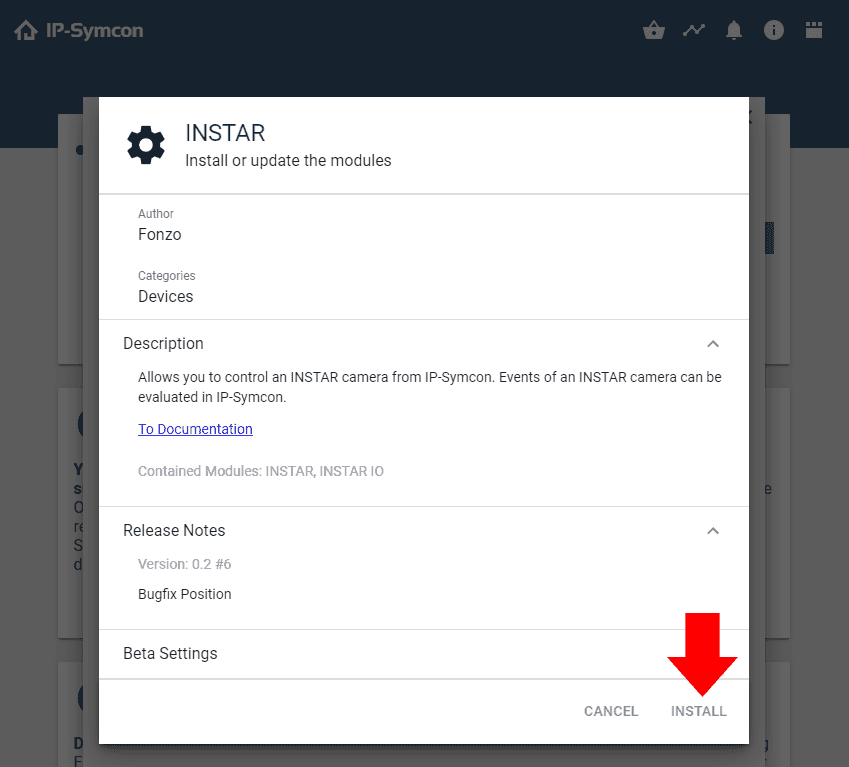
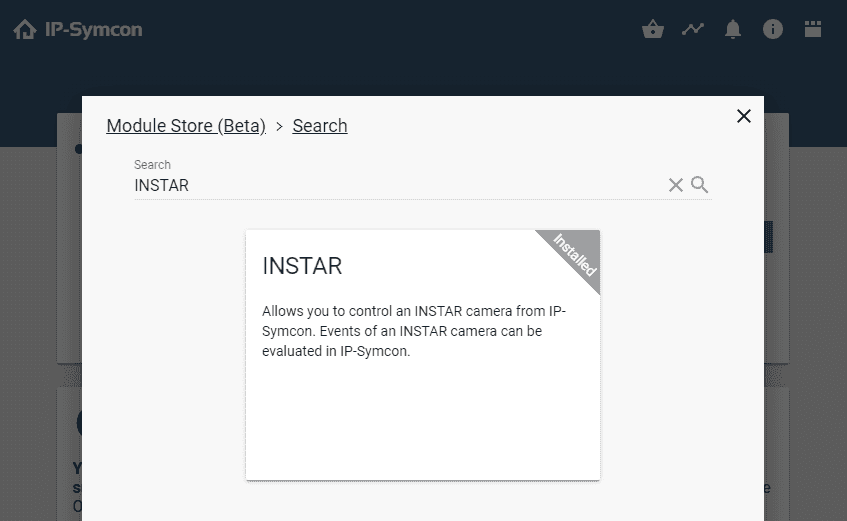
Click Install to install the Module:
Configuration in IP-Symcon
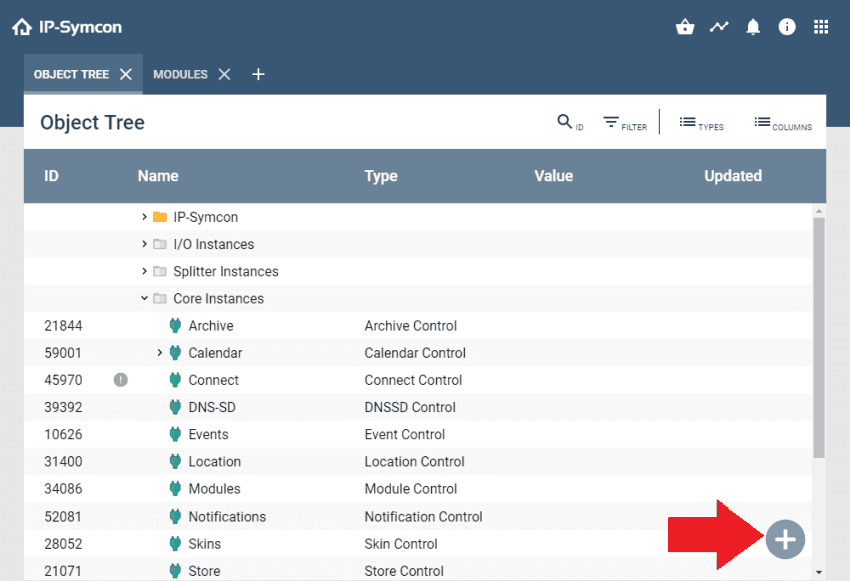
Before the actual instance is created, a category must be created at a desired position in the object tree. In this category, one image is stored in case of a motion detection event or manual when manually prompted. To create a category open the Object Tree and click on the + icon:
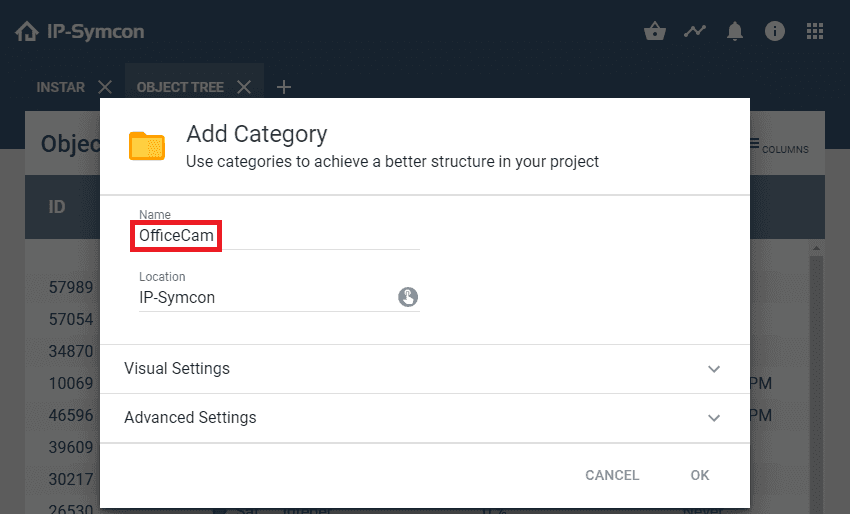
Choose Category and name it, e.g. with OfficeCam:
Now we can add the module Instance by again clicking on the + icon in the Object Tree and this time select Instance:
Select INSTAR as the Vendor for the instance, add a name and click on OK:
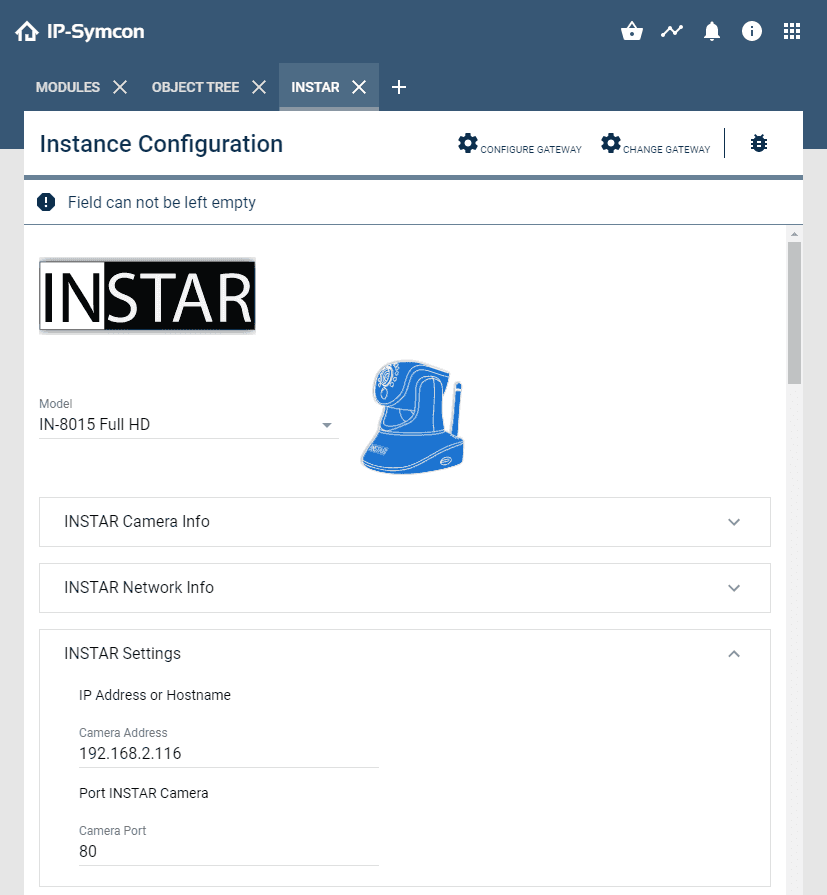
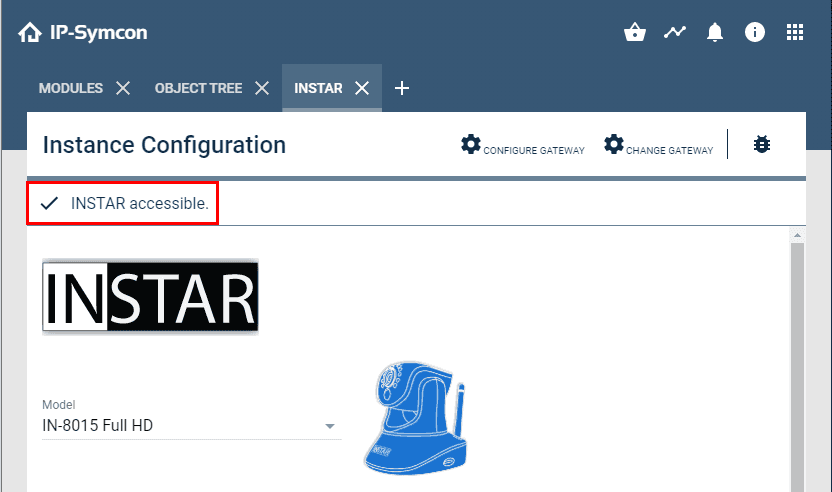
Finally, we can add our camera. Select your camera model and type in it's IP address and web (http) port - default is port 80:

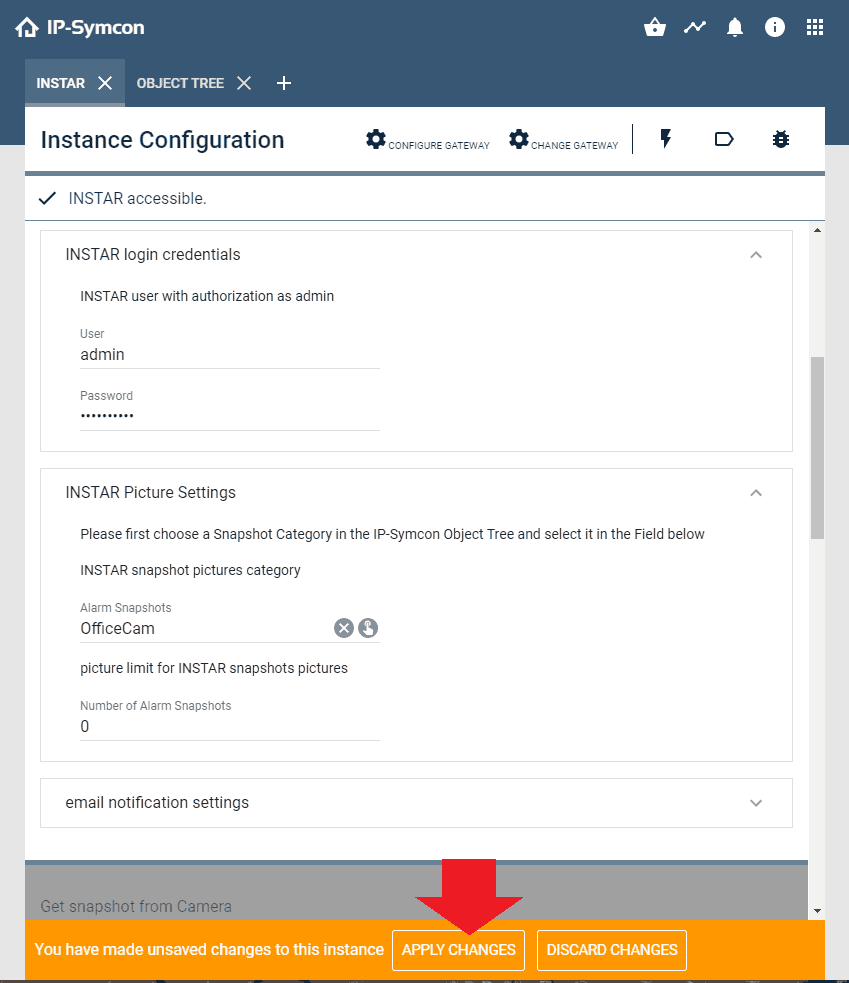
A little bit further down you can add your camera login (admin user), assign the category we created earlier for the camera snapshots and apply the changes:
You should now see that your camera is accessible by the IP Symcon software:
If you scroll down a little further, you will see an overview of the elements that you can read out and set directly via the IP Symcon interface on the camera. Select here which elements you would like to have displayed in the IP Symcon web front:
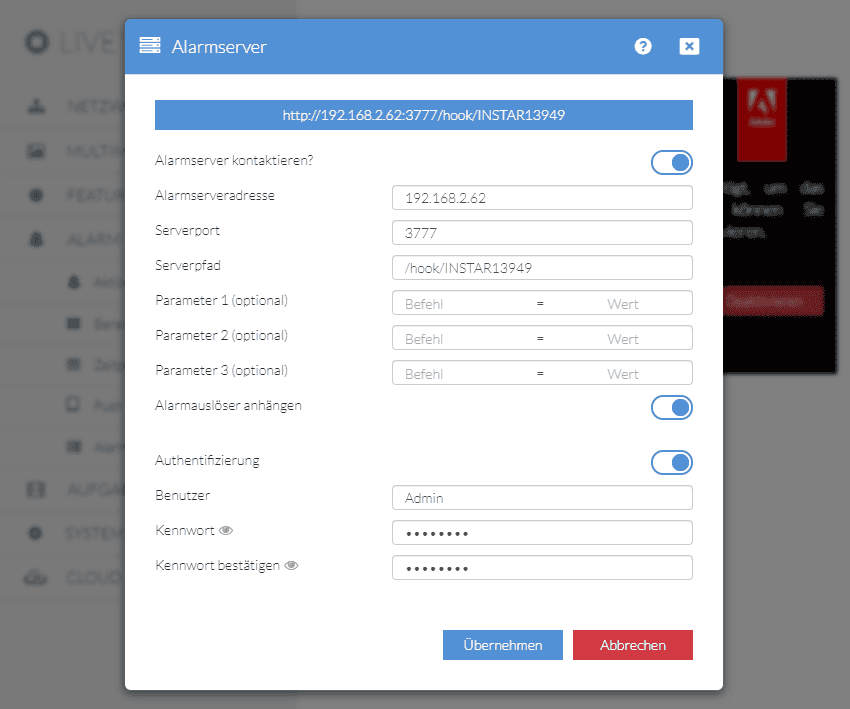
In the Alarm section you will be able to add a INSTAR webhook that will be used to notify the IP Symcon software through the alarm server on your INSTAR IP camera (720p series / 1080p series).
Make sure to select the local network option and click to confirm your settings. IP-Symcon will now automatically configure your cameras alarm server to contact your IP-Symcon installation when an alarm was triggered - which will trigger an alarm snapshot displayed in the IP-Symcon we frontend.

The Web Interface
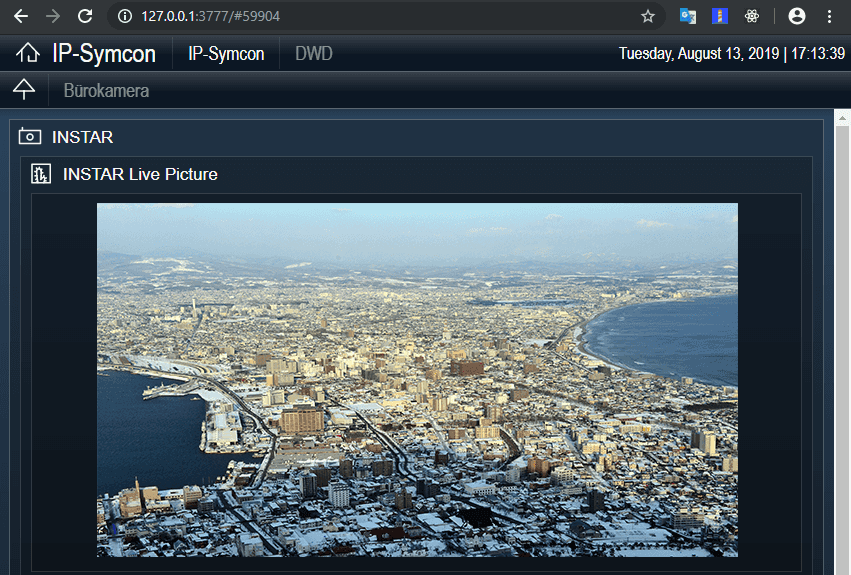
In the web frontend you can now view the live video of the camera:
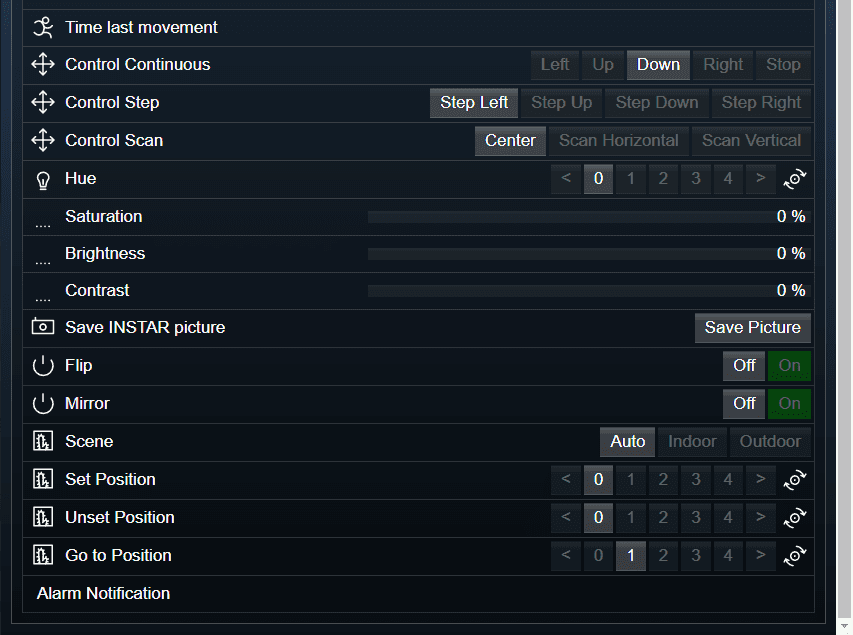
Configure your camera directly through the IP-Symcon web frontend:
And in case of a motion detection (camera alarm), one snapshot is taken to give you an overview of everything that happened during the day:
Events & Scripts
IP Symcon allows you to use System Events to control you INSTAR camera. A system event can be both a time schedule or an event triggered by a different device that was added to the software.
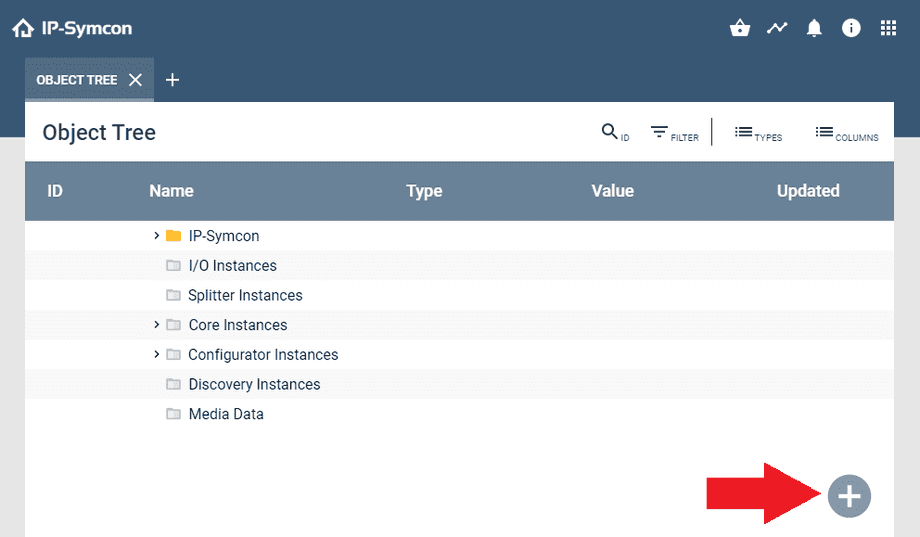
To add a scheduled event please open the object tree and click on the + button in the bottom right.
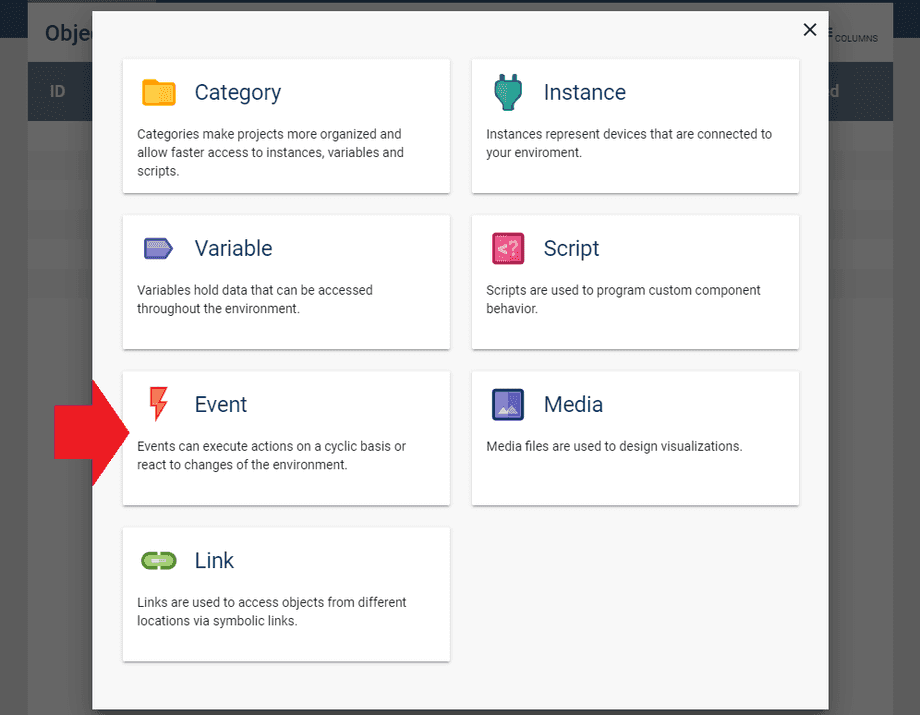
This time we need to choose an Event.
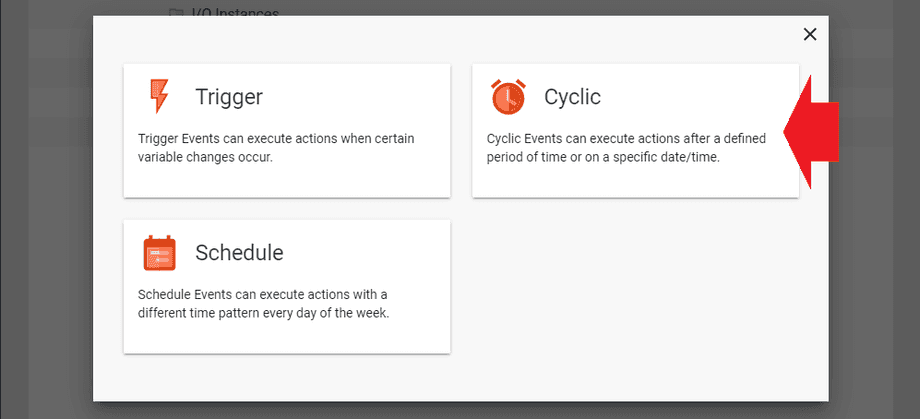
In this example we want our camera to move between 2 different positions depending on the time of the day. For this we need to choose a cyclic event.
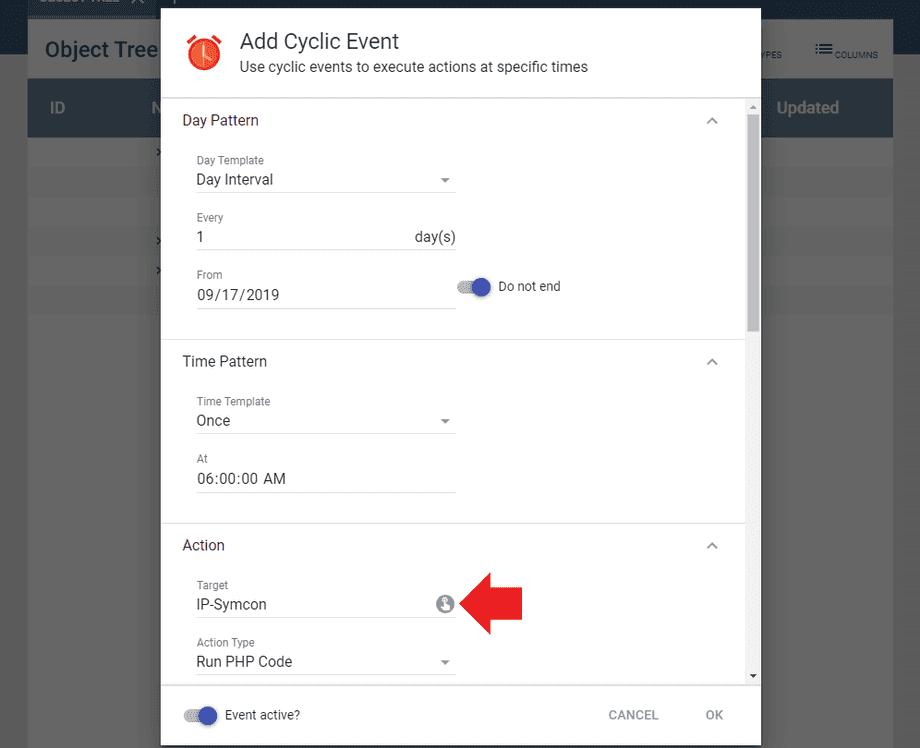
Set the day and time pattern according to your needs and assign your camera instance as target for the action.
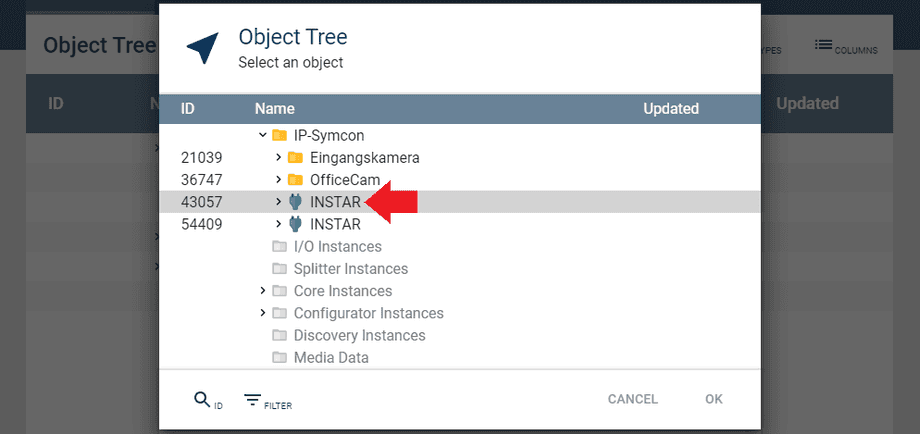
Choose the camera you want to control from the object tree.
And set the Action type to Switch instance.
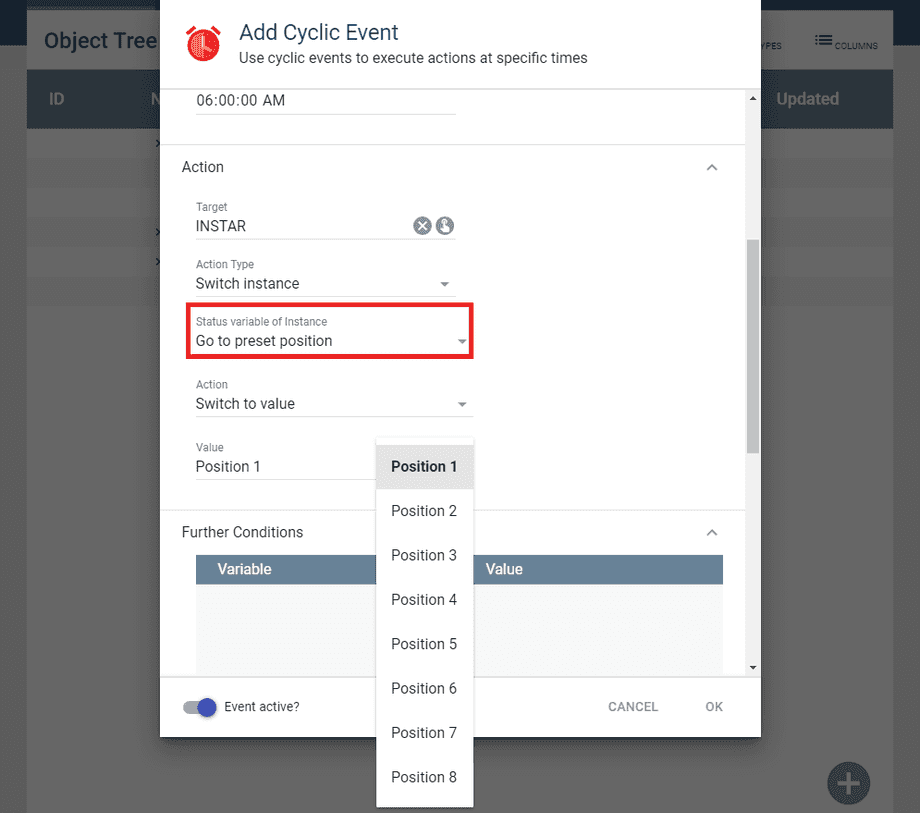
Now you can pick the variable you want to switch from the list. In this example we have chosen to move our camera to the saved position 1.
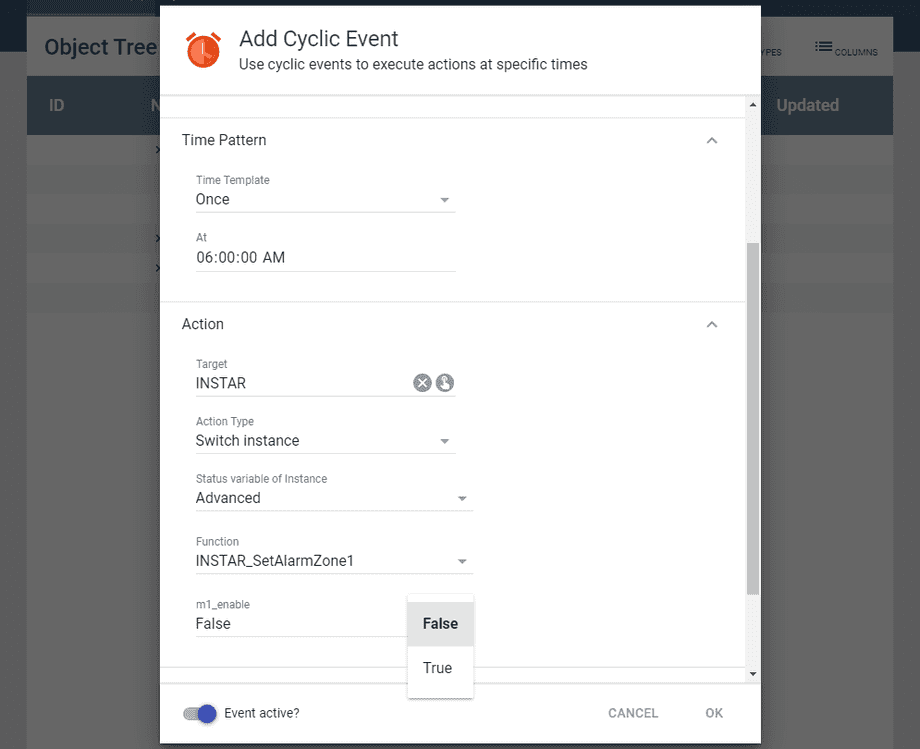
Alternatively, you can also go to the Advanced list item and pick e.g. to activate / deactivate the alarm area 1.
Whatever you choose here will now be triggered every day at the set time. Helping you to automate your camera.
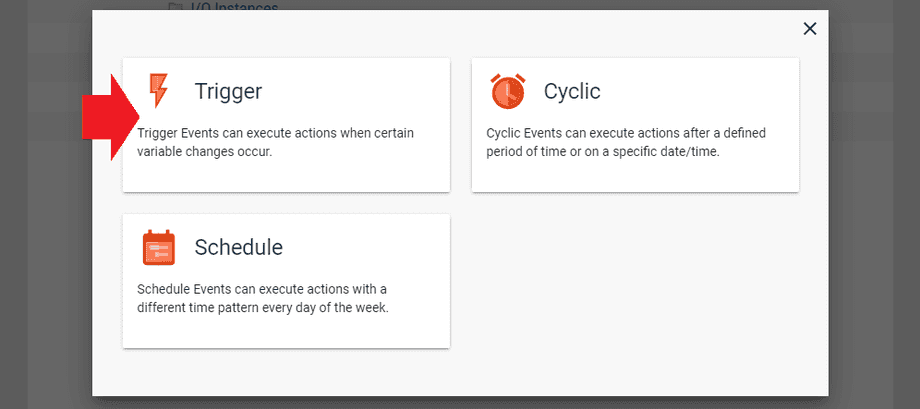
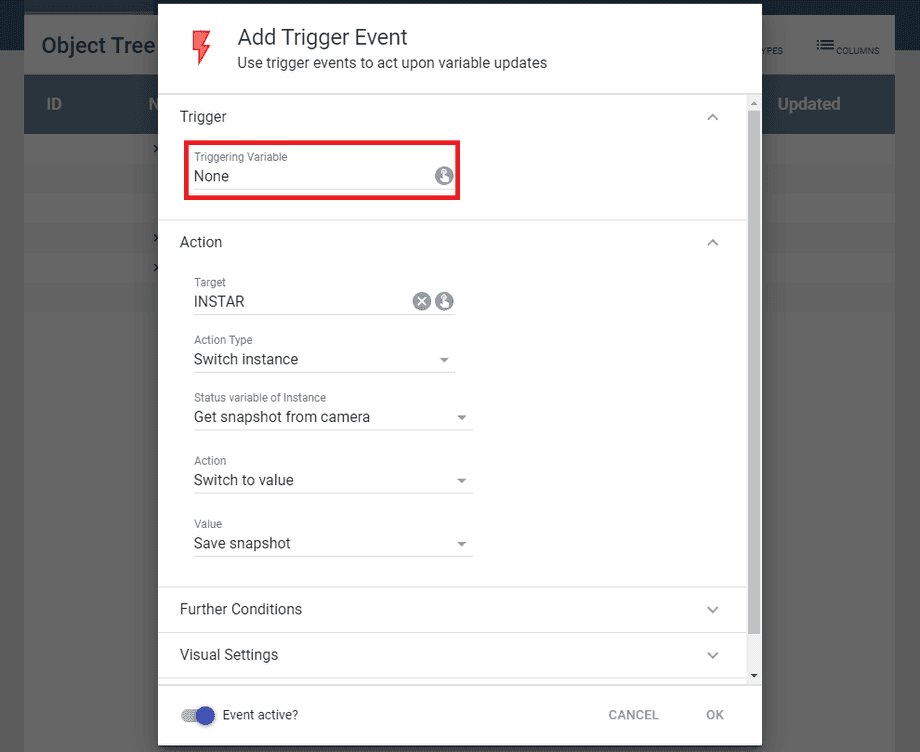
If you already have a different device added to the IP Symcon Software you can also set up this device to trigger actions on your camera. Back to the Object Tree click on add, choose Event and this time click on Trigger.
If you set up your thirdparty device to switch a System Variable you can now select it here to trigger a function on your camera.
You can also find more information in the README of the INSTAR Addons.
Discuss this article on the INSTAR Forum !
