Software
Other
homee
- Adding Z-Wave Components
- Camera Alarmserver and homee Webhook
- INSTAR IP Cameras and external Z-Wave Motion Sensors
- Day/Night Position
- Deactivate Alarm when you are Home
In the following tutorial I want to add a Fibaro Motion Sensor and an ABUS Indoor Siren to our network. Both will be connected using the Z-Wave wireless communications protocol with the help of the homee Gateway and Z-Wave Bridge Modul. The gateway will then function as a bridge between the wireless Z-Wave network and our INSTAR Full HD Camera.
Adding Z-Wave Components
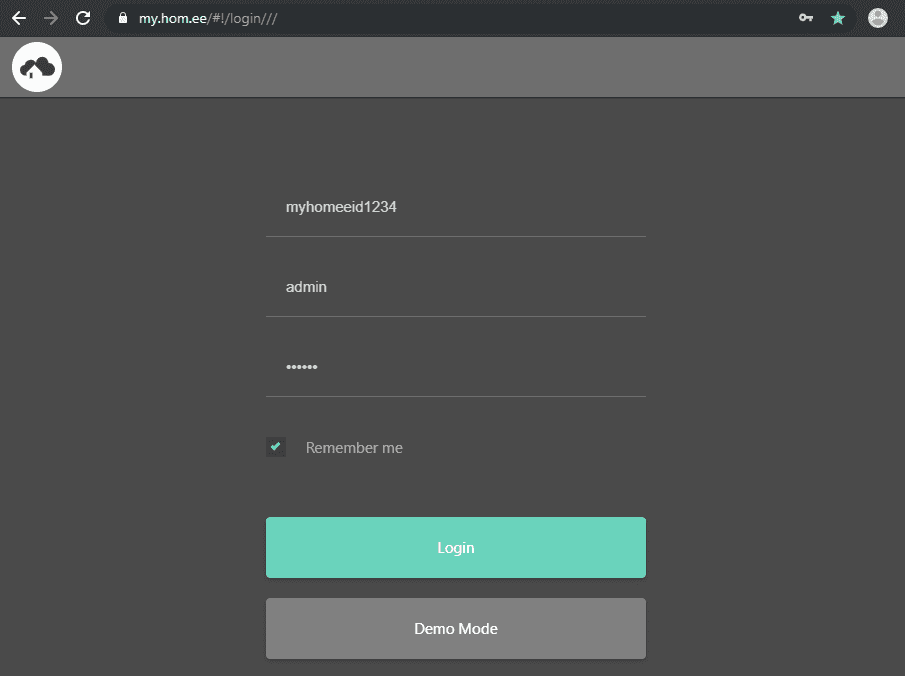
To add the Z-Wave devices I first login to the homee administrator dashboard https://my.hom.ee - alternatively you can also use the homee iOS app - the Android app was not working at the time of writing:
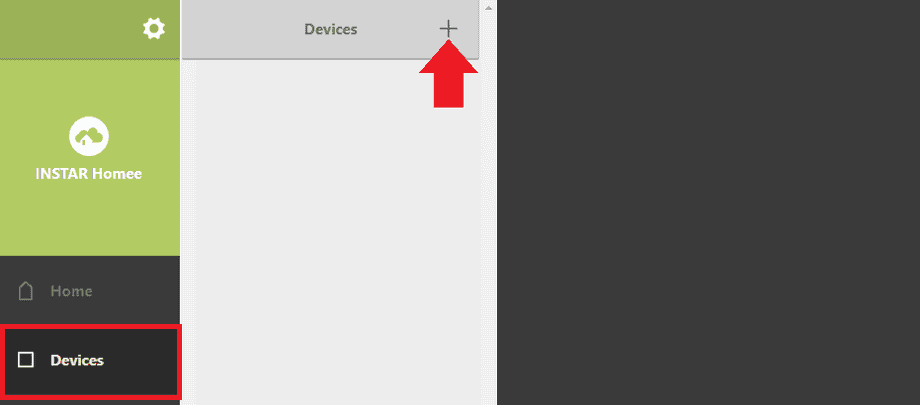
Go to the Devices tab and click the + button to add a new Z-Wave device:
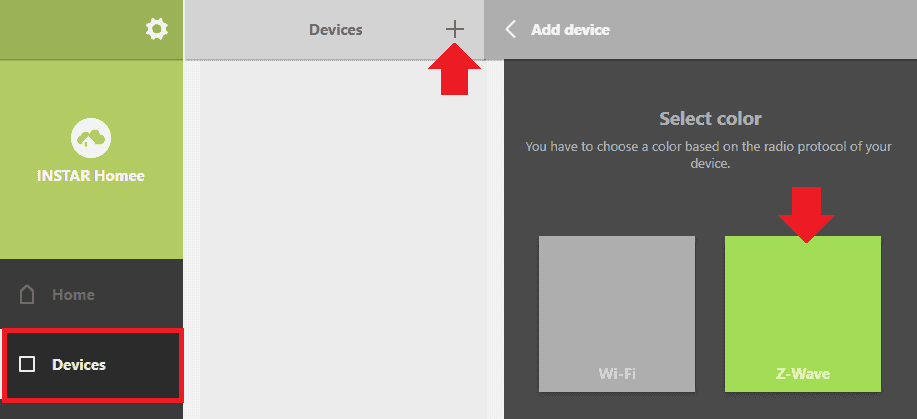
Select Z-Wave - Note you need to have the Z-Wave cube installed on your homee gateway. homee also offers a Zigbee and EnOcean cube that, of course, only works with devices that support those protocols:
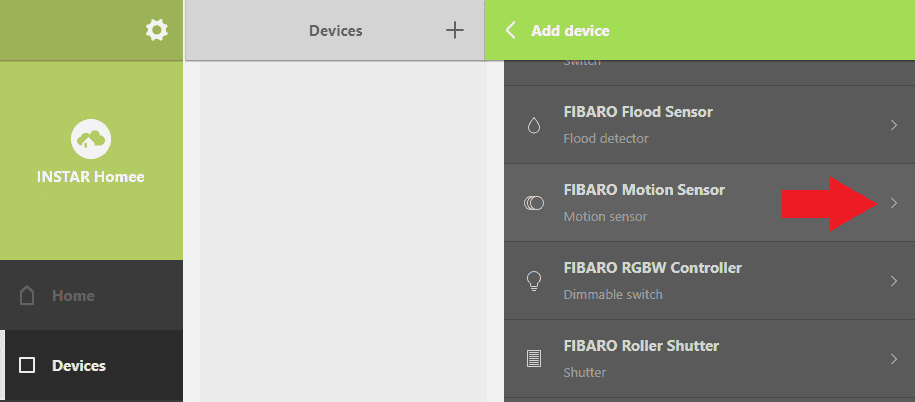
First I select the motion sensor from the following list:
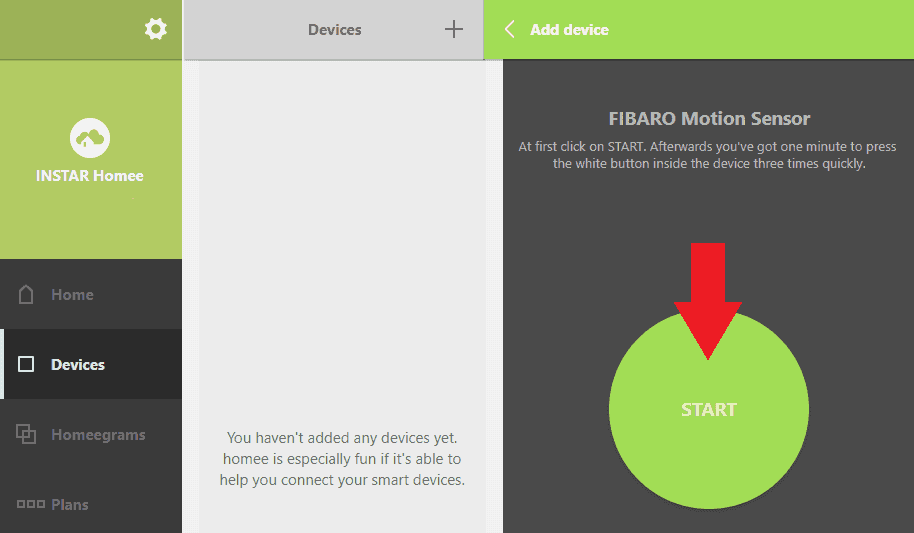
And follow the instruction to pair the Fibaro Motion Sensor - click on the green start button and then press the pair button on the motion sensor 3x fast:
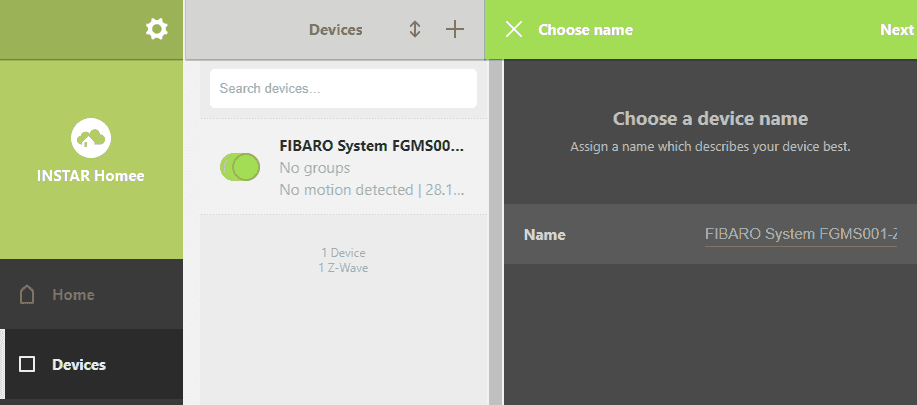
Once the sensor is paired you can give it a name and click Next:
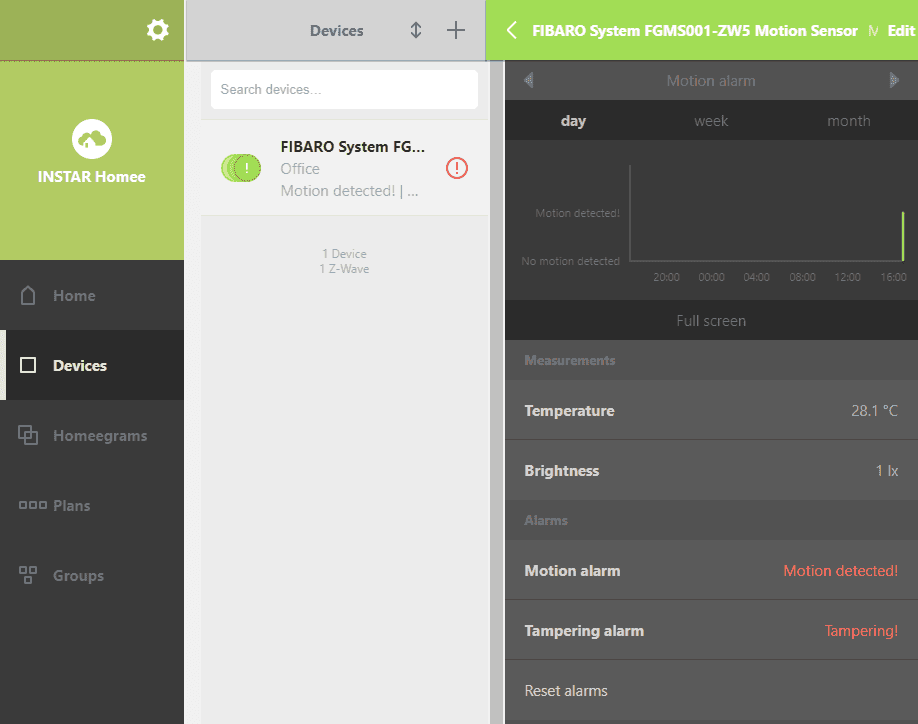
The sensor was successfully paired and is obviously already working:
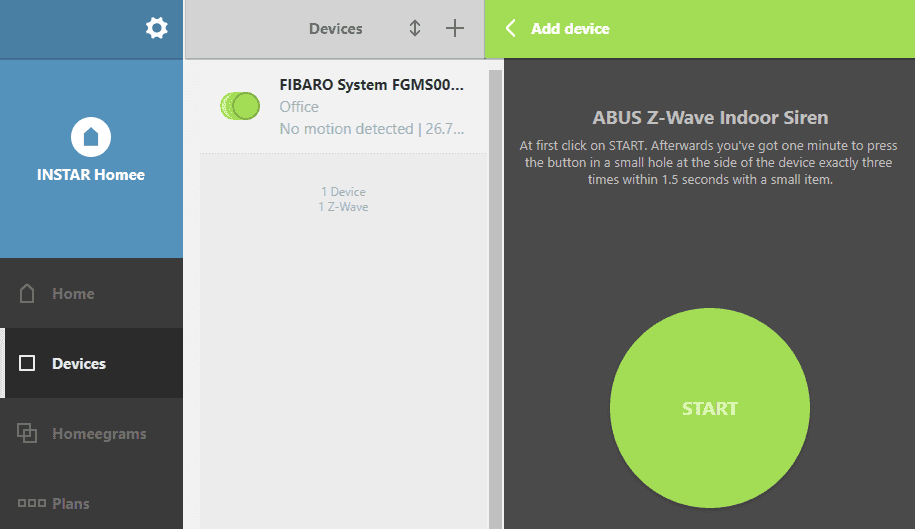
Now I repeat the previous steps with the ABUS Indoor Siren:
Both Z-Wave devices are now paired with the homee gateway and can now be used logical IF-THEN chains that homee calls Homeegrams
Adding Zigbee components
For the Zigbee example, this time we log in with the homee iOS app or Android app. Switch to the Devices tab and click on the large + to add a new device. Then select Zigbee here:

In the following list you can find all supported Zigbee devices. Select your device - in the example it is an Osram LIGHTIFY Plug socket. In the following window, press Start and then press and hold the power button of the socket for 10 seconds to put it into pairing mode.

The device should then be integrated and you can switch the socket on and off via the homee app:

Camera Alarmserver and homee Webhook
There is a new alarm server API for WQHD 2K+ cameras. The individual steps below are still valid. Only the URL query is now called &trigger instead of &active, the numerical values have changed and now allow the evaluation of multiple, simultaneous alarm triggers! You will find an example implementation of the MQTT and HTTP alarm server v2 API with Node-RED here.
In this step I want to generate a web hook - a URL on the homee gateway that can be accessed by the Alarm Server on an INSTAR Full HD camera. This web hook is then contacted in case of an alarm on the camera and should trigger the ASUS siren I installed earlier.
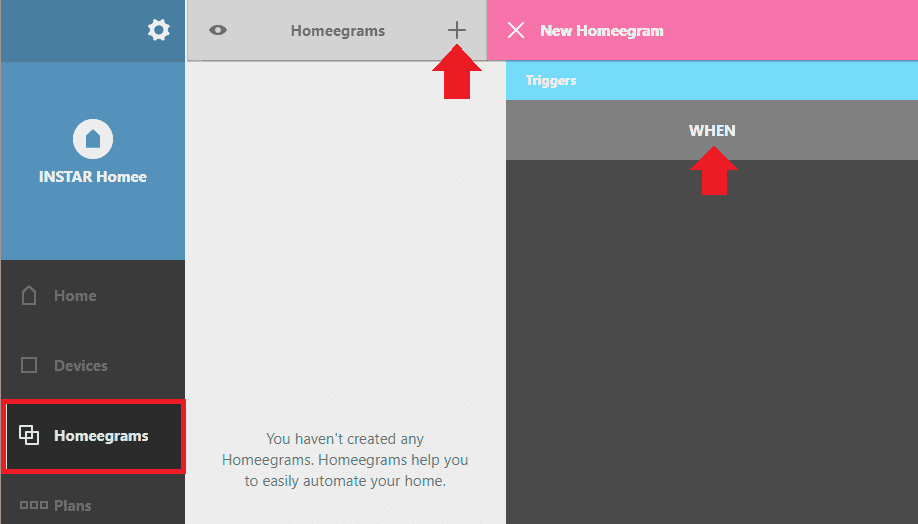
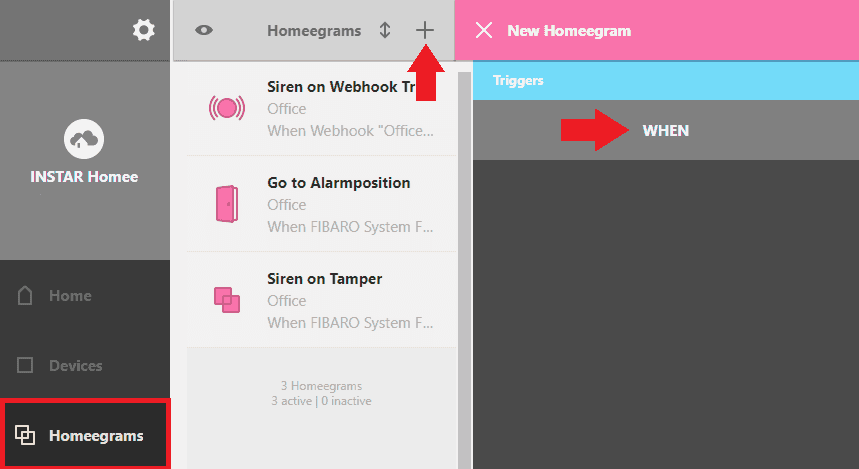
Start by going to the Homeegrams tab and click the + button to add a new function:
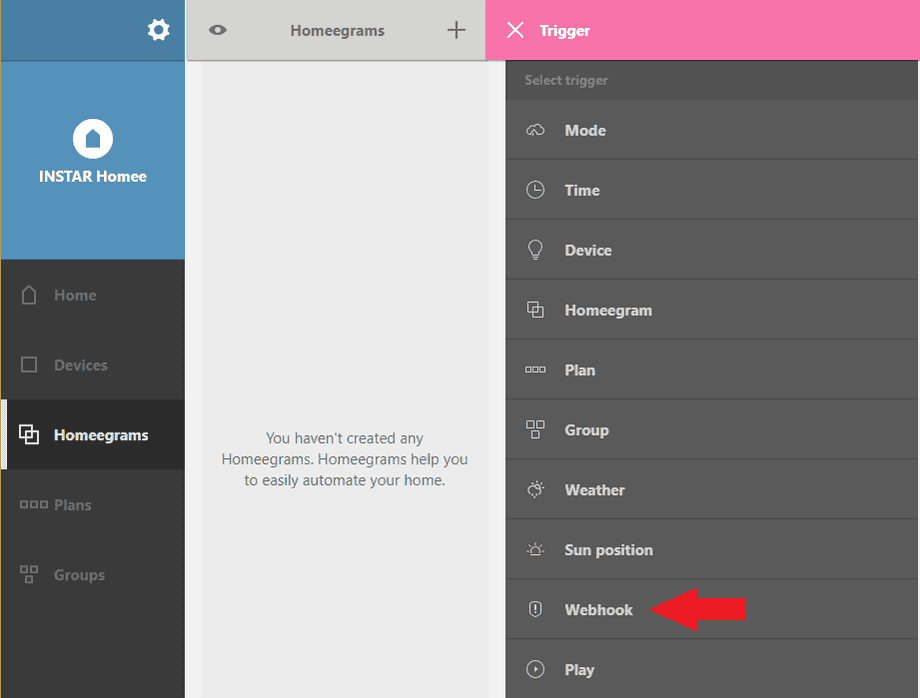
I am choosing the Webhook as the WHEN Condition for the script:
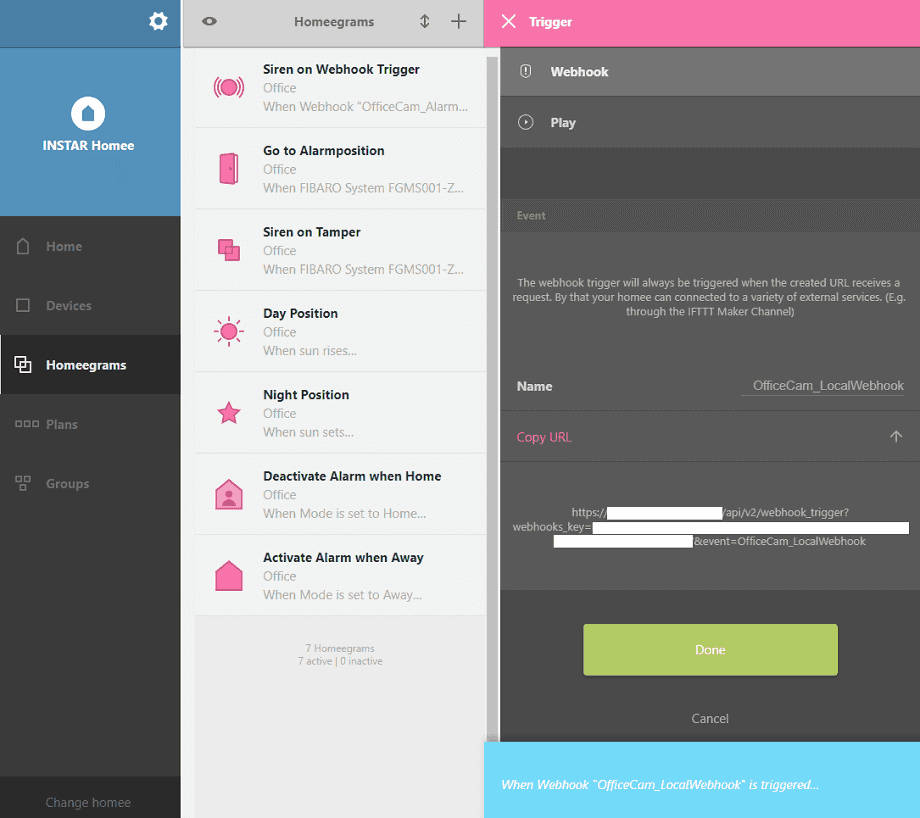
You can name your web hook and copy the complicated looking URL at the bottom - it should look something like this:
https://yourhomeeid.hom.ee/api/v2/webhook_trigger?webhooks_key=yourwebhookkey&event=OfficeCam_LocalWebhookThis is the path for your homee web hook - we can later test it by copying it into the address bar of our web browser and loading it. Whatever we will define in the next step as the THEN Condition of our script will be triggered by this URL.
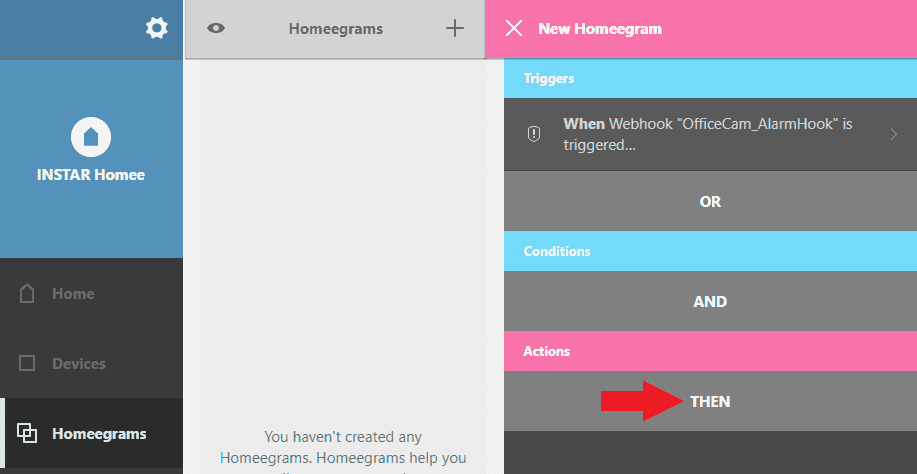
After saving those settings, we can now click on THEN to select our ABUS siren as the action we want to be triggered.
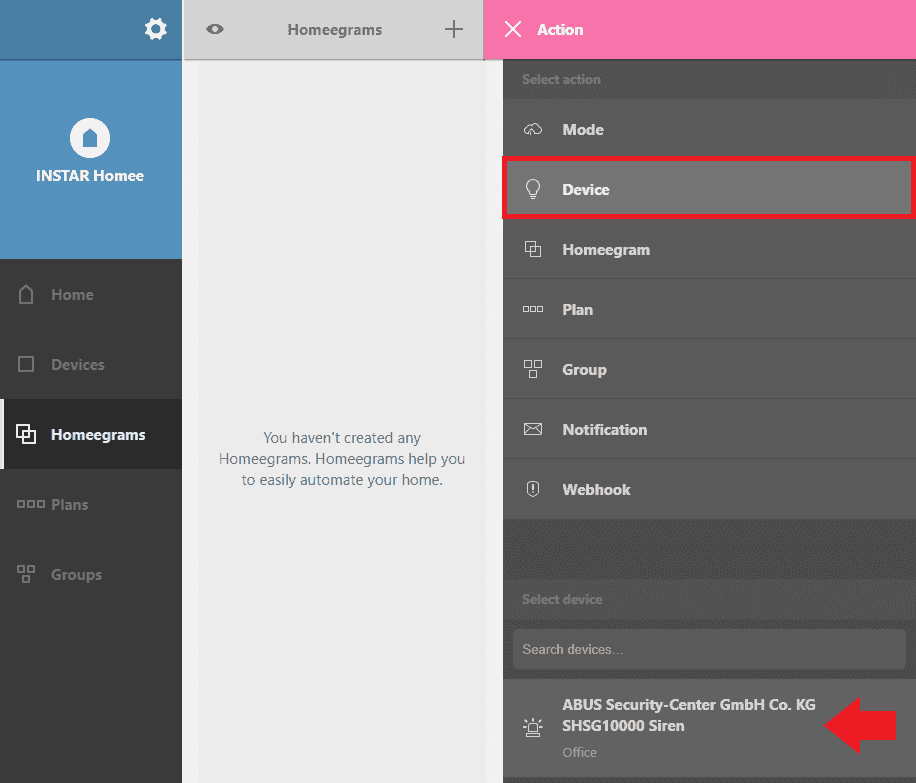
Click on Device and pick the siren from the list below.
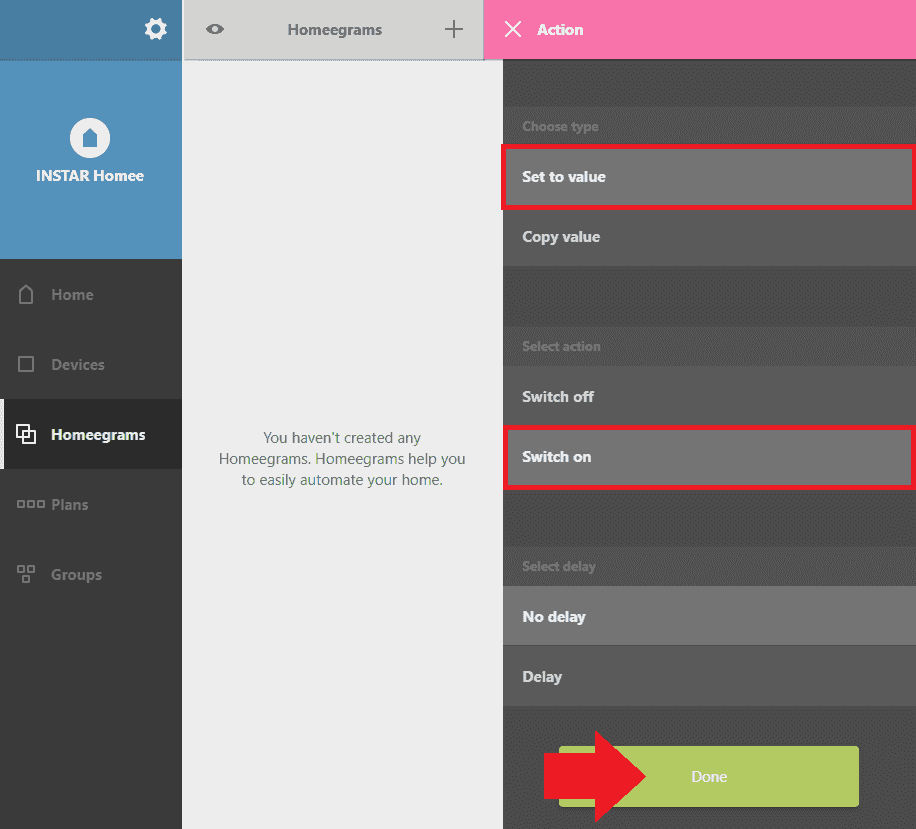
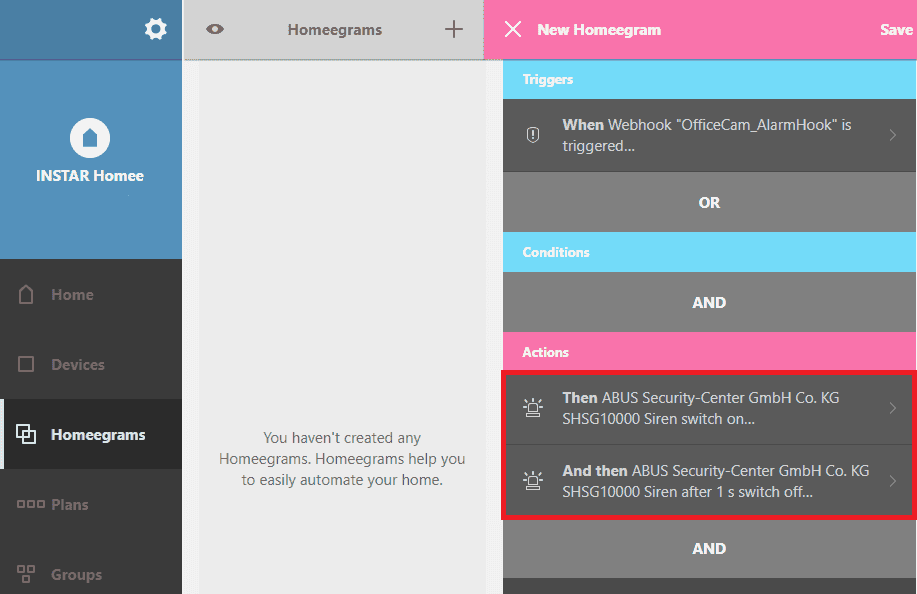
When the web hook is triggered, we want the siren to switch on without a delay - click on Done to save those changes. Then repeat those steps - but define a switch off with a short delay (to prevent the siren from going off indefinitely!):
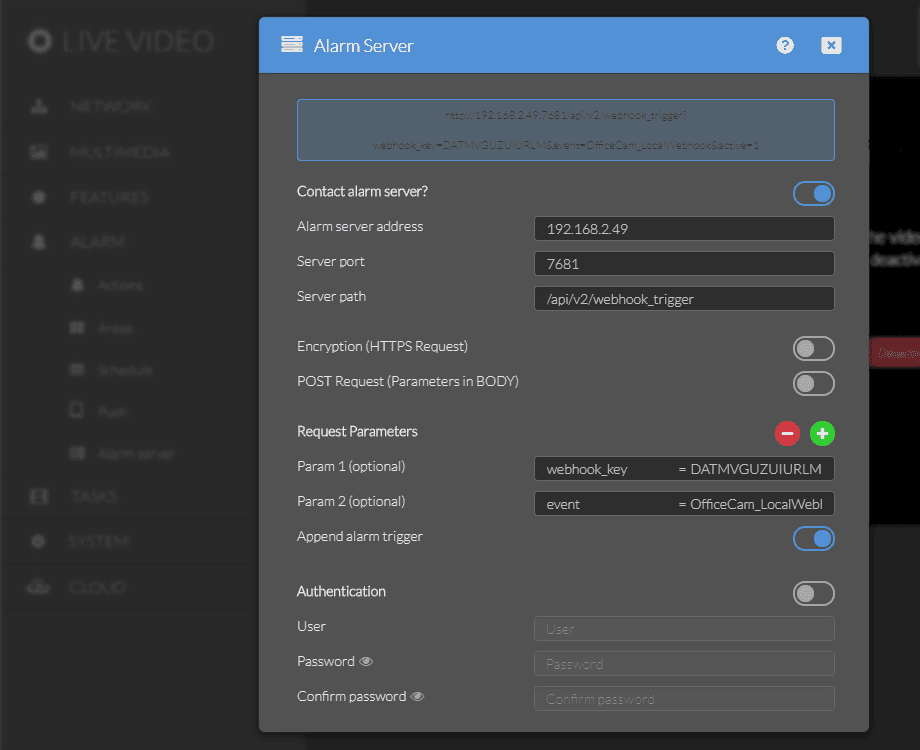
https://yourhomeeid.hom.ee/api/v2/webhook_trigger?webhooks_key=yourwebhookkey&event=OfficeCam_LocalWebhookWe can now add the web hook URL to the Alarm Server settings our camera. But we are not going to use the web URL that we were given but use the local IP of our homee base station with the port 7681 instead - e.g. 192.168.2.49:7681:
The server path is always /api/v2/webhook_trigger, the webhooks_key is the yourwebhookkey from the webhook URL above and event is the name you have given your webhook.
When triggern an alarm on your camera you should now see an entry inside your camera log that the alarm server (in this case the homee base station) was contacted. The siren should be triggered shortly afterwards.
INSTAR IP Cameras and external Z-Wave Motion Sensors
We now are able to contact the homee gateway with our camera in case of an alert. Let's do the opposite now. Whenever the Z-Wave Fibaro Motion Sensor is triggered I want to send an CGI command to my camera that triggers it to move to a different position. E.g. I have a camera that primarily is used to watch the entrance door. But when a person enters the room from the side entrance the motion sensor is triggered and should move into that direction while starting to record a video.
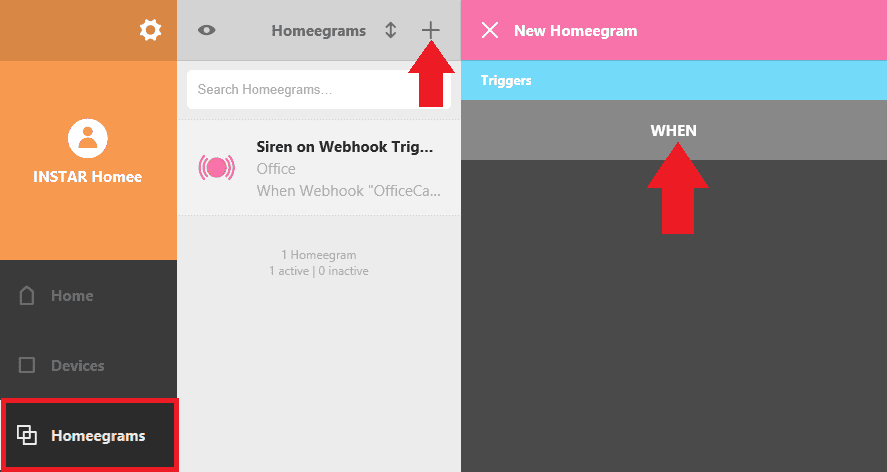
Again we start with writing a Homeegram and defining a WHEN Condition for the script:
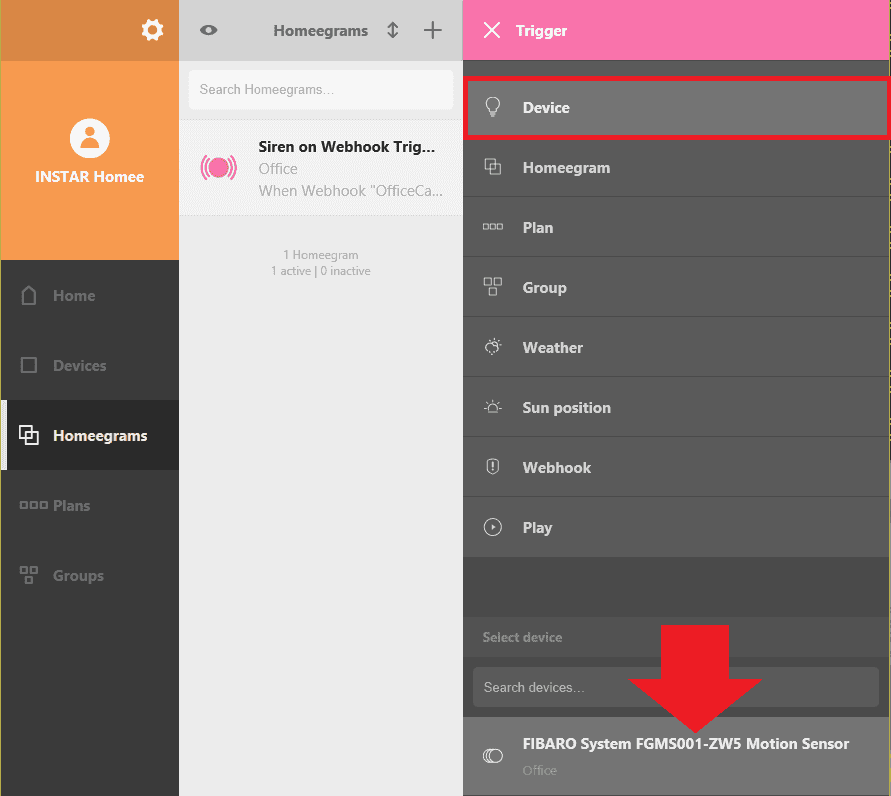
This time we need to select the Motion Sensor from the list:
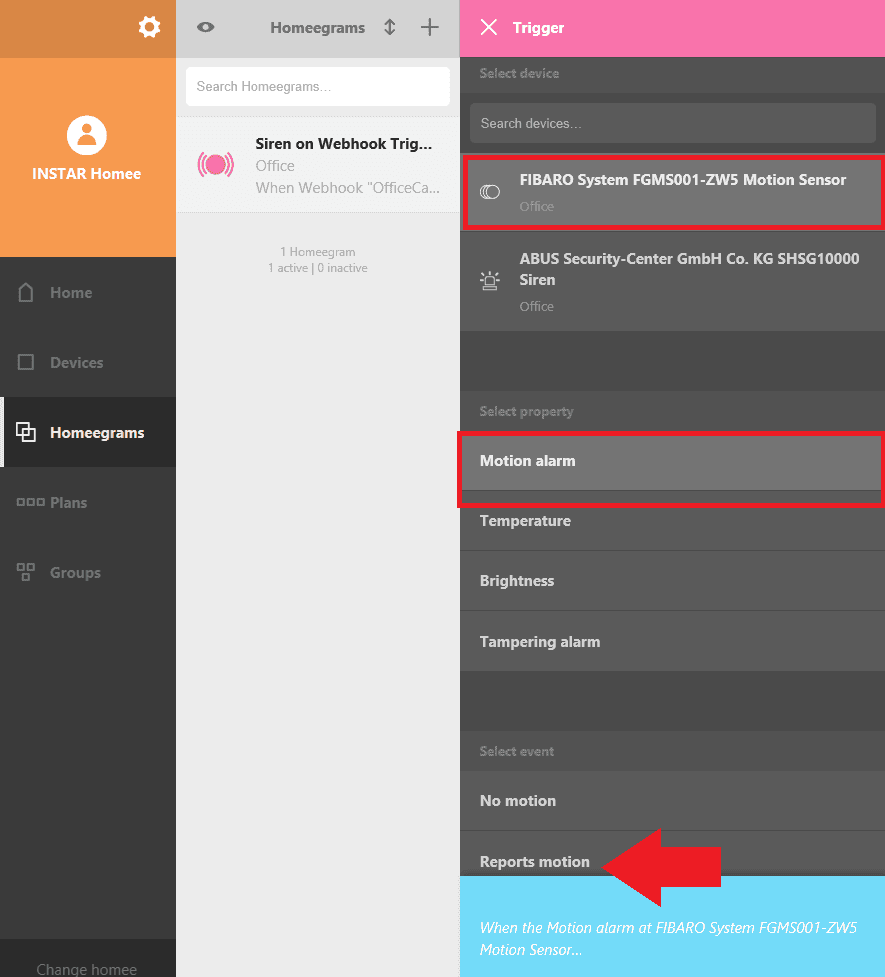
Select Motion Alarm and that you want to be alarmed when a motion is recorded:
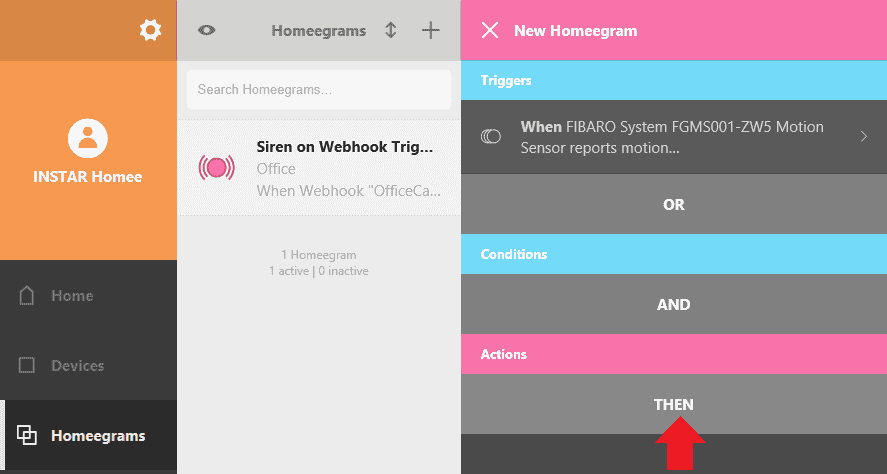
Next we need to define what we want to happen when our motion sensor is tripped:
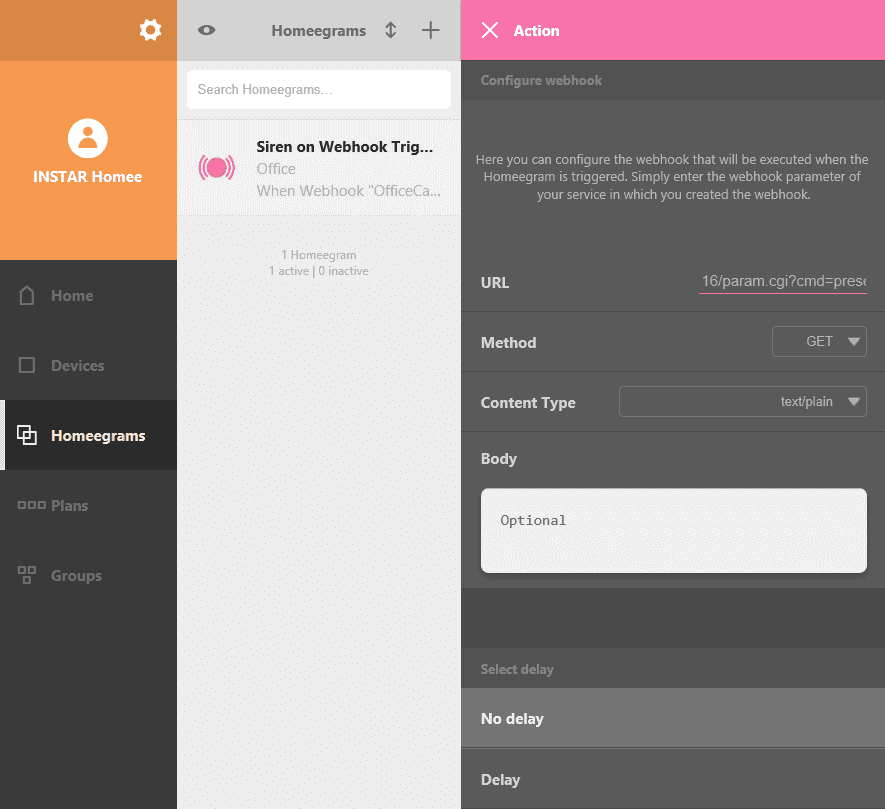
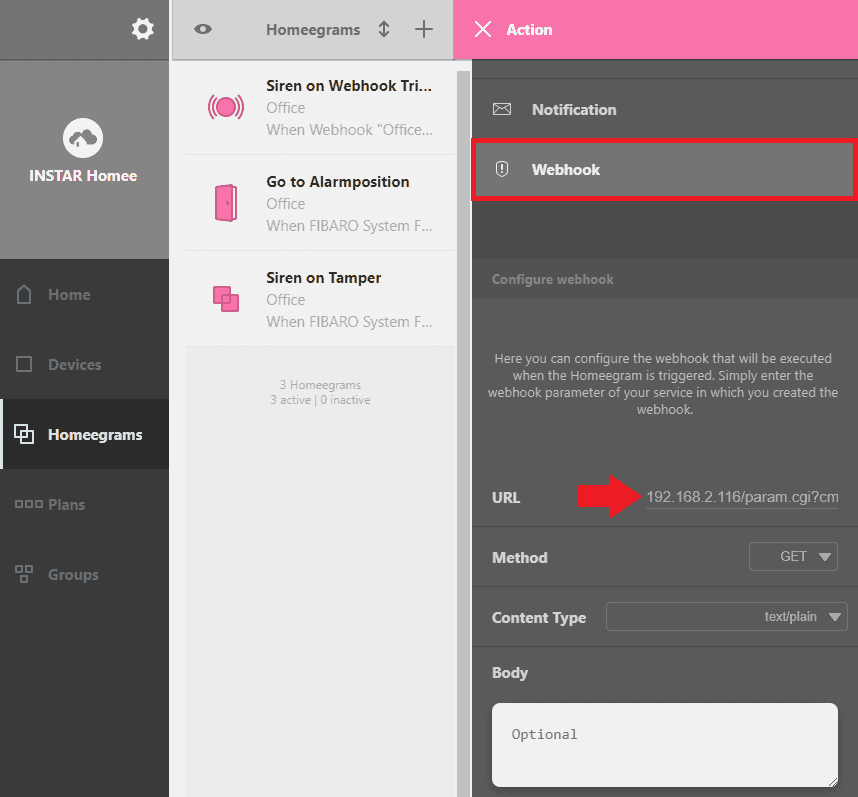
Here you need to choose the Webhook and use the CGI command as URL that sends your camera to the stored position 1:
192.168.2.116/param.cgi?cmd=preset&-act=goto&-number=1&-usr=admin&-pwd=instarHere 192.168.2.116 is the IP address of the camera, admin is the user name for the administrator account on the camera and instar the corresponding password - change those accordingly.
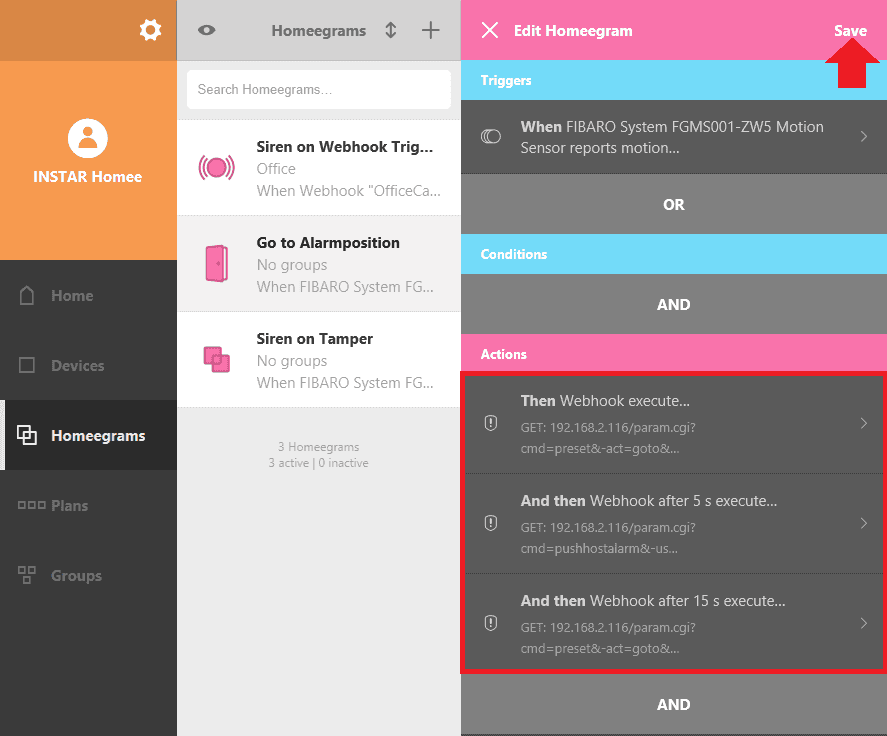
I refined the script a little bit by adding two further web hooks that are triggered with a delay of 5s and 15s. The first one triggers an alert on my camera that in turn triggers all active Alarm Actions. The second one makes it return to the original position once the entering persion was recorded:Alarm/Actions/) auslöst. Die zweite bewirkt, dass die ursprüngliche Position wiederhergestellt wird, sobald die Alarmaufnahme beendet wurde:
192.168.2.116/param.cgi?cmd=pushhostalarm&-usr=admin&-pwd=instar

192.168.2.116/param.cgi?cmd=preset&-act=goto&-number=0&-usr=admin&-pwd=instar
Day/Night Position
We now set up our camera to interact with both Z-Wave devices - we trigger alerts on our camera, when the external motion sensor is tripped and trigger the external siren, when our camera raises an alarm. But homee also offers us scheduled tasks, like triggering events at specific times of the day or at sunrise and sunset adjusted to our geo location.
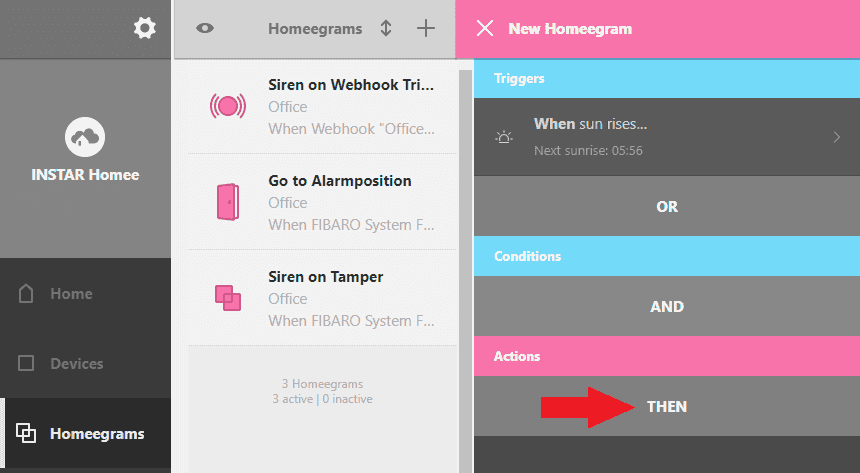
This can be used to change the direction our camera is looking in based on the time of day. E.g. you want your camera to watch the front gate as long as it is bright outside. But once it is getting dark swing it towards the carport and keep an eye on car instead? Ok, let's start writing a Homeegram for that:
Beachten Sie bitte, dass Sie die Kamera niemals vom Strom trennen sollten, wenn gerade ein Video auf der internen SD-Karte gespeichert wird. Wenn der unangekündigte, abprupte Neustart in einem sehr ungünstigen Moment erfolgt, kann es sein, dass die SD Karte nach dem Neustart nicht mehr lesbar ist und die Kamera diese nicht mehr mounten kann. In diesem Fall kann die Kamera in einer Bootschleife gefangen werden und würde erst wieder erreichbar sein, wenn man die defekte SD Karte aus der Kamera entfernt.
Sie sollten immer zuerst die Alarmaufnahme auf die SD Karte deaktivieren, bevor Sie die Kamera vom Strom trennen - dies läßt sich natürlich auch über den homee automatisieren.

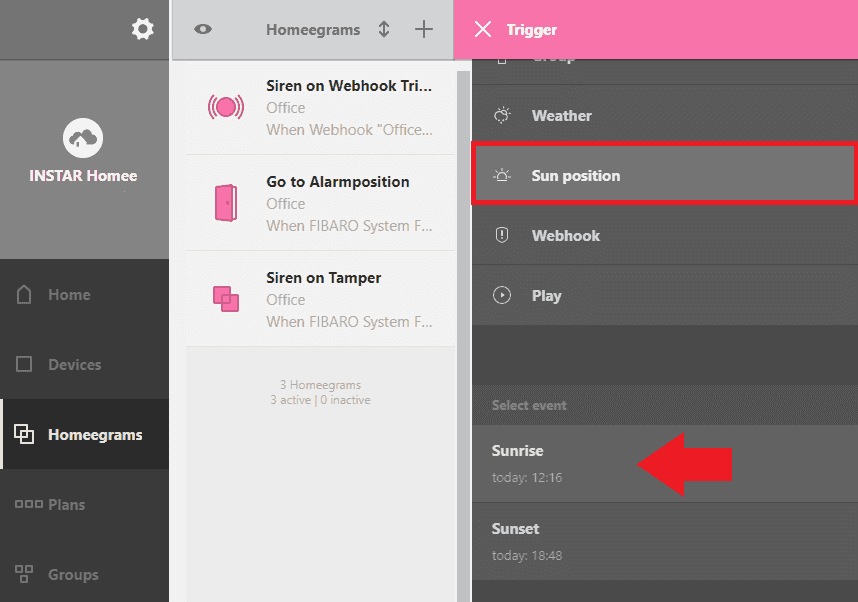
As the WHEN Condition we now have to choose Sun Position (or choose Time if you need specific times) and select Sunrise first:

On Sunrise our camera should be pointed towards the front gate:

The front gate is stored as position one that can set to be the park position of our camera with the following command:
192.168.2.116/param.cgi?cmd=settimerpreset&-timerpreset_index=1&-usr=admin&-pwd=instar
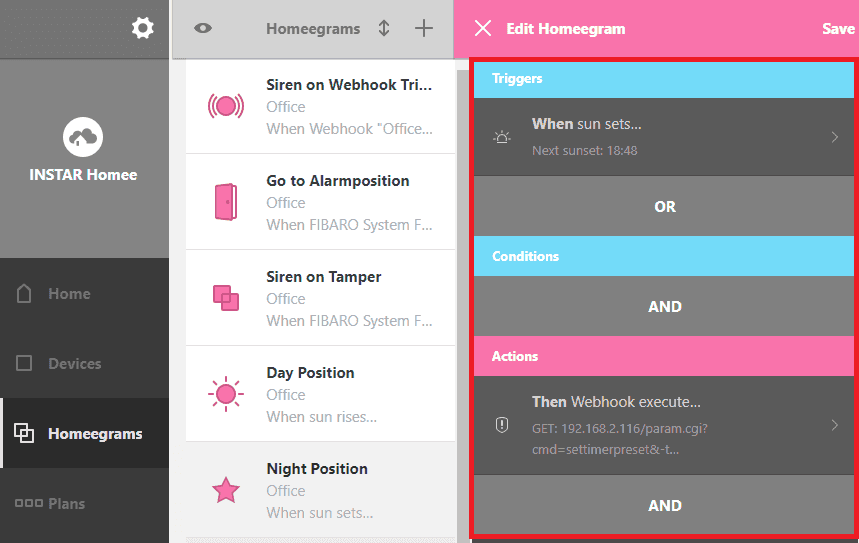
The script to move our camera to the Day Position is set. Now repeat those steps for the Night Position for Sunset using the following command to change the park position to stored position 3:
192.168.2.116/param.cgi?cmd=settimerpreset&-timerpreset_index=3&-usr=admin&-pwd=instar
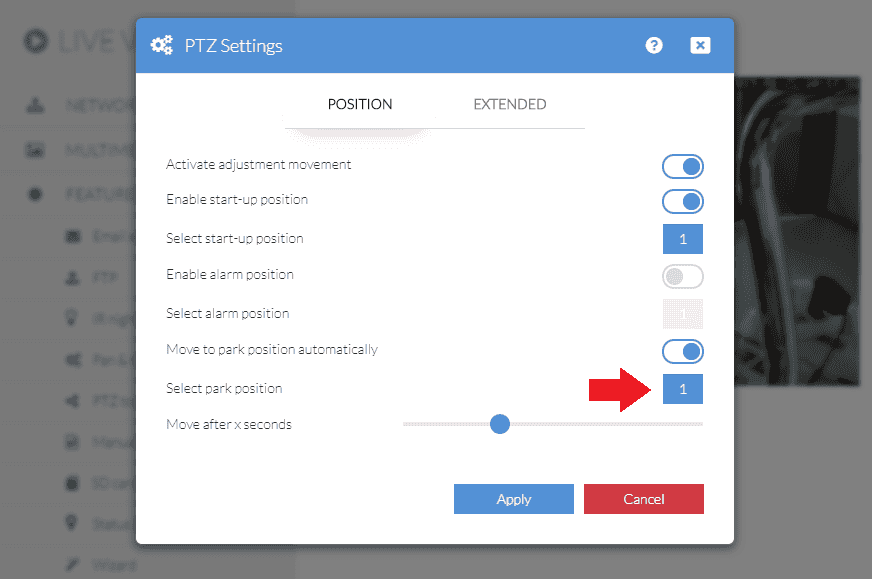
Make sure that you activated the Park Position inside your cameras PTZ Settings and adjust the time it should remain in a place before returning to the position with the slider below:

Every time our camera is now moved it will automatically return to the park position after a while. And the park position will now change according to the time of day.
Day/Night Position
We have now set up our camera to interact with both Z-Wave devices. We trigger alarms on our camera when the external motion sensor is triggered and the external siren when our camera triggers an alarm. However, Homee also offers us timed tasks, such as triggering events at certain times of the day or at sunrise and sunset, which are adapted to our geographical location.
This can be used, for example, to change the orientation of the camera depending on the time of day. For example, if you want your camera to watch the front gate while it is light outside. But as soon as it gets dark, you want it to pan towards the carport to monitor your car:
As a IF condition we now need to go to Sun Position (or Time if you need specific times) and select Sunrise first:
At sunrise our camera should be pointed at the front gate:
The gate is saved as position 1, which can be set as the parking position of our camera with the following command (i.e. we can always move the camera and look around - it will always automatically move back to the parking position after an adjustable time):
192.168.2.116/param.cgi?cmd=settimerpreset&-timerpreset_index=1&-usr=admin&-pwd=instarThe script for moving our camera to the day position is set. Now repeat these steps for the Night Position for Sunset with the following command:
192.168.2.116/param.cgi?cmd=settimerpreset&-timerpreset_index=3&-usr=admin&-pwd=instarThe command will then change the parking position to the stored position 3 and thus cause the camera to always automatically turn towards the carport:
Make sure you have enabled the park position in the PTZ Settings of your camera and adjust the time after which it should move back to the park position:
Every time our camera is moved now, it automatically returns to the parking position after a while. The parking position now changes to the entrance gate or our carport depending on the time of day.
Deactivate Alarm when you are Home
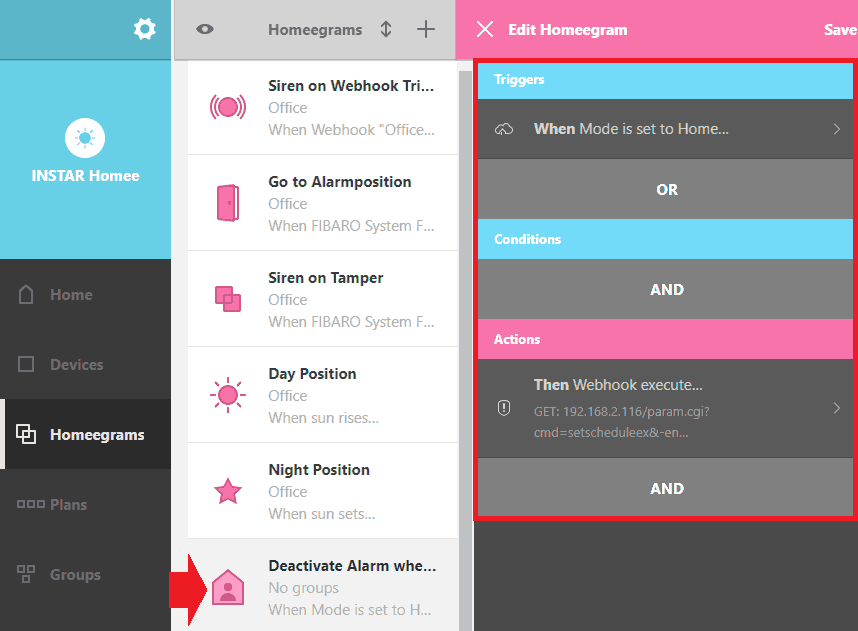
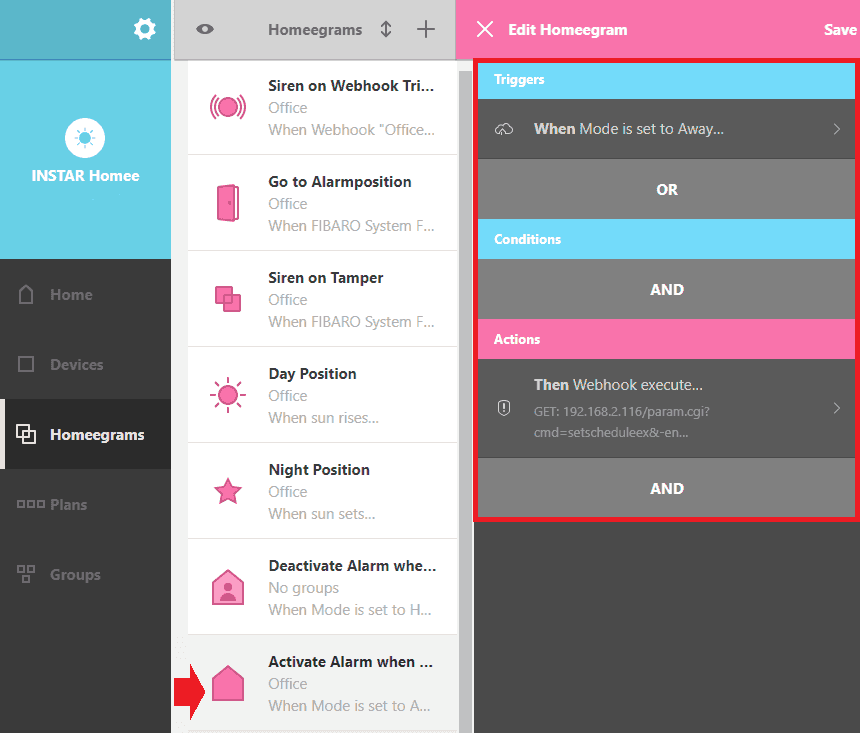
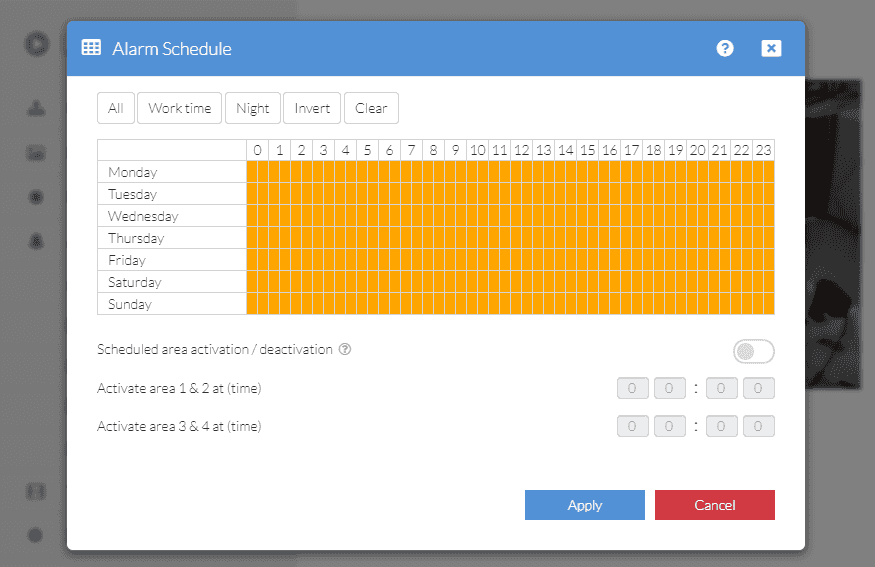
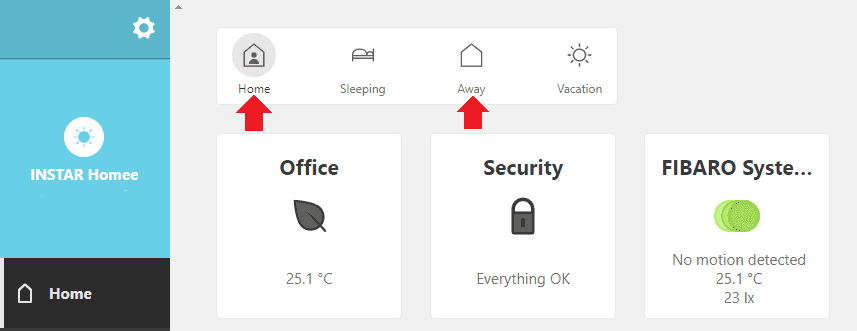
Beside time schedule you can also use the provided Mode System to trigger scripts on your homee gateway. I want to create two scripts that activate the alarm schedule for my camera, when I set my homee to Away and to deactivate the schedule again, when I arrive back home and set it to Home.
Let's start with the Deactivate Alarm when I am Home script:
The used CGI command for this web hook is:
192.168.2.116/param.cgi?cmd=setscheduleex&-ename=md&-week0=NNNNNNNNNNNNNNNNNNNNNNNNNNNNNNNNNNNNNNNNNNNNNNNN&-week1=NNNNNNNNNNNNNNNNNNNNNNNNNNNNNNNNNNNNNNNNNNNNNNNN&-week2=NNNNNNNNNNNNNNNNNNNNNNNNNNNNNNNNNNNNNNNNNNNNNNNN&-week3=NNNNNNNNNNNNNNNNNNNNNNNNNNNNNNNNNNNNNNNNNNNNNNNN&-week4=NNNNNNNNNNNNNNNNNNNNNNNNNNNNNNNNNNNNNNNNNNNNNNNN&-week5=NNNNNNNNNNNNNNNNNNNNNNNNNNNNNNNNNNNNNNNNNNNNNNNN&-week6=NNNNNNNNNNNNNNNNNNNNNNNNNNNNNNNNNNNNNNNNNNNNNNNN&-usr=admin&-pwd=instarNow to the Activate Alarm when I am Away script:
192.168.2.116/param.cgi?cmd=setscheduleex&-ename=md&-week0=PPPPPPPPPPPPPPPPPPPPPPPPPPPPPPPPPPPPPPPPPPPPPPPP&-week1=PPPPPPPPPPPPPPPPPPPPPPPPPPPPPPPPPPPPPPPPPPPPPPPP&-week2=PPPPPPPPPPPPPPPPPPPPPPPPPPPPPPPPPPPPPPPPPPPPPPPP&-week3=PPPPPPPPPPPPPPPPPPPPPPPPPPPPPPPPPPPPPPPPPPPPPPPP&-week4=PPPPPPPPPPPPPPPPPPPPPPPPPPPPPPPPPPPPPPPPPPPPPPPP&-week5=PPPPPPPPPPPPPPPPPPPPPPPPPPPPPPPPPPPPPPPPPPPPPPPP&-week6=PPPPPPPPPPPPPPPPPPPPPPPPPPPPPPPPPPPPPPPPPPPPPPPP&-usr=admin&-pwd=instarThose two scripts will completely wipe the alarm schedule - not allowing alarms to be triggered - when your homee is set to Home. And once you set it to Away the schedule will be filled for a 24/7 surveillance:
Discuss this article on the INSTAR Forum !
