IN-5905 HD Manual Lense Adjustment
When you receive your camera, we already adjusted the focus for the camera to be operational in a general surveillance scenario. For your IN-5905 HD this means, that they give you a sharp image for distances between 5 and 10m. If you need a different focus distance, just turn the camera lense clockwise or counter clockwise, until you have your scene in focus.
I. Please remove the top cover of your IN-5905 HD. Make sure not to lose the plastic ring under the white screw which is for waterproof purpose!
II. Loosen two screws of the back casing and open the casing carefully and make sure not to damage any cables.

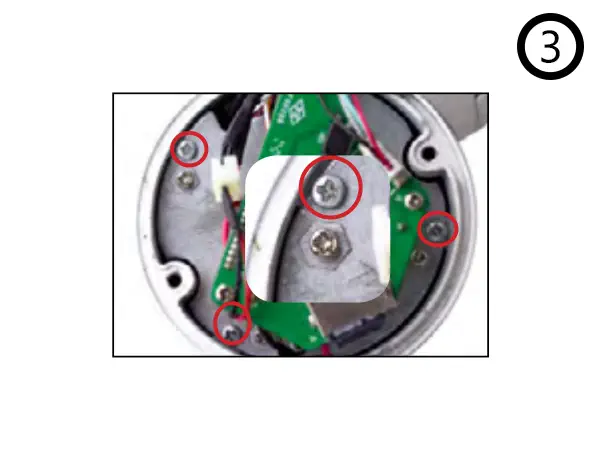
III. Remove the three screws (marked in red) which fixes the electronics to the front casing. Attention! Don’t touch the screws with a hexagon mark underneath.

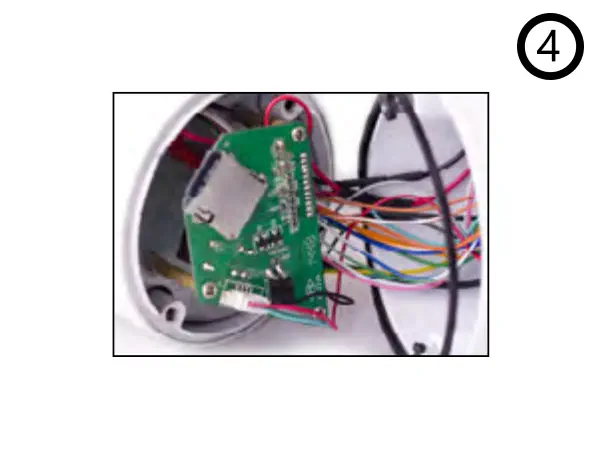
IV. Carefully take out the inner electronics. This part is still wired to the LED board on the front. Please be careful not to damage the cables or the connectors.
V. Loosen the fixing screw on the outer ring of the lens (marked in red color). The bottom screw (marked in blue) belongs to the lens mount and does not need to be loosen.
VI. Now please connect the camera to your network and access the WebUI. Then turn the front of the lens while keeping an eye on the camera feed until the image is sharp and clear. Tighten the fixing screw. While checking for the right focal, please be careful not to accidently screw the whole lens out of the mount.
VII. After you obtained the right focal, please carefully put everything back together by following this guide in reverse. When inserting the lens into the front case, please pay attention to the inner cables. Make sure they don’t obstruct the view and avoid squeezing any cables.
Wir zeigen Ihnen in diesem Video wie Sie bei einer INSTAR IN-5905HD Überwachungskamera das Objektiv scharfstellen können. Jenachdem welchen Bereich man überwachen möchte, ist es ggf. nötig das Objektiv auf den gewünschten Bereich einzustellen.