Alle Node-RED Tutorials
- Alexa Voice Control w/o Cloud
- Node-RED Alarm Ereigniszeitstrahl
- Node-RED and IFTTT
- Node-RED and MQTT
- Node-RED and ONVIF
- Node-RED and Alarmserver Queries
- Node-RED and the INSTAR Cloud Webhook
- Node-RED and SQL-Logging
- Node-RED Dashboard Live Video
- Node-RED in Docker
- Node-RED unter Android
- INSTAR MQTT - Node-RED
All Node-RED FAQs
HTML5 video stream for the Node-RED Dashboard
Q: I found your instructions for integrating the video stream into the Node-RED Dashboard. The new Full HD cameras now support a HTML5 video stream. Is it possible to use it directly in Node-RED?
A: You can download a collection of files here that you can use to embed the HTML5 video stream from your camera into a web page. You can also use these files together with the Node-RED Dashboard.
Preparation
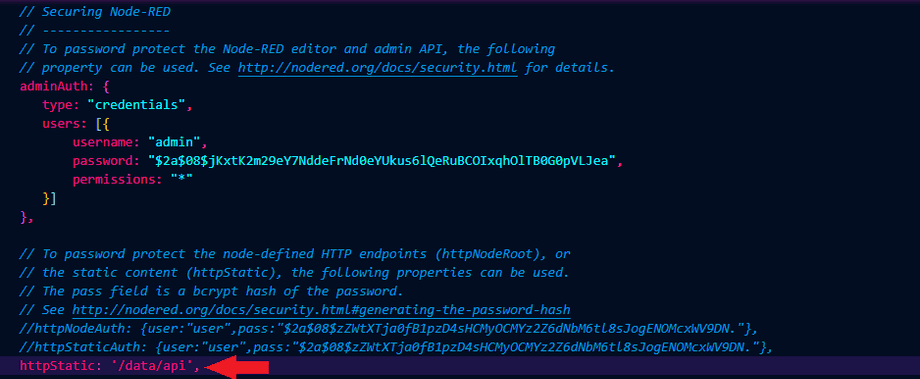
To do this, activate the directory for static files (httpStatic) in the settings.js file of Node-RED - in my case a directory was already set there /data/api. You can choose any directory you like. Just make sure that the directory exists and Node-RED has access to this directory:
In this folder, create a new /ui' subfolder, and copy the js' folder from the provided Zip Container to this folder:
api
└── ui
   └── js
      ├── commonff.js
      ├── decworker.js
      ├── g711.js
      ├── hi_h264dec.js
      ├── libffmpeg.js
      ├── libffmpeg.wasm
      ├── NetThread.js
      ├── pcm-player.js
      ├── video-player.js
      └── webgl-player.js
Now Node-RED has all Javascript files, which are needed for the integration of the HTML5 video stream.
Creating the HMTL Template Nodes
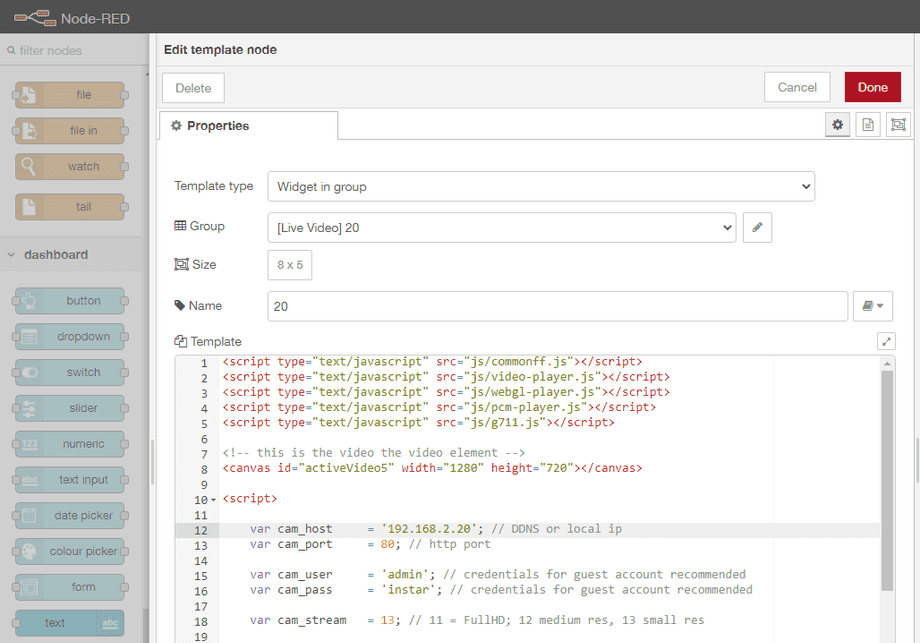
Next you have to take one HTML Template Node (belongs to the Node-RED Dashboard Nodes) for each camera you want to include and fill it as follows:
Please note that each camera requires a separate instance of the player. The following is the example of my 5th camera, which I added in Node-RED. Accordingly, the canvas has the ID activeVideo5 and the player has the name player5. For the next camera I could copy this template node, but had to change these names to activeVideo6 and player6 in ALL places!
<script type="text/javascript" src="js/commonff.js"></script>
<script type="text/javascript" src="js/video-player.js"></script>
<script type="text/javascript" src="js/webgl-player.js"></script>
<script type="text/javascript" src="js/pcm-player.js"></script>
<script type="text/javascript" src="js/g711.js"></script>

<!-- this is the video the video element -->
<canvas id="activeVideo5" width="1280" height="720"></canvas>

<script>

    var cam_host     = '192.168.2.20'; // DDNS or local ip
    var cam_port     = 80; // http port

    var cam_user     = 'admin'; // credentials for guest account recommended
    var cam_pass     = 'instar'; // credentials for guest account recommended

    var cam_stream   = 13; // 11 = FullHD; 12 medium res, 13 small res

    var canvas = document.getElementById("activeVideo5");

    var player5 = null;

    function startvideo(cam_host, cam_port, cam_stream, cam_user, cam_pass){
        // init video player5
        player5 = new HxPlayer();
        self.player5.init({canvas:canvas,width:640,height:352});

        // play video
        player5.playvideo(cam_host, cam_port, cam_stream, cam_user, cam_pass);
    }

    function stopvideo(){
        // stop video
        player5.stopvideo();
        player5 = null;
    }


    // initialize and play video

    startvideo(cam_host, cam_port, cam_stream, cam_user, cam_pass)


</script>
Node-RED Dashboard
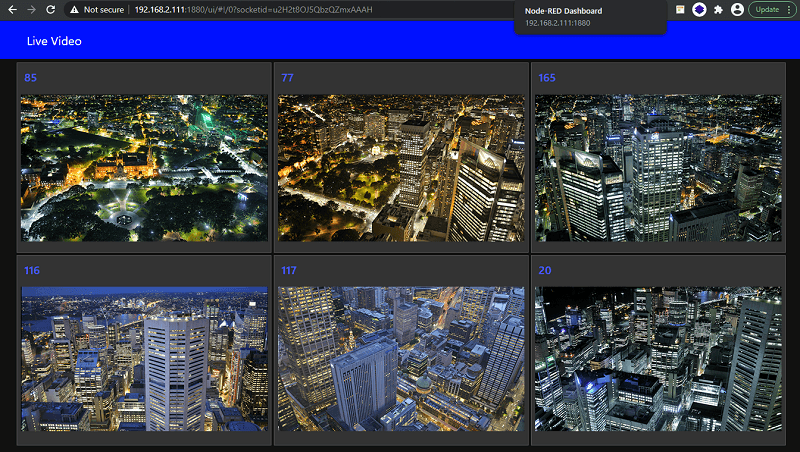
You can now see the h.264 video of all integrated cameras in your Node-RED Dashboard:


