Alle Node-RED Tutorials
- Alexa Voice Control w/o Cloud
- Node-RED Alarm Ereigniszeitstrahl
- Node-RED and IFTTT
- Node-RED and MQTT
- Node-RED and ONVIF
- Node-RED and Alarmserver Queries
- Node-RED and the INSTAR Cloud Webhook
- Node-RED and SQL-Logging
- Node-RED Dashboard Live Video
- Node-RED in Docker
- Node-RED unter Android
- INSTAR MQTT - Node-RED
All Node-RED FAQs
INSTAR MQTT Server with Node-RED
- Verwenden Sie den INSTAR MQTT Alarmserver mit Node-RED
- Verwenden Sie den INSTAR MQTT Alarmserver zum Erstellen einer einfachen Objektverfolgung
- Selbstsigniertes SSL-Zertifikat für den INSTAR MQTT-Broker
- Selbstsigniertes SSL-Zertifikat für den INSTAR MQTT-Broker und Node-RED
- CA SSL-Zertifikat für den INSTAR MQTT-Broker
Node-RED Configuration
If you aren't using Node-RED already please follow our tutorials on how to set up the program under Windows, LINUX Debian or on a Homematic CCU3. If you are using a Raspberry Pi to run Node-RED, you can use the official installation script to have the program set up automatically for you.
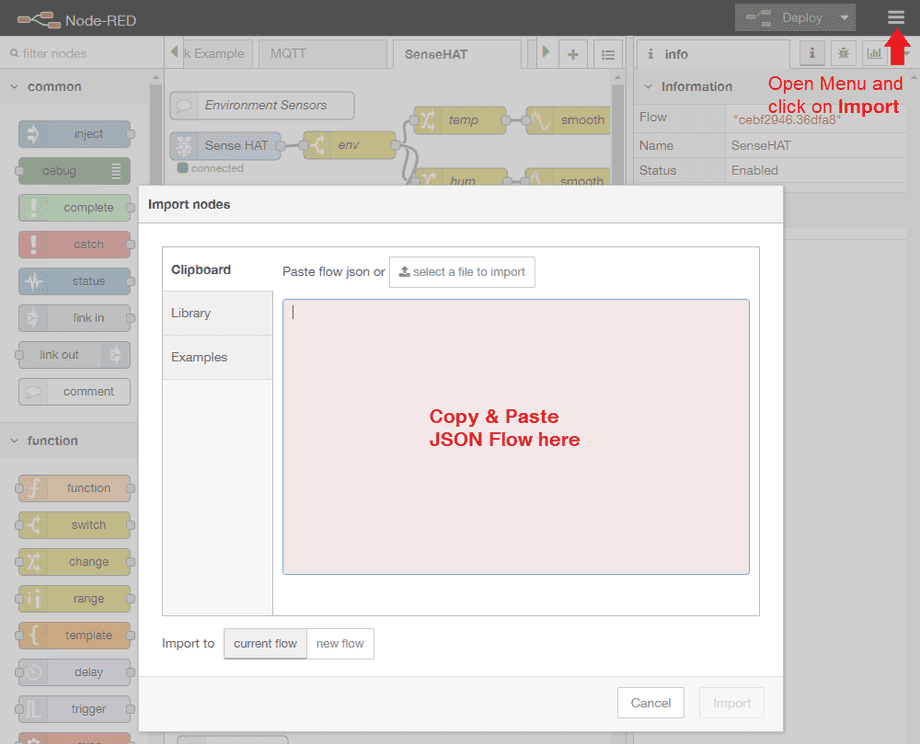
We prepared Node-RED flows for you that give you access to all camera functions through the MQTT Broker. All you need to do, is to click on the flow you want to use (see below), copy it and paste it into the Node-RED import dialogue:
Node-RED JSON Flows
Note: It makes sense to delete every sequence inside those flows that you are not going to use.
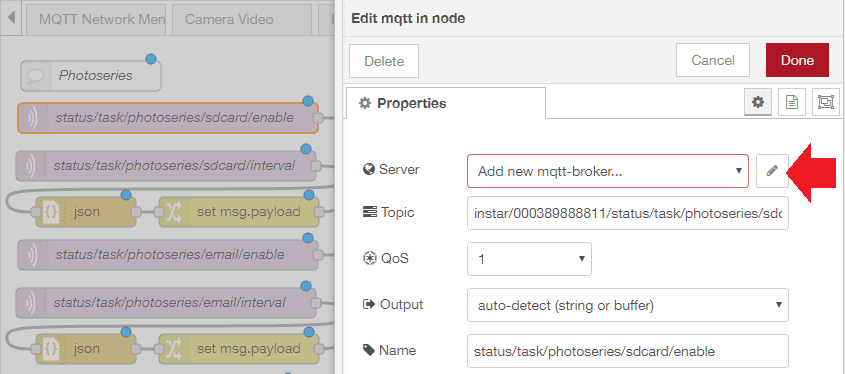
Now double-click the first MQTT Node (the first on the left) and assign your INSTAR MQTT Broker to Node-RED:
Type in your camera's IP address as MQTT Server. Choose the MQTT Server Port that you have set in the MQTT Menu inside your camera's WebUI - the default value is 1883.
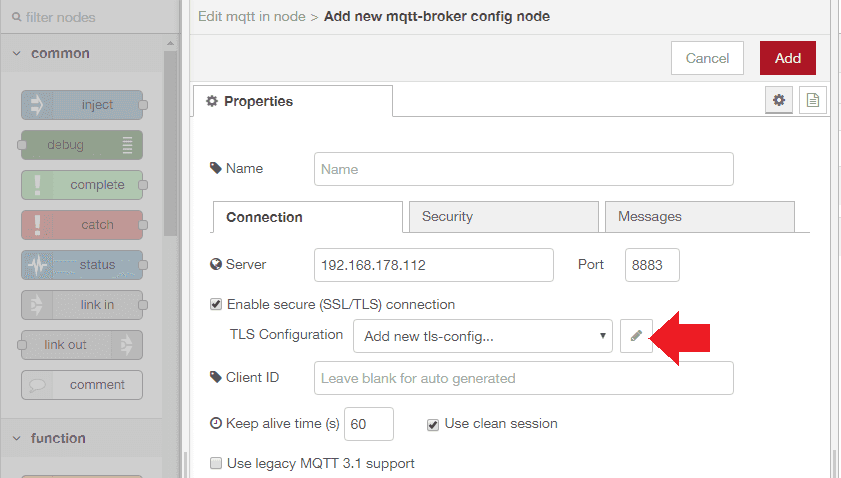
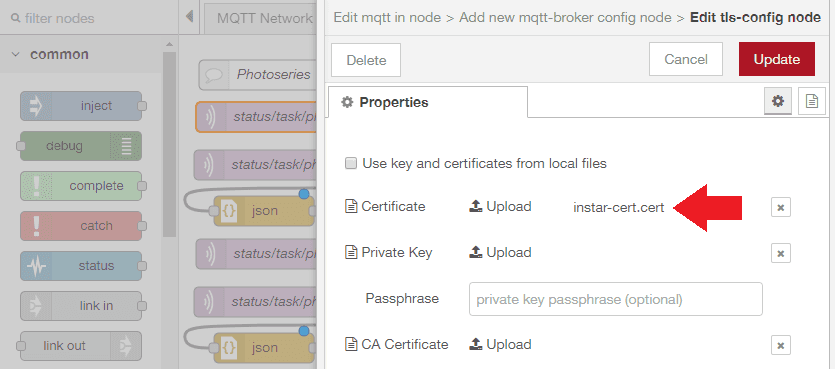
If you want to use the TLS encryption, choose the SSL Port instead - default is 8883. Now you have to open your camera's MQTT Menu and download the Certificate (Client Key). And upload the certificate to Node-RED and save it:
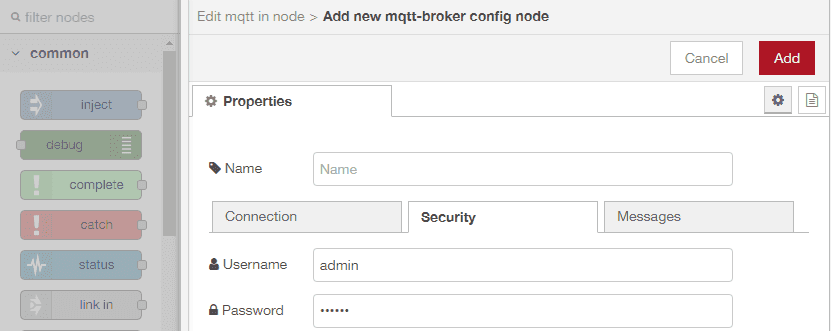
Now add the user login that you have set up in the MQTT Menu:
Click on add to add the INSTAR MQTT Broker to Node-RED and make sure that every MQTT Node of the flow is using the broker. After clicking on Deploy all MQTT Nodes should show that they successfully connected:
Node-RED User Interface
You are currently using the Node-RED admin panel under an URL looking something like this: http://<IP Address>:1880/#flow/b7397920.044be8. To switch to the Node-RED dashboard simply add a ui to the end of it like http://<IP Address>:1880/ui/:
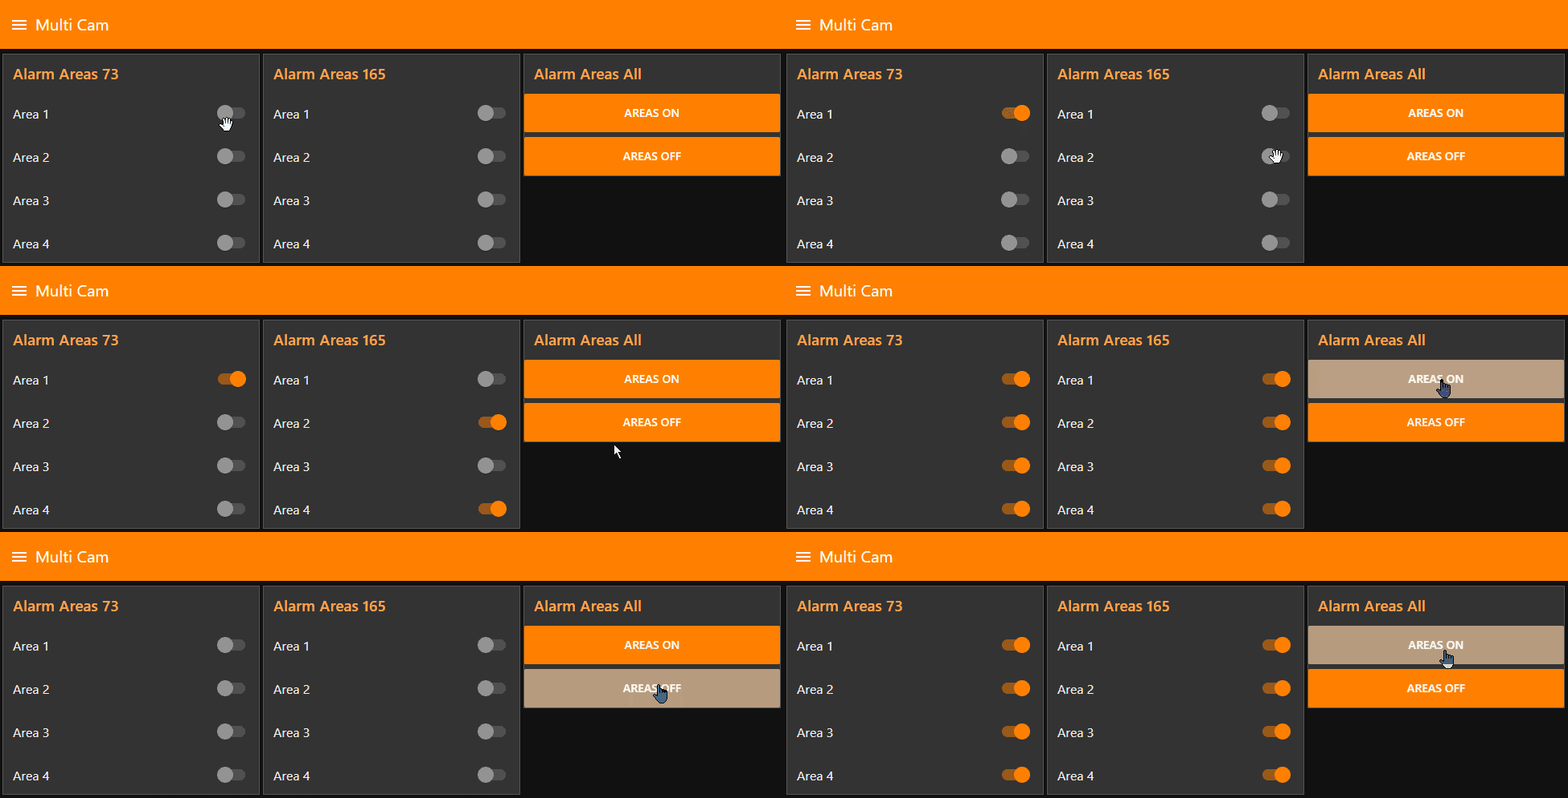
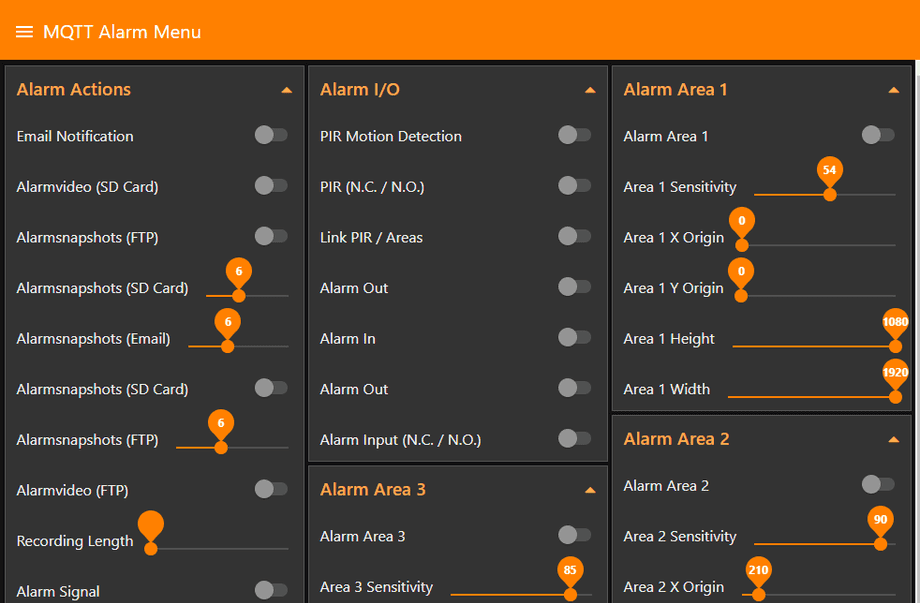
Every flow that you have imported above will be on it's own board. Clicking on toggles and swiping sliders allows you to change the settings on your camera.
Note that the changes happen instantly, but some settings require a restart of your camera to become active - e.g. when changing a camera port, WDR settings, etc. As the WebUI is using the HTTP interface changes will not be reflected there unless you reload the menu.
Multi-Camera Setup
Node-RED is one of the few systems that allow you to connect more than 1 MQTT Broker. This way you can connect all your cameras via it's own broker - without including a single point of failure to your security network.
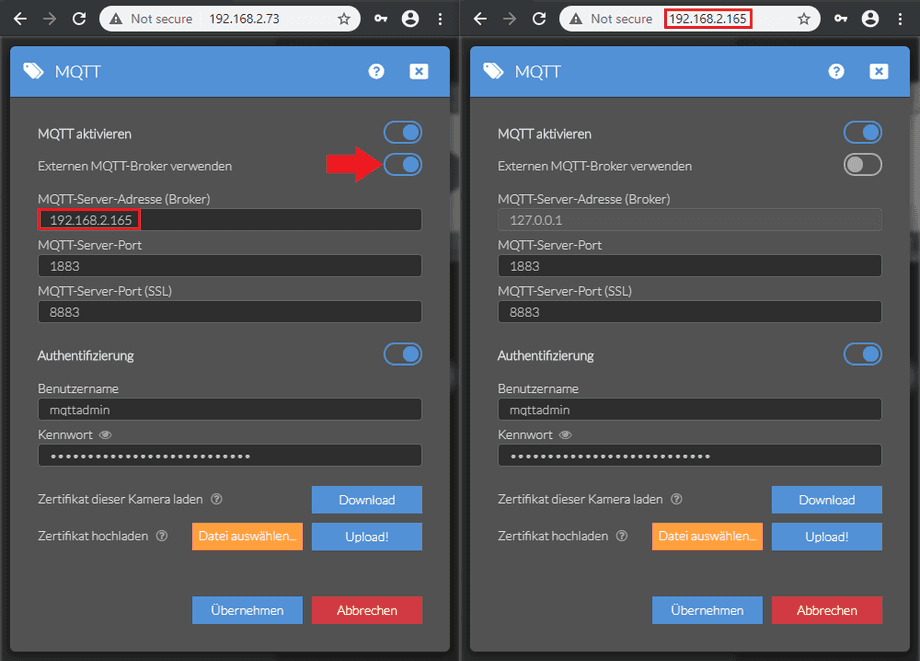
But you still might want to connect some of your cameras into groups, e.g. connect all your cameras that are connected by WiFi to a broker on a camera that has a Ethernet connection. In the following example we have two cameras:
- IN-8015 Full HD (192.168.2.73, 091419200118) /MQTT Client
- IN-9010 Full HD (192.168.2.165, 000389888811) /MQTT Broker
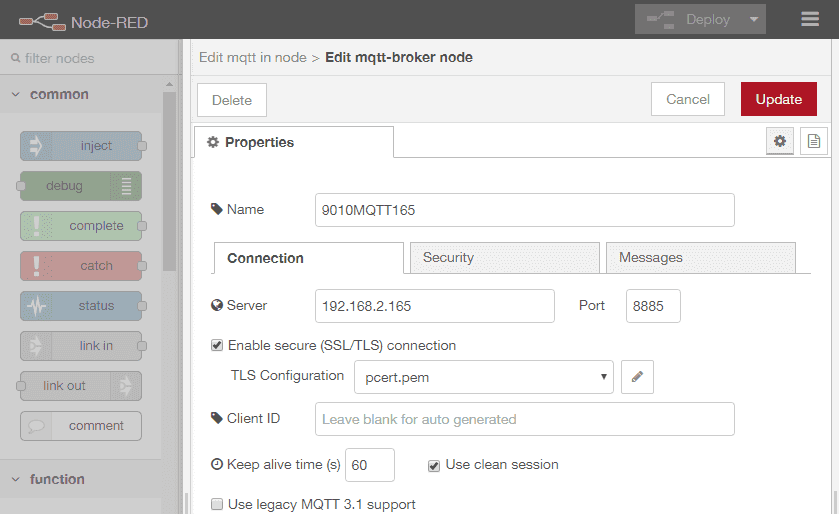
Since all INSTAR Full HD cameras use the same certificate for the instar-ddns.de domain (unless you uploaded your own certificates) and both cameras are on the same network, we can directly add the IP address of our designated Broker Camera to the Client Camera. Only make sure that both are configured with the same MQTT ports and user login.
First of all we now need to add our Broker Camera as a new broker to Node-RED:
To address each camera we can use their MQTT ID's (LAN MAC Addresses), which is 091419200118 for the IN-8015FHD and 000389888811 for the IN-9010FHD*. Note that below instead of instar/000389888811/alarm/area1/enable we use the LOCAL Topic instar/local/alarm/area1/enable for the camera the broker is running on. This is optional, but saves you some typing:
- Alarm Area 1
- instar/091419200118/{status}/alarm/area1/enable
- instar/local/{status}/alarm/area1/enable
- Alarm Area 2
- instar/091419200118/{status}/alarm/area2/enable
- instar/local/{status}/alarm/area2/enable
- Alarm Area 3
- instar/091419200118/{status}/alarm/area3/enable
- instar/local/{status}/alarm/area3/enable
- Alarm Area 4
- instar/091419200118/{status}/alarm/area4/enable
- instar/local/{status}/alarm/area4/enable
* If you downloaded the Node-RED flow above you can use your text editors Search&Replace function to swap these MQTT ID's with the once from your cameras.
Now that we have more than one camera on our MQTT network we are finally able to also use the ALL Topic to send a update command for a function to all our cameras:
- Alarm Area 1
- instar/all/{status}/alarm/area1/enable
- Alarm Area 2
- instar/all/{status}/alarm/area2/enable
- Alarm Area 3
- instar/all/{status}/alarm/area3/enable
- Alarm Area 4
- instar/all/{status}/alarm/area4/enable
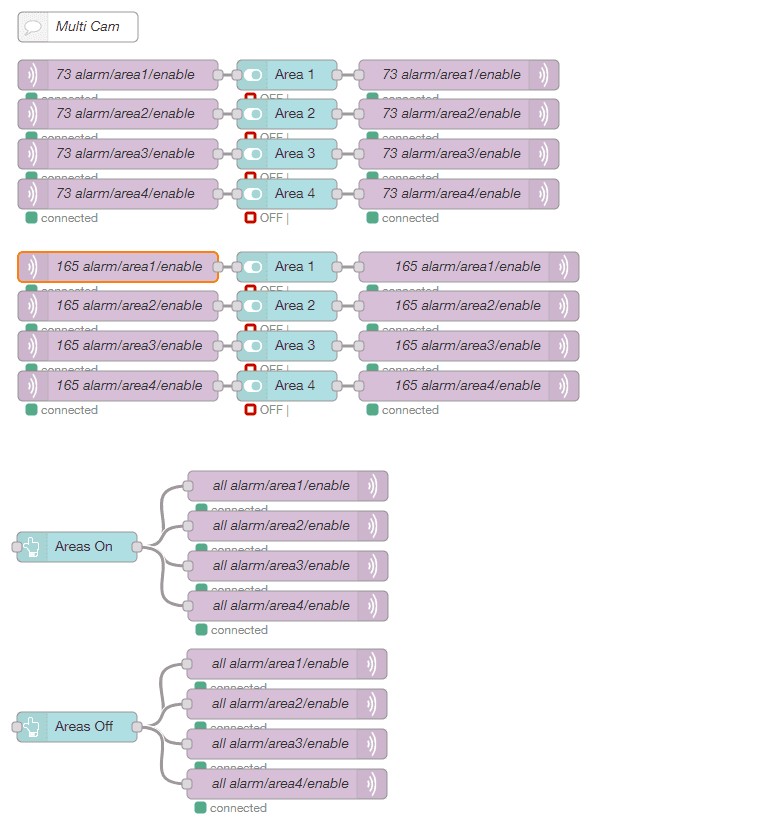
The resulting Node-RED flow can look something like this:
We are now able to switch the Alarm Areas of both cameras through one MQTT broker. By combining cameras to a MQTT network group we are also able to use the ALL Topic to update settings on all cameras at once:
