BlueIris MQTT with Node-RED
Make your camera the heart of your smart home
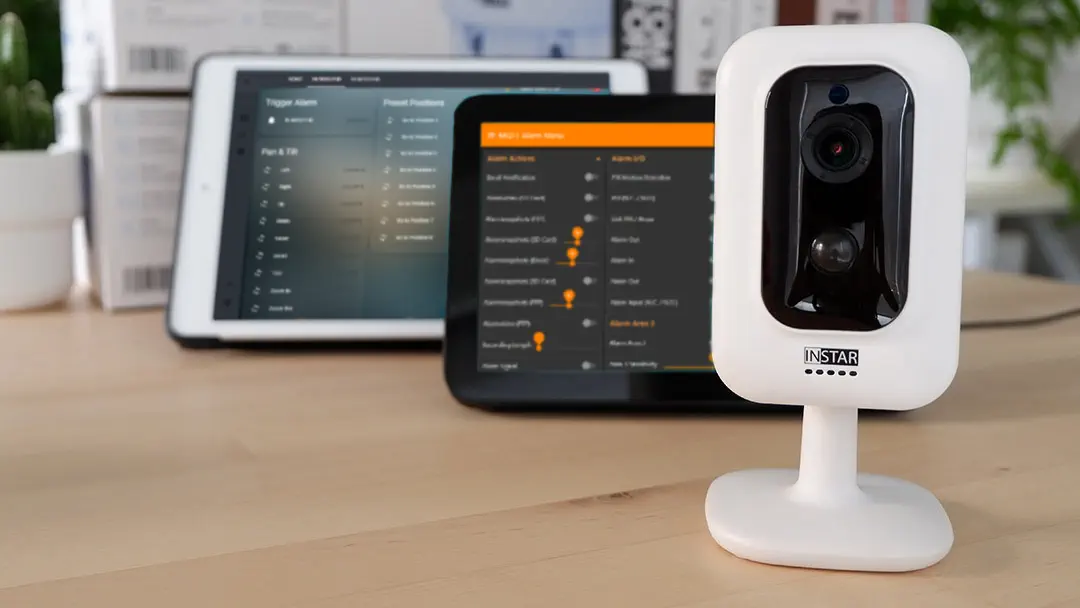
Using the MQTT interface of your INSTAR Full HD cameras you can connect them to an existing smarthome system (Home Assistant, OpenHAB, Node-RED, Athom Homey, Homematic, ioBroker, Loxone, homee) can be added. Or even make it the main broker for your MQTT sensors. MQTT allows you to automate ALL functions of your camera and link them to other services in your smarthome.
Control your camera via the IFTTT online service
On the IFTTT platform, we provided a service called INSTAR. The INSTAR applets provide you with the ability to control some settings of your INSTAR camera or INSTAR Cloud with IFTTT. You can connect INSTAR with triggers for location (Geo Location) and date & time, send notifications and much more. For example, you can connect INSTAR applets to the IFTTT location service and automatically disable the alarm when you arrive home. You can also use the INSTAR applets to create your own automation and connect them to other third-party applets.
Configuring the BlueIris MQTT Service
To activate the MQTT Service enter the BlueIris Software Settings:
Switch to the Digital IO and IoT tab and click to Configure the MQTT service:
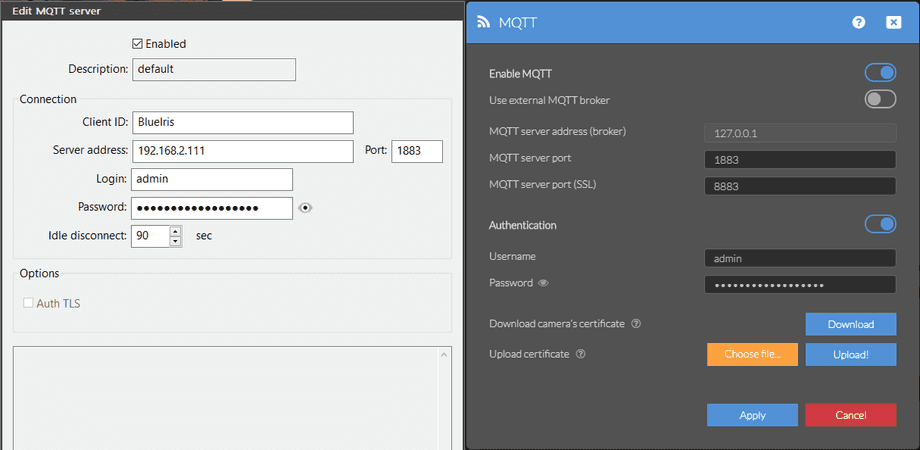
In this case I am using an INSTAR MQTT Camera as my MQTT broker. Type in your broker IP address (e.g. IP address of your camera), the broker login and port:
MQTT Alarm Service
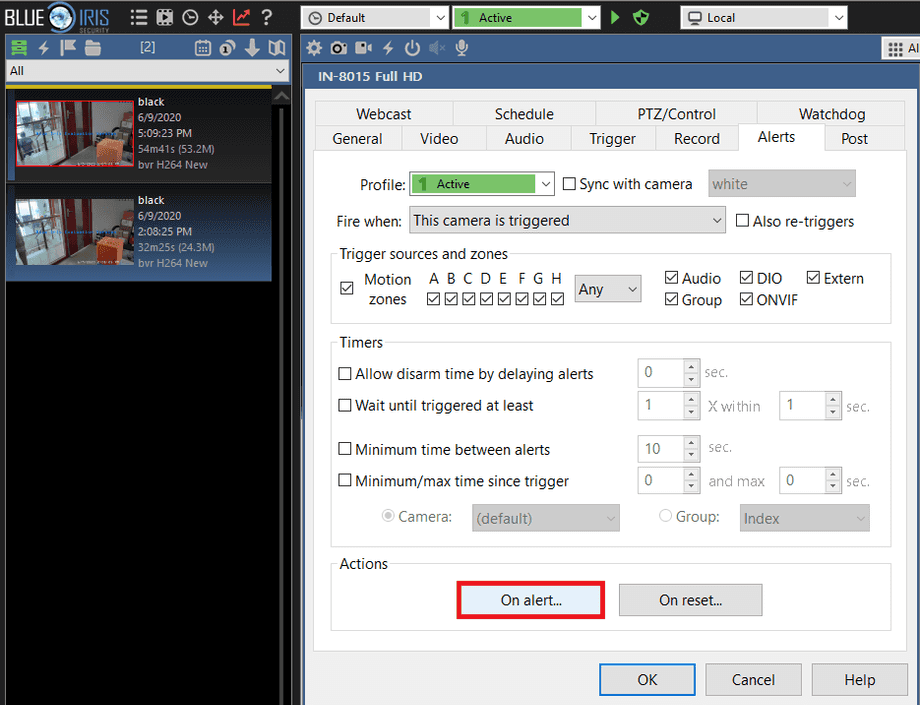
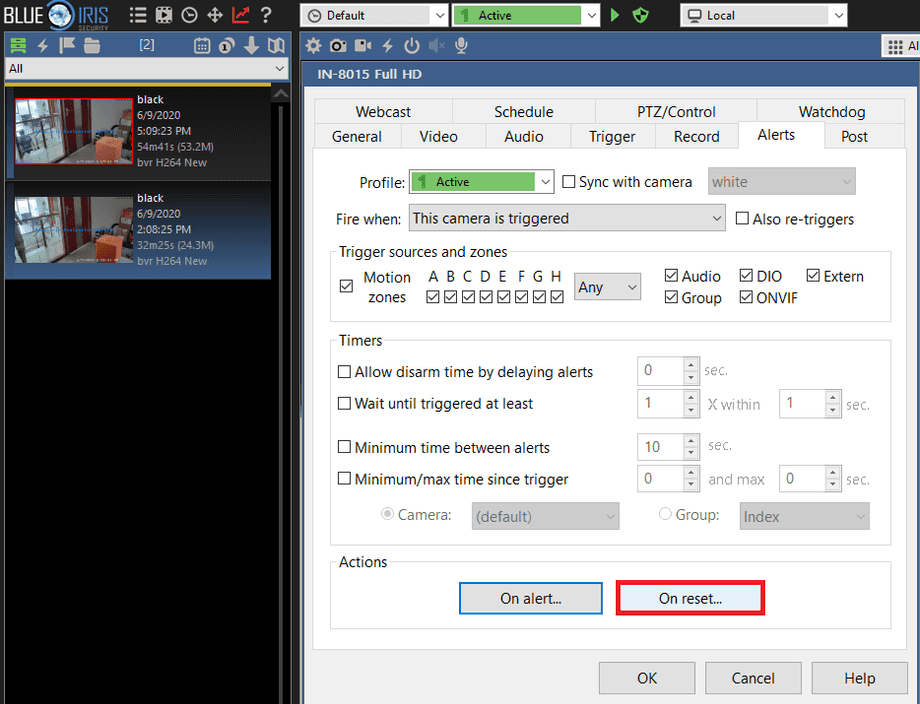
Now right-click your cameras live video and select Camera Settings from the pop-up menu. In the settings menu switch to the Alerts tab and click on ON alert... in the Actions section:
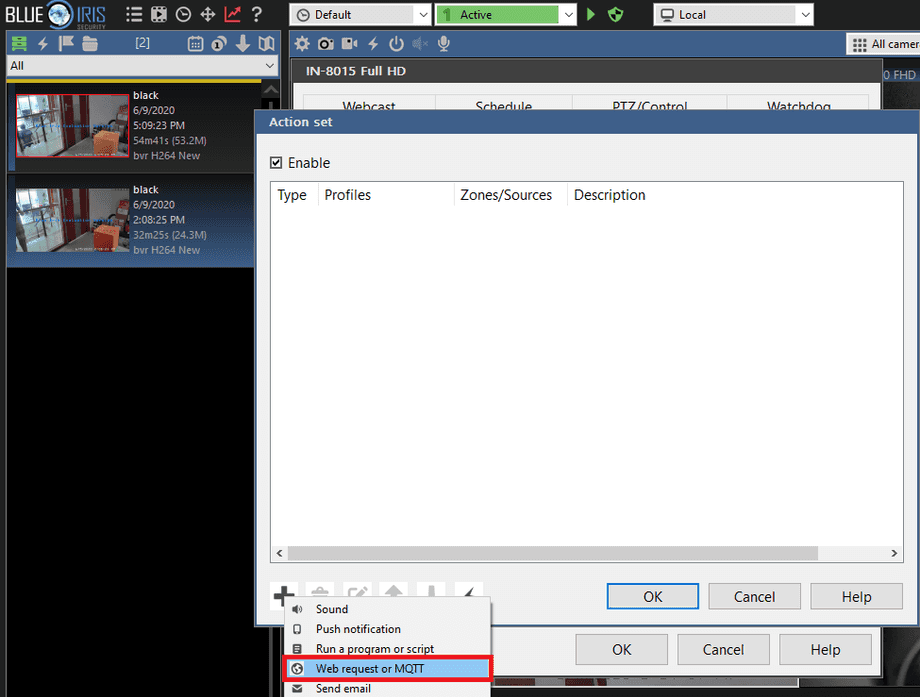
Here we can define the action that we want to be triggered if the camera enters the alarm state. Choose Web request or MQTT:
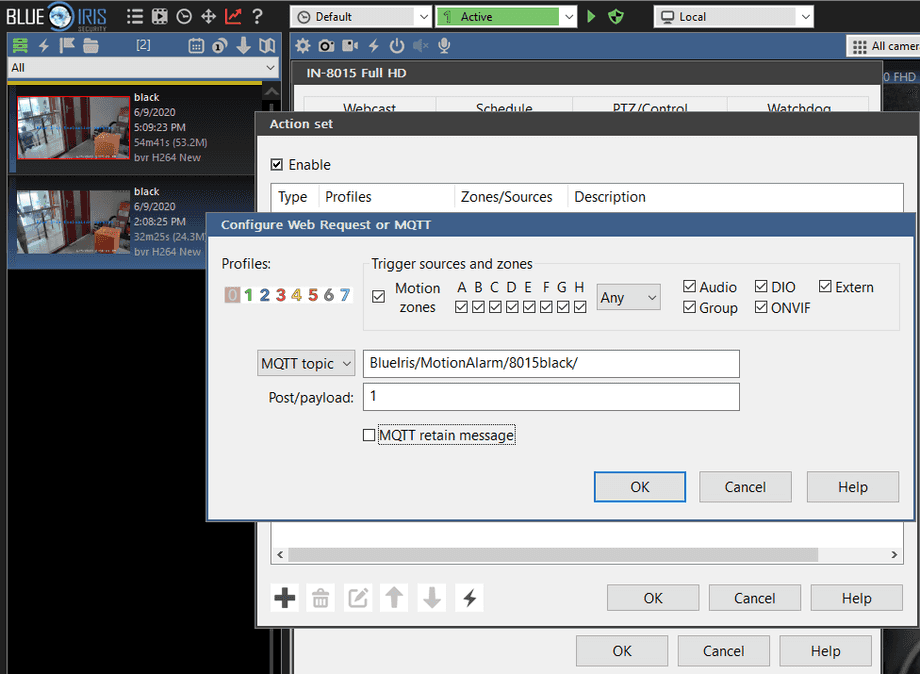
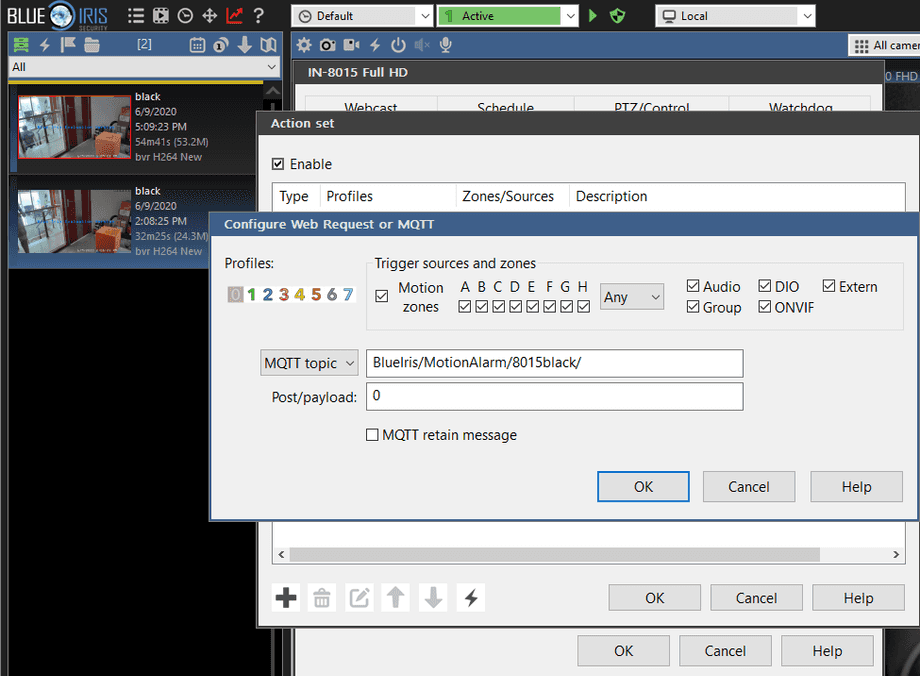
Choose an MQTT Topic - you can name it freely according to your MQTT setup. As payload choose 1 or ON to signify that the alarm state of this camera was activated:
Now we can define another topic that is to updated once our camera falls back to idle. Click on On reset... to continue:
Here I choose the same topic that I had before. But this time the payload will be 0 or OFF:
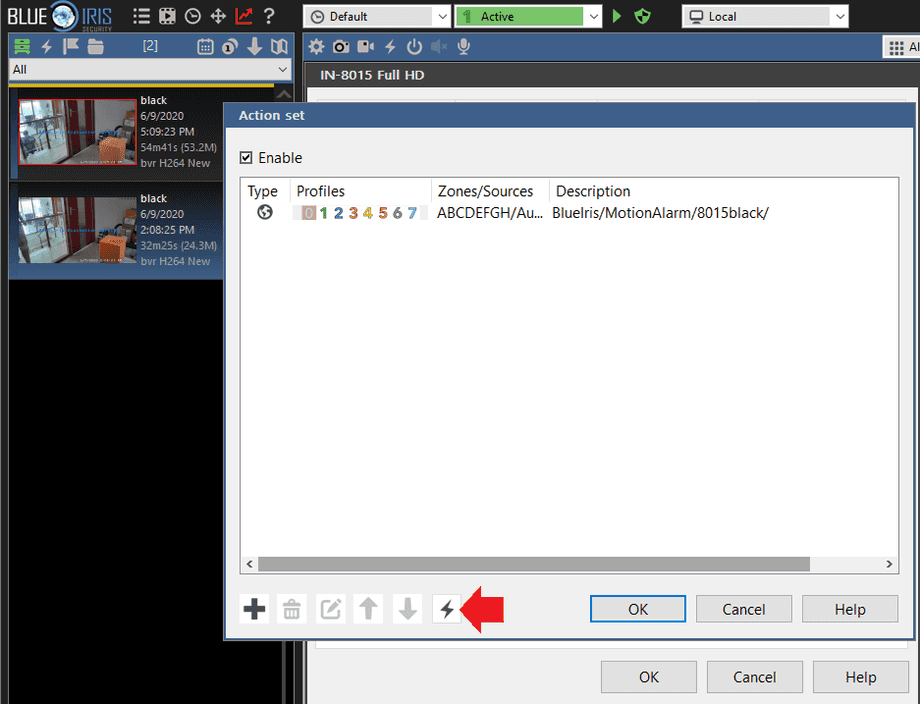
Click on the Lightning symbol to test-run your MQTT topic. You can use an MQTT debug tool to see whether the topic is successfully updated. In my case I have an instance of ioBroker running to see the result of the test:
Now we are receiving an MQTT update, every time BlueIris triggers an alert - we can continue working with that in our smarthome solution, e.g. ioBroker, Node-RED, OpenHAB or Home Assistant.
Controlling BlueIris through MQTT
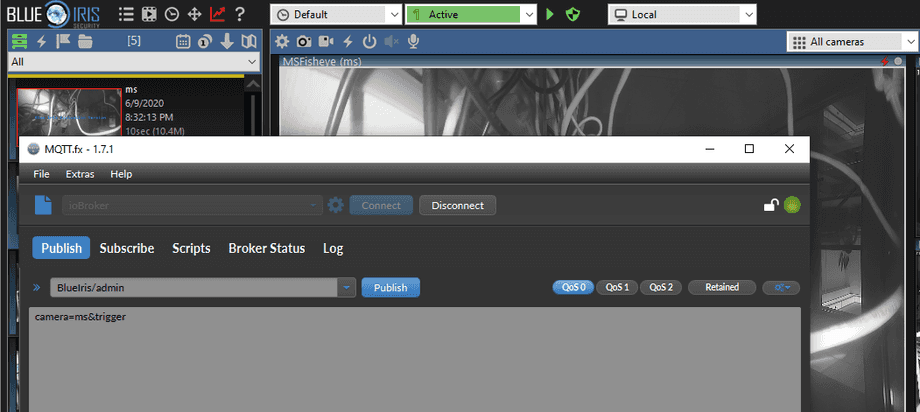
We can also use MQTT to trigger events inside the BlueIris software. For example you can use a tool like MQTT.fx to send the following payload to the MQTT topic BlueIris/admin:
camera=cameraname&trigger(replacecameranamewith the camera shortname you defined for your camera when you added it to BlueIris)
This will trigger an alarm for the selected camera in BlueIris and with it all activated alarm actions - e.g. alarm recording, etc.
Admin Commands
This is a list of the allowed admin command that you can use through MQTT:
camera=x&autocycle=1or 0 Automates the auto-cycle function for camera x’s framecamera=x&alerts=xEnable or disable alerts on camera x (short name)camera=x&enable=1or 0 Enable or disable camera x (short name)camera=x&escapeEquivalent to using Esc key on camera window to exit full screen or other temporary modes.camera=x&flagalert=1Mark the most recent alert as flagged in the clips database and timeline.camera=x&flash=1or 0 Enable or disable Flash broadcasting on camera x (short name). A camera reset will also be required (&reset)camera=x&fullscreen=1or 0camera=x&hide=1or 0 Hide or show camera x (short name)camera=x&manrec=1or 0 Start or stop manual recording on camera or group x (short name)camera=x&mdelay=xDelay motion detection on camera x (short name)camera=x&motion=1or 0 Enable or disable motion detection on camera x (short name)camera=x&output=n&msec=t Set or reset the digital output n (1-10) on camera x (short name). Use msec=0 to reset the output and any other value to set it.camera=x&pause=nPause camera x (short name). n=-2,-1,0,1,2... for toggle, infinite, 0,+30s,+5min,+30m,+1h,+2h,+3h,+5h,+10h,+24h,+15mcamera=x&preset=nGoto PTZ preset n on camera x (short name)camera=x&priority=x1: temporarily move camera to top-left position, 0: return to normal position.camera=x&profile=nForce profile n on camera x (short name)camera=x&ptz=nPTZ command n on camera x (short name). n=0,1... for left,right,up,down,center,zoom+,zoom-camera=x&ptzcycle=1or 0 Enable or disable PTZ preset cycle on camera xcamera=x&reboot Rebootcamera x (short name) (as supported)camera=x&reset Resetcamera x (short name)camera=x&schedule=1or 0 Enable or disable schedule on camera x (short name)camera=x&selectSelect camera x (short name). Omit the camera name (x is empty) to de-select all cameras.camera=x&snapshotSnapshot on camera x (short name)camera=x&trigger&memo=textTrigger camera or group x (short name) as an External source; optionally add text to the memo field in the database.camera=x&trigger=1Trigger camera or group x (short name) as a Motion sourcecamera=x&trigger=-1 Trigger camera (short name) as an ONVIF sourcecamera=x&trigger=0Reset trigger on camera (short name). NOTE: With the ONVIF source, the camera will remain triggered until the &trigger=0 command is used and the break time has expired.camera=x&webcast=1or 0 Enable or disable webcasting on camera x (short name)
Discuss this article on the INSTAR Forum !


