Software
Home Automation (MQTTv5)
This guide uses the MQTTv5 API. For Full HD cameras please replace the MQTT topics with the MQTTv3 API. If you don't use MQTT in your smarthome system please refer to our HTTP API (CGI) documentation - the CGI version of this guide can be found here.
Homematic Home Automation
- Home Automation MQTTv5
- Introduction
- How does it work
- Use external Sensors
- Activate Nightvision only when Motion is detected
- Schedule different Positions
- Use different Detection Areas for each Position
- Use different Sensitivities for Day & Night
- Turn off all Cameras when you arrive home
- Use external Sensors to turn your Camera when Motion is detected
- Use external Sensors to trigger Alarm Recordings
- Interconnect your Cameras
- Scan for Noise Sources
- Manually deactivate all Alarm functions for all your Cameras
- Switch between PIR and Software Motion Detection
Make your camera the heart of your smart home
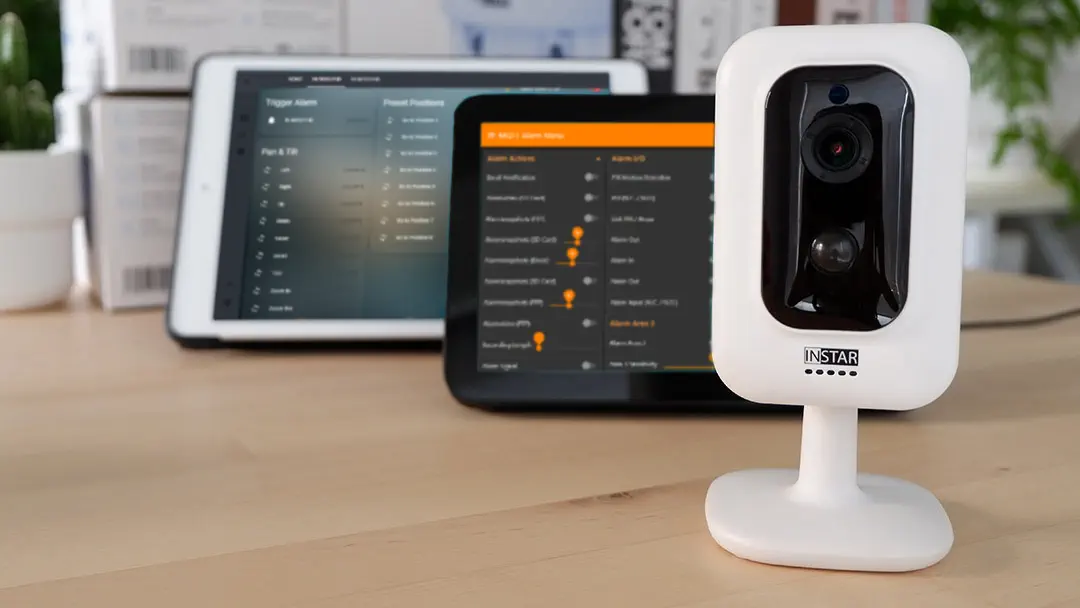
Using the MQTT interface of your INSTAR Full HD cameras you can connect them to an existing smarthome system (Home Assistant, OpenHAB, Node-RED, Athom Homey, Homematic, ioBroker, Loxone, homee) can be added. Or even make it the main broker for your MQTT sensors. MQTT allows you to automate ALL functions of your camera and link them to other services in your smarthome.
Control your camera via the IFTTT online service

On the IFTTT platform, we provided a service called INSTAR. The INSTAR applets provide you with the ability to control some settings of your INSTAR camera or INSTAR Cloud with IFTTT. You can connect INSTAR with triggers for location (Geo Location) and date & time, send notifications and much more. For example, you can connect INSTAR applets to the IFTTT location service and automatically disable the alarm when you arrive home. You can also use the INSTAR applets to create your own automation and connect them to other third-party applets.
Introduction
Homematic is the smart home system manufactured by eQ-3. It enables comprehensive control of various functions – from simple to complex scenarios in houses or flats. Besides increasing the level of comfort and security in homes, another of the system’s main benefits is the way in which it considerably reduces energy costs.
The wide portfolio of more than 80 devices includes products for light, shutter and radiator control, with the range being rounded off by hazard alarms, safety sensors and products for measuring weather data. All of which can be configured to interact with your INSTAR IP camera.
Homematic can be set up using the browser-based user interface of the Homematic CCU2 Central Control Unit. The system can be controlled from within the local network as well as via the Internet. The software offers various configuration and application possibilities, so that there are no limits to creativity. If you don't want to use the proprietary hardware, just install the Homematic software on a Raspberry Pi - everything you need is available on Github.
In the following paragraphs we want to show you how to connect external wireless sensors through the Homematic system with your INSTAR IP camera, set up time schedules for your surveillance and optimize your camera operation.
If you are looking for a deep dive into setting up your Homematic automation with an INSTAR IP camera, switch to our FULL GUIDE instead, where we show you how to add your camera using both the CuX Daemon and the RedMatic Node-RED Plugin.
How does it work
When you are interested in using the MQTT interface to add your camera to a smarthome system, you are probably already familiar with our HTTP/S CGI interface that you can use to send commands to your camera through your web browser.
MQTT works much the same way. Every CGI command corresponds to an MQTT topic and every topic can carry specific payloads. For example to activate the first Motion Detection Area on your camera, you can send the following CGI command:
param.cgi?cmd=setmdattr&-name=1&-enable=[val]
Where the value (val) can be 0 or 1 - depending on whether you want to deactivate or activate the detection area. In MQTT doing the same thing looks like this:
alarm/area1/enable {"val":"0"}, {"val":"1"}
The topic to switch the area on or off is alarm/area1/enable and you have to send either a value of 1 or 0 to switch it.
- How to Configure the INSTAR MQTT Broker/Client
- The INSTAR MQTT Service
- The INSTAR MQTTv5 API Documentation
1. Use external Sensors
Triggering an alarm on the camera by an event registered by your home automation system:

alarm/pushalarm {"val":"1"}2. Activate Nightvision only when Motion is detected
Activate your cameras night vision according to a schedule or triggered by an external sensor integrated in home automation system:

features/nightvision/autoled {"val":"0"}, {"val":"1"}, {"val":"2"}The activation of the night vision in case of an alarm is of course only possible if the camera has an internal PIR sensor for motion detection, or if you use the alarm signal of an external sensor in home automation to "focus" the camera. The advantage - the camera is inconspicuous at night and the IR light attracts no insects / spiders. And the power consumption is of course also pressed.
3. Schedule different Positions
Scheduled day and night position - guard the front door when I'm not at home but I turn the camera to my carport when I'm back from work:

features/ptz/preset {"val":"0"} - {"val":"7"}4. Use different Detection Areas for each Position
In combination with the scheduled day and night position (see above) you can also activate different motion detection areas - in the example the areas 1 & 2 are activated during the day and the areas 3 & 4 at night:

alarm/area1/enable      {"val":"0"}, {"val":"1"}
alarm/area2/enable      {"val":"0"}, {"val":"1"}
alarm/area3/enable      {"val":"0"}, {"val":"1"}
alarm/area4/enable      {"val":"0"}, {"val":"1"}
5. Use different Sensitivities for Day & Night
Since there are often different sensitivities needed for the motion detection during day and night conditions, you can also adjust these - in the example to 75% during the day and 25% at night:

alarm/area1/sensitivity     {"val":"1"} - {"val":"100"}
alarm/area2/sensitivity     {"val":"1"} - {"val":"100"}
alarm/area3/sensitivity     {"val":"1"} - {"val":"100"}
alarm/area4/sensitivity     {"val":"1"} - {"val":"100"}
6. Turn off all Cameras when you arrive home
Either schedule or manually disable all alarm detection areas and the PIR sensor, if you do not want to trigger an alarm:

alarm/area1/enable          {"val":"0"}, {"val":"1"}
alarm/area2/enable          {"val":"0"}, {"val":"1"}
alarm/area3/enable          {"val":"0"}, {"val":"1"}
alarm/area4/enable          {"val":"0"}, {"val":"1"}
alarm/actions/pir/enable    {"val":"0"}, {"val":"1"}
7. Use external Sensors to turn your Camera when Motion is detected
Let your camera move between positions depending on system variables in home automation system. For example - when the door sensor is tripped, look to the door, when the window sensor is triggered turn towards the window and when the external motion sensor detects a person, turn to the kitchen door:

features/ptz/preset {"val":"0"} - {"val":"7"}This can be combined well with the parking position in the camera - the camera then automatically returns to the standard position after x minutes.
8. Use external Sensors to trigger Alarm Recordings
When you set up your camera to turn to a position when triggered by an external sensor, you probably want to start an alarm recording on the internal SD card to catch the intruder. This can be done by starting the manual recording through your home automation system and after a delay following up the stop command. Due to adjustable delay, the length of the alarm video is freely selectable (15s - 60s):

task/video/rec/start     {"val":"15"}, {"val":"30"}, {"val":"45"}, {"val":"60"}
task/video/rec/stop      {"val":"1"}
9. Interconnect your Cameras
Install your cameras so that they always keep an eye on each other by utilizing the Park Position that always returns your camera to a set position after it was moved. This prevents intruders from tampering with your cameras unseen.
When one camera detect a motion you can have it contact your home automation system using your camera's Alarmserver Function. You smarthome can then send a command to other cameras nearby to turn towards the position where the initial camera detected the intruder and start an alarm recording.

features/ptz/preset     {"val":"0"} - {"val":"7"}

task/video/rec/start     {"val":"15"}, {"val":"30"}, {"val":"45"}, {"val":"60"}
task/video/rec/stop      {"val":"1"}
In this example both cameras look at each other - and keep an eye on what is happening behind the other camera. This position is stored as Position 1 (number=0) and set to be the Park Position. When the left camera detects something, the right one turns around towards the potential intruder - stored as Position 2-8 (number=1-7) - and starts a recording. And vice versa...
10. Scan for Noise Sources
For example, when triggering the audio detection on your camera, you probably do not know the location of the source of the noise. Here you can trigger a horizontal (hscan) or vertical (vscan) search scan. This must then be manually stopped again with the desired delay:

features/ptz/panscan      {"val":"1"}
features/ptz/tiltscan     {"val":"1"}
11. Manually deactivate all Alarm functions for all your Cameras
If you have activated more than one alarm trigger in your camera - PIR sensor, alarm areas, audio detection, alarm input - you can activate and deactivate them all at once via the alarm schedule without addressing each trigger individually:

alarm/schedule/master/sunday {"val":"NNNNNNNNNNNNNNNNNNNNNNNNNNNNNNNNNNNNNNNNNNNNNNNN"} - {"val":"PPPPPPPPPPPPPPPPPPPPPPPPPPPPPPPPPPPPPPPPPPPPPPPP"}Set the alarm schedule for each day of the week from Monday through Sunday. Each P is half an hour of the day the alarm schedule is active (48 x 30min = 24h). An N equals a 30-minute period in which it is disabled. The schedule activates / deactivates all alarm actions.
12. Switch between PIR and Software Motion Detection
Most of our new cameras have both an internal, software-based motion detection and a hardware PIR (passive infrared) heat sensor to detect motion of objects that have a different surface temperature as the ambient. In most cases we recommend that you link both as they have different strengths and weaknesses and the coupling can filter many sources of false alerts.
But there are situation where one of those two ways to detect motion simply fails and does not provide any filtering effect anymore. Examples are:
- The PIR is exposed to direct sunlight through most of the day. Shadows and temperature changes trigger regular false alarms.
- The Motion Detection Areas are constantly triggered at night due to the light from passing cars.
- etc.
We can use our smarthome to automatically deactivate the problematic sensor during times where we know that their accuracy is affected. Since we probably want to use both sensors during times of the day when both work perfectly, we also have to switch the coupling on and off, accordingly.
Link between PIR and Alarm Areas
alarm/actions/pir/link {"val":"0"}, {"val":"1"}Alarm Areas Activation / Deactivation
alarm/area1/enable          {"val":"0"}, {"val":"1"}
alarm/area2/enable          {"val":"0"}, {"val":"1"}
alarm/area3/enable          {"val":"0"}, {"val":"1"}
alarm/area4/enable          {"val":"0"}, {"val":"1"}
PIR Activation / Deactivation
alarm/actions/pir/enable {"val":"0"}, {"val":"1"}Discuss this article on the INSTAR Forum !