Direct LAN Connection
How to connect your camera directly with your computer via an Ethernet cable?
The following instructions will explain to you step by step how you can create a direct LAN connection between your computer and an INSTAR IP camera. Use this approach if you want to use the camera in an area, that does not provide a network infrastructure or to if you want to configure the camera to connect to a WiFi network when you don´t have a LAN Ethernet connection available to make the initial WiFi configuration.
Connect the Camera
Connect the camera with a regular Ethernet cable to your PC or Notebook (Very old PCs might still need a special - Crossover - cable to make this connections).
Search the Camera
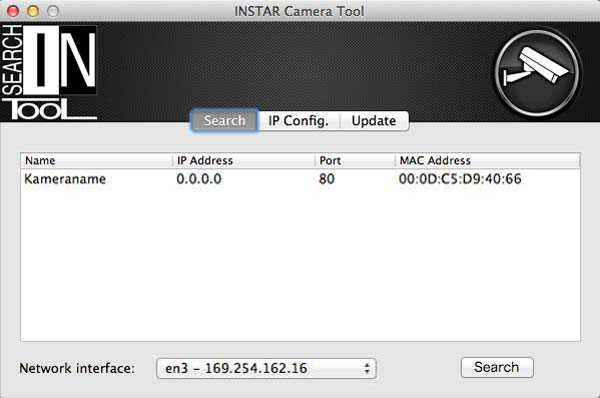
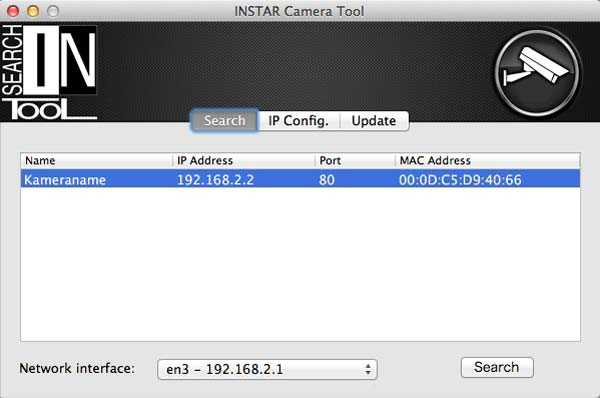
Install/Open the INSTAR Camera Tool which will show you the following message after clicking the Search button: (you might have to select the correct network interface to which the camera is connected to. If for example you have a VPN connection, an active Bluetooth module and the regular LAN interface, then you have to select the LAN interface in order to find your IP camera.
Open the camera tool and press Search.
Assign a static IP to your Windows PC
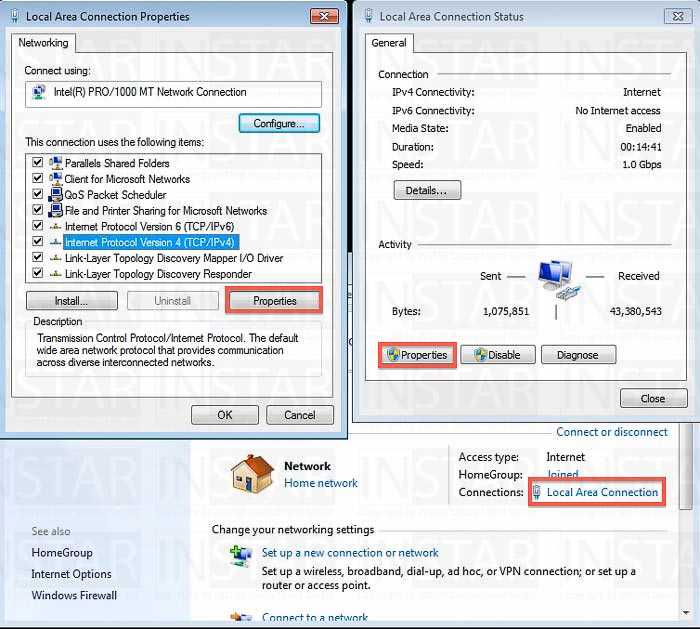
Open the Network and Sharing Centre (Control Panel -> Network and Security). The interface will show you a new unidentified LAN connection. Open it´s settings by clicking Local Area Network. Go to Properties, select the Internet Protocol Version 4 (TCP/IPv4) and select Properties as shown below.
Open the Windows Network- and Sharing Centre and go to the LAN adapter properties.
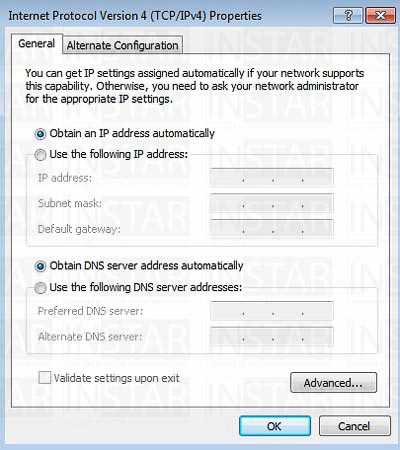
The following window will open and allow you to set a static IP address for your PC/Laptop. Submit the settings by clicking OK and return to the IP Camera Tool.
Open the IPv4 properties.
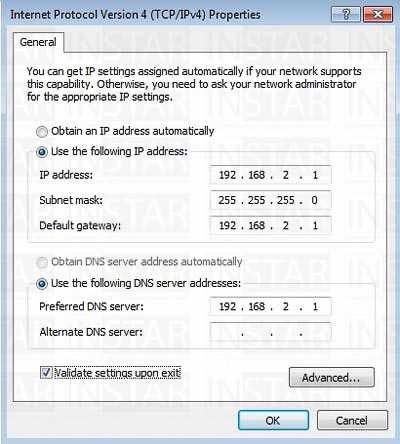
Please fill in a valid IP address for your computer and set it to be new networks gateway and DNS server (see below):
Assign a static IP address to your PC.
Assign a static IP to your Mac
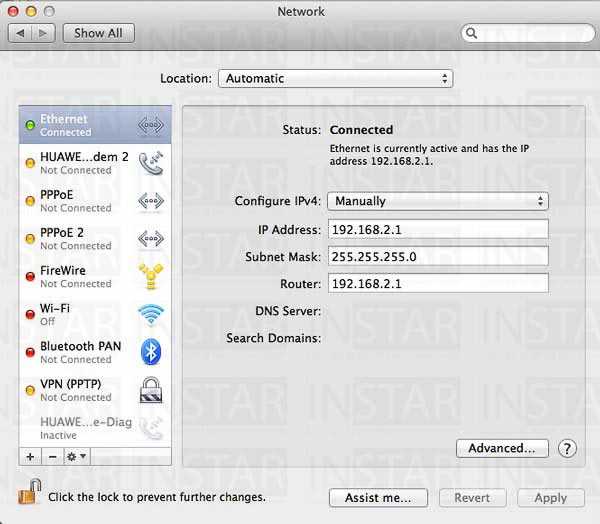
Open the menu System Preferences go to Network and click on Ethernet. Please choose Configure IPv4: Manually and type in a valid IP address. Use the same IP address as the Router IP. Submit the new settings with Apply and return to the IP Camera Tool.
Go to the System Preferences and open the Ethernet configuration.
Assign a static IP to your Camera
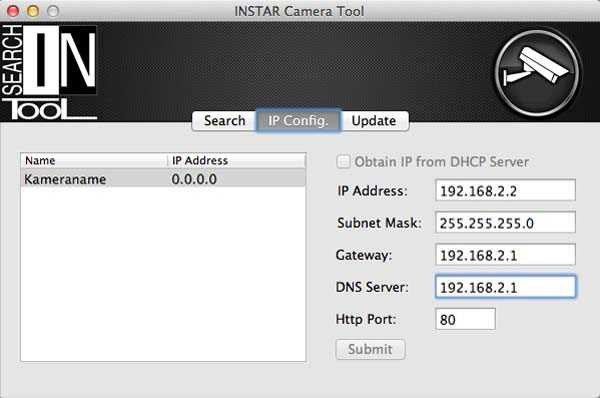
Click on IP Config and select your camera on the left side. Fill in the IP address for the camera. The address has to be in the same IP subnet you used for your computer in step 3 but has to be different from the address you choose above - e.g. just add 1 to the last octet (see example below)! The Gateway and DNS server will be the IP address of your computer that you set above.
If you are using a class C network the standard subnet mask is (Subnet Mask: 255.255.255.0).
Open the IP configuration tab of the INSTAR camera tool and set a valid IP address and submit.
After submitting the data, the camera will restart which takes about 30 seconds. Click on Search to find the camera again and double-click die camera entry to open the WebUI inside your default browser. If you want to use a different browser, type in the camera´s IP address into your browser´s address line and press Return. You are now able to change the camera´s settings and access the live stream.
Open the camera´s new IP address with your default browser.
If you choose the direct connection to do the initial WLAN configuration of your camera to integrate it into an existing WiFi network, type in the WLAN information under Network/WIFI and change the cameras IP address to a free address in the IP subnet that is used inside the wireless network. The camera will then restart - please unplug the LAN cable right after submitting the new IP address to allow the camera to connect to your wireless LAN.
Discuss this article on the INSTAR Forum !
