Enable P2P access to your camera
- Enable P2P access to your camera
- Link to your INSTAR Cloud account
- Adding your INSTAR camera
- Use of INSTAR Skills
Enable P2P access to your camera
Start with the create an account in the INSTAR Cloud. If you already have an account, you can log in there: cloud.instar.de.
Creating a test account is free of charge and gives you access to the Alexa function even after the 30-day trial period has expired. Only the storage of alarm videos in the cloud would require a paid activation code.
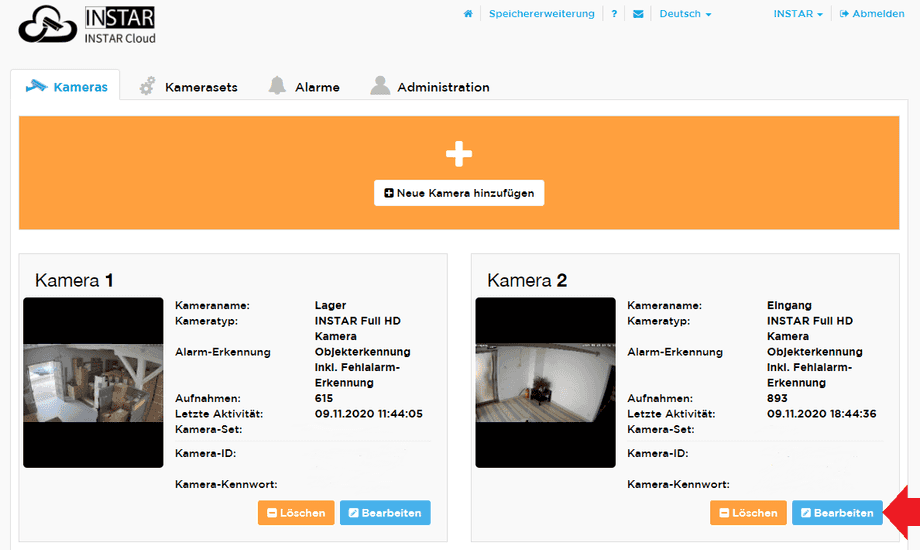
Once you have logged into the cloud, go to the Cameras tab and add a new camera there if your camera has not already been created there. After the camera is created, go to Edit for the respective camera (see screenshot below):
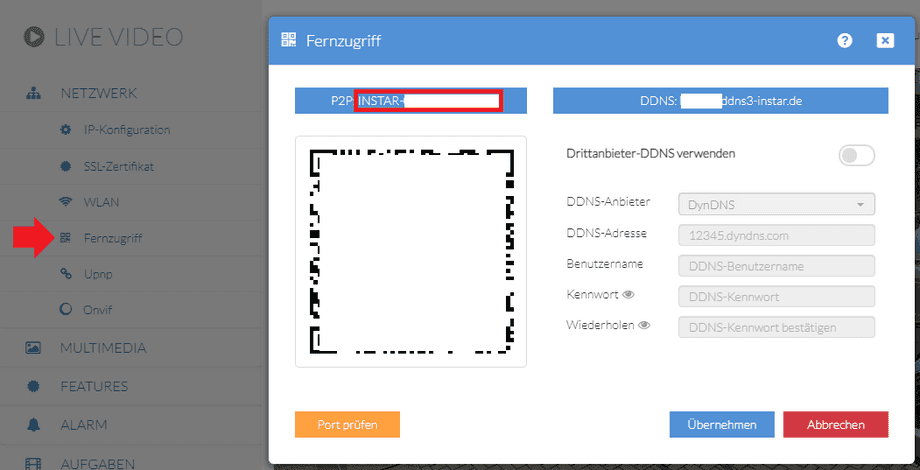
Open the web interface of your camera in a new tab and copy your P2P and Admin Login:
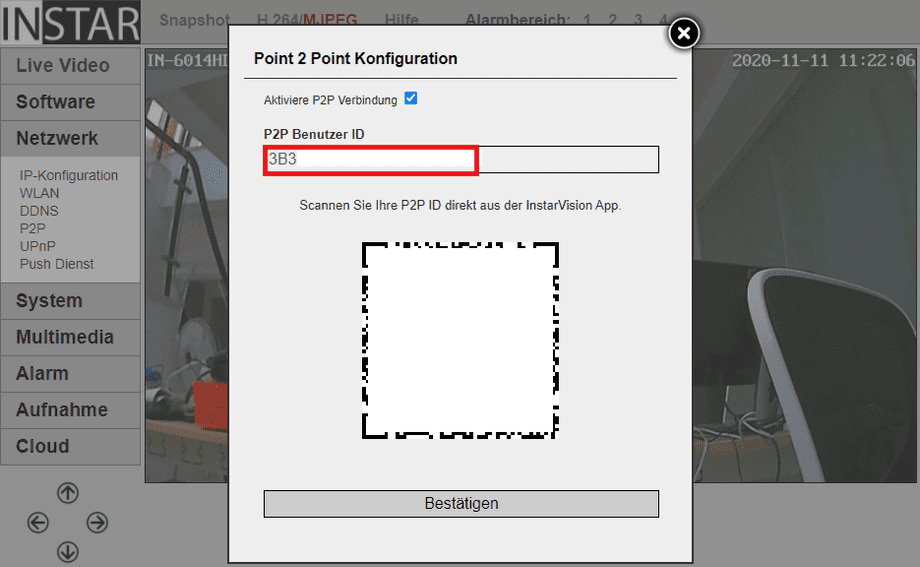
In the screenshot above you can see the menu 'Network / Remote Access' of the Full HD camera series. In case of a HD camera you can find the P2P UID under 'Network - P2P'. Please note here that the UID must start with 'INSTAR-' for it to work. In the example below there is another P2P address that does not meet this requirement. In this case please contact the INSTAR Support via Email (support@instar.com):
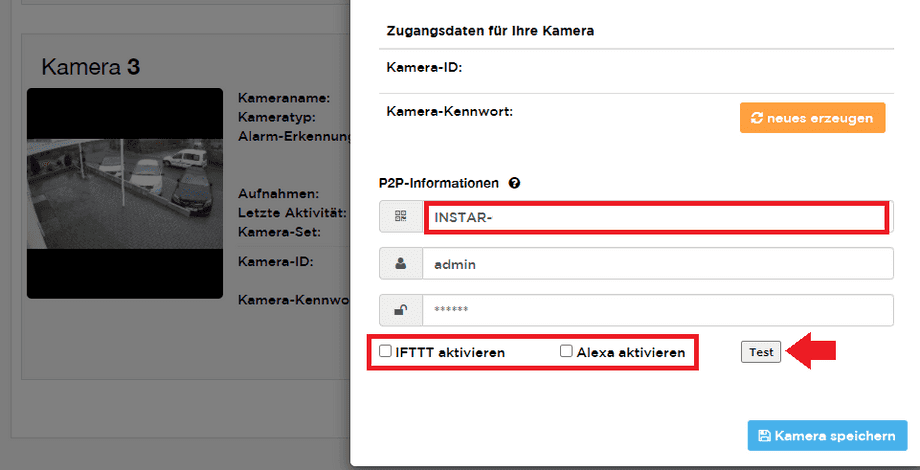
Write down your P2P information and switch back to the INSTAR Cloud. There you had previously pressed Edit in the Cameras tab for the camera. Scroll down in this input mask until you see P2P Information and enter the P2P UI of your camera and your administrator login to the camera:
By activating the service (IFTTT or Alexa) you give your consent that the INSTAR Cloud Platform may access your camera via P2P. Then click on Test to check the settings. If everything is entered correctly, you should see a Connection successful.
Alternatively via the Web Interface
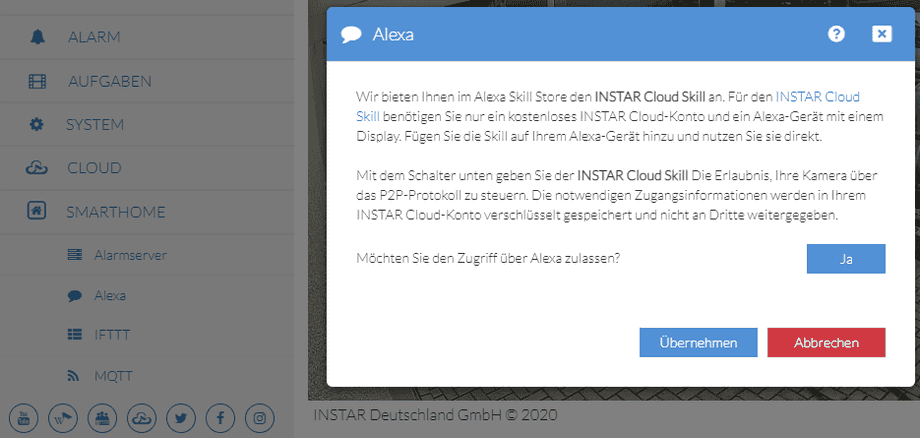
Permission for P2P access can also be granted and revoked - only Full HD cameras- via the WebUI. This way is available if the camera has already been added to the INSTAR Cloud.
In the web interface of your FullHD camera go to Smarthome in the settings and there to Alexa. As shown in the screenshot below, you can allow access via Alexa there. After clicking on Apply you will be asked if you want to enable P2P access in the cloud, please confirm this so that access via Alexa works.
If you receive the following error message, you must first add your camera to the INSTAR Cloud (see first step above):
To set this setting, the camera must be logged in to your free cloud account!
Link to your INSTAR Cloud account
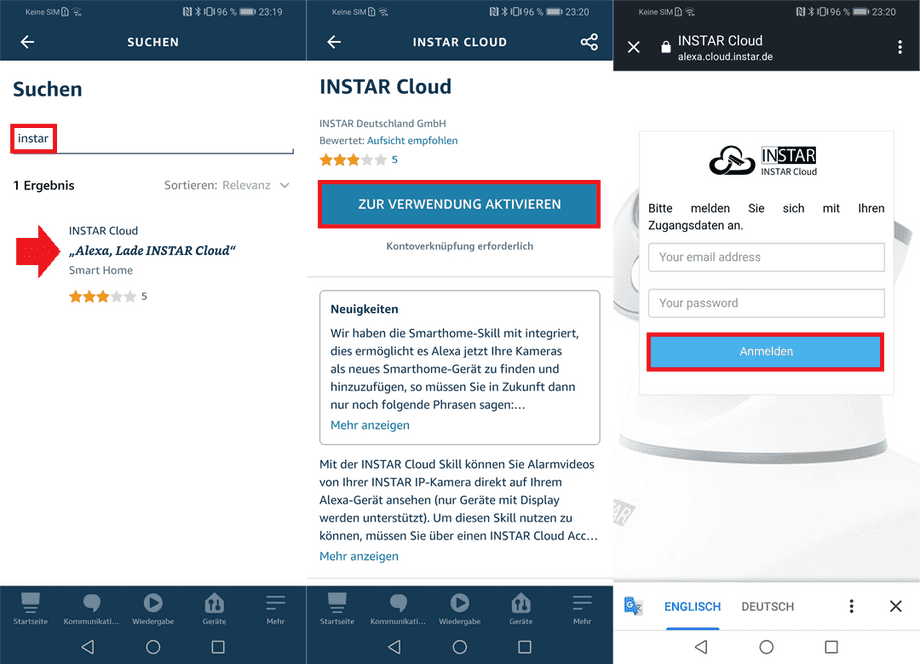
Link your INSTARStart the Alexa App on your smartphone and install the INSTAR Cloud Skill. During activation you will be asked for the login for your INSTAR Cloud Account. Enter your data to link your account with Alexa: Cloud Account
Adding your INSTAR camera
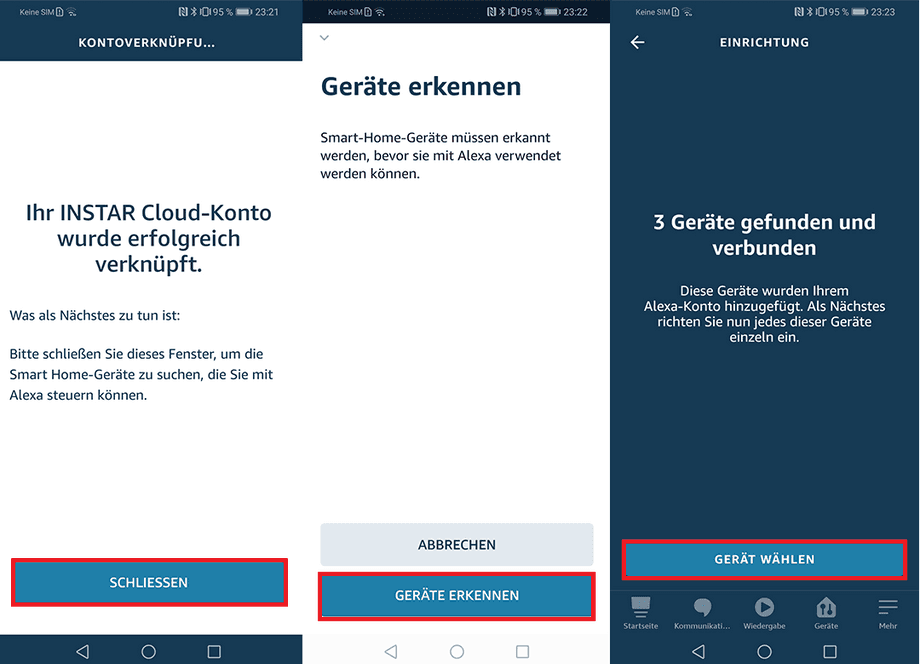
You can use Auto Search to search for compatible devices. All cameras that you have previously unlocked in the INSTAR Cloud should be displayed as available:
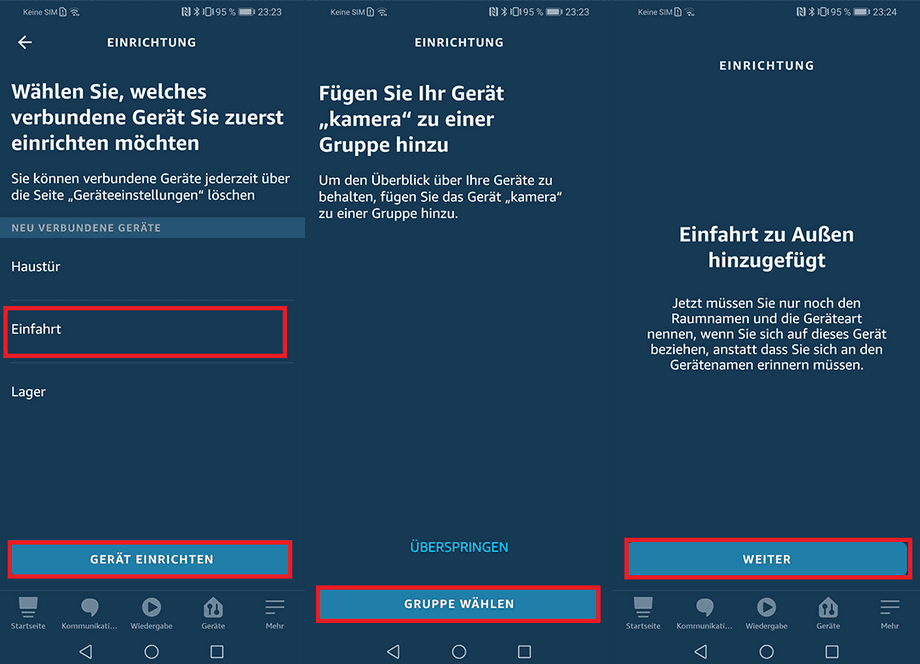
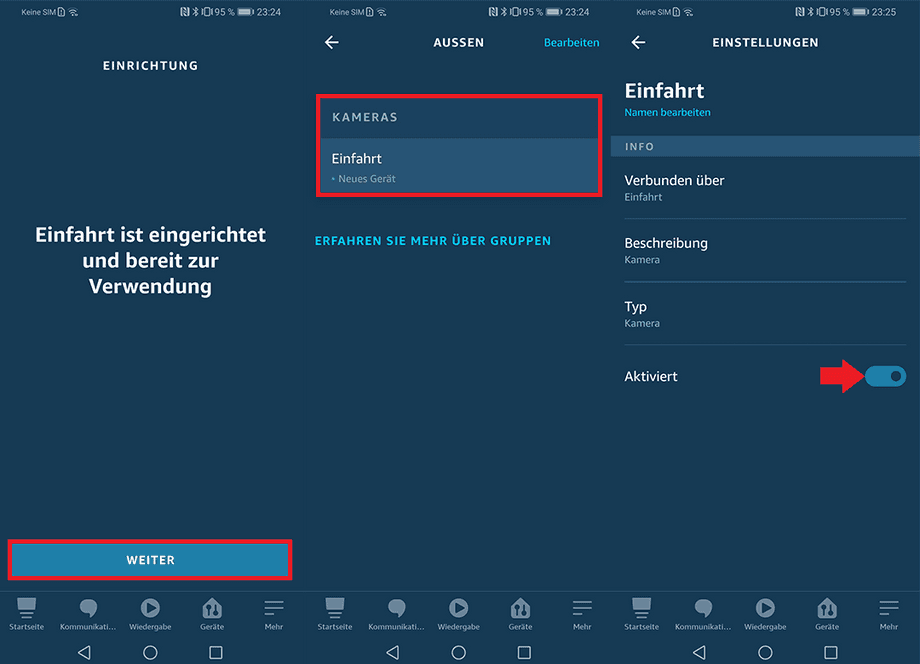
Select the camera you want to add and click on Device Setup. Adding the camera to a group as shown in the screenshot below is optional and can be skipped:
The camera will be set up for you automatically and will be available to you shortly afterwards. You can then check that the camera is also activated:
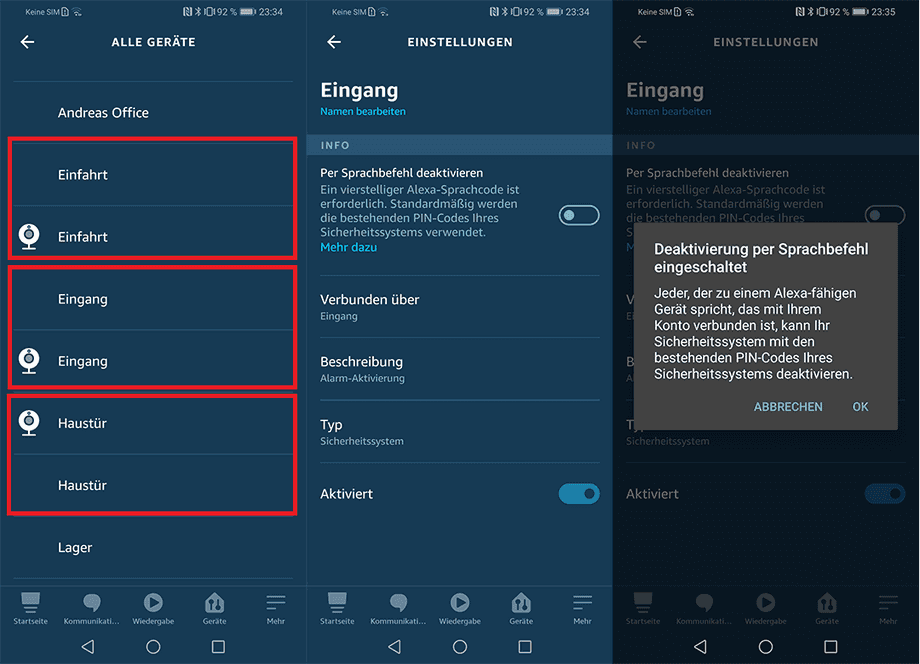
If you look at the Device Overview, all cameras are displayed twice - once as IP cameras and once as security system. You need the latter if you want to be able to disable the motion detection of your camera by voice command:
Disabling motion detection will disable the alarm function of your camera. This means that no more alarms are triggered and no more alarm recordings or alarm notifications are made.
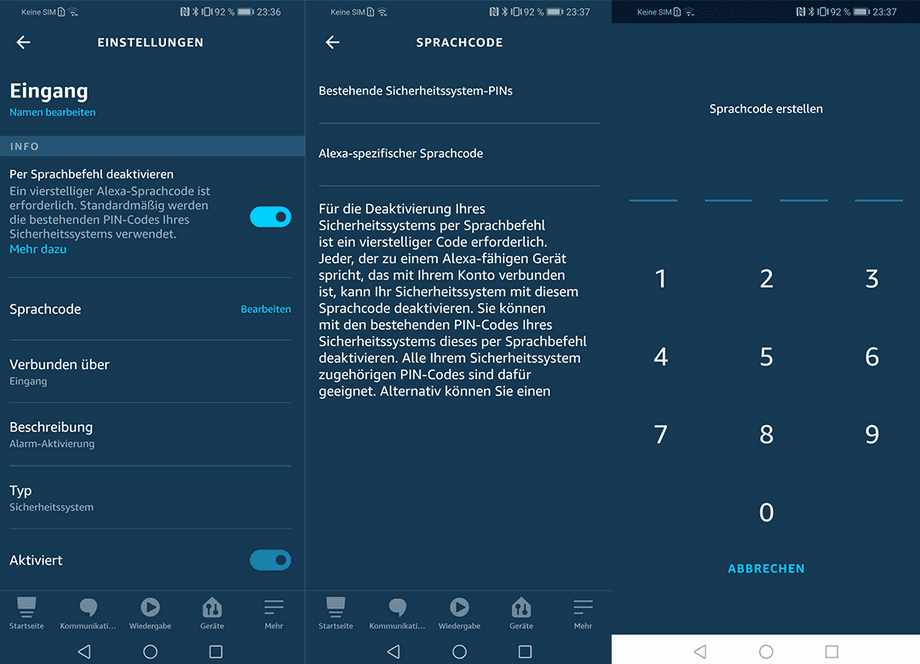
Activate the function Disable voice command and enter a PIN code:
Use of INSTAR Skills
Smart-Home Skill
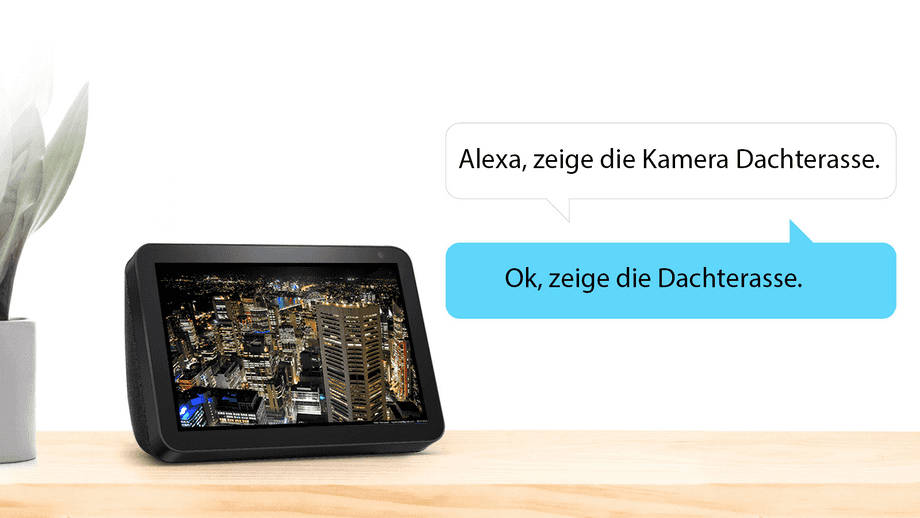
With the Smarthome Skill you can now display the live video of your camera on your Alexa device. For the camera named Dachterasse (this is the name you gave to your camera in the INSTAR Cloud) you now only need to say the following:
To deactivate the motion detection, simply type "Alexa, deactivate roof terrace". You will then be asked for the 4-digit PIN you entered in the Alexa app above.
An overview of the commands can be found under INSTAR Alexa camera commands. A list of possible error messages can be found in the Troubleshooting.
INSTAR Cloud Skill
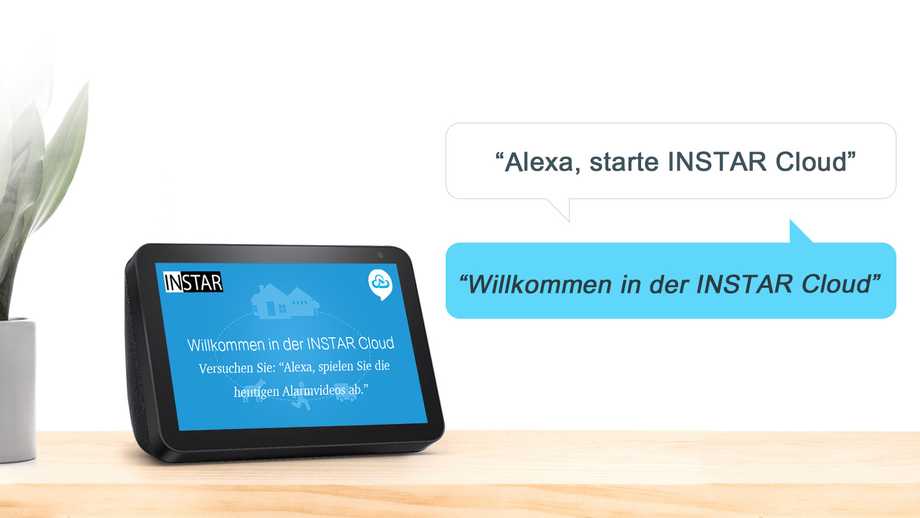
To view your alarm recordings in the INSTAR Cloud and adjust your cloud settings, you must start the INSTAR Cloud Skill:
An overview of all cloud commands can be found at INSTAR Alexa Cloud Commands
Discuss this article on the INSTAR Forum !
