INSTAR MQTT Server with Mosquitto
We are going to use the Open Source Mosquitto MQTT broker to control our INSTAR Full HD IP cameras. We will install it via Docker and run the broker on a CentOS LINUX server.
Docker Installation
Docker can be installed on Linux, Windows and macOS. In this example we will use CentOS Linux - for other operating systems, please check the official documentation.
First we need to add the repository to pull the Docker code from - type nano /etc/yum.repos.d/virt7-docker-common-release.repo and add:
[virt7-docker-common-release]
name=virt7-docker-common-release
baseurl=http://cbs.centos.org/repos/virt7-docker-common-release/x86_64/os/
gpgcheck=0
Then install Docker on Centos server:
yum update
yum -y install --enablerepo=virt7-docker-common-release docker
systemctl enable docker
systemctl start docker
Setting up Mosquitto
Since all the data inside the Docker container, that runs our broker, will be erased once the container is stopped, we want to create three directories outside of the container to store data we want to persist - the broker configuration, persistent storage and logs:
sudo mkdir /opt/mosquitto/
sudo mkdir /opt/mosquitto/config
sudo mkdir /opt/mosquitto/data
sudo mkdir /opt/mosquitto/log
Now create a configuration file that your broker should use sudo nano /opt/mosquitto/config/mosquitto.conf:
persistence true
persistence_location /opt/mosquitto/data
log_dest file /mosquitto/log/mosquitto.log
You can download a ready-to-use configuration template from here and continue working with this one instead. It already contains all the edits that we are going to add in the following steps. Note that you will have to choose the same directories as laid out in this tutorial for this file to work.
Running the Broker
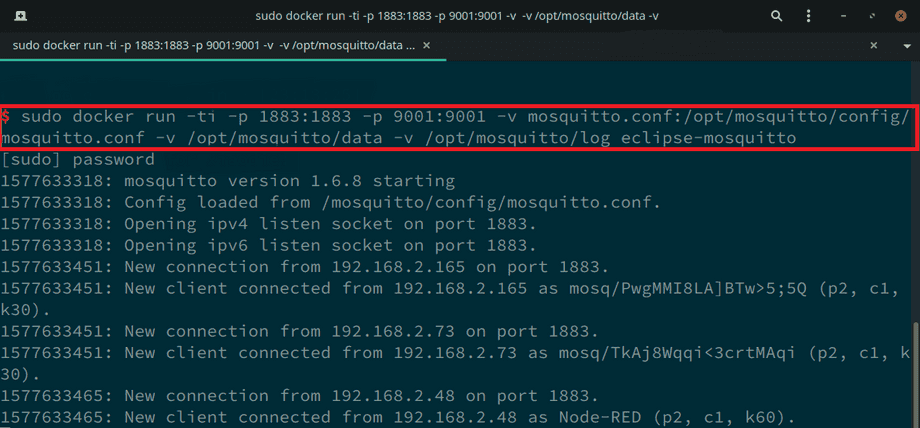
To run the Docker image for Eclipse Mosquitto with the configuration file we just created, we have to tell docker to mount the file:
sudo docker run -ti -p 1883:1883 -p 9001:9001 -v /opt/mosquitto/config:/mosquitto/config -v /opt/mosquitto/data:/mosquitto/data -v /opt/mosquitto/log:/mosquitto/log eclipse-mosquitto This Docker command runs the Eclipse Mosquitto image and mounts all three directories that we just created. For our cameras we only need to expose the port 1883. Port 9001 is used for web socket connections - if you are not planning to use software that connect through web sockets, you can remove -p 9001:9001 from the command.
User Authentication
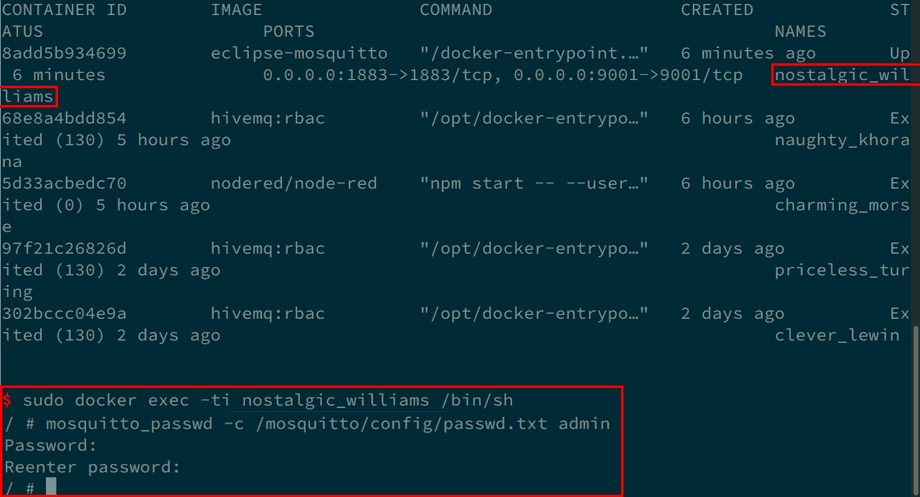
We now want to add a user authentication to our broker, so that only devices that know the login are able to connect. For this we can use a tool that is provided by Mosquitto. Lets start by logging into the docker container that runs Mosquitto. Run the following command to find out the name of the container:
sudo docker ps -aAs you can see in the screenshot below, Docker decided to call my container nostalgic_williams - yours will be different. To enter the container run the following command - just substitute the container name with yours:
sudo docker exec -ti nostalgic_williams /bin/shTo start the Mosquitto password tool mosquitto_pass run the following command - note that the admin in the end of the command is the user that is going to be generated. You can choose your own username here and add a password when prompted:
mosquitto_passwd -c /mosquitto/config/passwd.txt adminNote that the
passwd.txtfile is going to be saved in the directory/mosquitto/configthat we mounted into the container from our host system in the beginning. This means that the user you create here will be persisted if you restart the docker container.
We now have to add the generated password file to our Mosquitto configuration file. While you are still inside the docker container, use:
vim /mosquitto/config/mosquitto.confOr when you already left the container, run sudo nano /opt/mosquitto/config/mosquitto.conf to edit the configuration file directly on your host system.
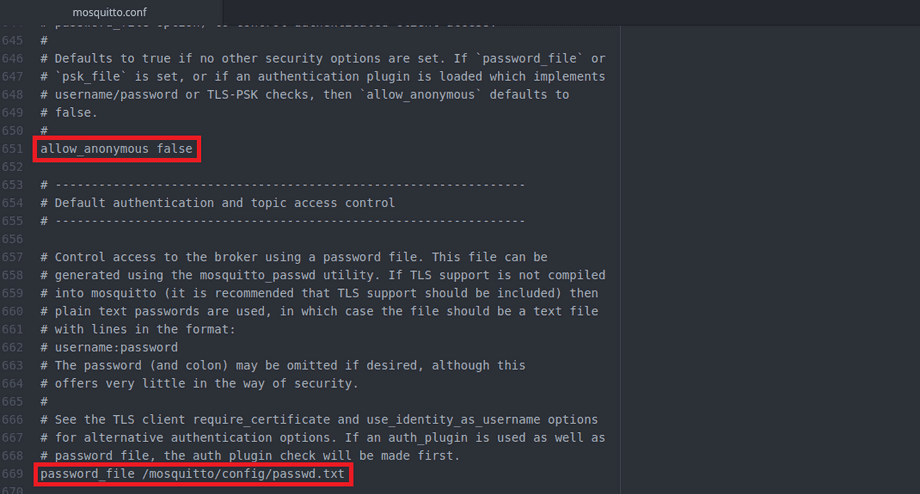
We now have to uncomment the two following lines and add the path to our password file:
allow_anonymous false
password_file /mosquitto/config/passwd.txt
You can now stop the container and restart it the way you started it earlier. All configuration should be persisted. And we can now try to connect our cameras to the MQTT service.
Connecting Cameras
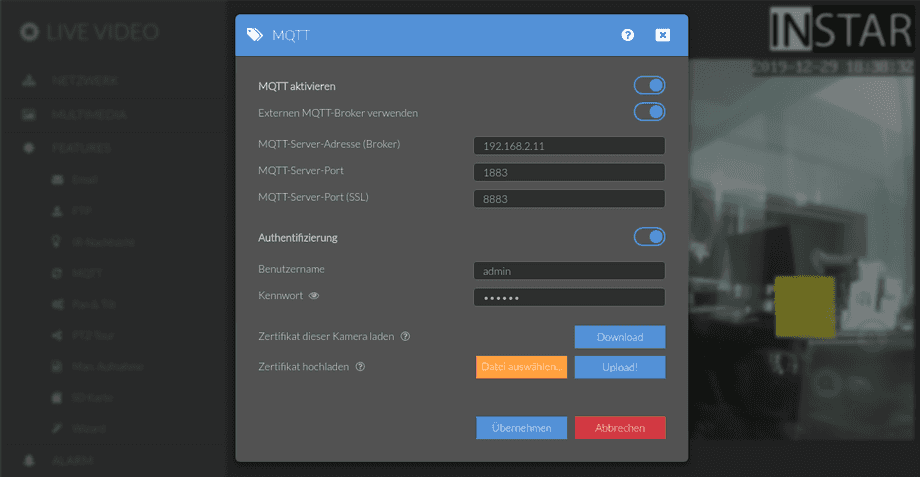
We can now configure our INSTAR Full HD cameras to connect to our MQTT broker. Start by opening the MQTT Broker Configuration in your camera's web user interface:
The IP address of my LINUX host system is 192.168.2.11, we left the MQTT ports that Mosquitto uses at their default values and I added the user login admin/instar. Change those settings according to your setup.
Node-RED
You can now connect every compatible MQTT Software to the Mosquitto Broker to control every connected camera. In the following we will show how to connect Node-RED as an example.
You can download the Node-RED flow that I am going to use from here: Download Flow.
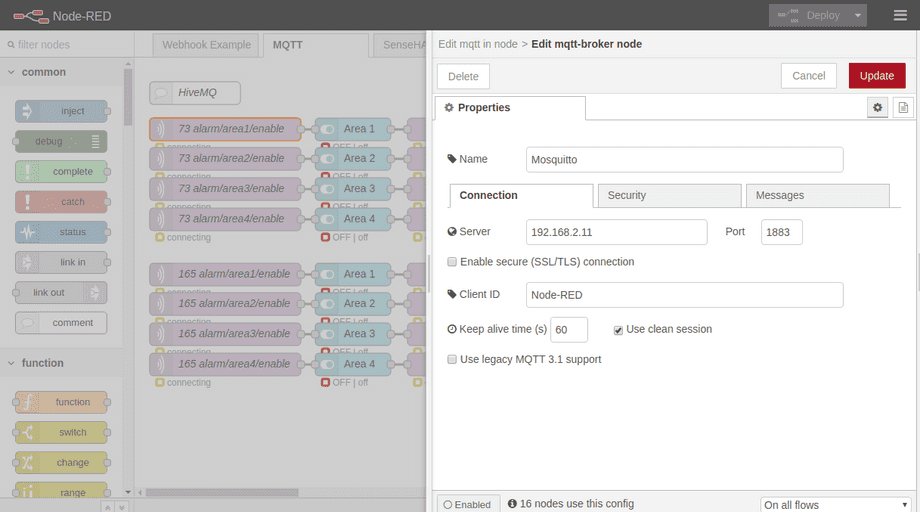
We already used this Node-RED flow in our HiveMQ Tutorial. The only thing that we have to change now to make it work with Mosquitto is to add the MQTT Broker configuration to Node-RED. Do this by adding a new MQTT Broker to every MQTT node inside the flow:
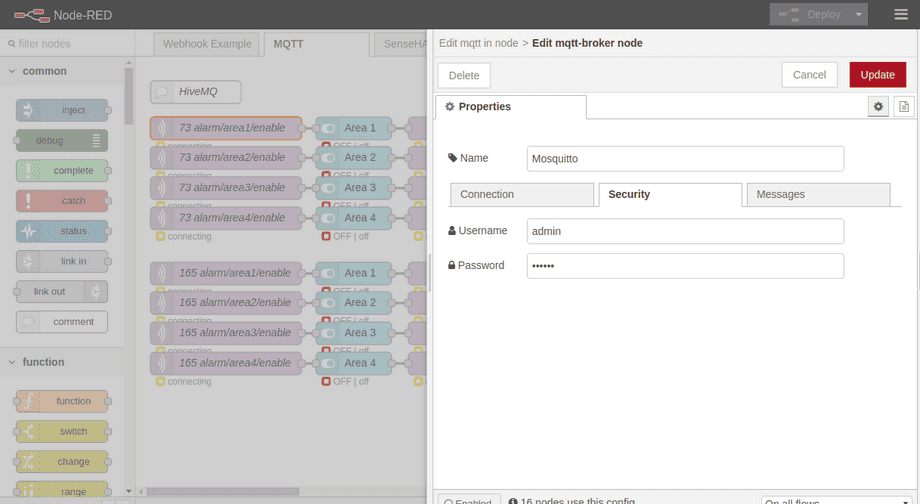
On the Connection tab add the server (broker) address and port. And on the Security tab add the Mosquitto user that you created - in my case admin/instar:
Once you deployed those changes in Node-RED, you should be able to see the same switches and buttons to control your cameras alarm areas on the Node-RED dashboard that we created HiveMQ Tutorial (note that you have to replace the cameras MQTT IDs/MAC Adresses with those of your own cameras). For more details, please continue reading our Node-RED Tutorial.

