Local FTP Server
Setting up FTP Access on a Western Digital (WD) MyCloud
In diesem Video erklären wir Ihnen wie Sie den FTP Upload bei einer WD MyCloud aktivieren und Ihre INSTAR Kamera so einrichten damit diese Videos und/oder Bilder auf die WD MyCloud aufnimmt.
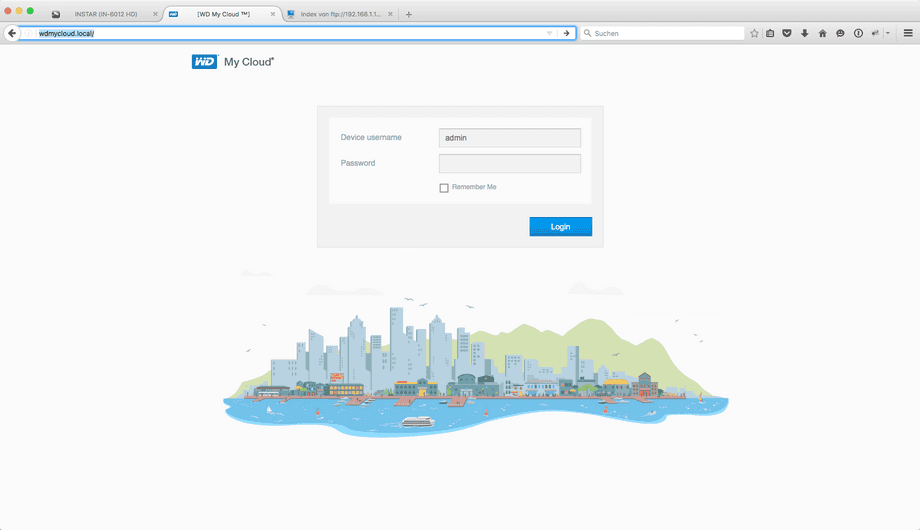
Step 1: Open the WD MyCloud in your web browser by typing http://wdmycloud.local in the address bar of your web browser. The login to your WD MyCloud should open. Please log in with your admin account.
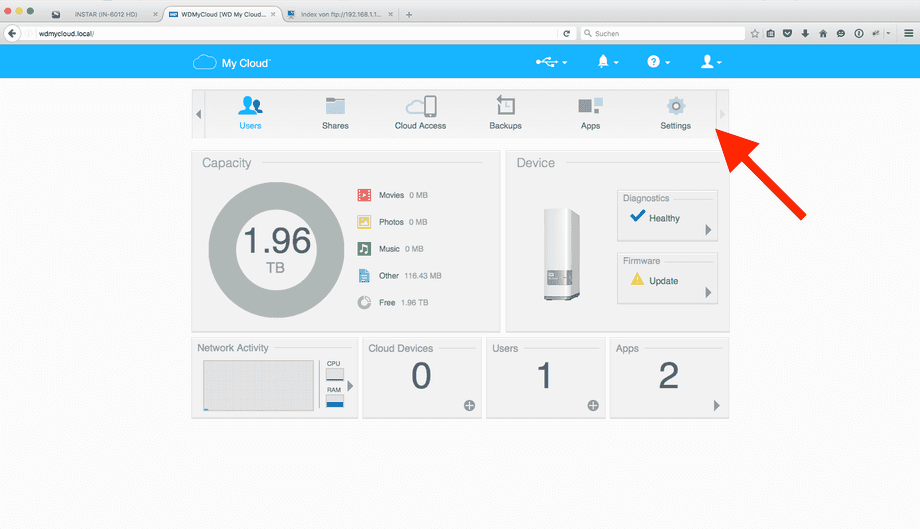
Step 2: In the upper menu please click on the arrow to the right side and select „Settings“.
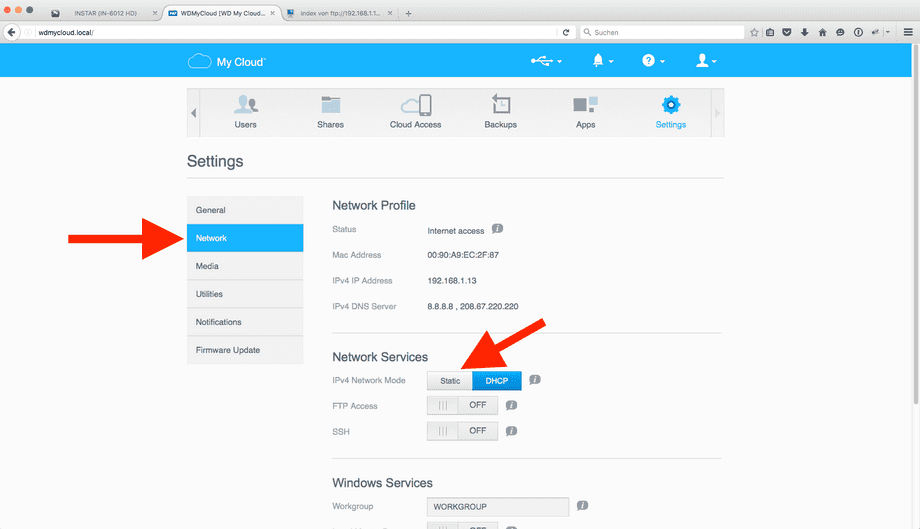
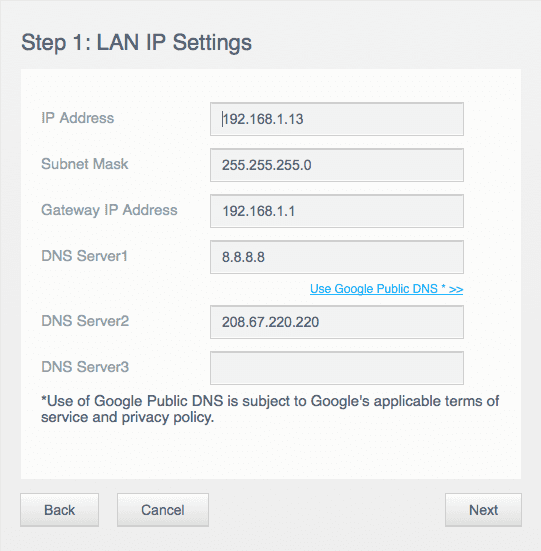
Step 3: On the left side please click on „Network“ and within the network services please switch the IPv4 Network Mode to „static“. This is important to make sure that the IP address of your MyCloud is not changing. If you are noting switching it to static, it could be that your router will assign a different IP address to your MyCloud. In this case the camera would not be able to reach it anymore and therefore will not record anymore to the MyCloud. Therefore this step is very important.
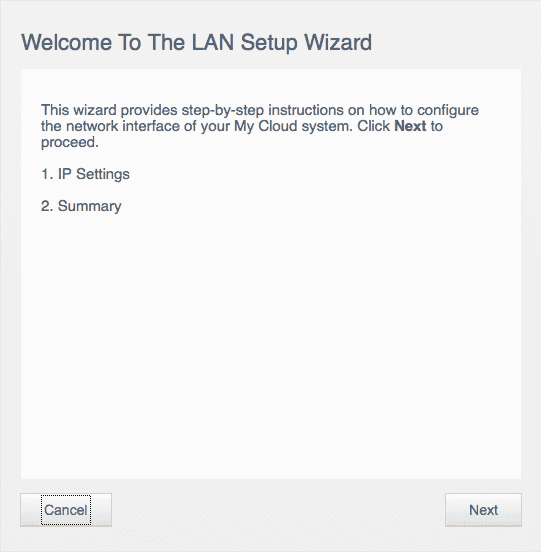
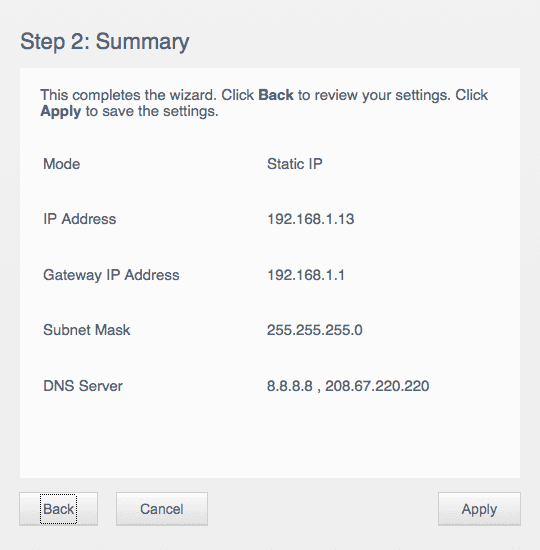
Step 4: Follow the assistant to assign a static IP address. You actually only have to click on „Next“ and „Apply“ in order to apply the settings. Please remember the IP address shown in Step2. This IP address will be the one with which you can access your WD MyCloud at any time.
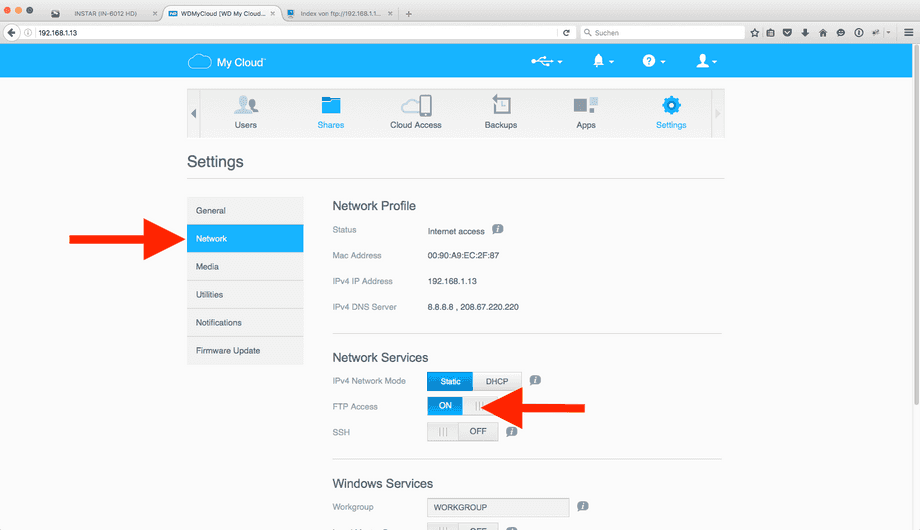
Step 5: You have to login again once the IP has been changed to a static IP. Please login in again. Once logged in, please click the right arrow again in the upper menu and click on „Settings“.
Step 6: Once again select „Network“ and within the network services please switch the FTP Access to „ON“. ON should then be shown in blue.
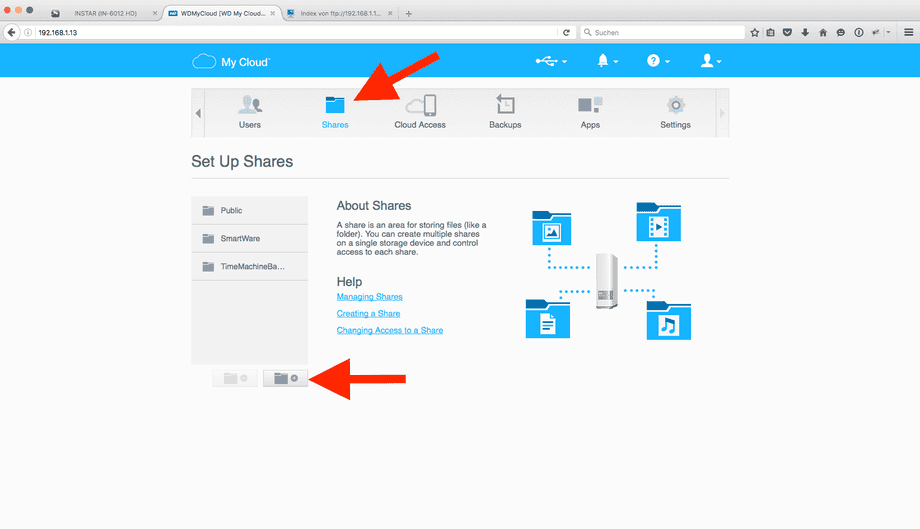
Step 7: The FTP Access in general is now activated. In order to tell the camera in which folder it should record, we will need to set up a shared Folder. Therefore please click on „Shares“ in the upper menu and inside this menu please click on the + sign in order to add a shared Folder.
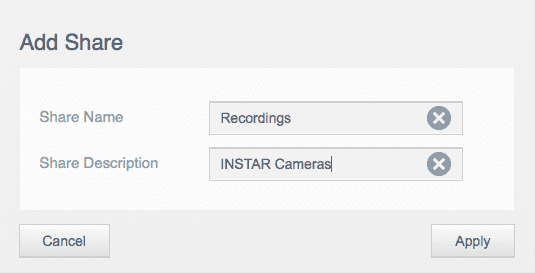
Step 8: For Share Name you can now type in the folder name in which you want the recordings being stored. In our case we choose the folder name „Recordings“. You can also add a description to the folder name. In our case we name it „INSTAR Cameras“. Once you typed in the Share Name and Description please „Apply“ the settings.
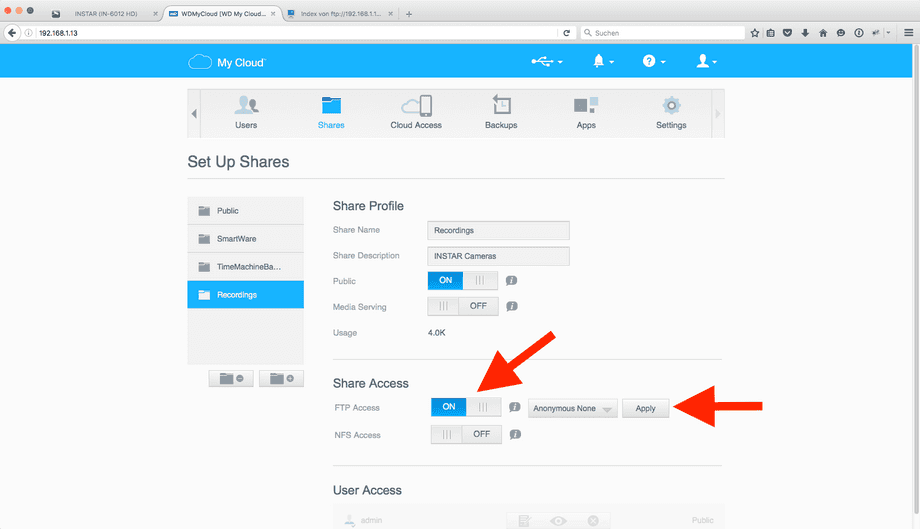
Step 9: The newly created shared Folder should now already be selected. In order to be able to access it by FTP, you will need to activate the FTP access. Please activate it. Now you still need to choose if a anonymous user can access the folder or not, in this case we recommend you to select Anonymous None“ which means that no one can access the recordings besides you. Once done please click „Apply“.
Step 10: Finally, we have to set up our camera by typing in all the FTP data. To do so, please open the web interface of your INSTAR camera. You can either type in the IP address of your camera in the address bar of your web browser, or you can use the INSTAR camera tool to search for your camera and to open it in the default web browser.
Once it is opened, please click on „Alarm – FTP“ on the left menu bar to open the FTP settings.

Step 11: In the FTP mask please fill in the following data:
- FTP Server: Here you will need to type in the IP address of your WD MyCloud. As an alternative you can also type in wdmycloud.local
- FTP Port: Please leave it Port 21 which is used for FTP.
- FTP Folder: You will have to type in the folder name which you have created before as a shared Folder on your MyCloud. In our case it was the folder „Recordings“. If you are having more than one camera, we recommend you to also add another sub folder for each camera, in our case „Camera_LivingRoom“. This way it will be easier later to separate between the different cameras.
- FTP Username: The username of your WD MyCloud.
- FTP Password: The password of your WD MyCloud.
- FTP Mode: Please keep this PASV Mode.
- FTP Folder Structure: Here you can select if the camera should record everything in one single folder, or if the camera should create a new folder for each day. If the camera created a new folder for each day, each folder will be named according to the date. Therefore it will be much easier later to search for a recording from a particular day.
Submit your settings and test them. If the test is successful, your camera should now be able to save the recordings on your WD MyCloud.
Please don't forget to activate the motion detection (alarm areas) inside your camera and also make sure you activate the FTP upload under „Alarm – Actions“. Here you can select if the camera should Upload videos or images to the FTP server (WD MyCloud) in case of an alarm event. If you activate everything accordingly, the recordings should now be saved on your WD MyCloud.
Discuss this article on the INSTAR Forum !
