OpenHAB 2 IP Camera Binding
Make your camera the heart of your smart home
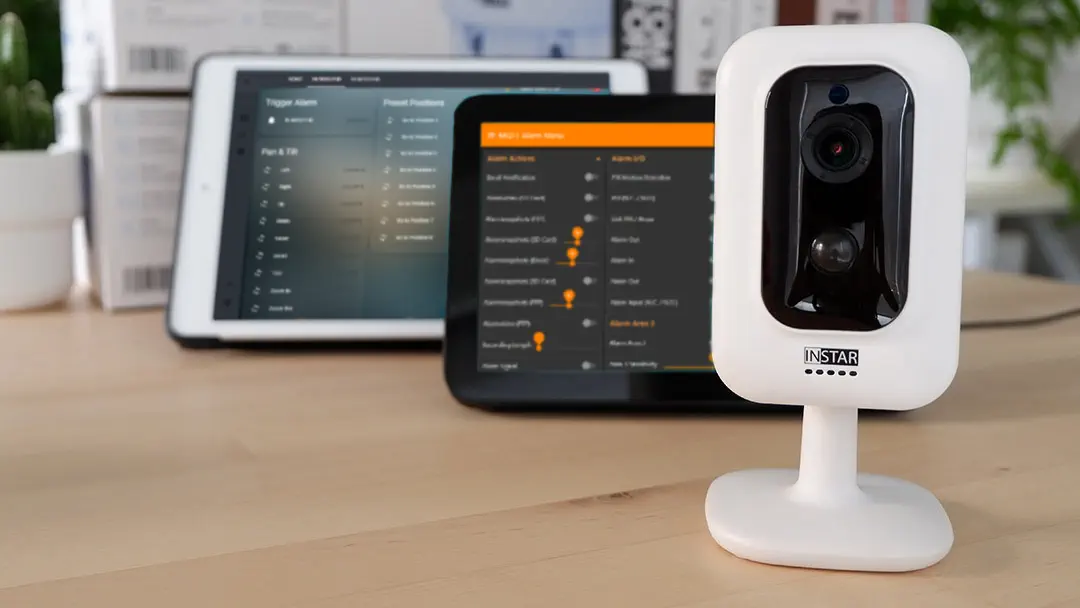
Using the MQTT interface of your INSTAR Full HD cameras you can connect them to an existing smarthome system (Home Assistant, OpenHAB, Node-RED, Athom Homey, Homematic, ioBroker, Loxone, homee) can be added. Or even make it the main broker for your MQTT sensors. MQTT allows you to automate ALL functions of your camera and link them to other services in your smarthome.
Control your camera via the IFTTT online service
On the IFTTT platform, we provided a service called INSTAR. The INSTAR applets provide you with the ability to control some settings of your INSTAR camera or INSTAR Cloud with IFTTT. You can connect INSTAR with triggers for location (Geo Location) and date & time, send notifications and much more. For example, you can connect INSTAR applets to the IFTTT location service and automatically disable the alarm when you arrive home. You can also use the INSTAR applets to create your own automation and connect them to other third-party applets.
Installation
- Download the binding already built in JAR format from here (currently this is the version
ipcamera-2020-02-01.zip):
- Place the JAR file after you unzip it into your openhab2-addons folder
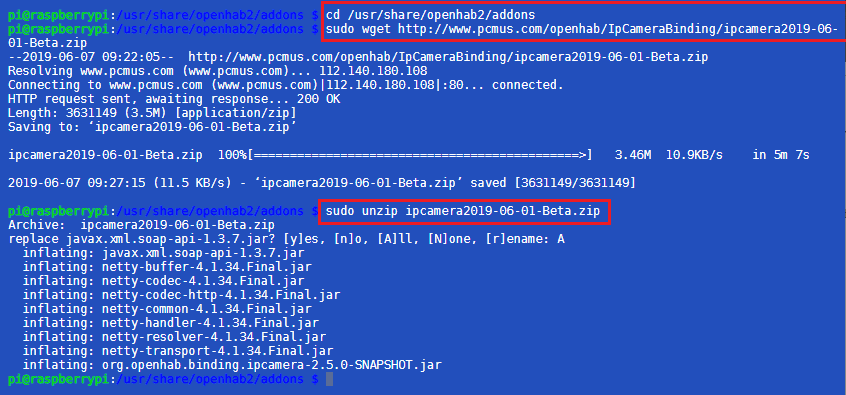
/usr/share/openhab2/addons. You don’t need to install the binding from PaperUI - once the JAR file is in the correct folder the binding should be available to use (make sure that you download the latest version and notipcamera-2020-02-01.zipused in the commands below):
cd /usr/share/openhab2/addons
sudo wget http://www.pcmus.com/openhab/IpCameraBinding/ipcamera-2020-02-01.zip
sudo unzip ipcamera-2020-02-01.zip
sudo reboot- Install FFMPEG
sudo apt update
sudo apt install ffmpeg
Configuration
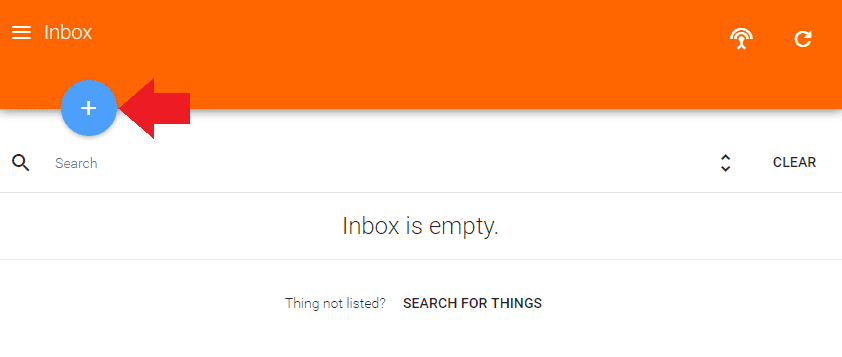
- Open the OpenHAB Paper UI and navigate to your Inbox and click on the Plus button:
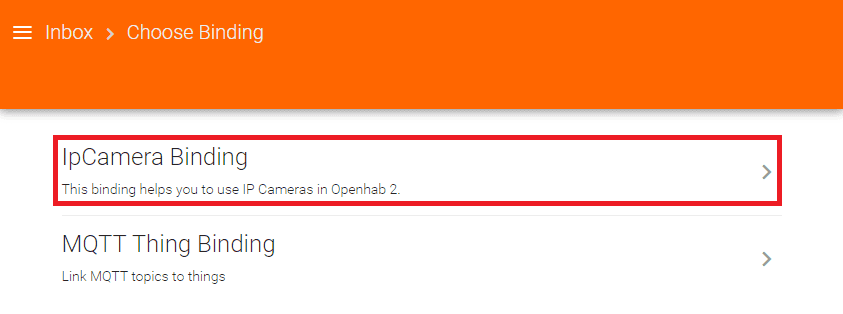
- Select the IPCameraBinding:
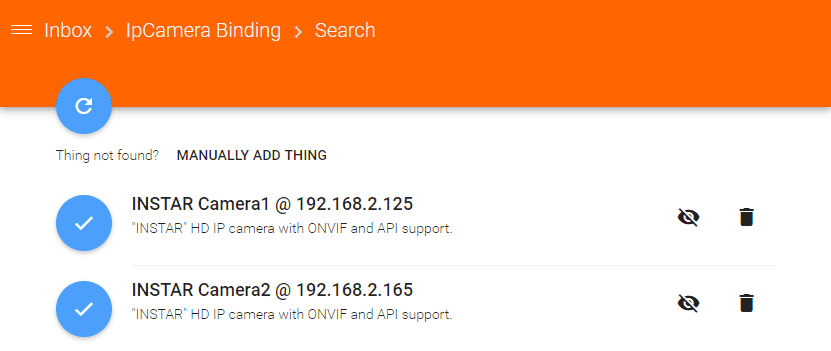
- Wait for the discovery and select your camera:
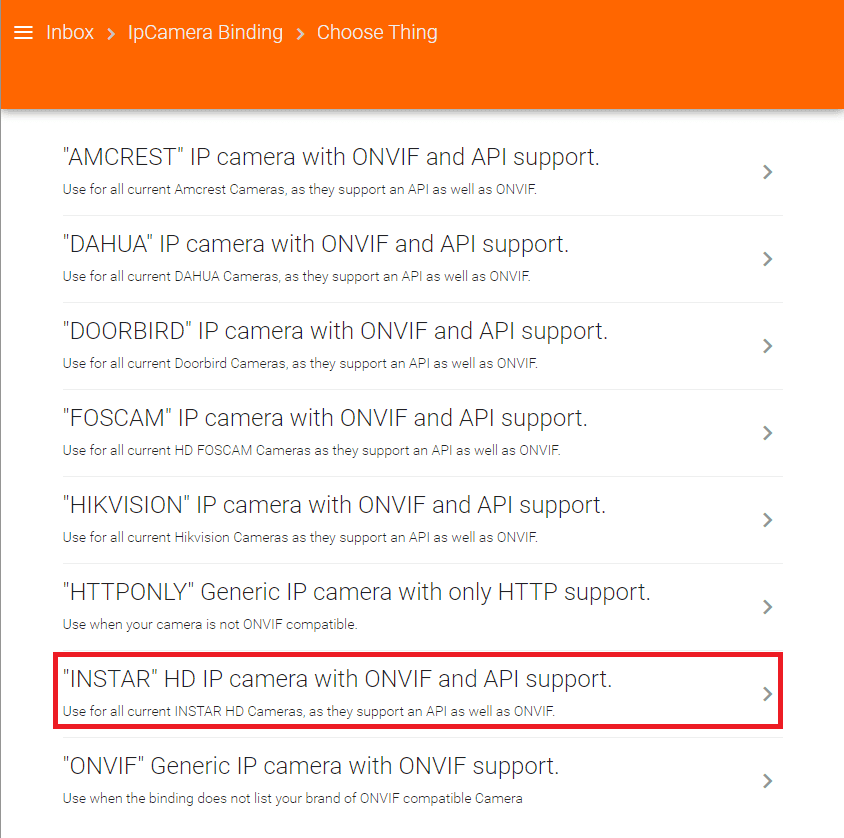
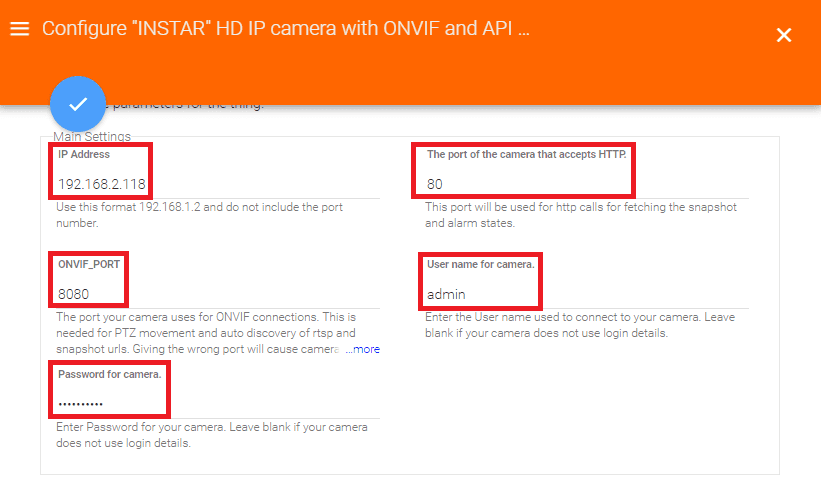
If the discovery cannot find your camera, click in Add Manually aand select INSTAR HD IP camera with ONVIF and API support
- To use the new streaming features, you need to:
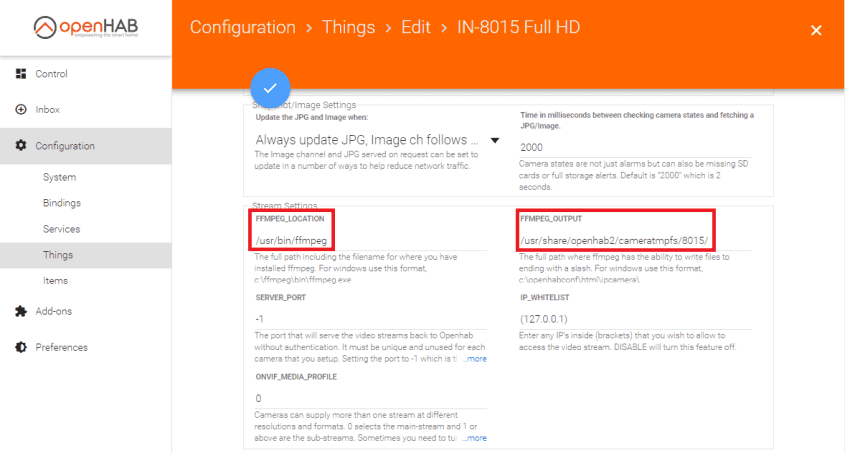
- Set a valid SERVER_PORT as the default value of -1 will turn the features off.
- Add any IPs that need access to the IP_WHITELIST surrounding each one in brackets (see below example). Internal IPs will trigger a warning in the logs if they are not in the whitelist, however external IPs or localhost will not trigger a warning in the logs as they are completely ignored and the binding will refuse to connect to them. This is a security feature.
- Ensure ffmpeg is installed.
- For cameras that do not auto detect the H264 stream which is done for ONVIF cameras, you will need to use the FFMPEG_INPUT and provide a http or rtsp link. This is used for both the HLS and animated GIF features. For most brands the ONVIF_MEDIA_PROFILE needs to match the stream number you have setup for h264. This is usually 0 and is the main-stream, the higher numbers are the sub-streams if your camera has any. The DEBUG log output will help guide you with this in the openhab.log if ONVIF is setup correctly.
The default ffmpeg directory is /usr/bin/ffmpeg you can verify this with the which ffmpeg command on your linux bash. For the output directory you can choose a path - in the example I added a folder /usr/share/openhab2/cameratmpfs/8015 inside the OpenHAB 2 install directory. Make sure to set the owner for this directory - recursively - to openhab: sudo chown -R openhab:openhab /usr/share/openhab2/cameratmpfs to allow OpenHAB to use it.
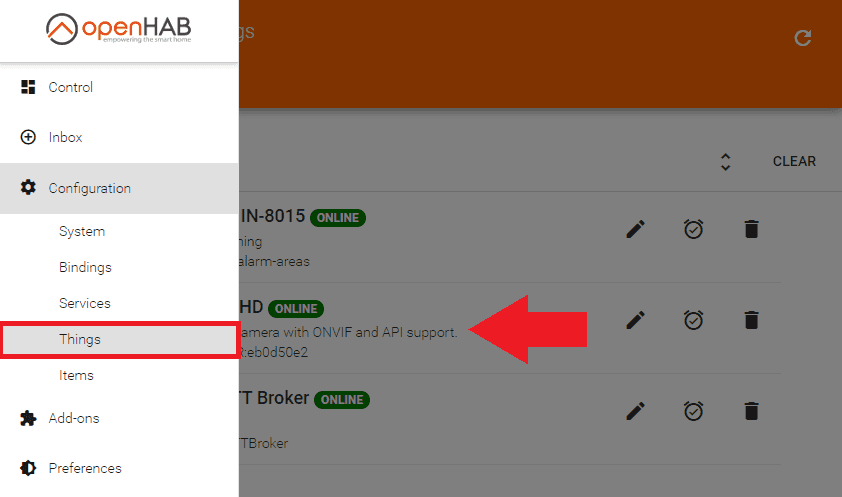
- Now go to Configuration/Things and select the camera you just created:
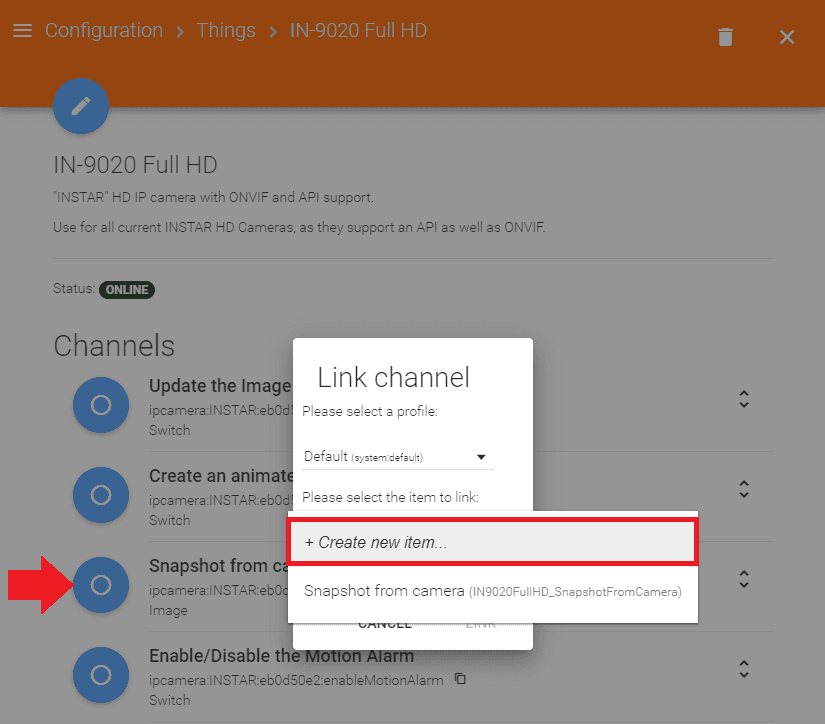
- Click on each Channel that you want to link to an Item on the Paper UI - I choose the Snapshot from Camera:
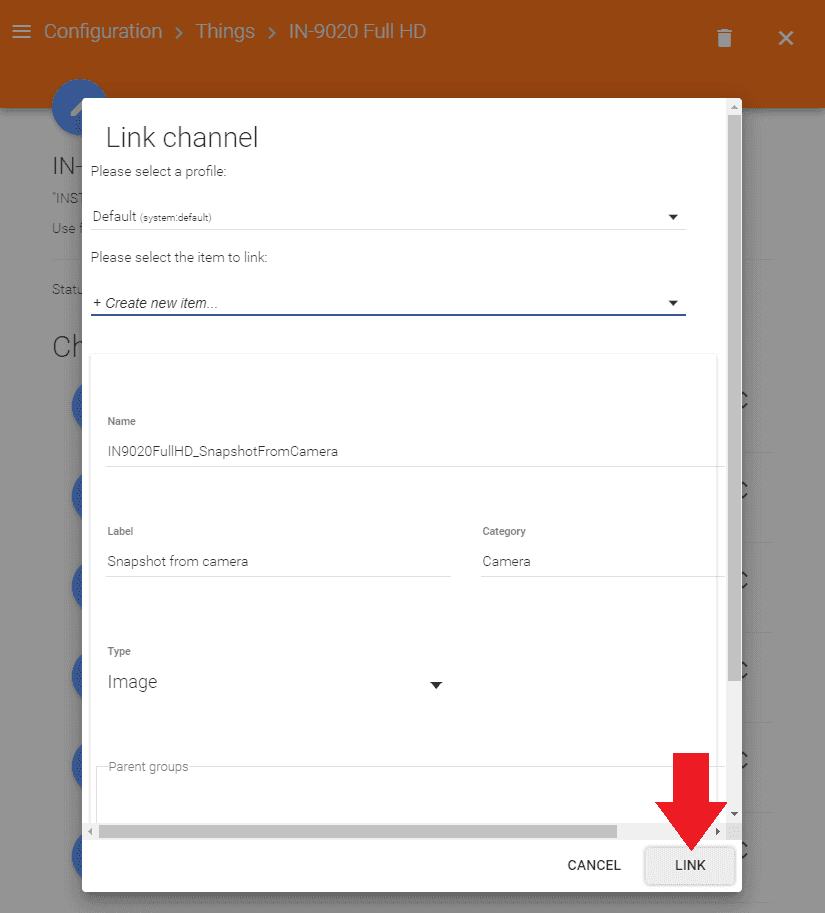
- We can leave everything by it's default value for now and click on Link:
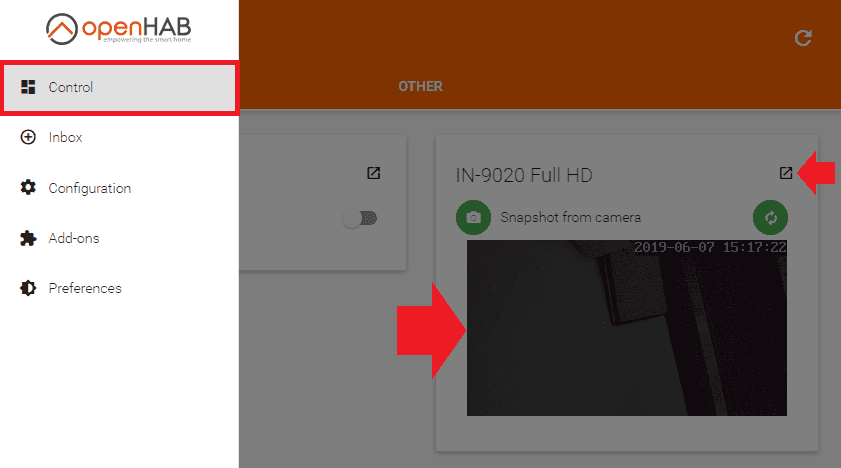
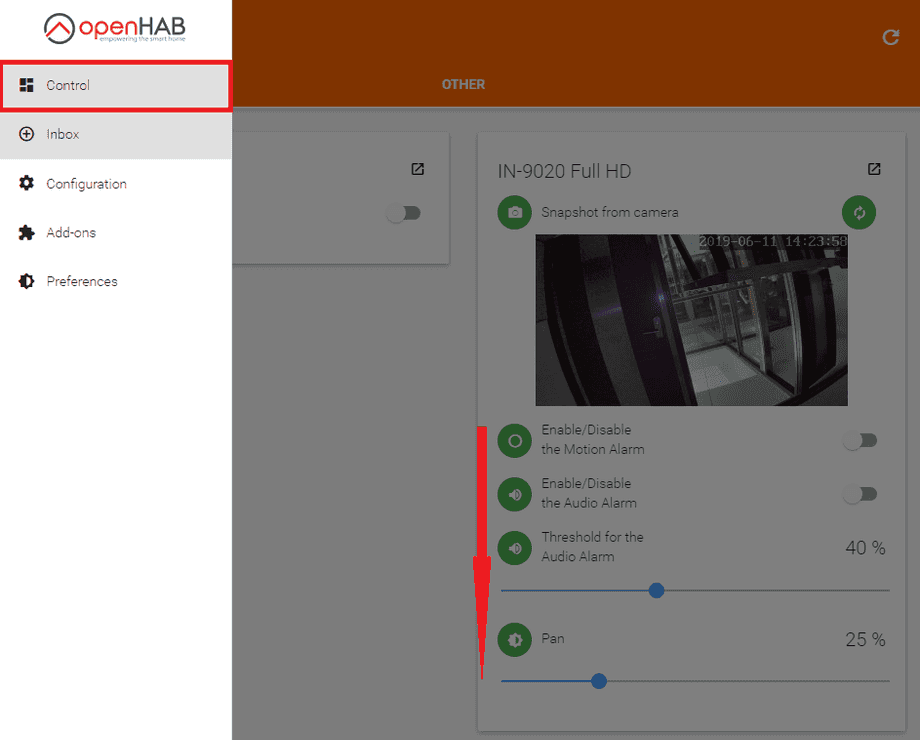
- Back on the Control Panel you can now see your cameras life video (JPG Stream):
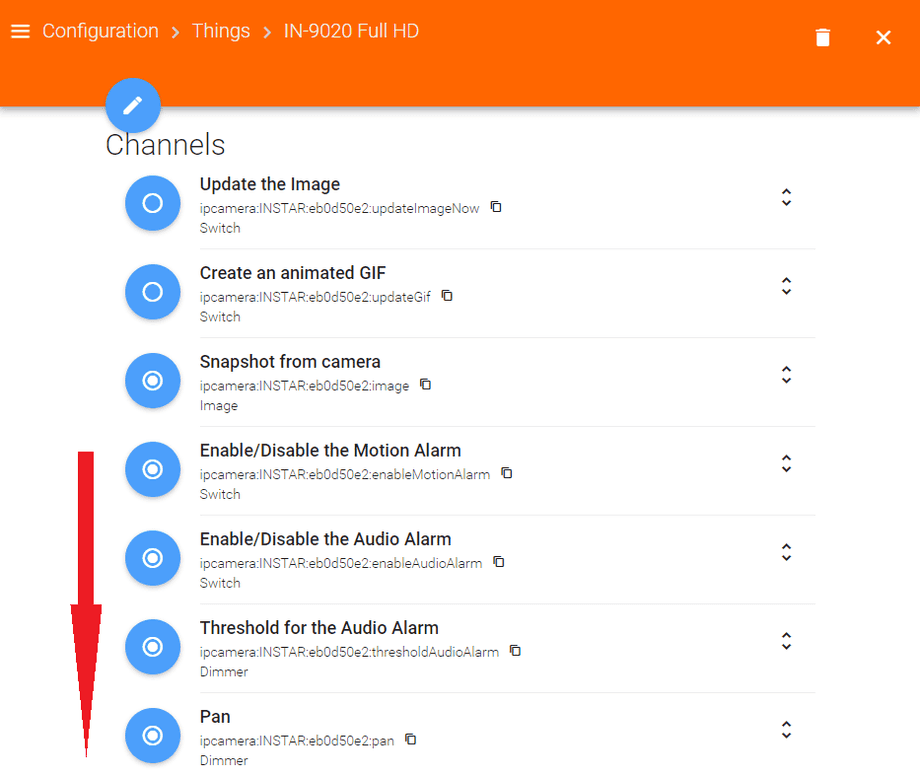
- Go back to the Things page and link as many Channels as you need:
- All Items will then be displayed on the Control Panel and allow you to control your INSTAR IP camera:

