II-d-1 Ethernet Cable
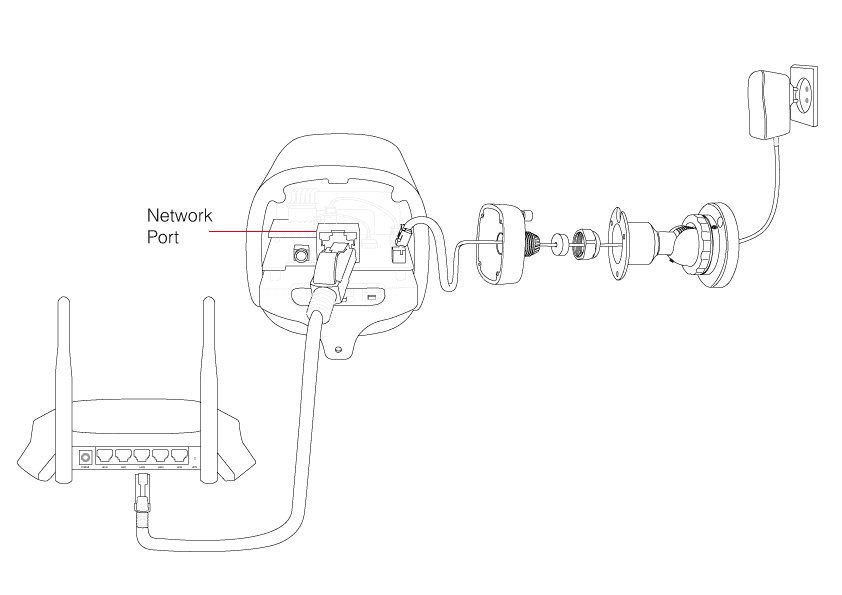
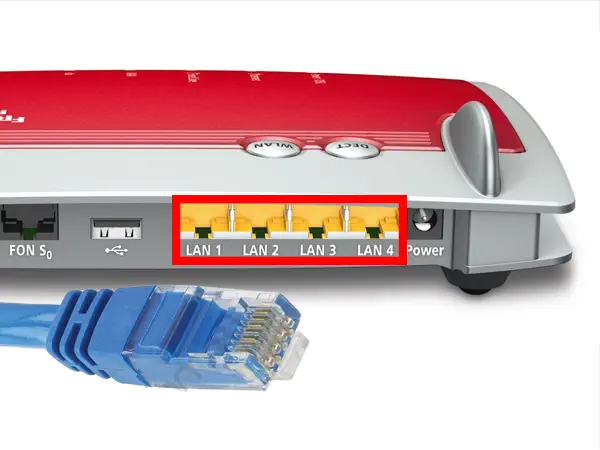
Connect the Ethernet cable with your camera´s Ethernet port. Then plug in the other end of the Ethernet cable to a free LAN port on your internet router.
II-d-2 Router Connect
Connect the cameras network cable to a free LAN port on your internet router. Plug in the power supply to boot-up your camera.
II-d-3 Camera Tool
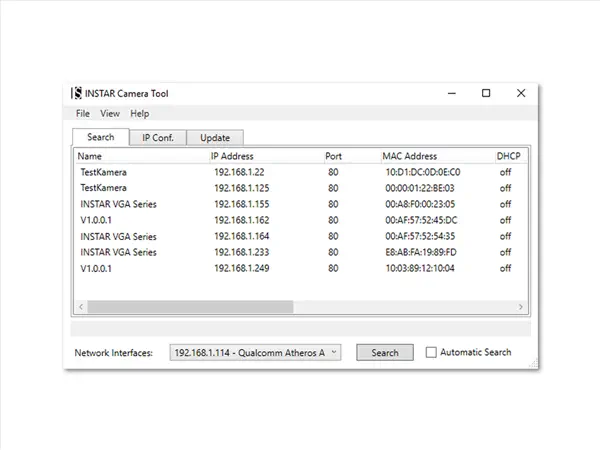
Start our IP Camera Tool from the Software CD and double click on the name of the camera.
II-d-4 User Login
The default administrator login is User/Password: admin / instar. Our Installation Wizard will lead you through the rest of the installation process.
II-d-5 Video Plugin
You no longer need to install the Adobe Flash Plugin to display your cameras h.265 video stream.
II-d-6 WiFi Antenna
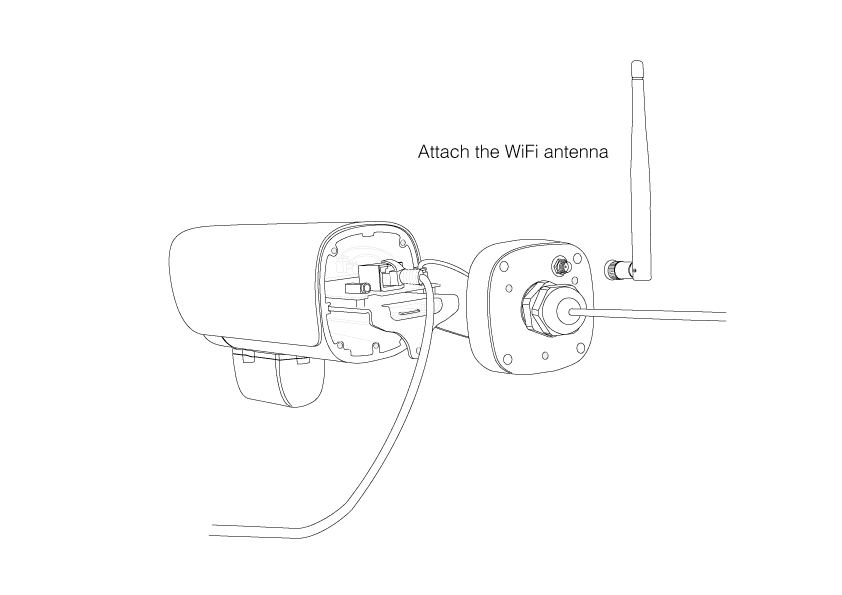
Now attach the WiFi antenna and make sure that the antenna cable is still connected to the WiFi board (see step #3 Here).
II-d-7 WiFi Connection
Access your camera´s WiFi Settings and enter your WiFi information. Save your credentials, unplug the network cable and restart your camera, to connect it to your WiFi network.
II-d-8 Internet Access
You need to Forward a Port inside your router, if you want to access your camera over it´s DDNS Address from the internet. Alternatively, you can use the P2P User ID to access your camera with our smartphone app (see Step 13 below).
II-d-9 DDNS Access
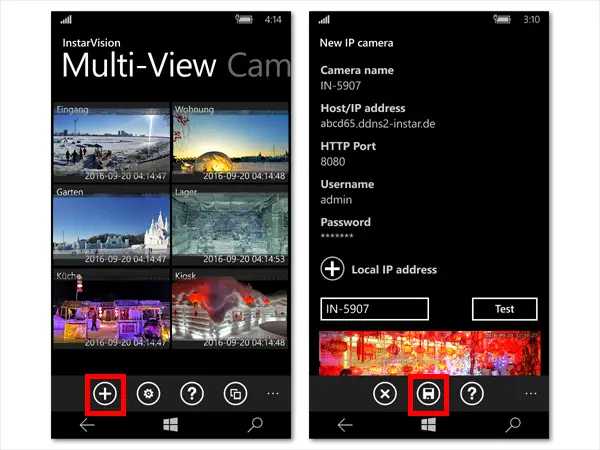
Now you can enter your camera´s DDNS information to our free Windows Phone, Windows Metro, Android, iPhone, iPad or Blackberry App.
II-d-10 P2P Access
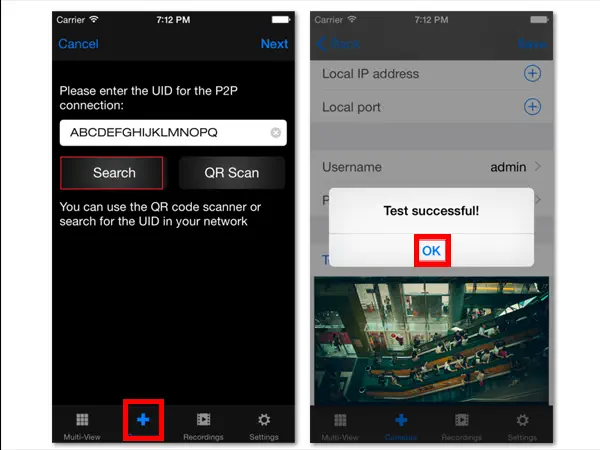
If you cannot open a port for camera´s DDNS service, you can still use the POINT-2-POINT SERVICE instead with our Windows Phone, Windows Metro, Android, iPhone, iPad or Blackberry App.
II-d-11 Reassemble
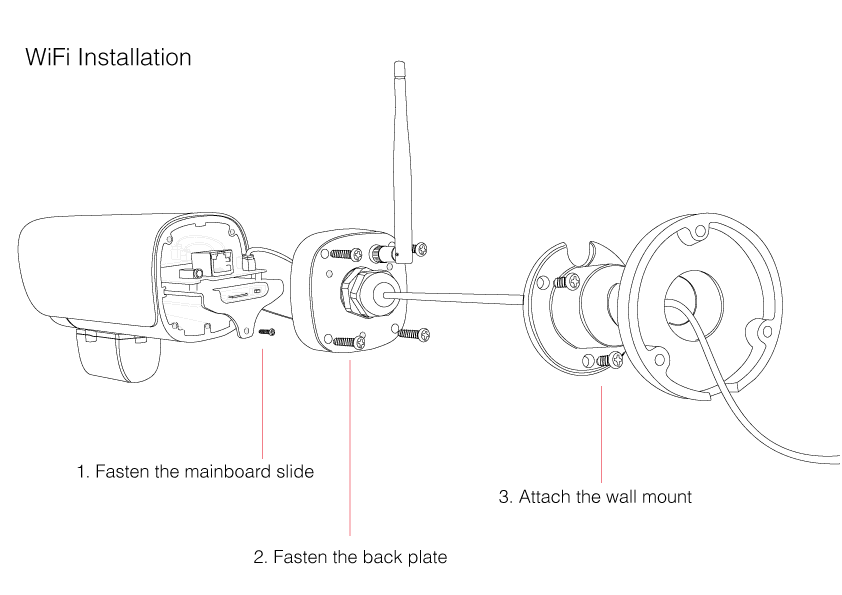
Fasten the mainboard slide and use the 4 screws to mount the back plate back onto your camera casing. Screw the wall mount to the back of the camera.
II-d-12 Final Installation
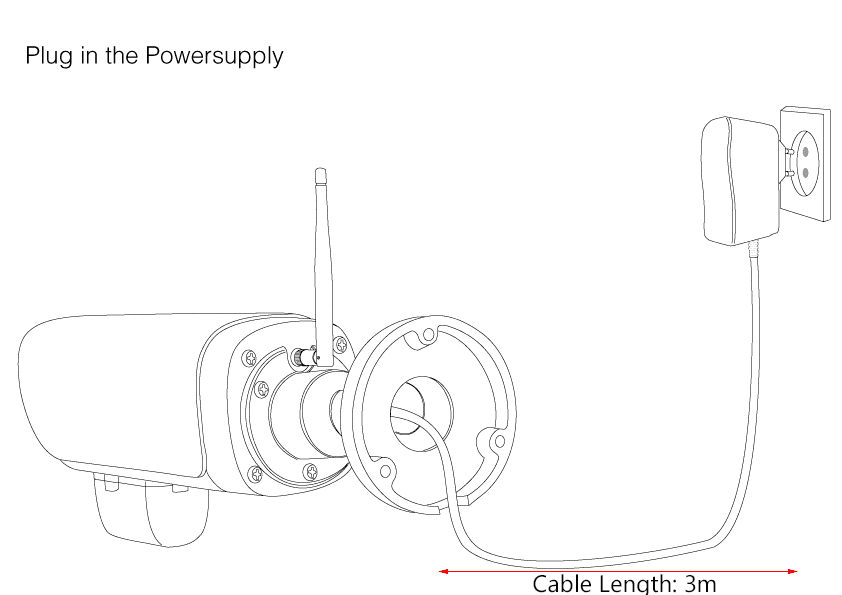
Install your camera and plug in the power supply. The camera should automatically reconnect itself to your WiFi network.
