Set up a ProFTP Server for your WQHD Camera
Q: I want to use my cameras FTP service to upload alarm recordings and snapshot series to my Linux Server (Raspberry Pi).
A: The simplest way would be to use your Internet Router as FTP Server. If you want to use a Linux Server like an Raspberry Pi we recommend using the sFTP Service instead of FTP or FTPS. But of course you can also set up your own FTP server instead. I would recommend building an vsftpd Docker image for this task.
Or you can install the server software directly from your Linux Console. In the following tutorial I want to go throught the steps of setting up ProFTPD with a self-signed TLS ertificate and connecting with an WQHD and Full HD camera.
Install ProFTP on Debian Linux
apt update && apt upgrade -y
apt install proftpd-basic -y
We can now edit the default ProFTP configuration file in /etc/proftpd/proftpd.conf. Or alternativly, create a custom configuration file in the directory /etc/proftpd/conf.d/. This will override rules from the default configuration file:
nano /etc/proftpd/conf.d/custom.confAdd the following content to this configuration file and adjust it if necessary:
# FTP users don't need a valid shell
<Global>
    RequireValidShell off
</Global>

# Disable IPv6 (if wanted)
UseIPv6 off

# Set home directory as root directory for FTP users
DefaultRoot ~

# Allow login only for users of the group "ftpuser"
<Limit LOGIN>
    DenyGroup !ftpuser
</Limit>

# In some cases you have to specify passive ports range to by-pass
# firewall limitations. Ephemeral ports can be used for that, but
# feel free to use a more narrow range.
PassivePorts 4242 4243
Restart the ProFTPD Server and check if the service is satisfied with your configuration:
systemctl restart proftpdAnd we can also make sure that our firewall - for example ufw - will allow clients to connect:
ufw allow 20:21/tcp
ufw allow 4242:4243/tcp
ufw reload
Add the FTP User
Now you have to create the group ftpuser. Use the following command to create the group:
addgroup ftpuserNext, we have to create the user that is allowed to log in to the FTP server:
adduser ipcamera --shell /bin/false --home /home/ipcamera
passwd ipcamera
Add the FTP user you just created to the group ipcamera so that this user can log in to the FTP server:
adduser ipcamera ftpuserTesting the Login with Filezilla (optional)
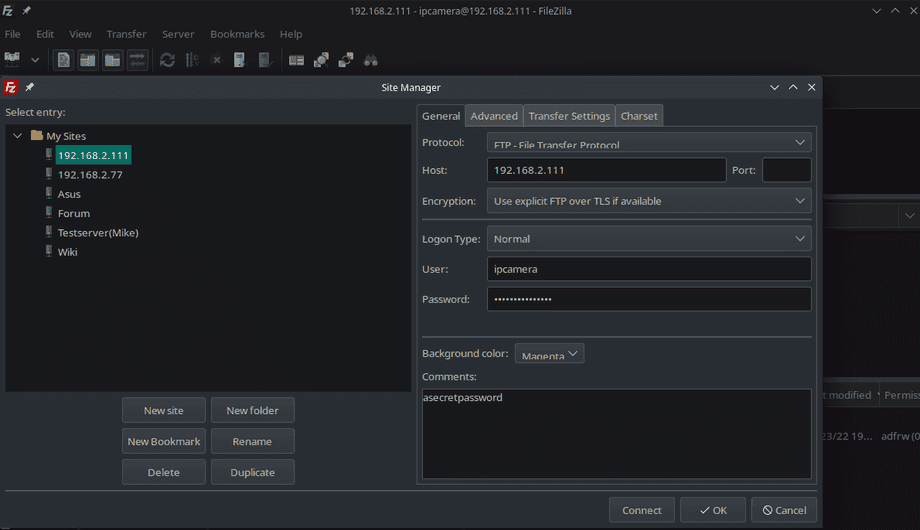
If you have the Filezilla client at hand you can now use it to connect with your server using the new ftpuser and the local IP of your server:
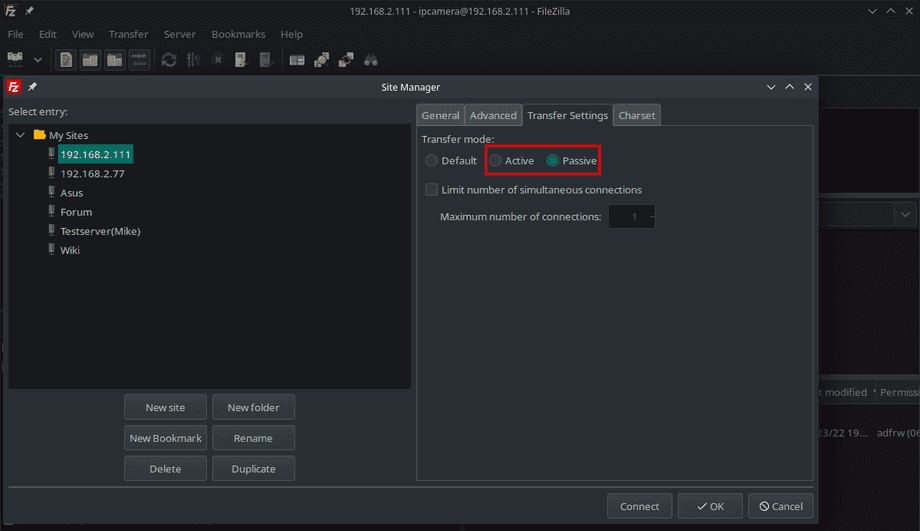
Since we limited to PASV port range to 4242 - 4243 and made sure that our firewall gives us access to those ports we can now use either the Active (PORT) or Passive (PASV) mode to connect:
You should be able to connect and uploade / create items.
Set up TLS Encryption
The FTP protocol transfers login information as well as sent data in cleartext. The most common solution is encryption via TLS, which can be set up with minimal effort using the free OpenSSL software.
apt install opensslStarting by adding to our custom configuration file custom.conf from the previous step we now need to add a TLS certificate to our server. If your server runs on a public server you can use a service like Let's Encrypt / Certbot to generated a valid certificate for the domain name of your server. You can use this certificate for your Web as well as your FTP server. Otherwise you can follow our tutorial on how to generate your own CA certificate. This tutorial goes through the steps of generating a valid CA cert for a local domain (provided by an AVM Fritzbox Home Internet Router) and put it to use with an external MQTT Broker. The same certificate can be used here as well.
But in the following steps we will simply generate a self-signed certificate that can be used with an local IP address (instead of a domain name). Of course, this means that we will have to activate the insecure mode in our cameras FTP client. This does not mean that the encryption will be weaker, but the camera will not try to verify if your personal FTP server really is the server the TLS certificate was issued to.
Generate Certificate and Key
Start by creating a directory for your certificate mkdir /etc/proftpd/ssl then run the following command to generate the key and certificate with a lifetime of 1 year:
openssl req -new -x509 -days 365 -nodes -out /etc/proftpd/ssl/proftpd.cert.pem -keyout /etc/proftpd/ssl/proftpd.key.pemSince we are not planning to verify this certificate you can leave all the answers blank except the FQDN - here you can add the local IP of your FTP server, e.g. 192.168.2.111:
Generating a RSA private key
..........................................................+++++
...................................................+++++
writing new private key to '/etc/proftpd/ssl/proftpd.key.pem'
-----
You are about to be asked to enter information that will be incorporated
into your certificate request.
What you are about to enter is what is called a Distinguished Name or a DN.
There are quite a few fields but you can leave some blank
For some fields there will be a default value,
If you enter '.', the field will be left blank.
-----
Country Name (2 letter code) [AU]:.
State or Province Name (full name) [Some-State]:.
Locality Name (eg, city) []:.
Organization Name (eg, company) [Internet Widgits Pty Ltd]:.
Organizational Unit Name (eg, section) []:.
Common Name (e.g. server FQDN or YOUR name) []:192.168.2.111
Email Address []:.
Configure ProFTPD
Now create a configuration file to activate the mod_tls module in proFTPD /etc/proftpd/conf.d/tls.conf:
<IfModule mod_tls.c>
    TLSEngine on
    TLSLog /var/log/proftpd/tls.log
    TLSProtocol TLSv1.2 TLSv1.3
    TLSRSACertificateFile /etc/proftpd/ssl/proftpd.cert.pem
    TLSRSACertificateKeyFile /etc/proftpd/ssl/proftpd.key.pem
    TLSVerifyClient off
    TLSOptions NoSessionReuseRequired
    TLSRequired on
</IfModule>Note: INSTAR Full HD Camera require TLSv1.2 while INSTAR WQHD Cameras use the newer TLSv1.3. You can remove the
TLSv1.2configuration if you only work with WQHD Cameras.
Now make sure that the TLS module is actually active:
nano /etc/proftpd/modules.confThe un-comment the following lines - if necessary:
# Install proftpd-mod-crypto to use this module for TLS/SSL support.
LoadModule mod_tls.c
# Even these modules depend on the previous one
LoadModule mod_tls_fscache.c
LoadModule mod_tls_shmcache.c
And restart the proFTPD service:
service proftpd restart
service proftpd status
Testing the Login with Filezilla (optional)
Before we used Filezilla Client to access our FTP server and the Fillezilla log will have displayed that no encryption was being used connecting you your server:
Status:	Connecting to 192.168.2.111:21...
Status:	Connection established, waiting for welcome message...
Status:	Insecure server, it does not support FTP over TLS.
Status:	Logged in
Status:	Retrieving directory listing of "/"...
Status:	Directory listing of "/" successful
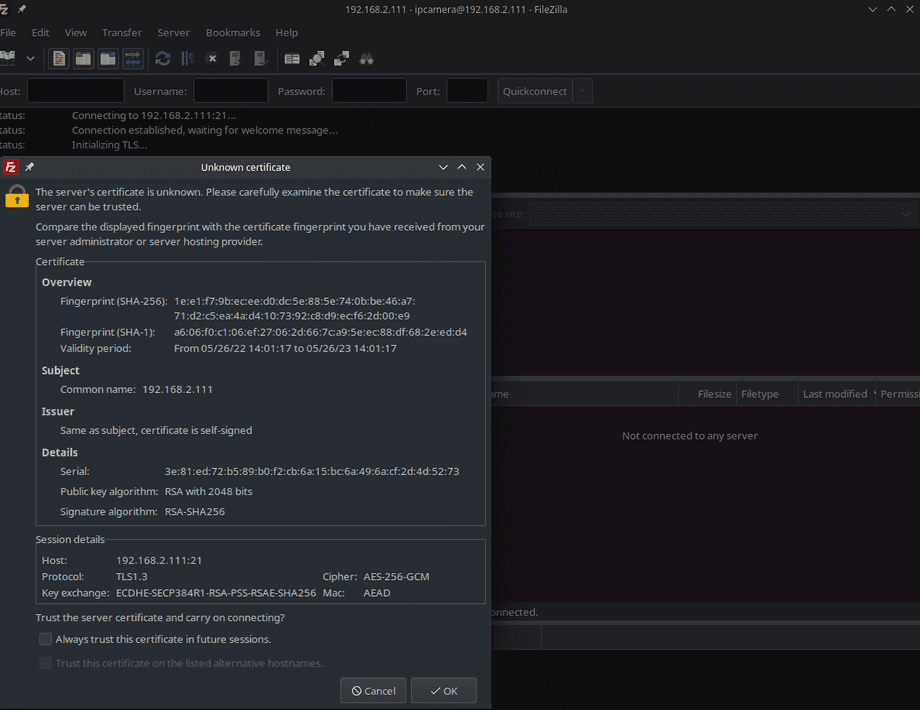
This time you will be greeted by a pop-up screen asking you to verify your own certificate - you can check the option to always trust this certificate in the future:
And the log will tell you that the connection is now secure!
Status:	Connecting to 192.168.2.111:21...
Status:	Connection established, waiting for welcome message...
Status:	Initializing TLS...
Status:	TLS connection established.
Status:	Logged in
Status:	Retrieving directory listing of "/"...
Status:	Directory listing of "/" successful
Connecting an INSTAR IP Camera
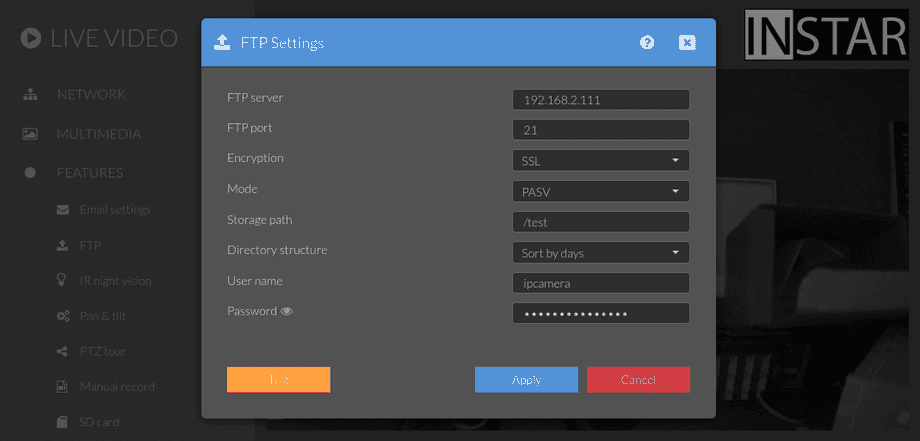
We can now connect to our server using TLS encryption:
WQHD Cameras
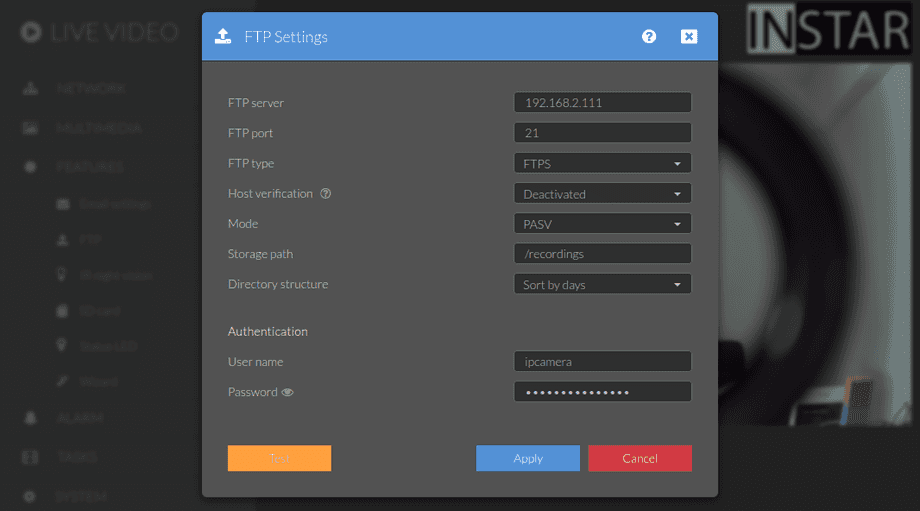
For your WQHD camera make sure to select the insecure option to skip the certificate verification step when connecting:
Checking the TLS log /var/log/proftpd/tls.log you will see that your camera connects using TLSv1.3:
2022-05-26 14:34:05,088 mod_tls/2.9[13571]: SSL/TLS-P requested, starting TLS handshake
2022-05-26 14:34:05,100 mod_tls/2.9[13571]: client supports secure renegotiations
2022-05-26 14:34:05,100 mod_tls/2.9[13571]: TLSv1.3 connection accepted, using cipher TLS_AES_256_GCM_SHA384 (256 bits)
2022-05-26 14:34:05,149 mod_tls/2.9[13571]: Protection set to Private
2022-05-26 14:34:05,160 mod_tls/2.9[13571]: TLSv1.3 data connection accepted, using cipher TLS_AES_256_GCM_SHA384 (256 bits, resumed session)
Full HD Cameras
For your Full HD camera make sure to select the SSL option:
Checking the TLS log /var/log/proftpd/tls.log you will see that your camera connects using TLSv1.2:
2022-05-26 14:36:31,743 mod_tls/2.9[13644]: TLS/TLS-C requested, starting TLS handshake
2022-05-26 14:36:31,789 mod_tls/2.9[13644]: client supports secure renegotiations
2022-05-26 14:36:31,789 mod_tls/2.9[13644]: TLSv1.2 connection accepted, using cipher ECDHE-RSA-AES256-GCM-SHA384 (256 bits)
2022-05-26 14:36:31,887 mod_tls/2.9[13644]: Protection set to Private
2022-05-26 14:36:31,943 mod_tls/2.9[13644]: TLSv1.2 data connection accepted, using cipher ECDHE-RSA-AES256-GCM-SHA384 (256 bits)