Using the sFTP Service with your WQHD Camera
Q: My web space provider Strato recently deactivated the FTP service that I was using for my alarm recording. Can I still upload my videos using the INSTAR WQHD camera series?
A: Our Full HD cameras only support FTP and the TLS encrypted version FTPS. With our new WQHD 2k+ line of cameras we are now also supporting FTP connections through SSH tunnels - also know as sFTP. For your Strato account you will just have to activate sFTP in the ecryption drop down menu and add your Strato account information.
Adding a Camera User
If you want to use the sFTP service on a generic Linux server you first have to create a user for your camera, e.g. ipcamera:
sudo useradd -m ipcameraThe -m flag in this command will create a home directory for your user in /home/ipcamera that we can use for our camera uploads.
It is also possible to define a specific directory as the home directory for this user, e.g. /opt/INSTAR:
sudo useradd -m -d /opt/INSTAR ipcameraTo enable your camera to log in to your server using this userr, you need to set the user password. Use the following command and type and retype a password for the ipcamera user:
sudo passwd ipcameraCreating SSH Keys
On your Linux Server
Login to your server using the ipcamera user and run the ssh key generator:
ssh-keygen -t ed25519 -C 'sFTP_server'

Generating public/private ed25519 key pair.
Enter file in which to save the key (/home/ipcamera/.ssh/id_ed25519):  #leave empty
Created directory '/home/ipcamera/.ssh'.
Enter passphrase (empty for no passphrase):  #leave empty
Enter same passphrase again:  #leave empty
Your identification has been saved in /home/ipcamera/.ssh/id_ed25519
Your public key has been saved in /home/ipcamera/.ssh/id_ed25519.pub
The key fingerprint is:
SHA256:ZevHZSnTAogNMrtSBCIF6fXJAXZXpALT0xYirUjGGyA sFTP_server
On your Camera
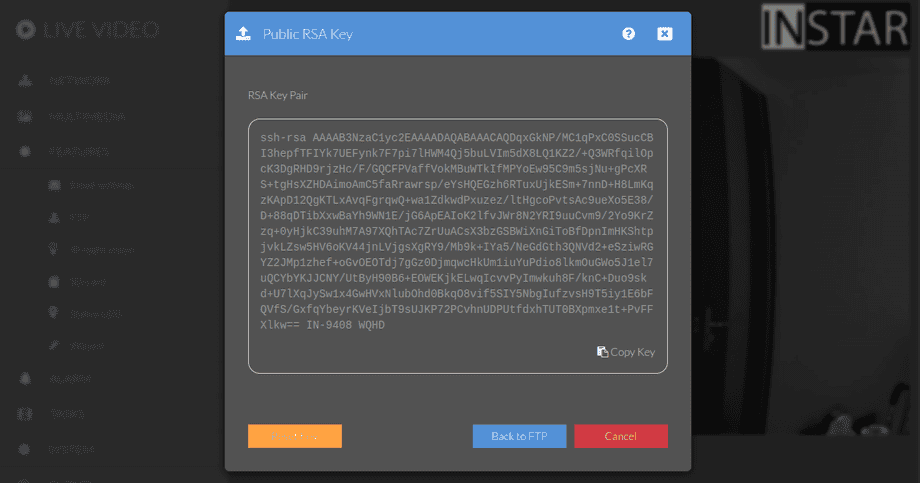
In the FTP Menu, once you set the Encryption to sFTP, you will see a button that will show you the SSH public key of your camera. When clicking it for the first time, your camera will generate those keys for you which might take a while:
Back on your Linux server you can now check the directory the previous command generated the SSH keys in:
ls -la /home/ipcamera/.ssh

total 24
-rw------- 1 ipcamera ipcamera  399 Jun 17 19:33 id_ed25519
-rw-r--r-- 1 ipcamera ipcamera   93 Jun 17 19:33 id_ed25519.pub
-rw-r--r-- 1 ipcamera ipcamera  738 Jun 17 19:47 known_hosts
Here we can append the camera public key, as displayed in the webUI, to the file known_hosts (just create it if your server does not have one):
nano /home/ipcamera/.ssh/known_hostsTo make sure our server uses this key whenever a connection to our camera is established we can configure SSH by adding the following lines:
nano /etc/ssh/sshd_config HostKey /home/ipcamera/.ssh/id_ed25519Save your changes and restart the SSH agent:
service sshd restartConfiguring your Camera
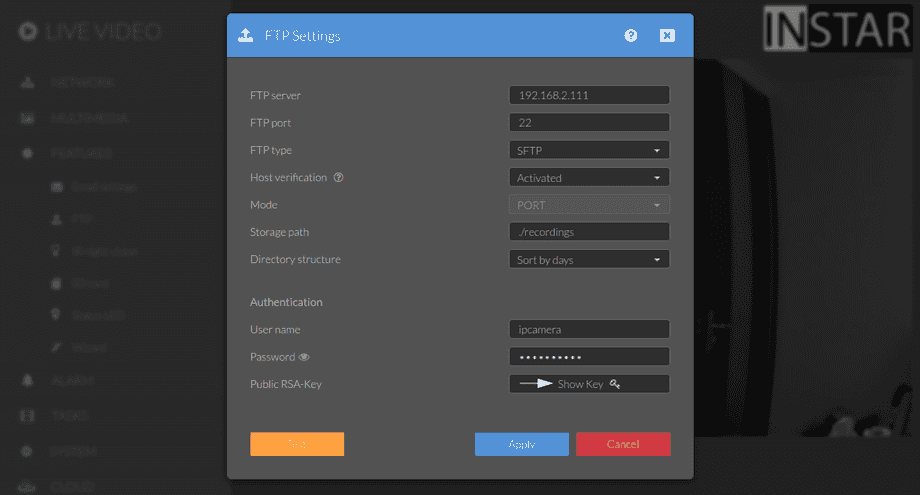
For my local Linux server on IP 192.168.2.111 - e.g. a RaspberryPi - I can use the following configuration:
The login is the user login we created above. And port 22 is the default SSH port on Linux - you can verify that your system is using the default by running the following command:
netstat -tlnp | grep sshd
tcp        0      0 0.0.0.0:22 LISTEN      621/sshd: /usr/sbin
tcp6       0      0 :::22      LISTEN      621/sshd: /usr/sbin
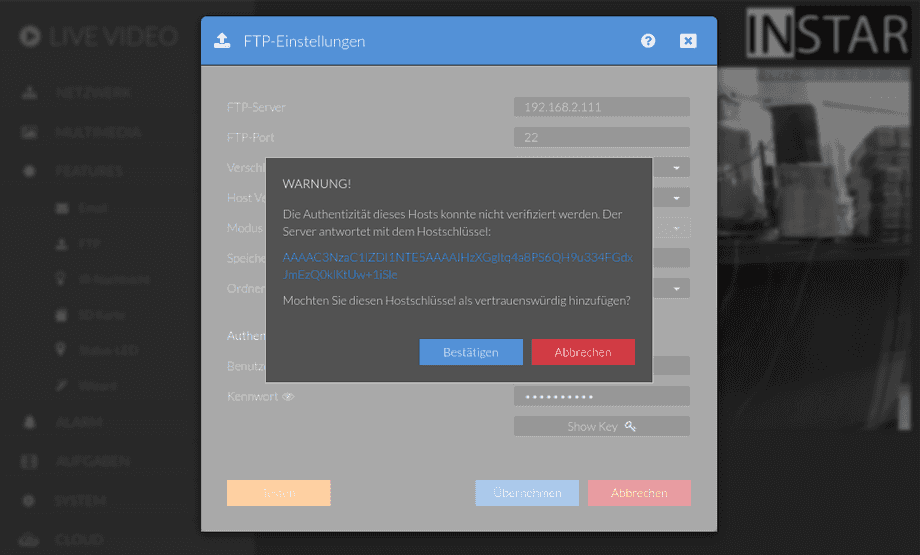
The Storage Path ./recordings tells your camera to use the /home/ipcamera/recordings directory for sFTP uploads. By activating the Host Verification option we now have to verify the public key from our server - Click OK if the key is a match. Your camera will then authorize your server key and try to upload the test file:
cat /home/ipcamera/.ssh/id_ed25519.pub
ssh-ed25519 AAAAC3NzaC1lZDI1NTE5AAAAICVmROPDTwmGE6Qfo2+PtvY/FTH9/izLg1TW/T8rLezX sFTP_server
We can verify that the upload was successful by checking the recordings directory. It should contain the Test-Snapshot.jpeg test file:
ls -la /home/ipcamera/recordings
total 132
drwxr-xr-x 2 ipcamera ipcamera   4096 Jun 17 16:34 .
drwxr-xr-x 6 ipcamera ipcamera   4096 Jun 17 16:34 ..
-rw-r--r-- 1 ipcamera ipcamera 124886 Jun 17 16:46 Test-Snapshot.jpeg


