Add a camera to InstarVision or iSpy via ONVIF
Read here to learn what hat exactly ONVIF is. In the following, we will explain how you can add your HD or FullHD camera to InstarVision or iSpy via ONVIF in just a few steps.
HD-Cameras: Activate the ONVIF Service
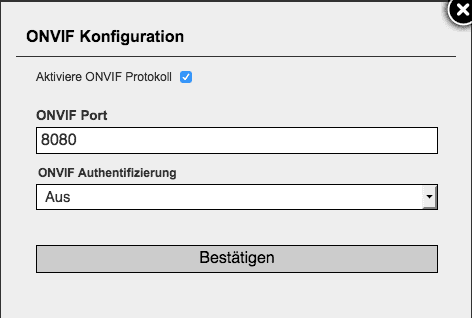
Connect to the camera and go to System / ONVIF in the web interface. Verify that ONVIF is enabled and the default port is 8080. Disable ONVIF authentication to use the camera in InstarVision. For iSpy, enable ONVIF authentication. By clicking on Confirm the settings are saved and the camera restarts.
Full HD-Cameras: Activate the ONVIF Service
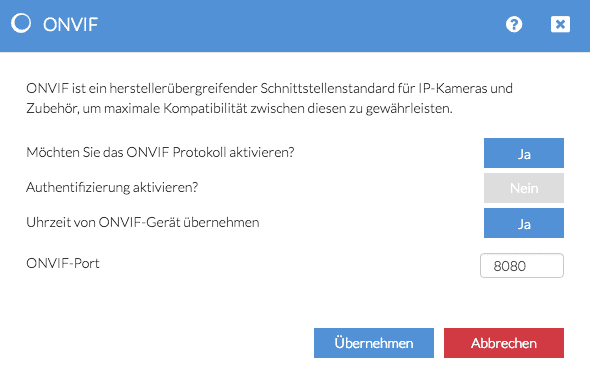
Connect to the camera and go to Network - ONVIF in the web interface. Verify that ONVIF is enabled. If you use InstarVision disable the authentication, leave the authentication enabled for use with iSpy. Whether the camera is to balance the time with that of the ONVIF device, you can decide for yourself. Leave the ONVIF port on the default port 8080. Then click Apply and confirm that the camera restarts.
The feature is currently only available in the beta version of InstarVision v2.1. These can be downloaded at This Link. As soon as a new version of the software is available, it will be linked immediately in our Download Area.
ONVIF integration with InstarVision v2 Windows software
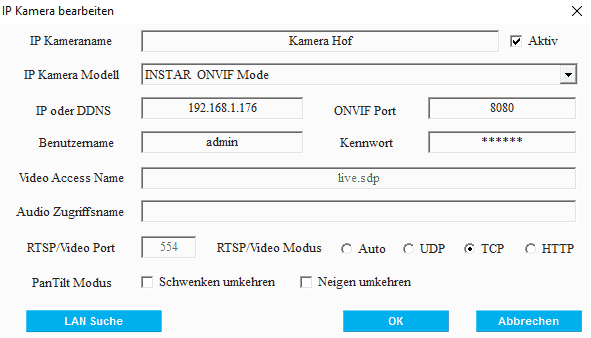
Start InstarVision and under the menu item Camera List go to the plus at the bottom right to add a new camera. Then make the settings for your camera as follows:
| IP Camera Name | Choose a name for your camera, for example camera yard. In addition, set the hook next to Active. | | IP Camera Modell | Select INSTAR ONVIF Mode from the list | | IP or DDNS | Enter the IP address of your camera here | | ONVIF Port | Select port 8080 here | | User Name and Password | Enter the login data of the camera here. |
You can leave all other settings and add the camera by clicking OK.
ONVIF integration into the open source software iSpy
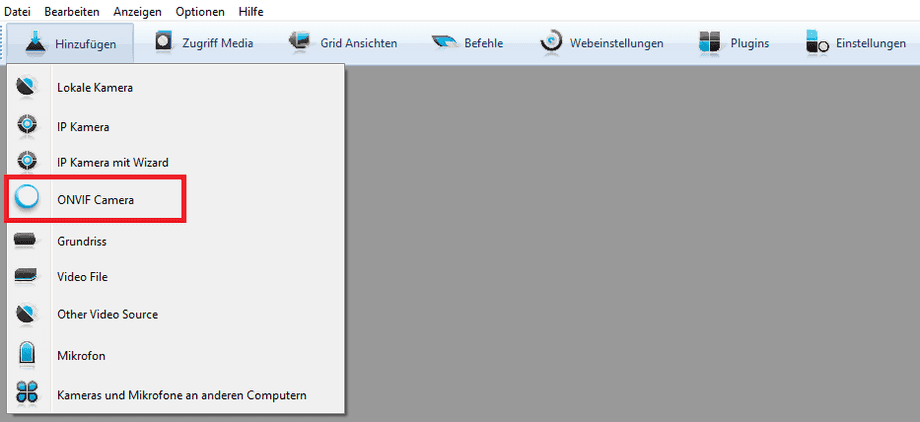
Start ISpy and go to Add - ONVIF Camera.
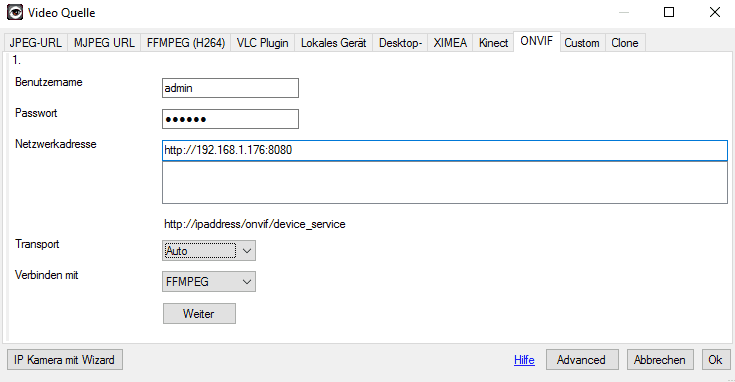
In the menu that appears, first enter the username and password of the access data of your camera.
Under Network address enter the local IP address of your camera, including http and ONVIF port. For example: http://192.168.1.176:8080
Leave the remaining settings and click Next.
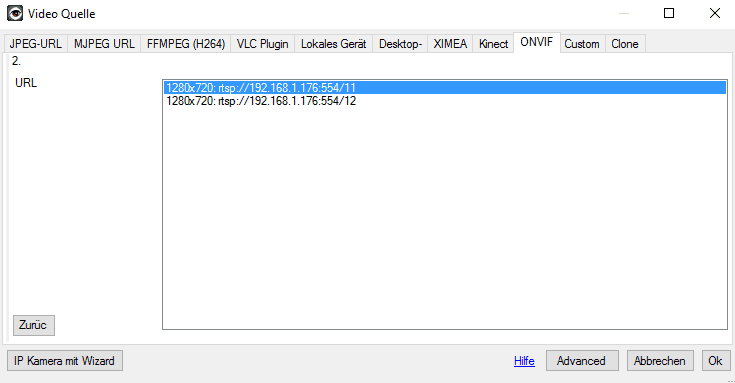
Now you have the choice of which RTSP-STREAM to use by the camera. The best way to do this is to select stream 11, which has the highest resolution. Select the stream and click OK. This locks the camera into iSpy.
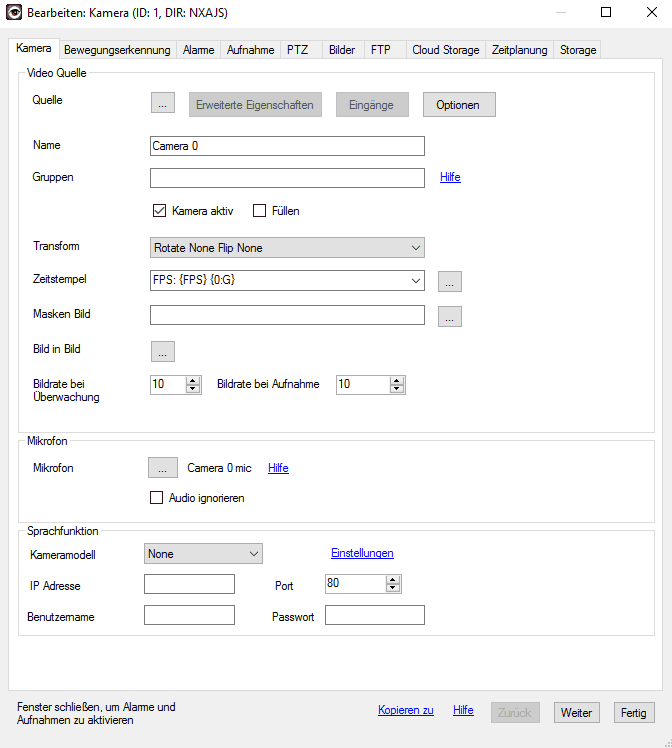
In the last window you can now make the individual settings of the camera. Click HERE for instructions on how to set camera features such as motion detection or alarm on iSpy.
Discuss this article on the INSTAR Forum !
