Node-RED and Alexa
A Node-RED node to control things via Amazon Alexa. Use voice commands to control your INSTAR IP camera without the need for an Amazon Alexa Skill - no Cloud required. We are going to use the node-red-contrib-alexa-local to create an endpoint for Alexa to control. It was designed to emulate a Philips Hue bridge & device within local network. Amazon Echo is hardcoded to support only on/off/dimming command via this route. Any other type of support has to go through the Alexa Skills route (cloud-based).
Zu diesem Zeitpunkt werden nur die Geräte Alexa Echo und Alexa Echo Dot Gen 1 & 2 unterstützt. Die Einbindung eines Echo Gen 2, Echo Dot Gen 3 & Echo Plus ist z.Z. noch nicht möglich. Die Geräte Echo Show, Echo Spot und Sonos One können keine lokalen Geräte erkennen.
Für dieses Tutorial wurde ein Echo Dot der Generation 2 verwendet.
Control your camera with Alexa terminal

We offer both a INSTAR Cloud Skill and a INSTAR Camera Skill in the Alexa Skill Store. For the INSTAR Cloud Skill, all you need is an INSTAR Cloud account and an Alexa device with a display. Add the Skill on your Alexa device and use it directly.
Control your camera with your iPhone or iPad
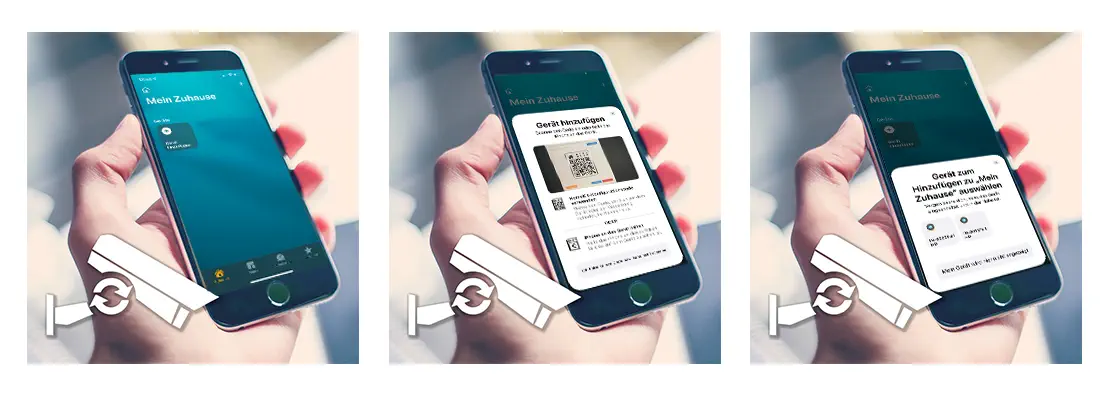
The connection to the Homekit service is available from firmware version 3.2(361) (June 2021) for all Full HD models. You can upgrade the firmware of your camera directly via the Web interface.
Node-RED
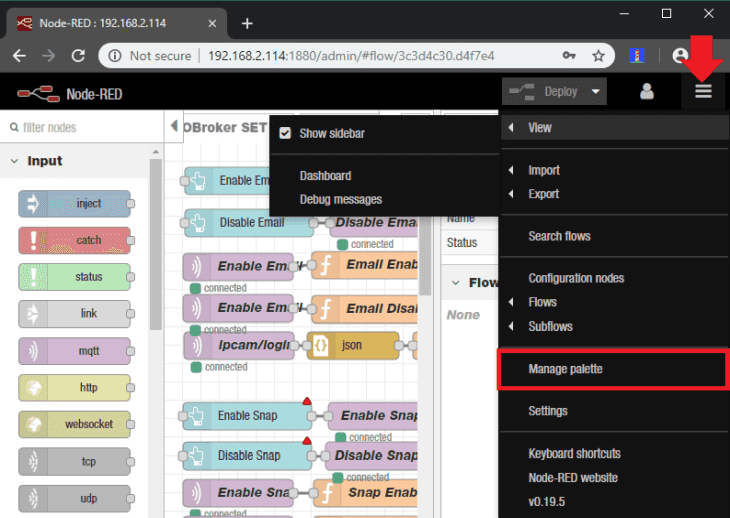
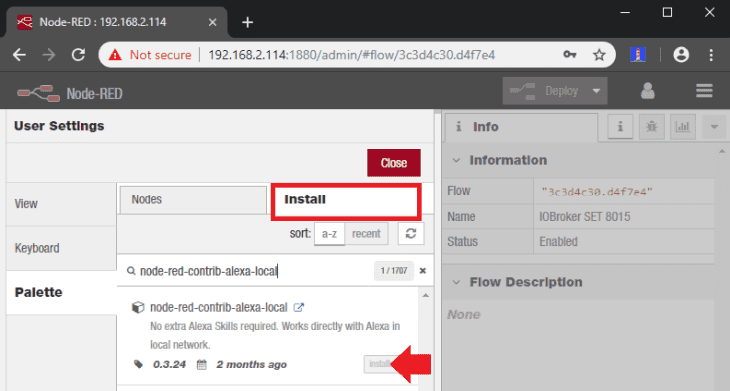
We already installed Node-RED under Windows and on a Raspberry Pi. Open the admin panel and go to the Manage Palette menu to install the alexa-local node:
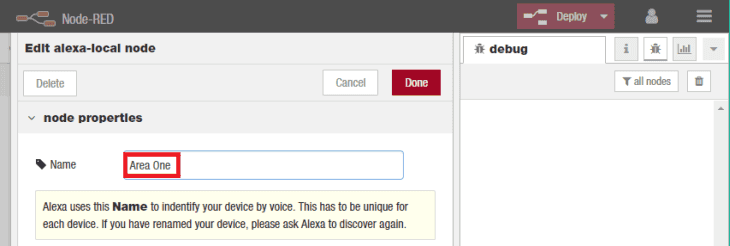
You should see a new Input Node called alexa local. Drag it onto the working area and double-click it. Type in a function name - e.g. Area One. This is the name that Alexa will use to identify the device. And the name you have to use to select it - so choose its name wisely.
Connect a Debug Node to its output and Deploy the flow. Then ask "Alexa, discover devices" - Alexa should reply that it discovered Area One.
You can test it by issuing the following commands:
- "Alexa, turn off Area One"
- "Alexa, switch on Area One"
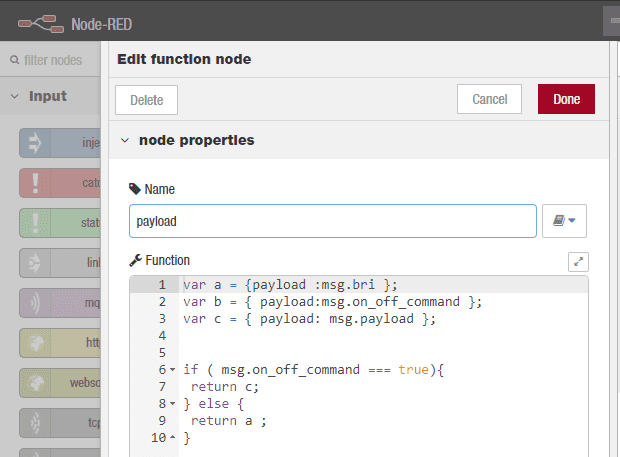
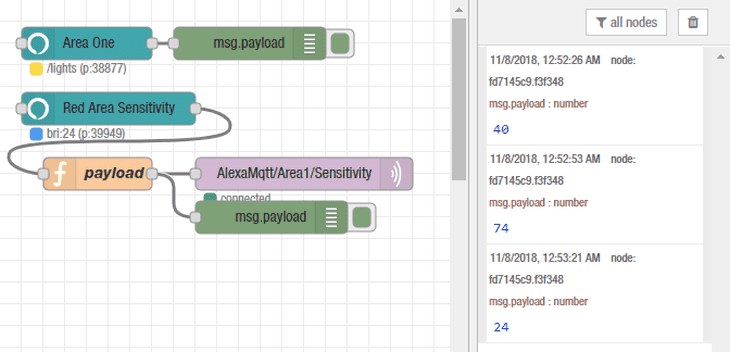
You will see that the corresponding payloads - on or off are received by the Alexa Local Node. To be able to send percentage values, we will have to add a little Function Node to our flow. It needs to be connected to the output of the Alexa Local Node and listens for a Brightness value to be send with the Alexa command. Remember that we are exploiting a function here that is meant to be used by local light switches on your network?
The function leaves the payload intact - if the incoming command is of the ON/OFF nature. But if a brightness value is send, it will set this to become the payload of the message:
var a = {payload :msg.bri };
var b = { payload:msg.on_off_command };
var c = { payload: msg.payload };


if ( msg.on_off_command === true){
 return c;
} else {
 return a ;
}
You can now use the following example commands:
- "Alexa, set Red Area Sensitivity to 40%"
- "Alexa, set Red Area Sensitivity to 30"
- "Alexa, increase Red Area Sensitivity"
- "Alexa, decrease Red Area Sensitivity"
You will see the % values transmitted in the Debug Node.
Add the MQTT input to an existing Flow
In the following sequence we are using the input from Alexa to switch Alarm Areas on our cameras - we already used the same sequence for the Zigbee Integration (the complete flow can be found in the Home Assistant Tutorial):
You can copy the following JSON code and import it into Node-RED (How do I import flows to Node-RED?):
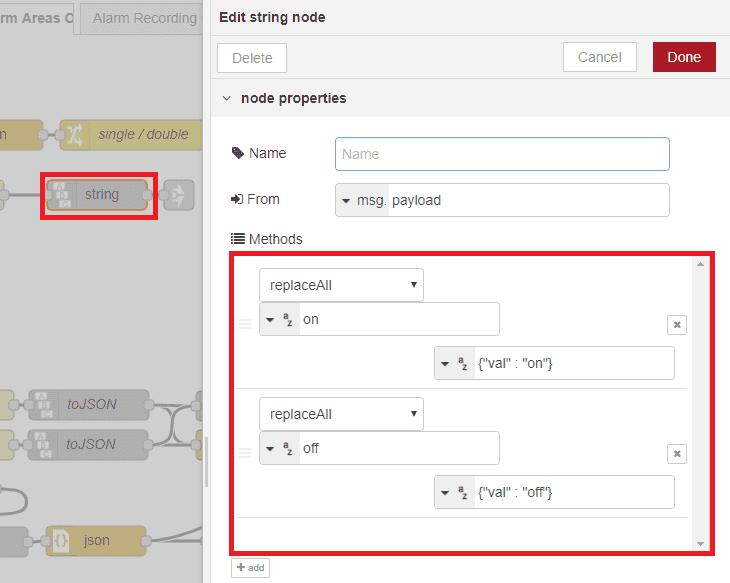
Download Flow (JSON)Download Flow (JSON)All we needed to add is a String Node (this node type has to be installed manually - it is called node-red-contrib-string) that searches for the payload on or off and replaces them with something that we need to trigger the Flow below - in this case we need a JSON expression that either sets a value {"val" : "on"} or {"val" : "off"}:
We then add a Link Node to plug it in to all 4 sequences for the for the 4 alarm areas and Deploy:
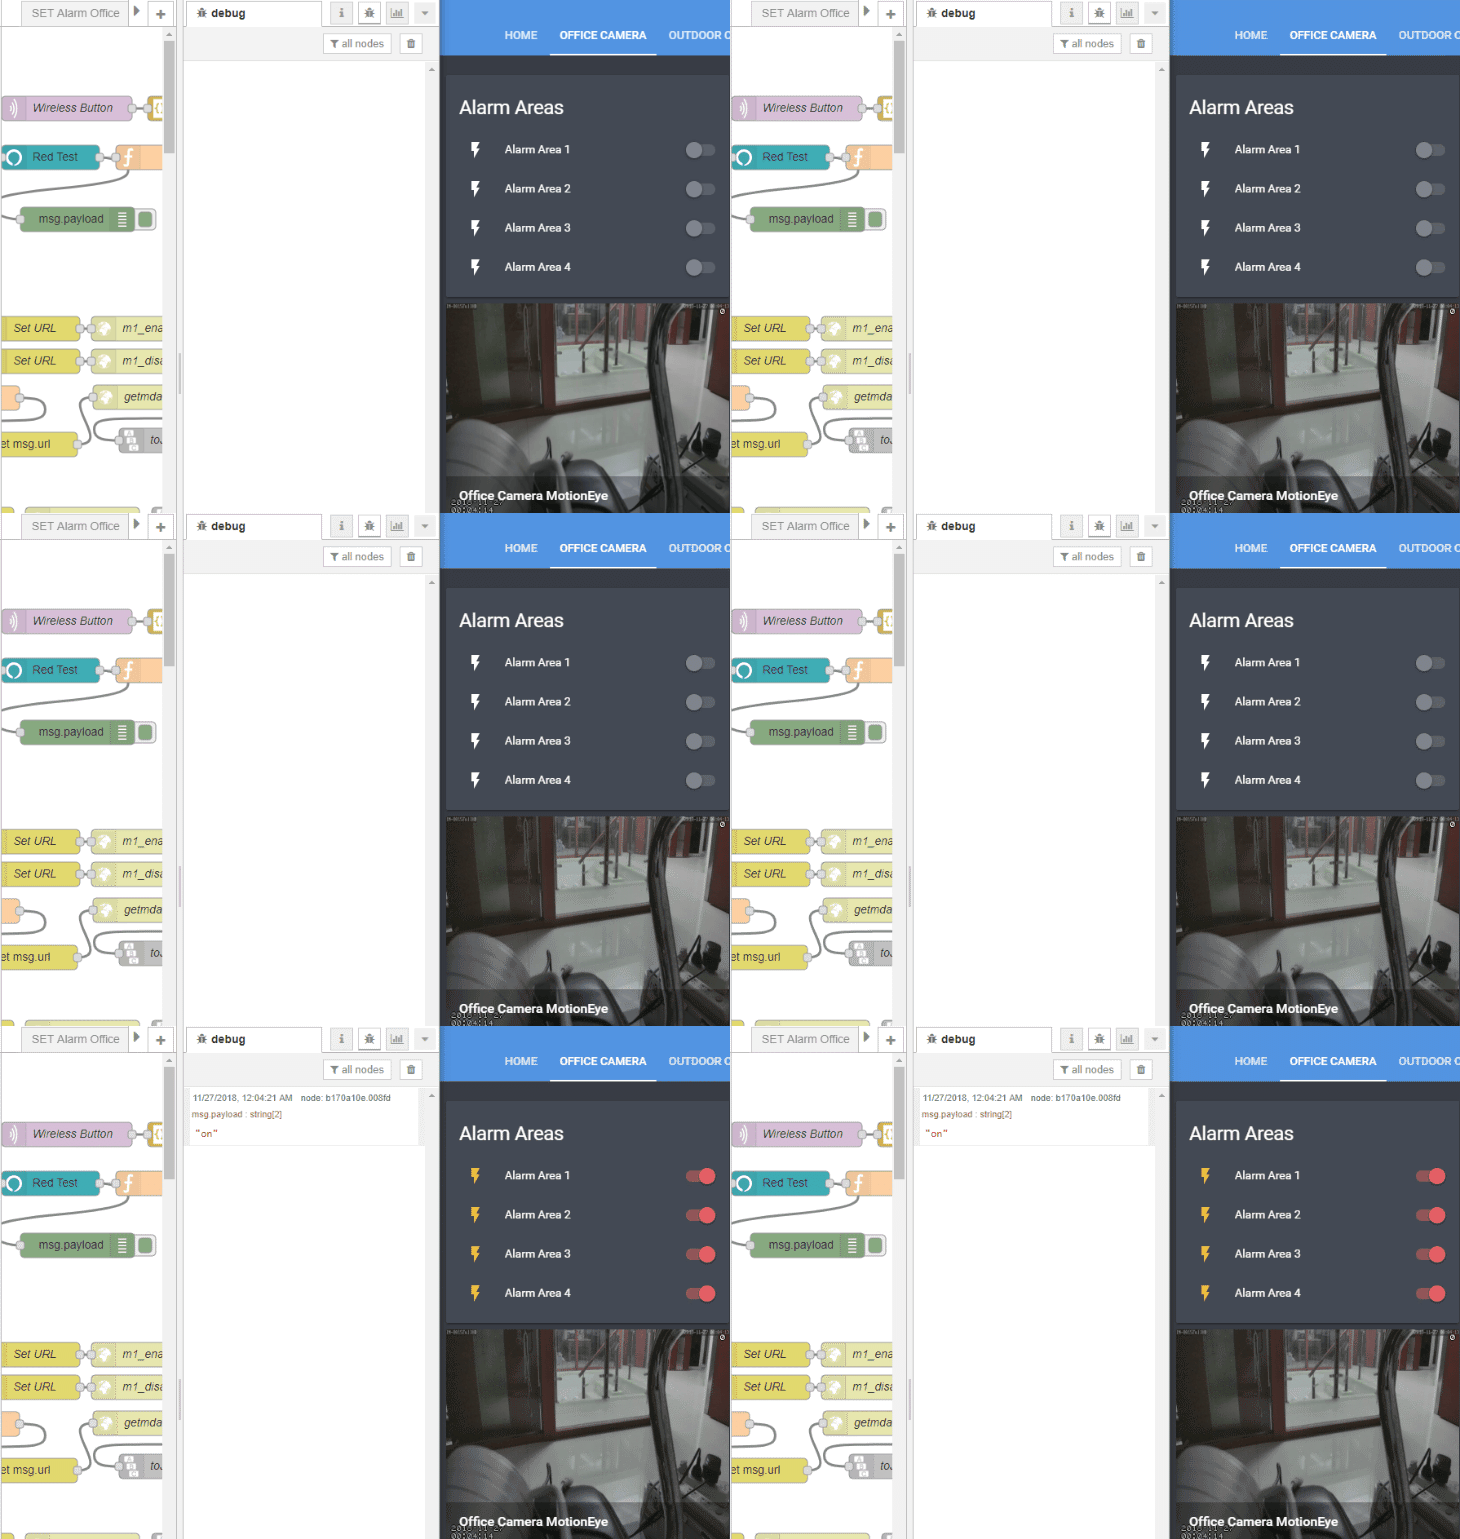
Now we can activate all areas with the command: Alexa, activate Red Test. And deactivate them by saying Alexa, switch off Red Test:
Troubleshooting
If you have installed a firewall on the computer on which Node-RED is running, the following ports must be released for the Alexa services:
Output TCP: *, 80, 8080, 443, 40317, 67, 68
Output UDP: *, 53, 123, 40317, 49317, 33434, 1900, 5000, 5353
Input TCP: 8080, 443, 40317
Input UDP: 53, 67, 68, 1900, 50000, 5353, 33434, 49317, 40317
