QVR Pro 2.1
Adding a Camera
QVR Pro is built-in in the QVR Pro appliance provides embedded monitoring channels, allowing you to quickly build a home surveillance environment.
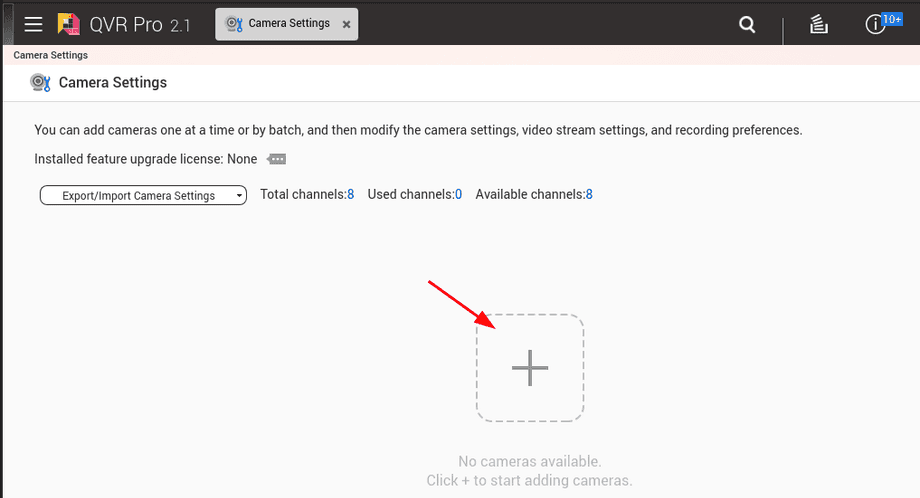
Open the QVR Pro application from your QNAP dashboard, select Camera Settings and click on the Plus icon to add a new camera:
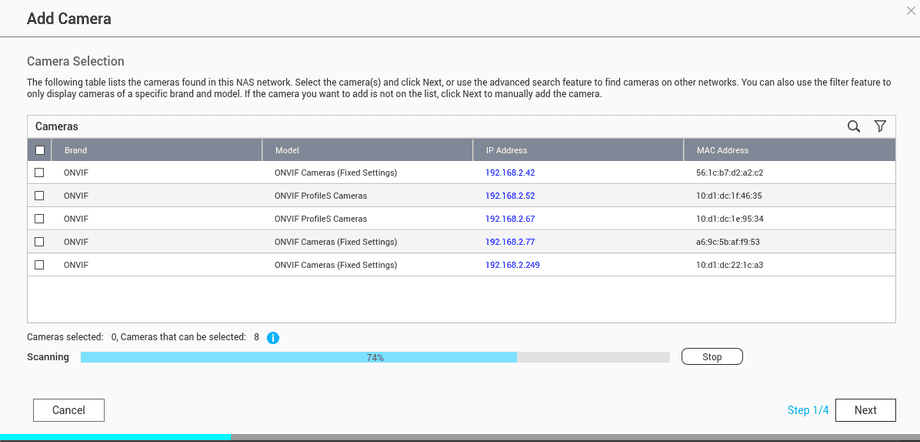
You now have 3 choices:
- Add your Camera as an generic ONVIF camera by simply selecting it and clicking on Next.
- Click Next and add your camera manually via the INSTAR profile from the following page.
- Click Next and add your camera as a generic RTSP camera.
ONVIF
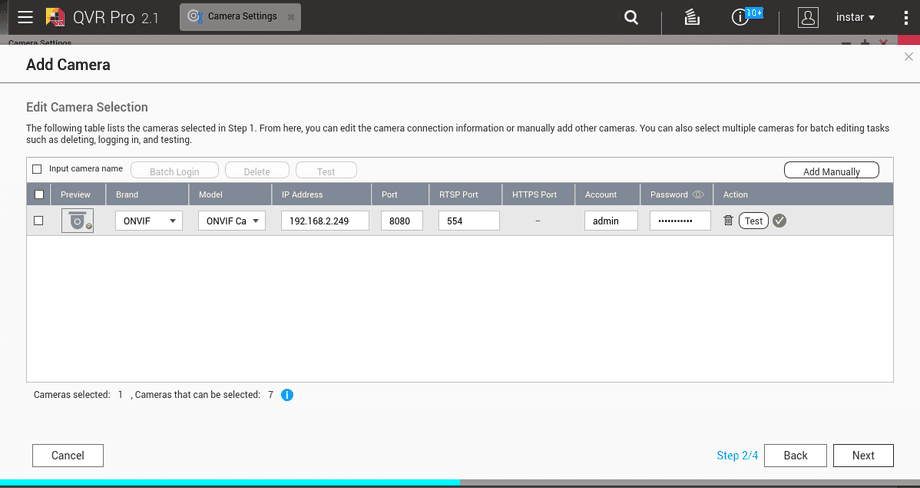
If you choose to add your camera via it's ONVIF service you don´t have to change anything. Just click on Test to verify that everything is set up correctly. And click Next to continue:
Note that all INSTAR HD and Full HD camera models support the ONVIF S Profile. Only the 2k+ WQHD models provide support for the newer T Profile. The main difference here is, that the latter allows you to use the camera's PIR sensor as an alarm trigger for the QVR Motion Detection.
INSTAR Preset
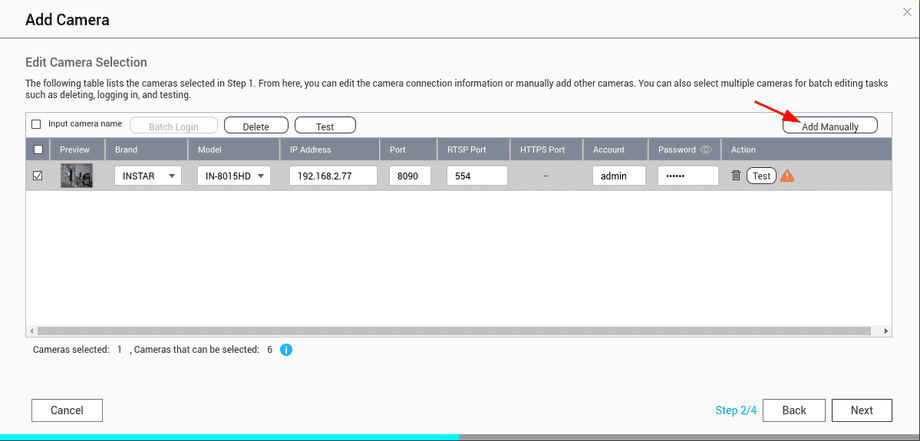
By stopping the ONVIF network and clicking on Next you now have the option to add your camera manually:
Select INSTAR as Brand and your camera Model. In addition you now have to specify your camera's IP Address, HTTP Port and RTSP Port. Test your settings and click next.
Note that the INSTAR profile allows you to use the (HD, Full HD and WQHD) camera's PIR sensor as an alarm trigger for the QVR Motion Detection.
Generic RTSP
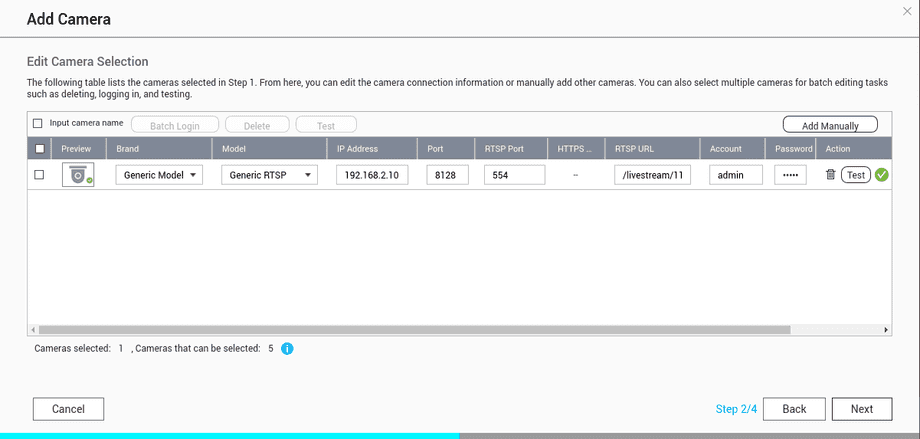
By stopping the ONVIF network and clicking on Next you now have the option to add your camera manually:
Select Generic as Brand and RTSP Model as Model. Add your camera's IP Address, HTTP Port and RTSP Port. In addition you now have to specify your camera's RTSP Streaming URL. Test your settings and click next.
Default Streaming URLs (high, middle and low resolution):
- INSTAR HD & Full HD Cameras:
/11,/12and/13 - INSTAR WQHD Cameras:
/livestream/11,/livestream/12and/livestream/13
Activating the Video Recordings
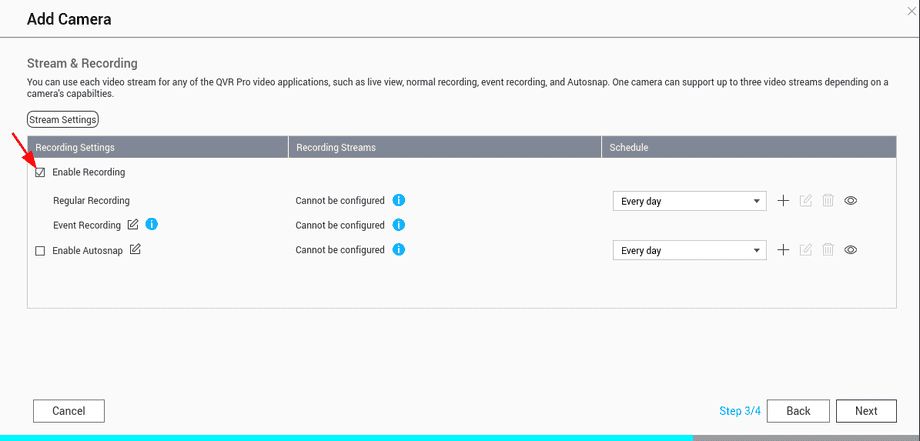
You will now be asked to set the video streaming and recording settings. Make sure to add the tick to Enable Recording or you won´t be able to see your camera's video stream:
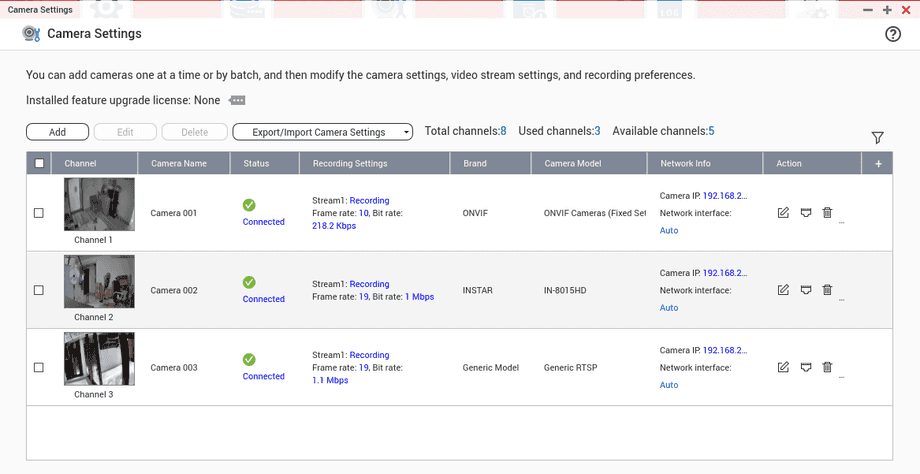
Click next and you will see an overview over all connected cameras:
Motion Detection
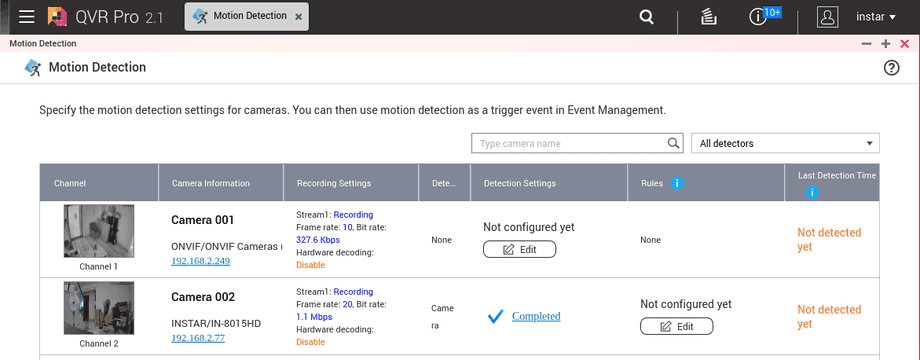
Close the Camera Settings menu and open the Motion Detektion menu:
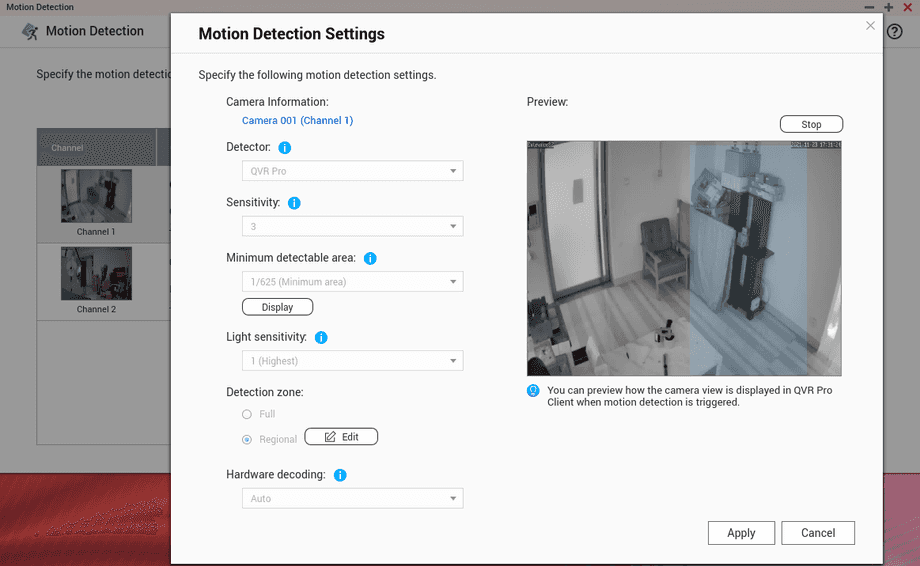
Here you can now configure the motion detection and select action rules that should be triggered when motion was detected.
Detection Settings
Select if you want the QVR Pro Software to use it's internal, software-based, motion detection, or if you want your camera to use it's own motion detection (including the PIR motion sensor - only available if you added your camera via the INSTAR preset or the ONVIF T Profile).
If you use the QVR Pro motion detection you can set sensitivity levels and motion detection areas.
Rules
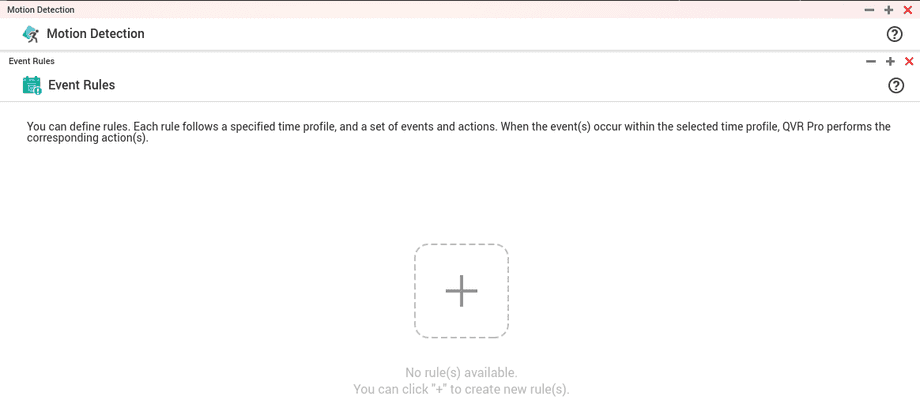
With the motion detection configured we can now add an If/Then rule set to specify what we want to happen when motion is detected:
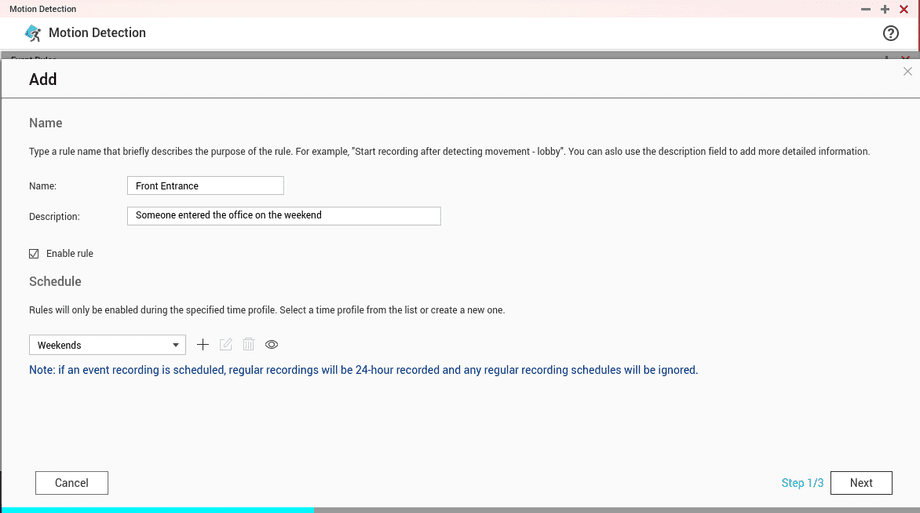
The first step is to name your rule, activate it and set a time schedule when it should be applied:
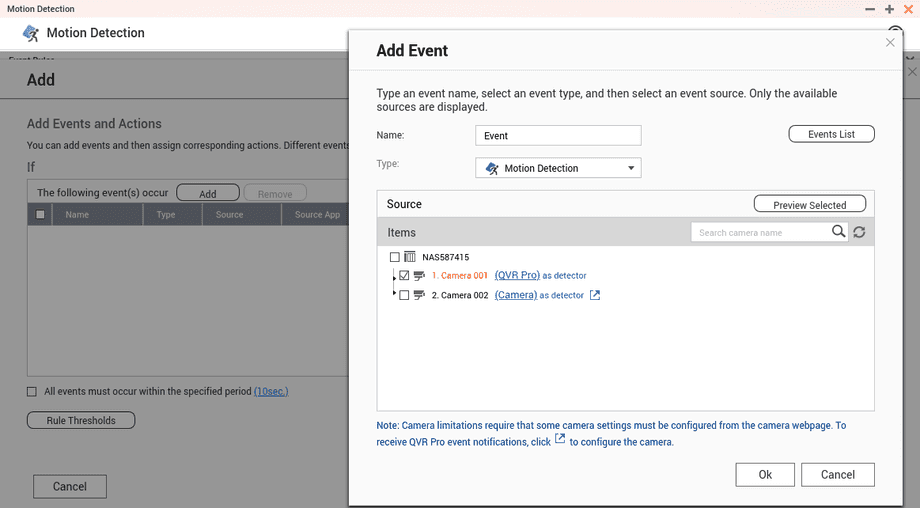
The event we want to react to is of type "Motion Detection" from a specific camera:
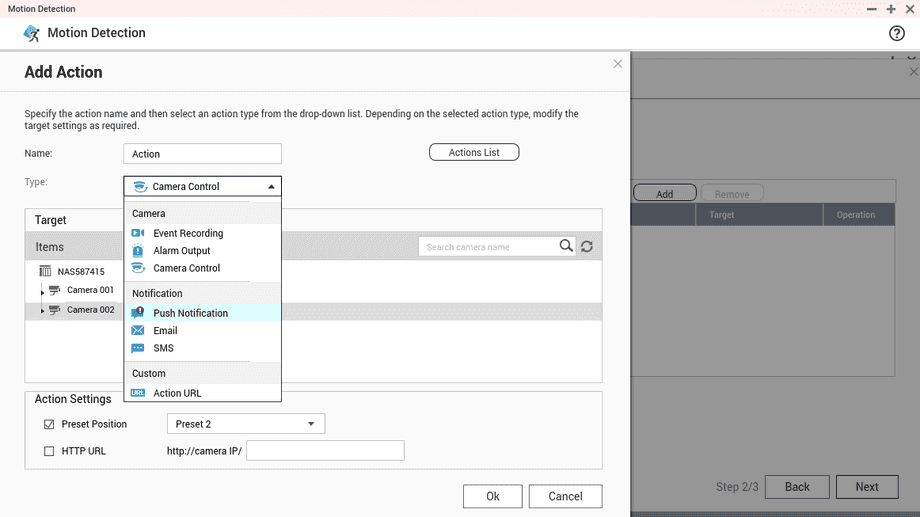
When this event occurs we want to trigger an action - e.g. an Email or Push Notification or sending a command to another camera to move to one of it's preset positions:
Once everything is set up click on Next to save the configuration:
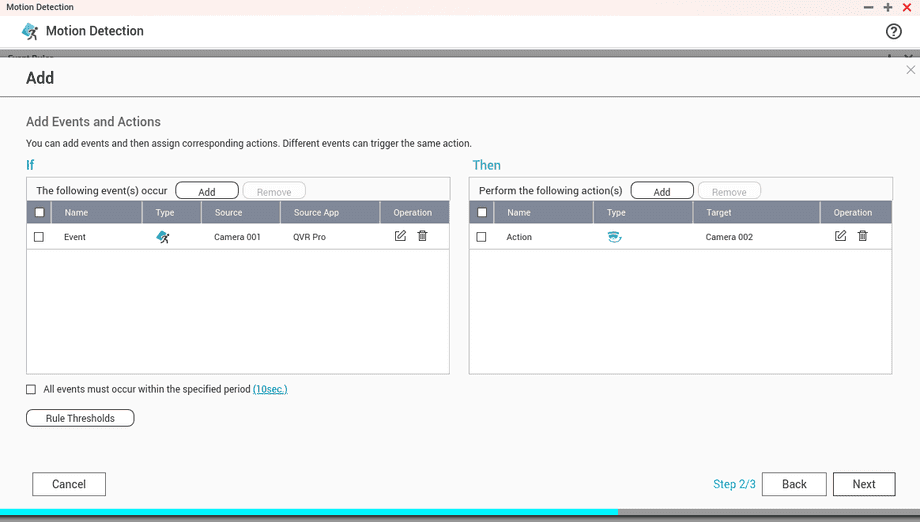
The Rule specified above waits for a motion detection event from camera 1. When this event occurs it will send a command to camera 2 to move to a specified preset position.
Discuss this article on the INSTAR Forum !
