Quicktime Plugin Setup
The Quicktime Plugin is needed to display the h.264 stream of your INSTAR HD camera in alternative Browsers like Chrome, Safari, Firefox or Opera. Please refer to ActiveX Plugin Installation on Windows if you want to use the Internet Explorer to access your camera.
Quicktime Setup under Windows
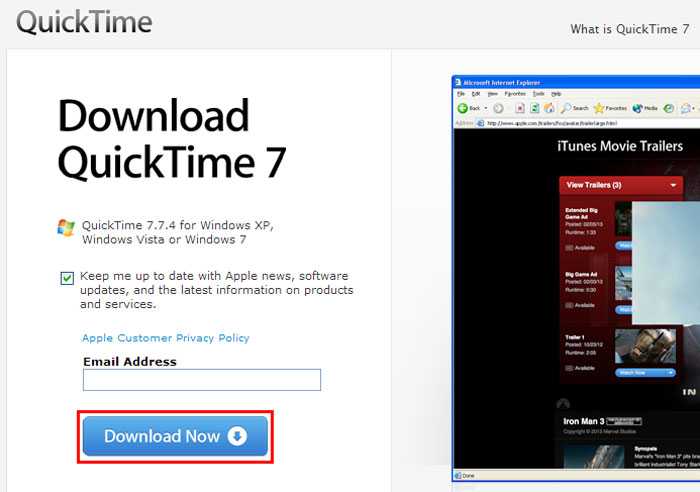
Step 1: Please download the newest version of Quicktime Player from Apple Inc. ...
Download the newest version of the full Quicktime player.
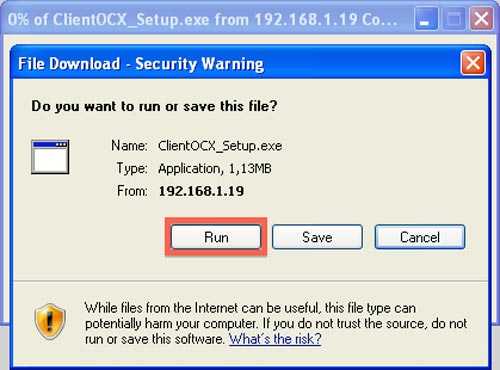
Step 2: Please click Run in order to download and start the installation of the Quicktime Player.
Step 3: Confirm that you want to install the ClientOCX_Setup.exe ActiveX Control Element by clicking Run in the upcoming window.
Step 4: After the installation please double click on QuickTime Player to start the program.
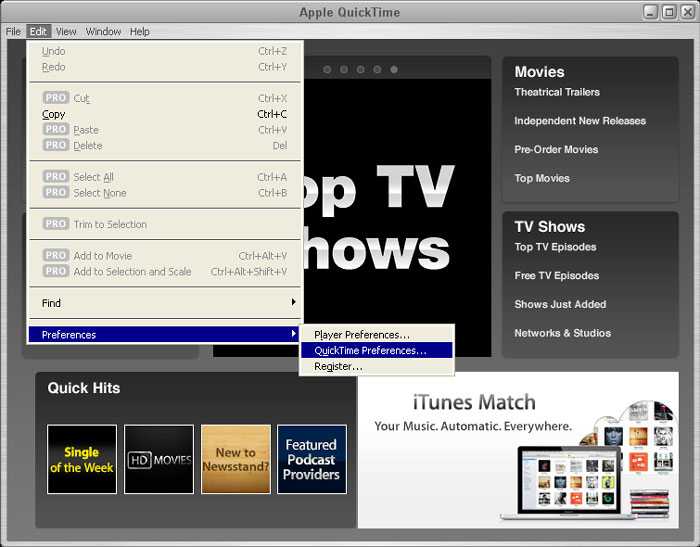
Step 5: Please select Edit - Preferences and the menu Quicktime Preferences.
Navigate to the Quicktime Preferences.
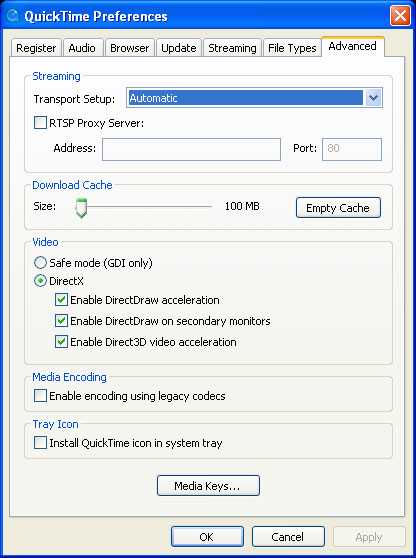
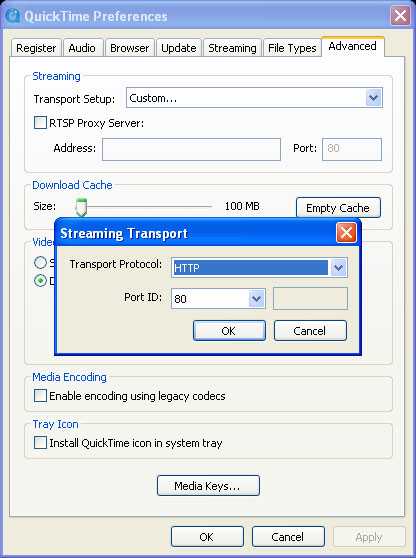
Step 6: Please click on Advanced, you should now see the below window.
Click on the Advanced tab.
Step 7: Please choose Custom... as the Streaming Transport and select Transport Protocol: HTTP and Port ID: 80 in the next window.
Select the Transport Protocol HTTP and Port ID 80.
Step 8: Please confirm all settings with "OK". Next please open the IP camera in your web browser. The picture should now be shown.
Note 1: You might have to start the Internet Explorer as Administrator. Just make a right click on the Internet Explorer Symbol in your Start menu and choose "Run as...".
Note 2: If you use a Virus scanner such as AVAST, KASPERSKY, AVIRA, F-SECURE or AVG you have to create an exception for the IP address of the camera. The easiest way is to shortly turn of all Internet Security Software in order to check which software is blocking the ActiveX plugin from installation/execution.
Quicktime Setup under Mac OSX
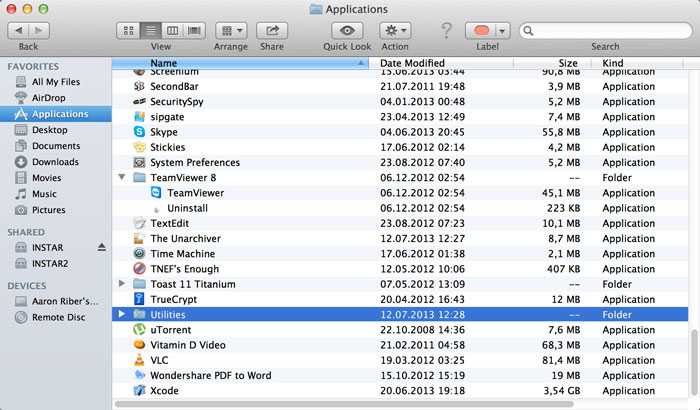
Step 1: Please open your Finder and select Applications and Utilities as shown below.
Open the Utilities in your Applications folder.
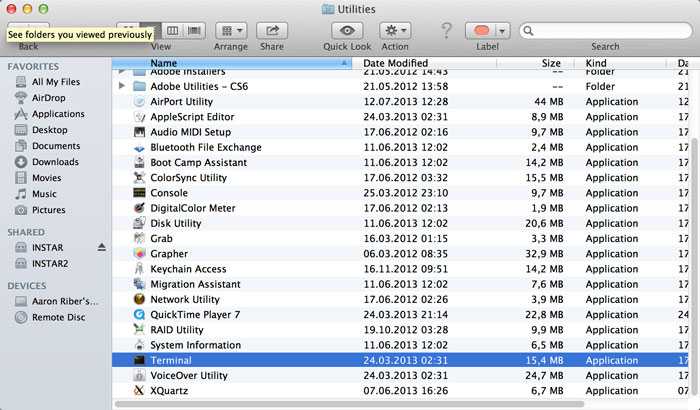
Step 2: Inside the folder Utilities please open the program Terminal.
Please start the Terminal from your Utilities folder.
Step 3: The Terminal window will open.
Step 4: Please input the following or copy the line into Terminal to make sure it is correct qtdefaults write TransportSettings "HTTP" "80".
Step 5: Please confirm your input. The following message should be shown in your Terminal window.
Continue the plugin installation.
Step 6: Open the IP camera in your web browser. The video should now be shown.
Note 1: You might have to start the Internet Explorer as Administrator. Just make a right click on the Internet Explorer Symbol in your Start menu and choose "Run as...".
Note 2: If you use a Virus scanner such as AVAST, KASPERSKY, AVIRA, F-SECURE or AVG you have to create an exception for the IP address of the camera. The easiest way is to shortly turn of all Internet Security Software in order to check which software is blocking the ActiveX plugin from installation/execution.
Discuss this article on the INSTAR Forum !
