IOBroker on a Raspberry Pi
- INSTAR MQTT Broker und ioBroker
- Verwenden Sie ioBroker als MQTT-Broker anstelle eines MQTT-Clients
- Verwenden Sie den INSTAR MQTT Alarmserver mit ioBroker
- Verwenden Sie den INSTAR MQTT Alarmserver, um eine einfache Objektverfolgung zu erstellen
- Aktualisieren, wenn Clients eine Verbindung zu Ihrem Broker herstellen
- Hinzufügen von Kameras, die MQTT nicht unterstützen
- Verwendung des HTTP-Alarmservers anstelle des MQTT-Alarmservers
- Verwenden des Node-RED-Adapters zum Erstellen einer Visualisierung
- Ein intelligenter Weg, die Live-Videos Ihrer Kameras dem ioBroker Vis hinzuzufügen
- INSTAR MQTT und BlueIris in ioBroker
- ioBroker MQTT Adapter und Sonderzeichen
Raspbian
We are going to use a clean installation of Raspian (a Debian based LINUX Dist for your Raspberry Pi) to set up ioBroker. Please be aware that there is also a specific Distro for ioBroker that - in theory - sets up everything for you. No assembly required. But we ran into some issues and decided to do it all manually instead. But please feel free to try the ioBroker OS first - it might work for you and save you some time.
Required Hardware
- Raspberry PI
- Power supply (it is important to have a good one. You will have stability problems with weak or bad quality power supplies)
- SD Card
Required Software
- Download the Raspian Image
- Etcher to flash the Image to your SD Card (we already used it to install openHABian)
- Putty or Mobaterm to SSH into your Pi
Raspbian Installation
Insert the prepared SD card into your RaspberryPi, connect a LAN and power cable and wait 20-45min for the Operating System to install.
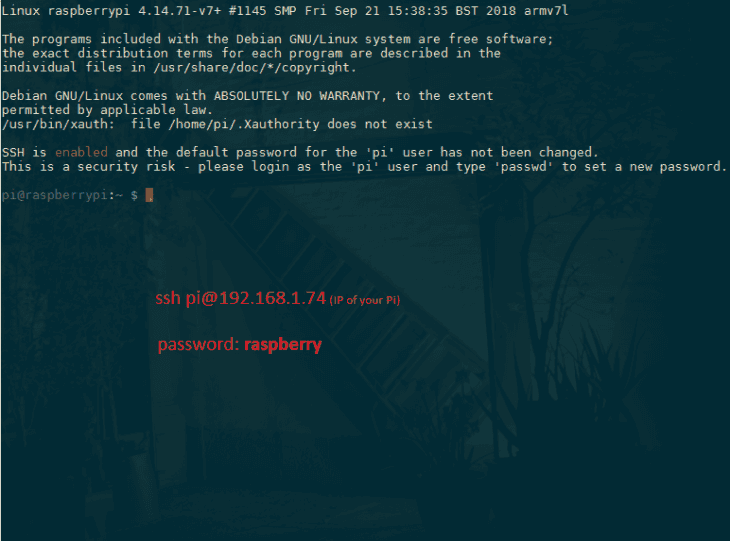
Connect to Raspberry via your SSH client. Login: pi, Password: raspberry
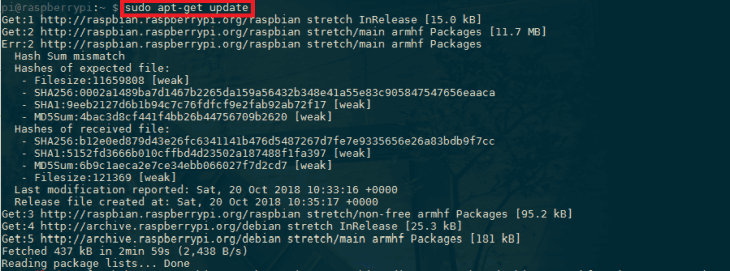
- Make sure that you are up-to-date with your software-base
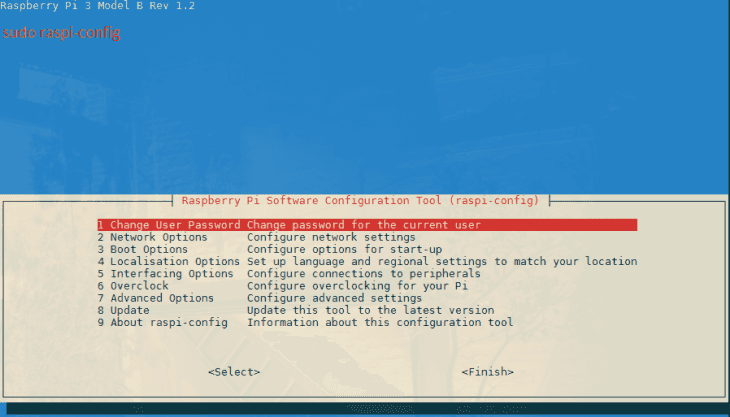
- Configure RaspberryPi with
sudo raspi-config
- First, change the default password:
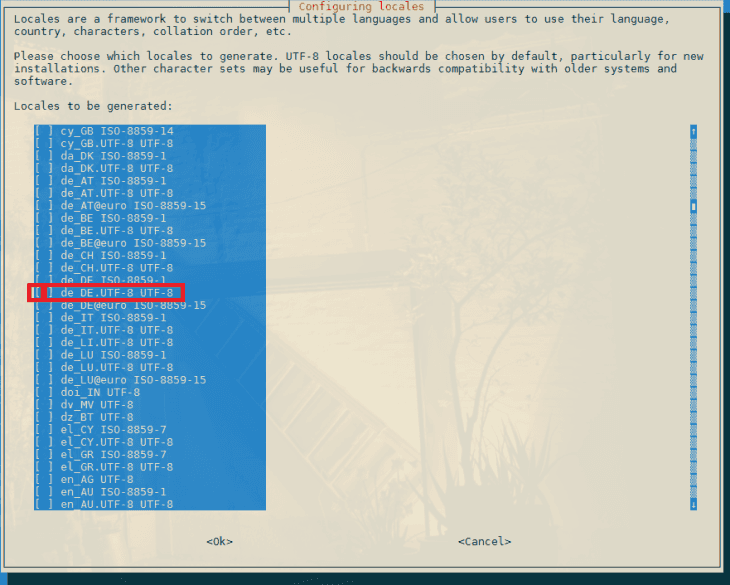
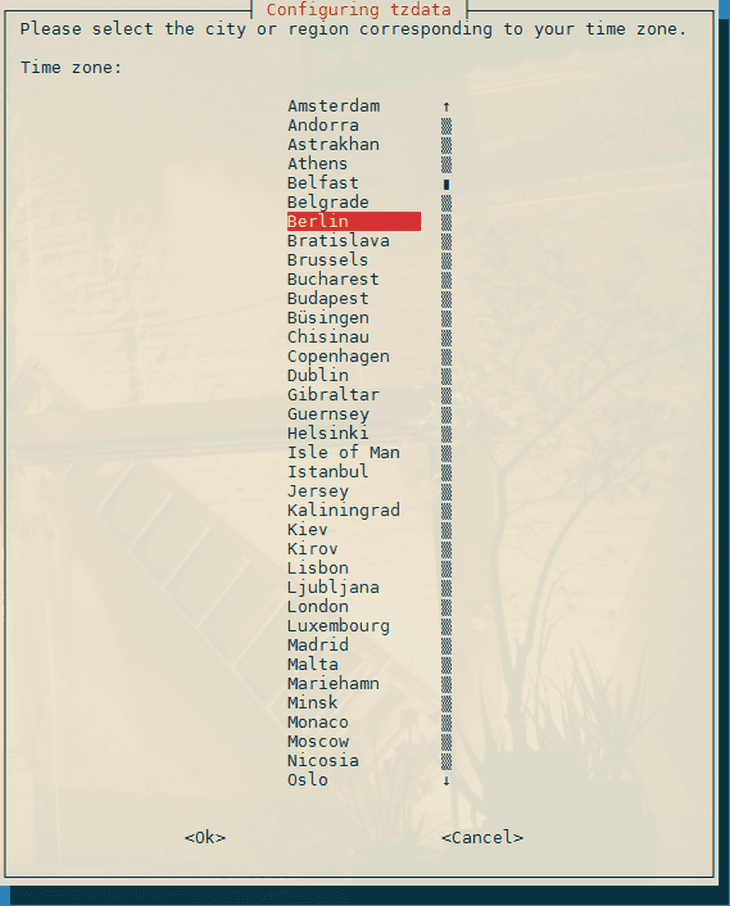
- Set your location and language
- Then go the Advanced Options and expand the file system to use the complete available storage space.
- Finish the Configuration and Login with your new Password:
- Installation of Node.js
Deinstall old node.je Version:
apt-get --purge remove node
apt-get --purge remove nodejs
apt-get autoremove
reboot
Then install Node.js anew for Raspbery 2/3:
sudo -s
curl -sL https://deb.nodesource.com/setup_10.x | sudo -E bash -
sudo apt-get install -y build-essential python-rpi.gpio python nodejs
reboot
After installation of node.js the command node -v should show the node.js version. if not, create alias to bin file:
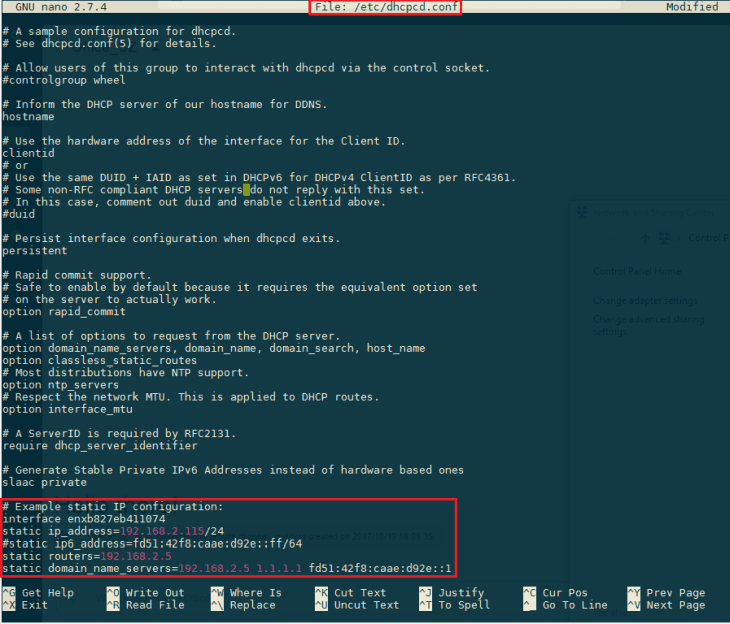
sudo ln -s /usr/local/bin/nodejs /usr/bin/node- Set static IP address (optional)
sudo nano /etc/dhcpcd.confCall per interface (example):
interface eth0
static ip_address=192.168.2.115/24
static routers=192.168.2.5
static domain_name_servers=192.168.2.5 1.1.1.1