Q: The Homebridge Tutorial showed how to add buttons and switches to Homebridge so that I am now able to to control my camera through Homebridge in my Homekit App on my iPhone. Is it possible to combine this with Node-RED to be able to write small scripts and automation ?
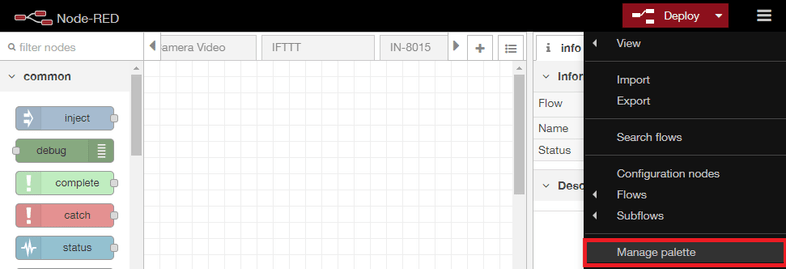
A: Yes! Start by installing node-red-contrib-homekit-bridged from your Node-Red Palette menu:
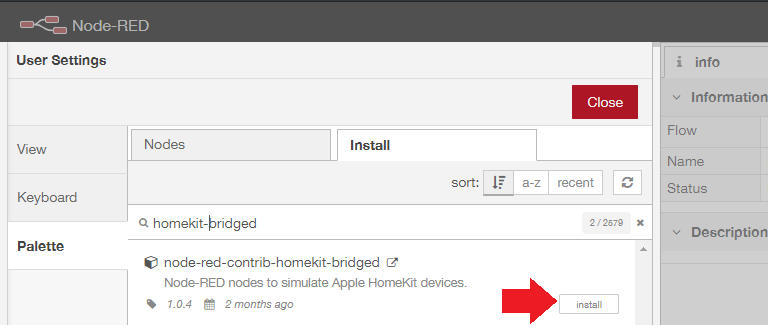
Search for homekit-bridged and click on install:
Note that you can also use a pre-configured Docker container from Docker-HUB as an alternative.
Homebridge
Now start the Homebridge device that we build according to this Homebridge Tutorial:
docker run \
  --net=host \
  --name=homebridge \
  --privileged \
  --restart=always \
  --rm \
  -e PUID=0 -e PGID=0 \
  -e TZ=Europe/Berlin \
  -e HOMEBRIDGE_CONFIG_UI=1 \
  -e HOMEBRIDGE_CONFIG_UI_PORT=8080 \
  -e HOMEBRIDGE_INSECURE=1 \
  -v /opt/homebridge:/homebridge \
oznu/homebridgeAnd login to the Hombridge UI on port 8080 with the default login admin/admin.
Creating a Device in Node-RED
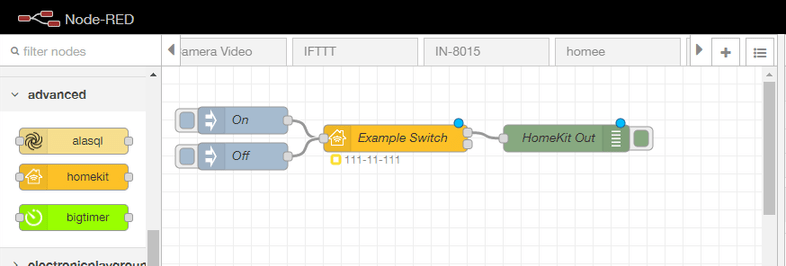
I now start by importing an example switch to Node-RED:
I now need to copy my Bridge PIN from the Homebridge UI:
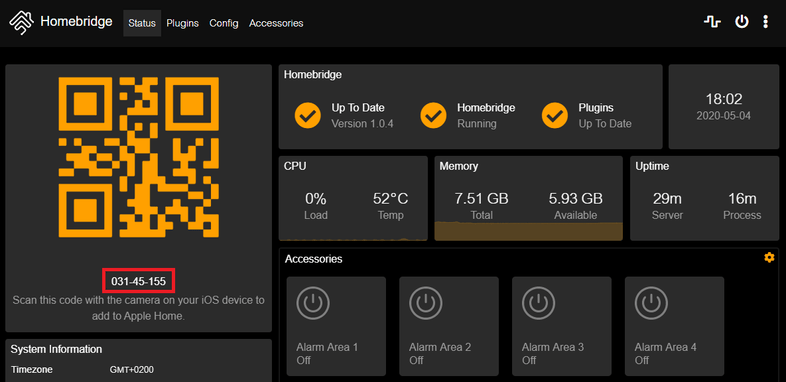
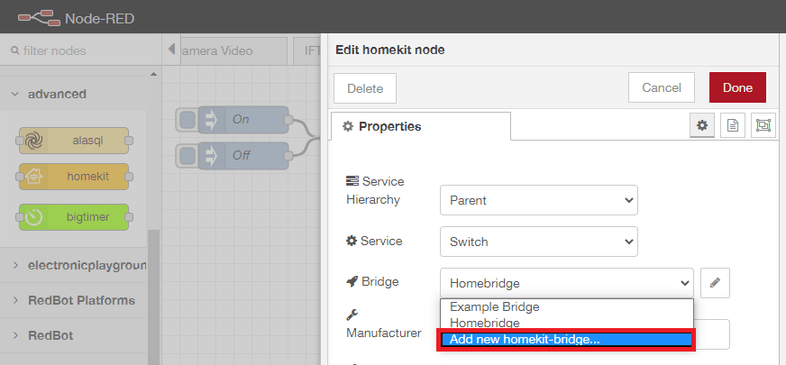
Now add a new bridge to the Homekit Node:
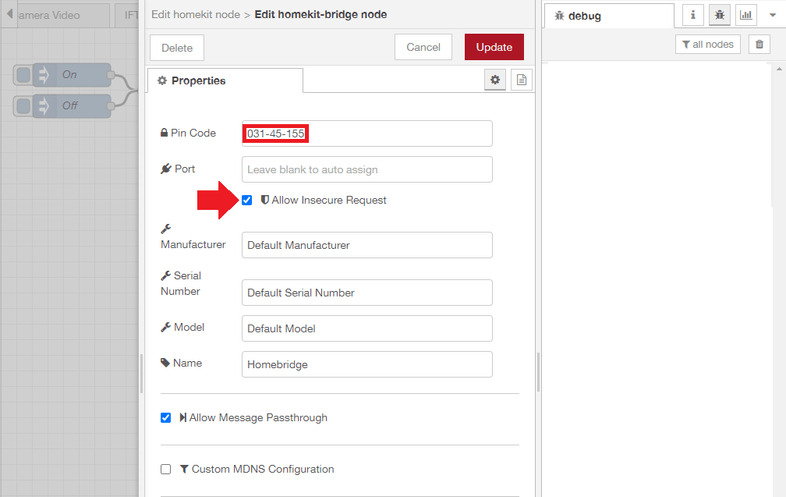
And copy your personal PIN into the Pin Code field:
Deploy your changes to Node-RED and try out the Inject nodes - they either inject false or true to your Homebridge device:

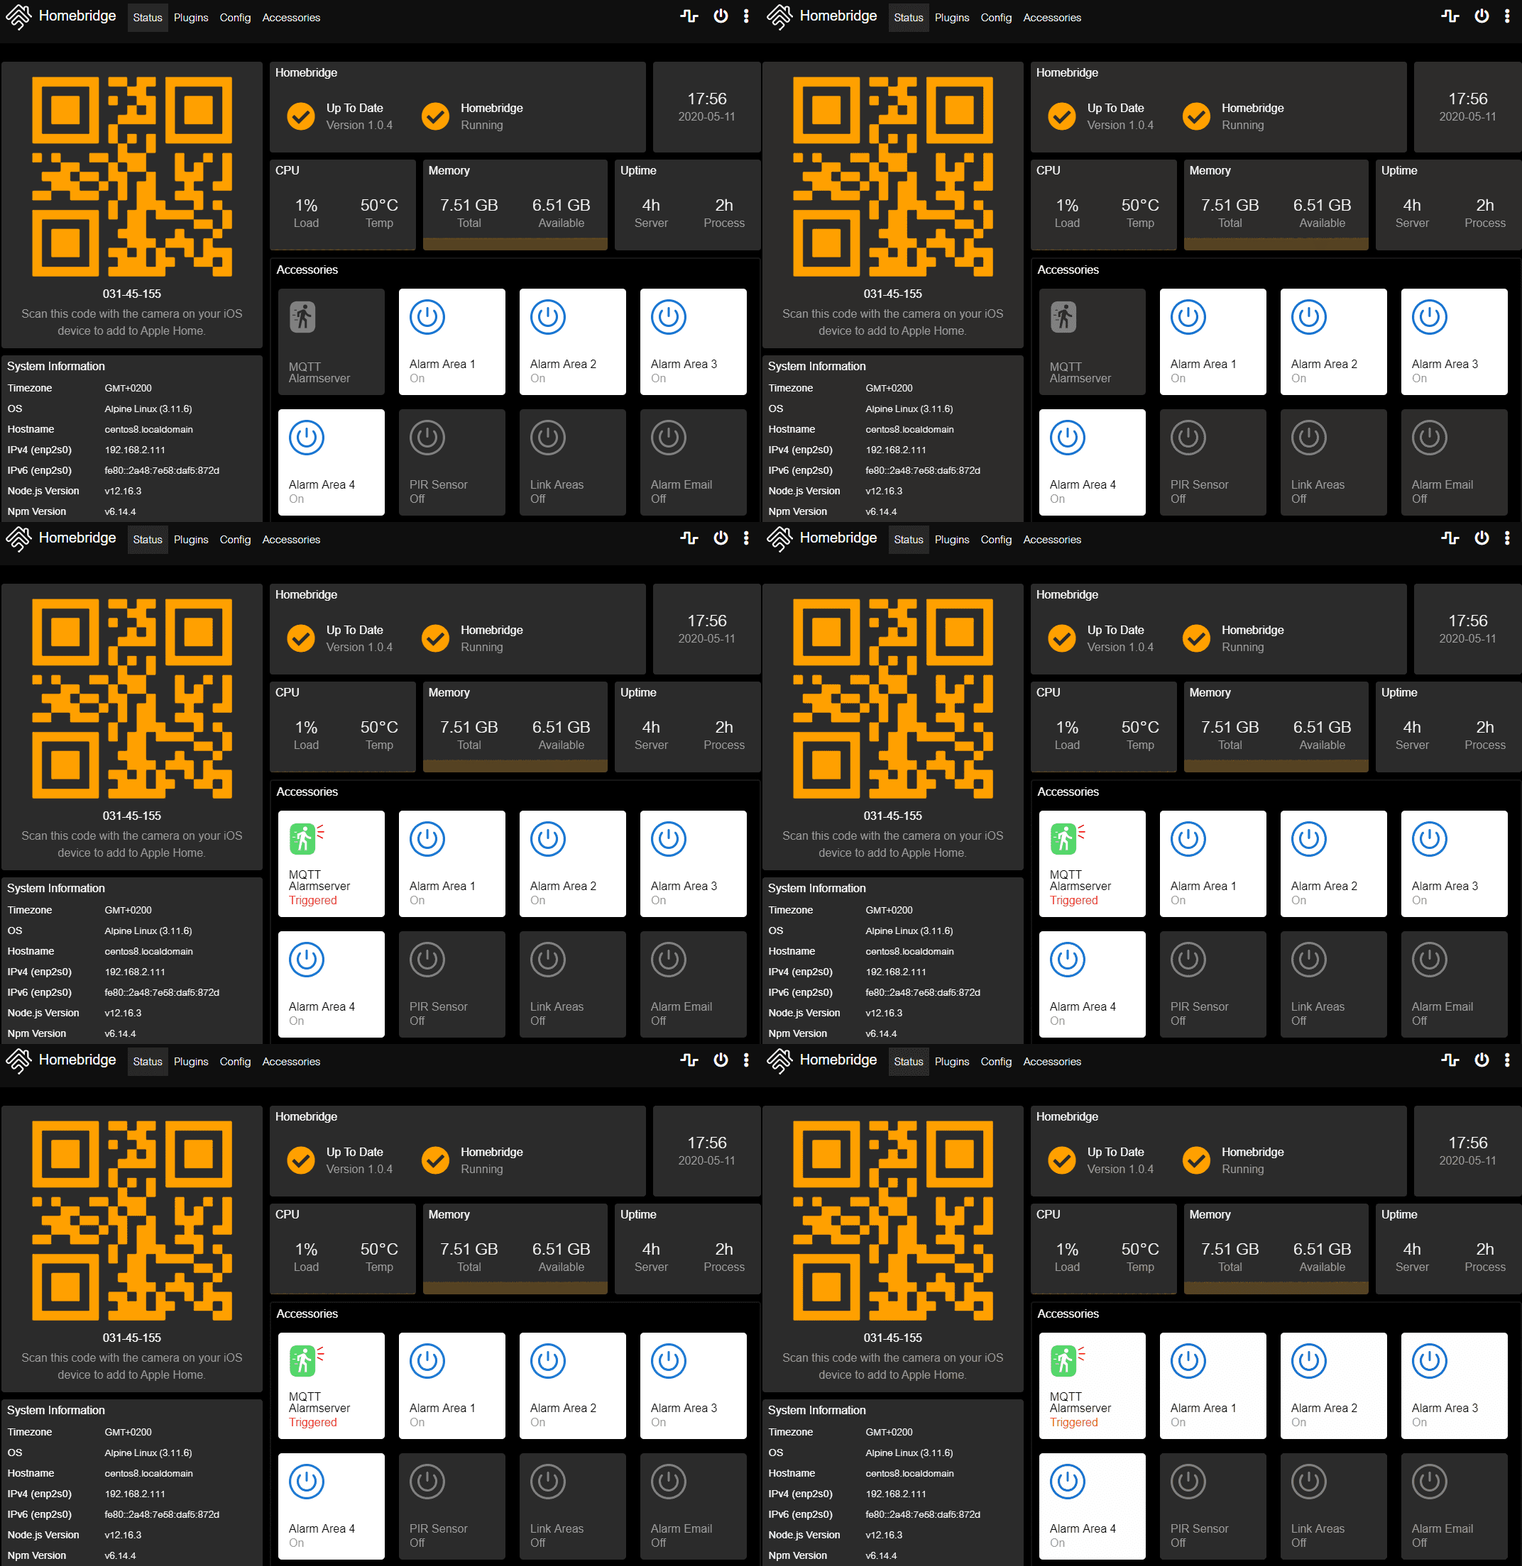
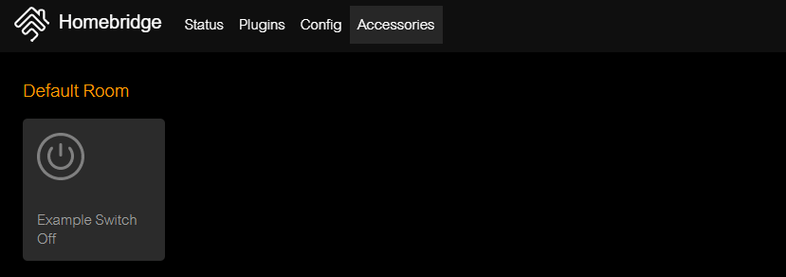
You can check the Accessories tab in Homebridge. There should be a button now that reflects the state that you are injecting in Node-RED:
Practical Example
We are now able to connect a pair of MQTT In/Out Nodes to an Homekit Node and start controlling our camera though it's MQTT API like in our previous tutoria. Let's now use Node-RED to write a slightly more complex script to interact with our camera and Homebridge.
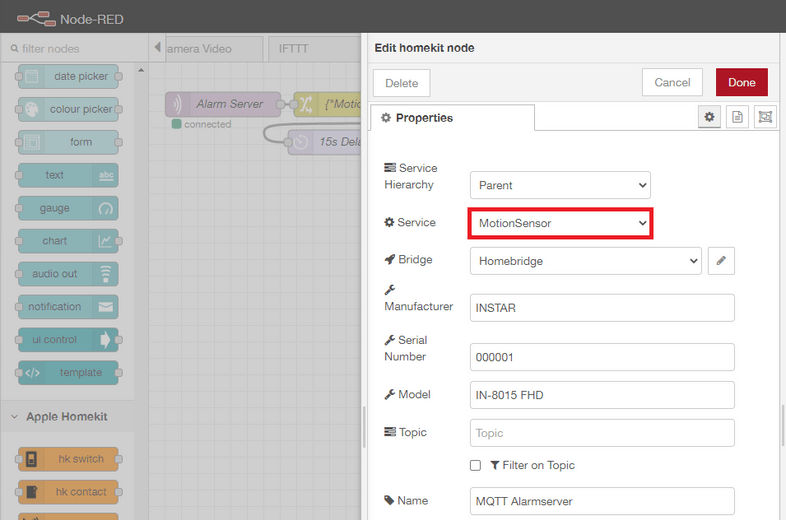
Start by adding a new Homekit Node but this time choose MotionSensor as the service template:
The complete Flow looks like this and can be imported from the JSON code below:

[{"id":"783862e2.45477c","type":"homekit-service","z":"9a6bd5e7.967408","isParent":true,"bridge":"4132a771.850788","parentService":"","name":"MQTT Alarmserver","serviceName":"MotionSensor","topic":"","filter":false,"manufacturer":"INSTAR","model":"IN-8015 FHD","serialNo":"000001","cameraConfigVideoProcessor":"","cameraConfigSource":"","cameraConfigStillImageSource":"","cameraConfigMaxStreams":"","cameraConfigMaxWidth":"","cameraConfigMaxHeight":"","cameraConfigMaxFPS":"","cameraConfigMaxBitrate":"","cameraConfigVideoCodec":"","cameraConfigAudioCodec":"","cameraConfigAudio":false,"cameraConfigPacketSize":"","cameraConfigVerticalFlip":false,"cameraConfigHorizontalFlip":false,"cameraConfigMapVideo":"","cameraConfigMapAudio":"","cameraConfigVideoFilter":"","cameraConfigAdditionalCommandLine":"","cameraConfigDebug":false,"cameraConfigInterfaceName":"","characteristicProperties":"{}","x":559,"y":51,"wires":[["4d9c9a3c.69a0d4"],[]]},{"id":"8f35f643.8ca9e8","type":"mqtt in","z":"9a6bd5e7.967408","name":"Alarm Server","topic":"instar/10D1DC218F96/status/alarm/triggered","qos":"1","datatype":"auto","broker":"fbc900bc.b83bb","x":90,"y":51,"wires":[["7dc6d773.751818"]]},{"id":"7dc6d773.751818","type":"change","z":"9a6bd5e7.967408","name":"{\"MotionDetected\":true}","rules":[{"t":"set","p":"payload","pt":"msg","to":"{\"MotionDetected\":true}","tot":"json"}],"action":"","property":"","from":"","to":"","reg":false,"x":286,"y":51,"wires":[["783862e2.45477c","d7eb0fd1.103b5"]]},{"id":"d7eb0fd1.103b5","type":"delay","z":"9a6bd5e7.967408","name":"15s Delay","pauseType":"delay","timeout":"15","timeoutUnits":"seconds","rate":"1","nbRateUnits":"1","rateUnits":"second","randomFirst":"1","randomLast":"5","randomUnits":"seconds","drop":false,"x":229,"y":97,"wires":[["d2b769a7.b94af8"]]},{"id":"d2b769a7.b94af8","type":"change","z":"9a6bd5e7.967408","name":"{\"MotionDetected\":false}","rules":[{"t":"set","p":"payload","pt":"msg","to":"{\"MotionDetected\":false}","tot":"json"}],"action":"","property":"","from":"","to":"","reg":false,"x":418,"y":97,"wires":[["783862e2.45477c"]]},{"id":"eeaf38d9.a69958","type":"switch","z":"9a6bd5e7.967408","name":"","property":"payload","propertyType":"msg","rules":[{"t":"eq","v":"{\"MotionDetected\":true}","vt":"str"},{"t":"eq","v":"{\"MotionDetected\":false}","vt":"str"}],"checkall":"true","repair":false,"outputs":2,"x":864,"y":44,"wires":[["1b0e0bfe.ad8c94"],["a61efdfd.82e8f"]]},{"id":"b3e74d68.7f11c","type":"mqtt out","z":"9a6bd5e7.967408","name":"Preset Position","topic":"instar/10D1DC218F96/features/ptz/preset","qos":"1","retain":"false","broker":"fbc900bc.b83bb","x":1135,"y":40,"wires":[]},{"id":"4d9c9a3c.69a0d4","type":"json","z":"9a6bd5e7.967408","name":"","property":"payload","action":"","pretty":false,"x":740,"y":44,"wires":[["eeaf38d9.a69958"]]},{"id":"a61efdfd.82e8f","type":"change","z":"9a6bd5e7.967408","name":"Idle","rules":[{"t":"set","p":"payload","pt":"msg","to":"{\"val\":\"0\"}","tot":"str"}],"action":"","property":"","from":"","to":"","reg":false,"x":985,"y":61,"wires":[["b3e74d68.7f11c"]]},{"id":"1b0e0bfe.ad8c94","type":"change","z":"9a6bd5e7.967408","name":"Alarm","rules":[{"t":"set","p":"payload","pt":"msg","to":"{\"val\":\"1\"}","tot":"str"}],"action":"","property":"","from":"","to":"","reg":false,"x":984,"y":24,"wires":[["b3e74d68.7f11c"]]},{"id":"4132a771.850788","type":"homekit-bridge","z":"","bridgeName":"Homebridge","pinCode":"031-45-155","port":"","allowInsecureRequest":true,"manufacturer":"Default Manufacturer","model":"Default Model","serialNo":"Default Serial Number","customMdnsConfig":false,"mdnsMulticast":true,"mdnsInterface":"","mdnsPort":"","mdnsIp":"","mdnsTtl":"","mdnsLoopback":true,"mdnsReuseAddr":true,"allowMessagePassthrough":true},{"id":"fbc900bc.b83bb","type":"mqtt-broker","z":"","name":"192.168.2.117","broker":"192.168.2.117","port":"8883","tls":"70b691b5.003e5","clientid":"nodered","usetls":true,"compatmode":false,"keepalive":"60","cleansession":true,"birthTopic":"","birthQos":"0","birthPayload":"","closeTopic":"","closeQos":"0","closePayload":"","willTopic":"","willQos":"0","willPayload":""},{"id":"70b691b5.003e5","type":"tls-config","z":"","name":"8015Black","cert":"","key":"","ca":"","certname":"pcert.pem","keyname":"","caname":"","servername":"","verifyservercert":true}]On the left ond the right we have an MQTT In and Out Node with the MQTT Topics:
instar/10D1DC218F96/status/alarm/triggered
instar/10D1DC218F96/features/ptz/preset
Don't forget to replace the MQTT ID - 10D1DC218F96 - with your personal camera's ID!
When an alarm is triggered, the MQTT Alarmserver Topic status/alarm/triggered will be updated by our camera. In this case we will send a {"MotionDetected":true} message into the Homekit Node that will fall back to {"MotionDetected":false} after 15s. When the Motion Detection is set to be true our camera will move to preset position 2 and back to 1 again once the detection is false again.
