OpenHAB CLI Tool
We want to set up the Node-RED flow that we were already working with in our Windows Installation, so that we will be able to use all of the Node-RED Projects we developed there. First we want to use the automatic installation offered by the OpenHAB CLI - below we also take a look at how this can be done manually (in case that you are using a different LINUX distro for your Pi).
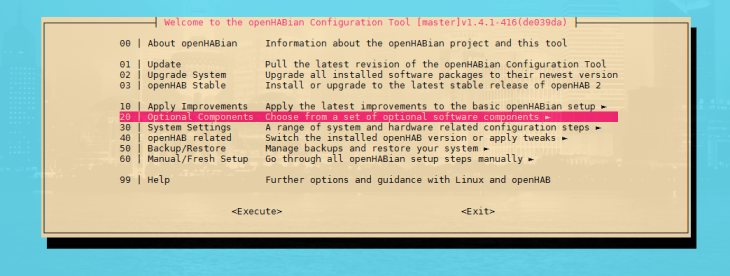
First, login to your Pi via SSH (Windows user can use the free Terminal from Mobaterm and open the CLI tool with sudo openhabian-config. Use your user password (on openHABian this is openhabian by default) to execute the program and choose Optional Components:
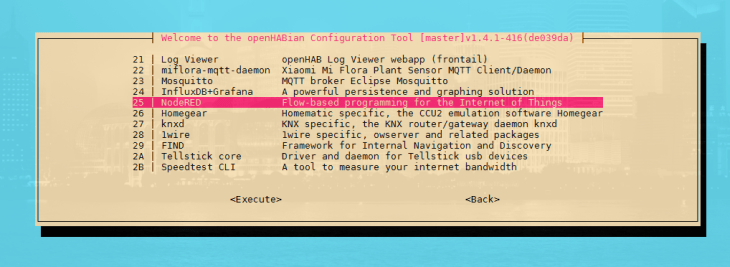
Then select Node-RED:
Let the install script run:
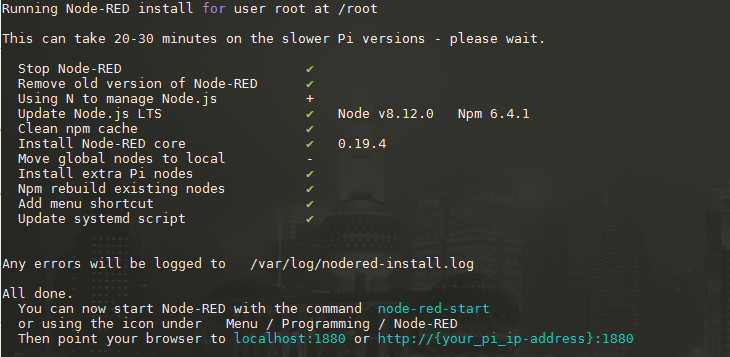
And all done - your Node-RED installation should now be available under http://openhabpi:1880 (or use the IP address of your Raspberry Pi instead of openhabpi). All Node-RED Projects that we developed earlier can now be copy&pasted here.
Setting up Node-RED
We already set up Node-RED for Windows - you can simply copy your setting.js file and use it on your Pi. The File is located under /home/openhabian/.node-red/settings.js:
module.exports = {
    uiPort: process.env.PORT || 1880,
    mqttReconnectTime: 15000,
    serialReconnectTime: 15000,
    debugMaxLength: 1000,
    httpAdminRoot: '/admin',
    httpStatic: '/home/openhabian/.node-red/static/',
    ui: { path: "dashboard" },
    adminAuth: {
        type: "credentials",
        users: [{
            username: "admin",
            password: "$2a$08$ffVDwvP4ZnPF3GVujYy7B.mEW4UIlb4NwuUsqikdgvUXvxyYg16.m",
            permissions: "*"
        }],
        default: {
            permissions: "read"
        }
    },
}
We changed the admin panel to be available under /admin, the dashboard to be under /dashboard and set up an admin login using the node-red-admin tool. Note that we changed the public directory.
Troubleshooting
You copied everything into the settings.js file but your Node-RED installation is not using it - e.g. you can still open the admin panel on the web root / instead of /admin and you are not asked to log in before making changes to your Node-RED flows.
The Node-RED installation script installs a start-up script for Node-RED that uses SystemD to manage the task. This script is located under /lib/systemd/system/nodered.service. Please make sure that the User, Group and WorkingDirectory is set to openhabian (/home/openhabian in case of the directory) and NOT root. The file should look something like this:
# systemd service file to start Node-RED

[Unit]
Description=Node-RED graphical event wiring tool
Wants=network.target
Documentation=http://nodered.org/docs/hardware/raspberrypi.html

[Service]
Type=simple
# Run as normal pi user - change to the user name you wish to run Node-RED as
User=openhabian
Group=openhabian
WorkingDirectory=/home/openhabian

Nice=5
Environment="NODE_OPTIONS=--max_old_space_size=256"
# uncomment and edit next line if you need an http proxy
#Environment="HTTP_PROXY=my.httpproxy.server.address"
# uncomment the next line for a more verbose log output
#Environment="NODE_RED_OPTIONS=-v"
#ExecStart=/usr/bin/env node $NODE_OPTIONS red.js $NODE_RED_OPTIONS
ExecStart=/usr/bin/env node-red-pi $NODE_OPTIONS $NODE_RED_OPTIONS
# Use SIGINT to stop
KillSignal=SIGINT
# Auto restart on crash
Restart=on-failure
# Tag things in the log
SyslogIdentifier=Node-RED
#StandardOutput=syslog

[Install]
WantedBy=multi-user.target
Manual Installation (optional)
If you are not using the openHABian Linux distro on your Pi, you can install or upgrade Node-RED using the following upgrade script command from the Node-RED Installation Guide:
bash <(curl -sL https://raw.githubusercontent.com/node-red/raspbian-deb-package/master/resources/update-nodejs-and-nodered)
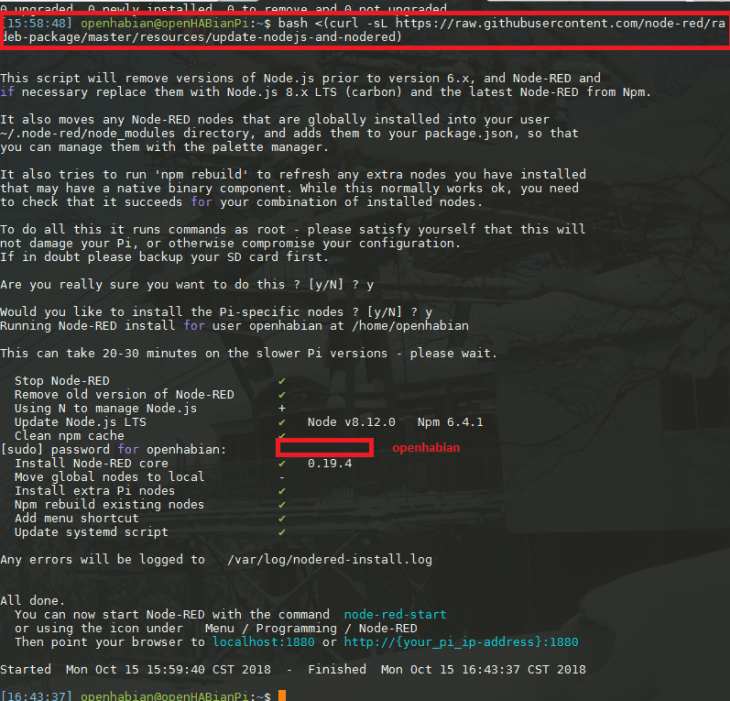
You can start Node-RED with the following command node-red-start - and stop it using node-red-stop. To see the log, run the command node-red-log.
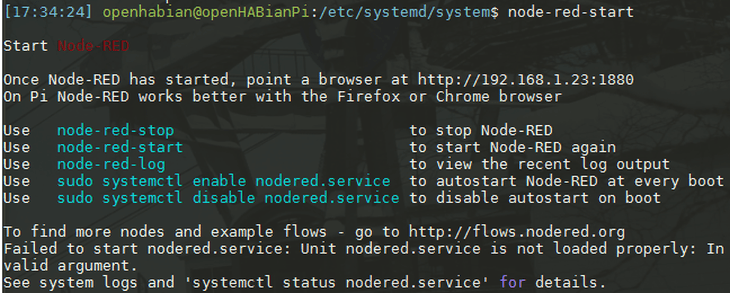
You can also activate a SystemD job to automatically restart Node-RED when you restart your Pi using the command sudo systemctl enable nodered.service:

