Integration of the live video stream in your website
There is two ways to add the video stream of your camera to your website.
- h264: This method will use the h.264 video stream of your camera. The h.264 requires the Flash Plugin installed inside your web browser. If you are still using an older camera model that uses the INSTAR ActiveX Plugin - please follow this guide instead
- MJPEG: This method will work with every web browser without the need for a video plugin.
Note: In order to access your camera over the internet you need to forward the HTTP and RTMP Port of your camera inside your Router and use your camera's DDNS Address instead of the local IP address. The following example only shows the use of the local IP.
Edit the HTML Page
Please download our HTML package and unpack the ZIP file. The ZIP file can be found here.

Download and unzip the files.
Adding the h.264 Videostream
If you want to use the h.264 video stream in your website please open the file h264_video.html and make the following modifications for your camera:
<html>
<head>
<title>INSTAR HD und FullHD Kamera</title>
<embed src="http://192.168.1.116:80/flash/StrobeMediaPlayback.swf"
mode="flash"
flashvars="&src=rtmp://192.168.1.116:1935/flash/12:YWRtaW46aW5zdGFy&streamType=live&autoPlay=true"
type="application/x-shockwave-flash"
width="640"
height="352">
</body>
</html>In this example I added a camera with the following information (please change them according to your camera setup):
| local IP address | 192.168.1.116 |
| http port | 80 |
| rtmp port | 1935 |
| username | admin |
| password | instar |
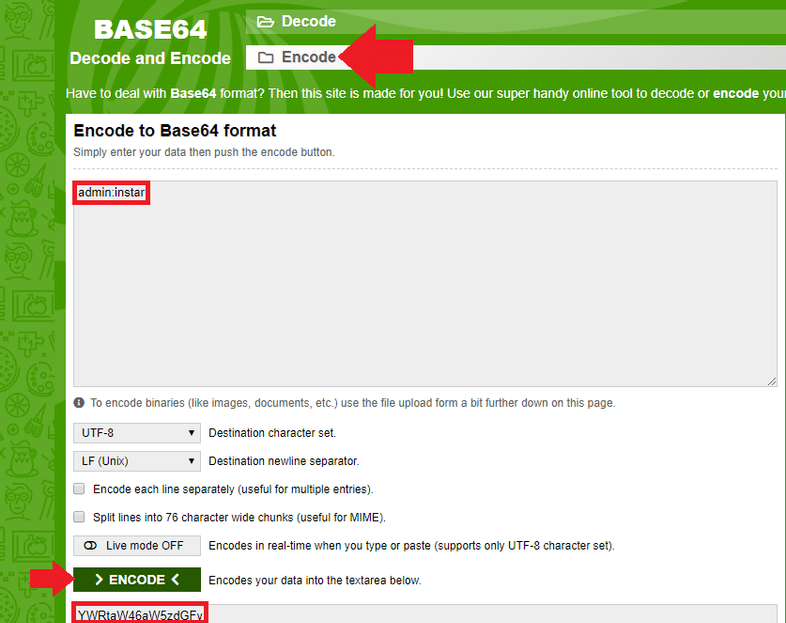
| base64 login | admin:instar => YWRtaW46aW5zdGFy |
As you can see in the Flash video URL you have to base64 encode the user login. This can be done on the www.base64encode.org website:

The player is then downloaded from:
http://192.168.1.116:80/flash/StrobeMediaPlayback.swf
And uses your cameras RTMP stream from:
rtmp://192.168.1.116:1935/flash/12:YWRtaW46aW5zdGFy&streamType=live&autoPlay=true
Adding the MJPEG Videostream
If you want to use the MJPEG stream instead, please modify the file mjpeg_video.html in the same way as explained above:
////////////////////////////////////////////////////////////////////////////////
// DIESE PARAMETER M�SSEN ENTSPRECHEND AN DIE IHRER KAMERA ANGEPASST WERDEN
// START KAMERA PARAMETER
////////////////////////////////////////////////////////////////////////////////
var url = '192.168.1.117:80';
var streamnum = 11; // Videostream user 11 for 1280 x 720 pixel, 12 for 640 x 352 pixel and 13 for 320 x 176 pixel resolution
var name0 = 'admin'; // Camera Username
var password0 = 'instar'; // Camera Password
////////////////////////////////////////////////////////////////////////////////
// ENDE KAMERA PARAMETER
////////////////////////////////////////////////////////////////////////////////Note: If your login contains a special character it has to be URL encoded. For example the character
&encodes to%26- if your camera login is&instaryou have to add%26instarinstead.
Testing Offline
If you want to verify that everything is working before you upload those files you need to use a local web server on your host machine to serve them to your web browser. If you already have an Apache or NGINX web server / proxy installed, just drop your file into the working directory of those applications and rename it index.html. You should now be able to access the website on your host machines IP address.
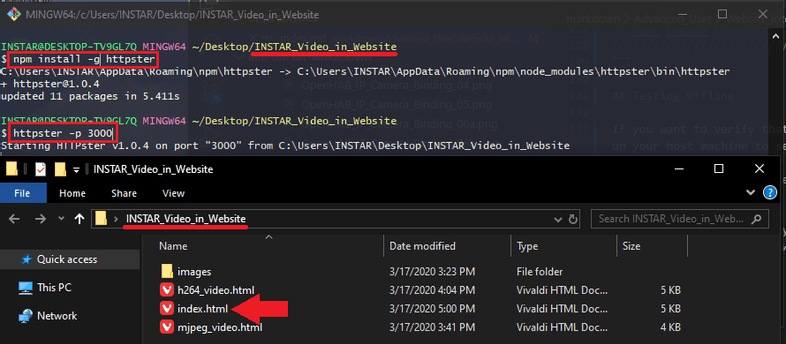
As an alternative you can install Node.js on your computer. Then install and run the program httpster by typing the following command into your terminal inside the folder that holds your files (rename the one that you want to use to index.html):
npm install -g httpster
httpster -p 3000

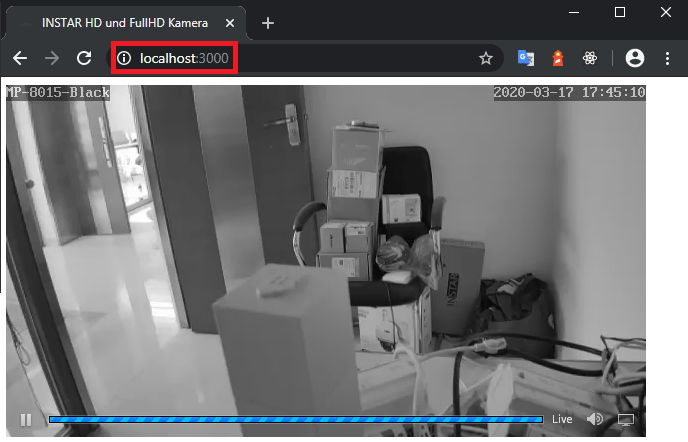
By typing httpster -p 3000 you now have started a web server on port 3000 on your host machine. This server is hosting the content of the folder you started it in. Since you renamed your file index.html your browser will see this as the entry point of your web site when accessing the URL http://localhost:3000:

Upload the Page to your Server
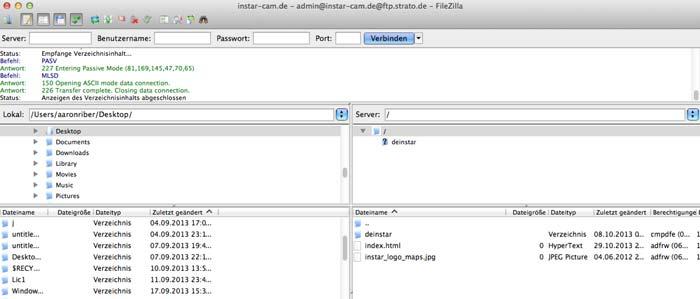
Now please use a FTP client in order to upload the files to your web space. In our example we are using the software FileZilla. If you are not familiar with HTML we recommend you to upload all files in the same folder next to the index.html of your website.

All you need to do is either to link either of those files - h264_video.html or mjpeg_video.html - into your website.
