UltraHD Series (2K+ 1440p & 4K 2160p) Web User Interface
Network Menu
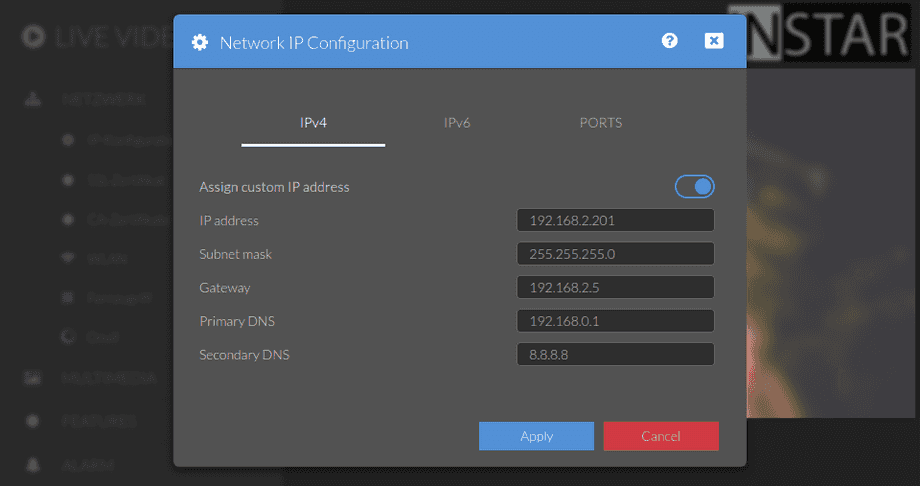
Change your cameras IP address, gateway and DNS server - all these settings are usually set up by the Installation Wizard and don´t need to be changed. The camera´s http port might have to be changed to access your cameras webUI over the internet.
Your camera provides a fine-grained access rights system that allows you to restrict access to certain menus of the web user interface and its underlying CGI commands. The minimum permission to access this menu is:
- User Permissions:
System Settings
User permissions can be modified in the user menu.
You can set whether the camera will be assigned an IP address by your router (DHCP) or, if you want to manually set a fixed address. Please check here on how to set a fixed IP address. In general, we recommend that you deactivate the automatic service and set a manual IP to avoid further trouble with the remote access to your camera.
Network Settings | Description |
|---|---|
| IP address | This is the IPv4 address of your camera inside your local network. To access your camera´s web user interface, simply type in the IP address into the address bar of web browser. If your camera´s HTTP port is not "80", please add the port to the IP address separated by a : , like 192.168.1.125:8081. |
| Subnetmask | The subnet mask defines the subnet your camera is connected to. It is 255.255.255.0 in most small networks. |
| Gateway | The gateway is the connection between your local network and the internet. In most small networks it is the IP address of your router - e.g. 192.168.1.1, 192.168.2.1 or 192.168.178.1. The first 3 numbers are the same, as the IP address of your camera - just add the number 1 in last position. |
| Primary DNS Server | The DNS server is needed by your camera to resolve internet addresses. In most small networks it is the IP address of your router - e.g. 192.168.1.1, 192.168.2.1 or 192.168.178.1. |
| Secondary DNS Server | Can be left empty if there is only one DNS server in your local network. Or it can be set to a public online DNS server like 1.1.1.1, 208.67.222.222 or 8.8.8.8 to provide a backup service. |
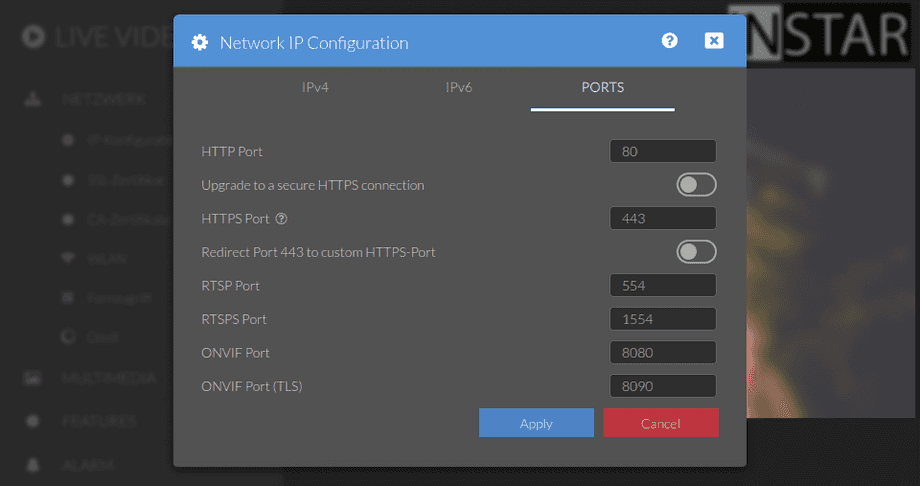
| HTTP Port | The HTTP Port is the LAN Port of your camera. Add this port to your camera´s IP address, if you want to access the web user interface with your web browser. This is also the port that you need to Forward inside your router, to access your camera with our smartphone app (Android, iPhone, iPad, Windows Phone, Windows Metro) via its DDNS Address. We recommend that you use a HTTP port that is 8081 or higher. If you have more than 1 camera, always add 1 to the port for the next camera 8081, 8082, 8083, etc... Only necessary if you want to access your camera with our smartphone app over its DDNS address!. |
| HTTPS Port | The HTTPS Port is the secure LAN Port of your camera. Add this port to your camera´s IP address and add the https:// prefix, if you want to access the web user interface with your web browser e.g. https://192.168.1.200:443. This is also the port that you need to Forward inside your router, to access your camera with your Browser via it´s DDNS Address. If you have more then 1 camera, always add 1 to the port for the next camera 443, 444, 445, etc.. Only necessary if your want to access your camera with your web browser over it´s DDNS address! |
Network Settings | Description |
|---|---|
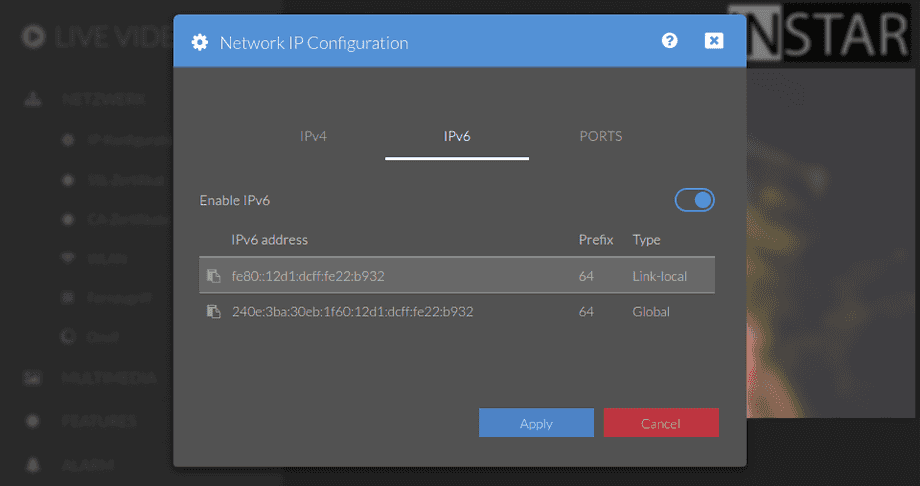
| Enable IPv6 | If you router is configured to use the Internet Protocol Version 6 you can activate the IPv6 support here to enable your camera to receive an IPv6 address from your routers DHCPv6 server. Once received they will show up in the field below. |
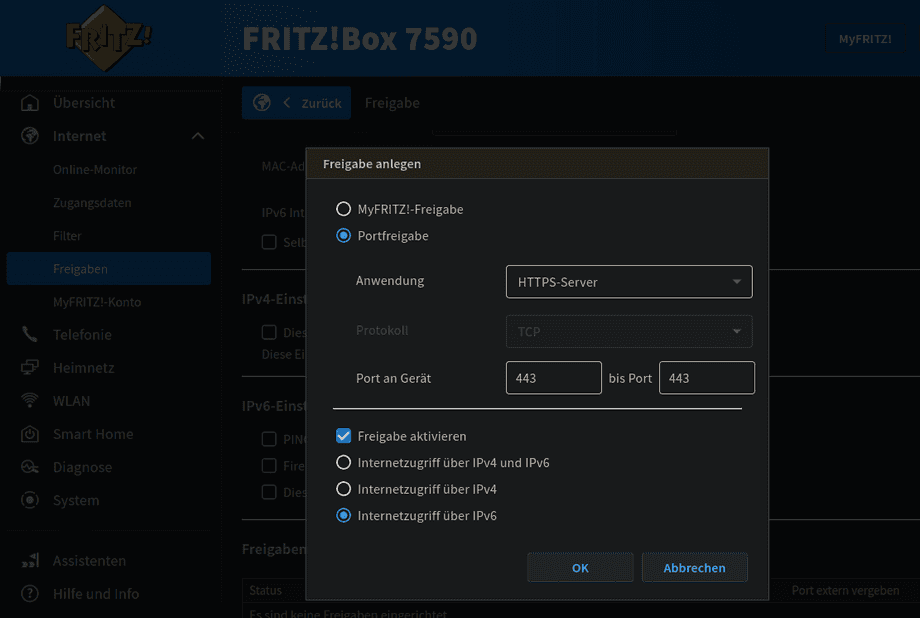
IPv6 Port Forwarding
- see also:

The global address is the address that must be used if you want to forward a port in your router to enable remote access. This address is used by your camera for your DDNS address and can be used to access the camera externally as soon as the HTTP or HTTPS port has been forwarded.
With IPv6, in contrast to IPv4, ports are only opened, not forwarded, so that every Instar 2K+ WQHD camera in the network can accessed via the same port, but you have to use a separate DDNS address for each camera.
For comparison, with IPv4 port forwarding, each camera is forwarded through a unique port. You can then access all cameras in the same network via the same DDNS address by simply appending other ports to the address.
Web Access Encryption
To access your camera´s web user interface securely, use the HTTPS port you set above. Add this port to your camera´s DDNS Address and add the https:// prefix, if you want to access the web user interface with your web browser - e.g. if your camera has the DDNS address abcd12.ddns-instar.de and your HTTPS port is 443, type https://abcd12.ddns-instar.de:443 into your browsers address bar.
Be aware that INSTAR Deutschland provided a valid encryption certificate for your DDNS address. If you try to access your camera´s local IP address over HTTPS - e.g. https://192.168.1.20:443, you will be confronted with a security warning. But there is no security risk in adding an exception to your browser, to access the site anyway:
The INSTAR SSL certificate is only valid, if you access your camera over its DDNS Address. When you try to use the HTTPS encryption, when accessing your camera inside your local network (over its local IP address), you will see a security warning.
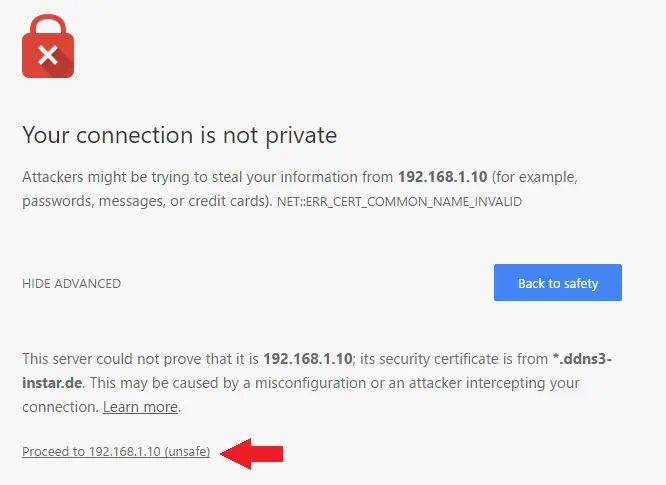
Click on advanced (the naming of this button will vary, depending on your browser) and click that you want to proceed anyway. The web browsers Safari and Firefox will additionally ask you to add an exception for the certificate - click on Ok to proceed.
