Software
macOS
InstarVision v3 for macOS
The InstarVision Surveillance Center is an IP camera software which can support 64 cameras at the same time, including Network cameras, USB cameras remotely accessed secondary installations of the software.
The InstarVision Surveillance Center allows you to keep an eye on your home from anywhere, turning your PC into a video surveillance system, remote controlling your IP camera via pan & tilt zoom function. This webcam software can also broadcast the cameras live RTSP video stream to the internet or integrate it into your website with via video plugins or as a auto-refreshing JPG stream. The advanced video motion detection algorithm can be set up to notify you by Email alerts and record video in case of an alarm event. Other features include a multi-level user management, an electronic interactive map displaying your cameras on a site plan and stand-alone multi-channel video player to quickly screen your video recordings.
Overview
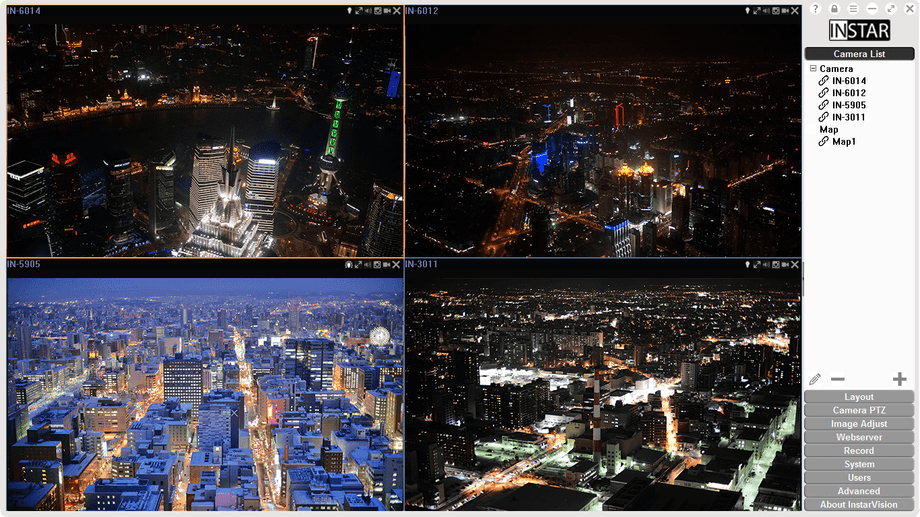
When you start the InstarVision Surveillance Center, you will be greeted by the main graphical user interface (GUI). The left area of the UI is the video canvas region. On the right you find the side navigation. You can hide or show the navigation at any time to maximize the space available for your cameras. Maximize the GUI to fit your screen, hide the program to macOS tray, or arbitrarily change the GUI size via dragging with your mouse. Click on Exit to stop the program and get back to the macOS desktop.
- To add cameras to the software open the Camera List and click on the + icon in the lower right of the list area.
- The software offers 3 recording methods. You can directly click the camera icon in the top right of each Video Channel Viewport to start or stop a manual recording. The Scheduled Recording and Alarm Recording is located in the Record Menu.
- The Email Notification and FTP Upload in case of an alert is also located in the Record Menu.
Video Mode, Default Login and Language
IF YOUR CAMERA´S VIDEO STAYS BLACK even though you are able to record videos and take snapshots, there might be a problem with the video encoding on your PC graphic card. Please open the System Menu and switch the Yuy2 Video Encoding. The video of your camera should become visible after you restarted the software.
You do not have to login to the software by default. But there is actually a default admin login and you might activate it by clicking the LOCK ICON in the top right of the user interface (above the INSTAR logo). Once the software is locked, you are no longer able to access any of the Side Navigation menus without logging in with the default username and password! Please be aware that these default values can be changed in the Side Navigation Users Menu. You can also activate the user lock by default - so that nobody but you can access the software. Consider writing down your login somewhere - there will be no way to access the software, if you forget your password!
Default Username | Default Password |
|---|---|
| admin | instar |
To change the LANGUAGE of the user interface, please go to the side navigation and open the System Menu. Now choose your language from the drop down menu.
Registration
When you first start the Surveillance Center you will see the following registration dialog:
You can click "Trial Version" button to test the software for 14 days for free - the software will be fully functional but limited to 16 camera channels! After you purchased the software and received your license code, please input the code here, and click Register Online. Alternatively, use the Email function to register your software by an ID token - Click on Create ID File and send that file to us by Email.
Once the software is registered this dialog will no longer be displayed, but can be accessed from the Advanced menu in the Side Navigation Bar in the software´s main window. In case you want to upgrade the software, just delete your old license key, copy & paste the new key into the input field and click on Register Online
Side Navigation
The Side Navigation Bar gives you quick access to all the software´s functions. There are 10 sub-categories you can click to display corresponding settings:
- Camera List: Add or edit your cameras and interactive site plans.
- Layout: Arrange your cameras according to your needs in layout presets.
- Camera PTZ: Control your camera´s Pan, Tilt and Zoom functions.
- Image Adjust: Adjust your camera´s image parameters.
- Webserver: Let InstarVision stream your camera´s video to the internet or embed the video in your website.
- Record: Use the software to record scheduled or alarm-triggered videos and manage FTP uploads and Email notifications.
- System: Adjust the UI language, start-up view and TCP ports used for the remote access.
- Users: Multi-level user management.
- Advanced: Check the software log, import/export system settings and start the InstarVision video player.
- About InstarVision: General Information about your software installation.
