Webserver
If you want to broadcast your camera´s video on your website, simply use the Webserver menu to create the necessary HTML code.
Use the InstarVision Surveillance Center to publish your cameras on your local network or the internet. The software offers a web service that you can reach by accessing the local server IP address on another PC on the same network. In the given example, the server address is 192.168.1.18. Just access a different workstation on your network, open the default web browser and type in http://192.168.1.18 to open the InstarVision web user interface. In case you want to check the webUI from the server itself, open your browser and type in http://localhost or http://127.0.0.1.
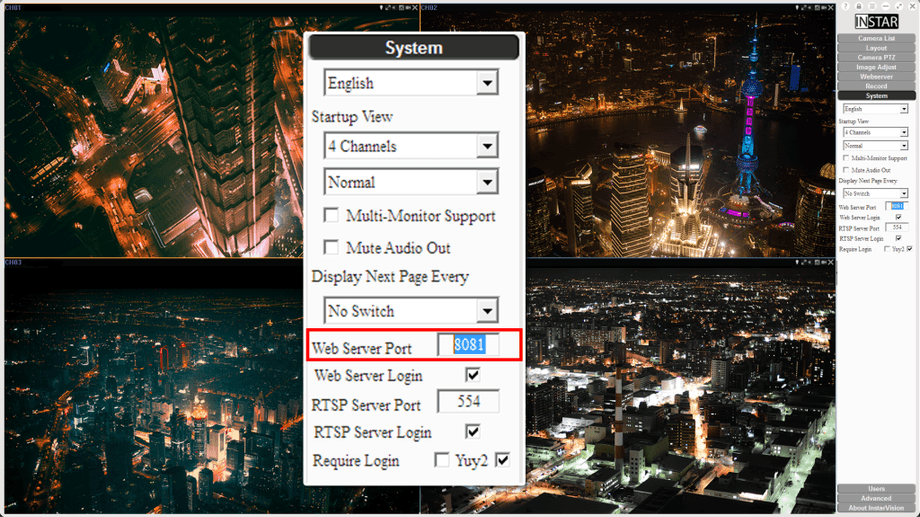
The default web server port is 80 - please change it to something above 8080 in case the web user interface does not show (see below). The web server port has to be added to the IP address, if it is not 80 - e.g. http://192.168.1.18:8081 or http://localhost:8081 ! The default login admin/instar can be changed in the User Menu.
To access the web user interface from the internet, first click on the Internet IP button to resolve your WAN IP address, then forward a port inside your router to the IP address of your InstarVision Server. You will be able to access the interface from the internet by using your internet IP followed by the forwarded port that you choose in the System settings. The default web server port is set to be 80. Please go to the System Settings to change the web port to the port that you forwarded inside your router´s NAT firewall. We recommend to use ports that are higher than 8080. The Internet Address of your internet access is most likely to change every 24h - please use the DDNS address of your INSTAR IP camera to access the software instead (see below).
Default User | Default Password |
|---|---|
| admin | instar |
Choose the right Video Plugin
ActiveX: The ActiveX viewer mode can display up to 32 video channels at once on your webpage - please click on Setup to configure the plugin to your needs. Your web site user is required to install the ActiveX plugin, when he enters the web site for the first time. The ActiveX plugin is only supported by Microsoft´s Internet Explorer. If you want to use Microsoft Edge, Firefox, Safari or Chrome, please select a different plugin - or go plugin-free using the Simple JPEG mode.
Windows Player: This view mode will use Windows Media Player to display your camera´s video - that means, it will only work under Microsoft Windows with the Windows Media Player installed! Also the recording video file format of the Surveillance Center has to be set to ASF or WMV for the channel that you want to broadcast. To change the file format, go to the General Recording Settings, select the desired channel and choose the format from the drop down menu.
QuickTime: This view mode will use the Quicktime Player web plugin to display your camera´s video. Please install and setup the Quicktime Player on your PC or MAC to be able to receive a video stream from an IP camera (set the streaming protocol to HTTP/Port 80). Also the recording video file format of the Surveillance Center has to be set to MP4 or MOV for the channel that you want to broadcast. To change the file format, go to the General Recording Settings, select the desired channel and choose the format from the drop down menu.
Flash: This viewer will use Flash player to display your camera's video stream. You must install the Adobe Flash plugin in your browser. Also the recording video file format of the Surveillance Center has to be set to FLV for the channel that you want to broadcast. To change the file format, go to the General Recording Settings, select the desired channel and choose the format from the drop down menu.
JPG Mode: This viewer will simply get single JPEG frames from your camera´s live stream and display them in a continuous fashion to create a video. Due to the nature of this process, there will be no audio signal from your camera. But you won´t need any Plugins to display the video!
All these broadcasting modes need you to forward the software HTTP (or RTSP) port to the server that runs the Surveillance Center. Please refer to our forwarding instruction for further information - note: in these instructions, we forward a port directly to each camera you want to access. In case of the Surveillance Center broadcast we only need to forward one port (HTTP or RTSP) directly to the server that runs the software and are able to access all camera streams maintained by the Surveillance Center! Remember that you can still use your camera´s DDNS address to access the software - just type in the DDNS address of your camera (that is operated on the same network as the Surveillance Center) and add the port that you forwarded to your server. E.g. if your camera is accessible from the internet via the address abcd12.ddns-instar.de:8081 and you forwarded port 8082 to the server, use type in http://abcd12.ddns-instar.de:8082 to access the software web user interface!
Give me an Example
1 - Go to the System Menu and change the Webserver Port to a port higher than 8080. You can also deactivate the required login here.
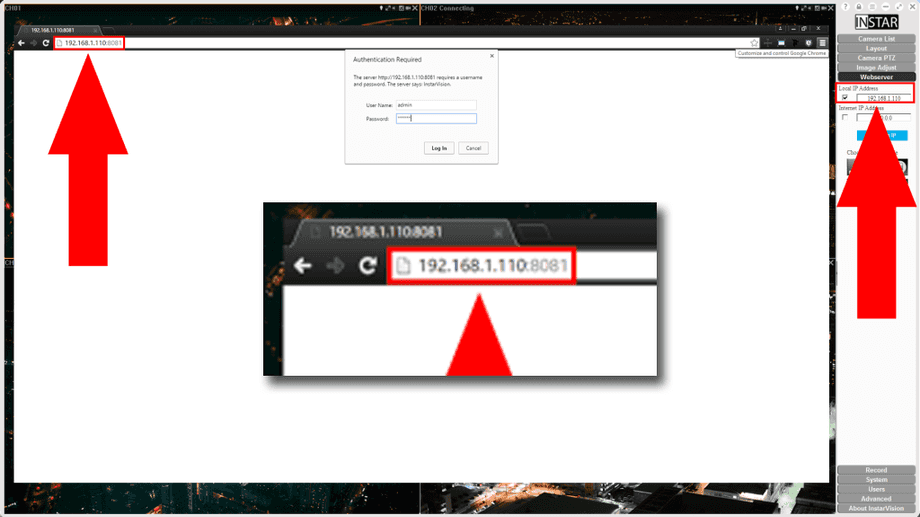
2 - Open the Webserver Menu to check your local IP address and type it into your web browser, followed by the Webserver Port. The default login is admin / instar.
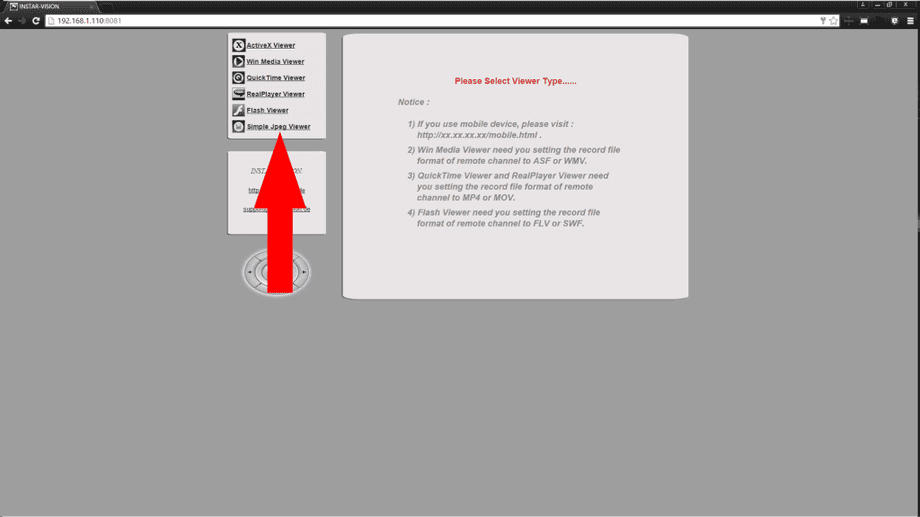
3 - Wait for the web user interface to load and choose the Simple JPEG Viewer - this is the only mode that does not require a browser plugin to display the video.
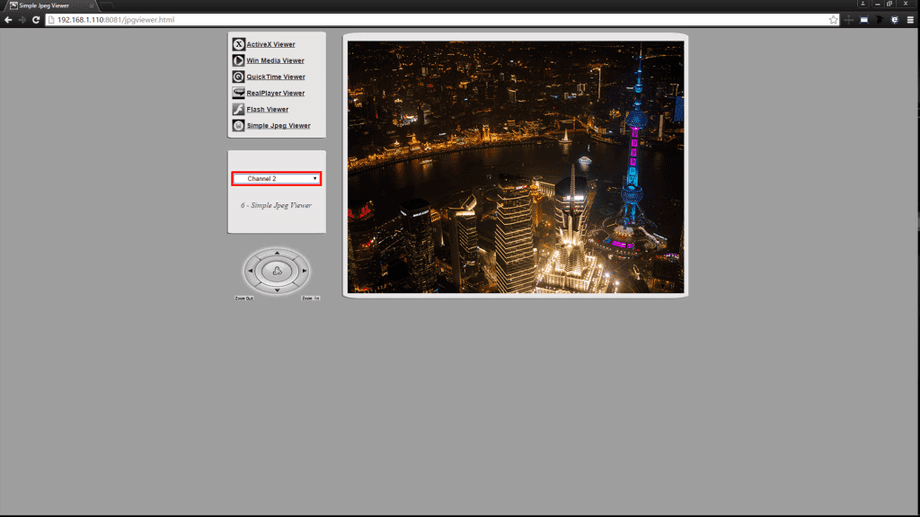
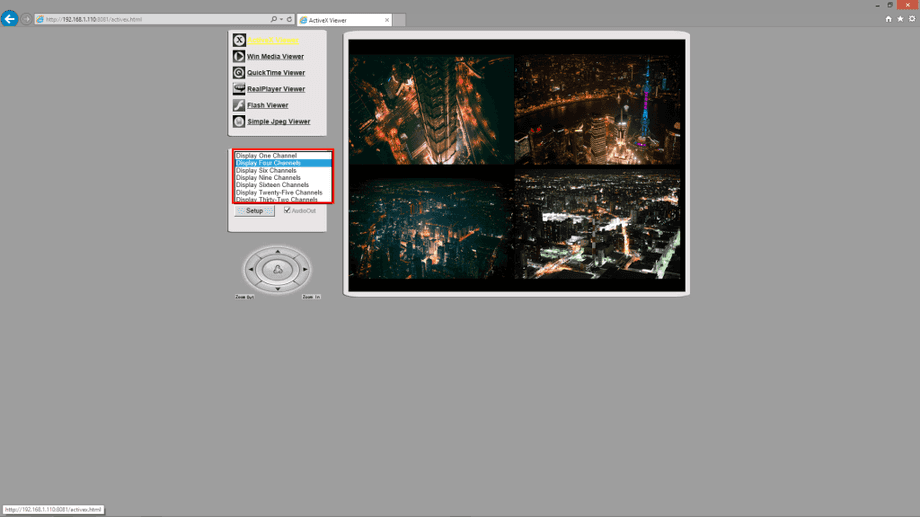
4 - Use the drop-down menu to switch between your camera channels. And the PTZ control pad to pan & tilt your camera (if supported by your model).
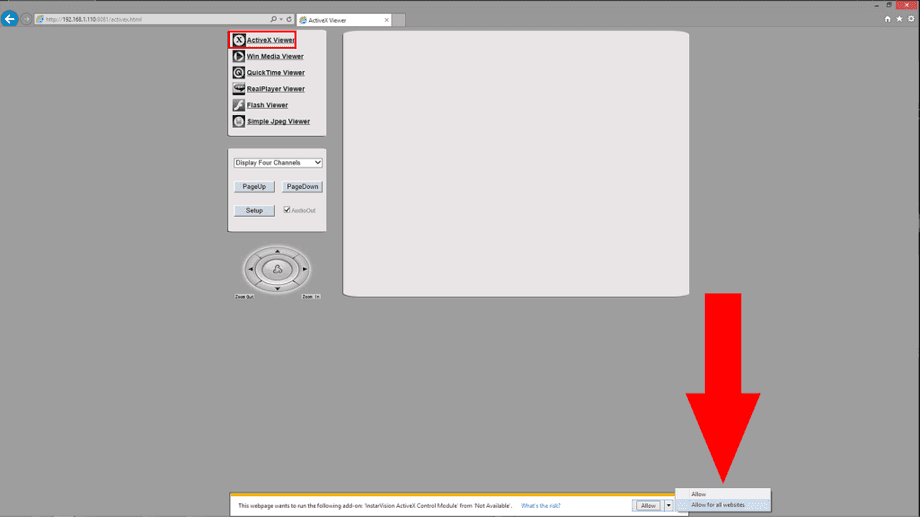
5 - In Internet Explorer choose the ActiveX Viewer and install the ActiveX plugin. Please make sure the plugin is not blocked by your Antivirus/Firewall.
6 - The ActiveX Viewer can display up to 32 cameras at the same time. Click on the Setup button to further configure the plugin to your needs.
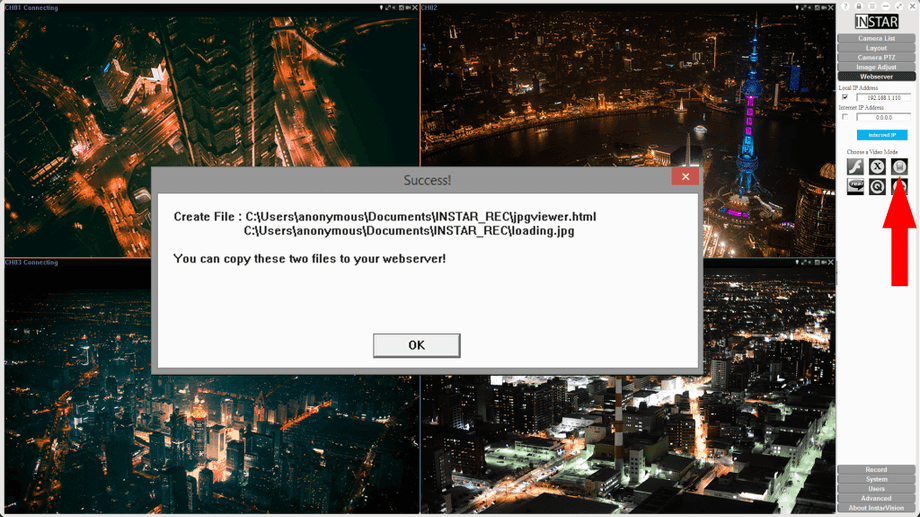
7 - To embed the web broadcast in your website, choose your Viewer in the Webserver Menu. The template files will be saved in your REC Directory.
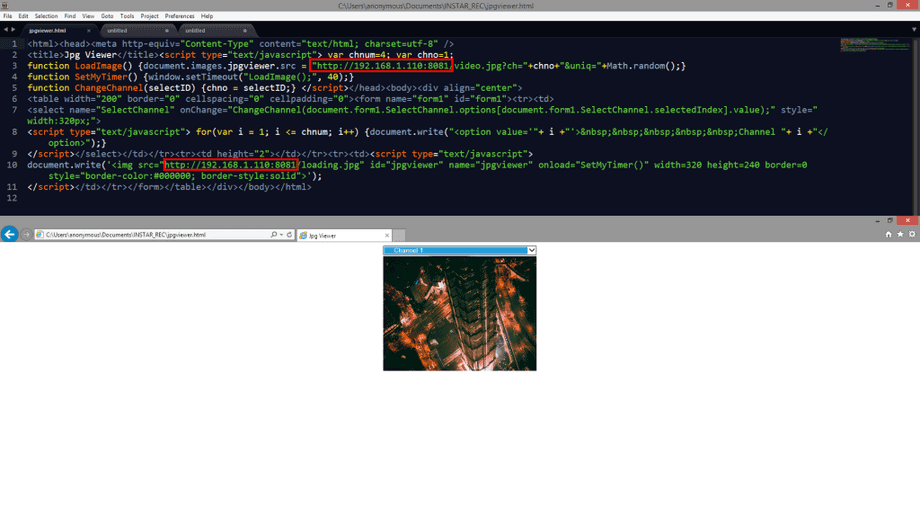
8 - The templates will contain the local IP of your server - please swap this for your DDNS address to access your server over the internet!

