iSpy Agent DVR in Docker
Agent DVR - Agent DVR is a standalone replacement for iSpy that runs as a service, uses less CPU and features a web user interface that is accessible from anywhere with no port forwarding required!
Agent runs it's own webserver. By default this is running at http://localhost:8090 on the PC running Agent (although it may be using a different port if that wasn't available or was changed when it was installed). Agent will also work over your local network - you can use private IP addresses or computer names to access Agent locally (examples: http://192.168.1.10:8090 or http://nvr:8090). You may need to open your firewall to Agent for your local network.
Setup
You need to have Docker installed before continue with this guide.
You can build the image by cloning the repository and running the following command from inside the directory:
git clone https://github.com/mpolinowski/agent-dvr-docker.git && cd agent-dvr-docker
docker build -t agent-dvr .
To persist data generated inside the running container later we have to create 3 directories on the host system (you can choose the location at will - but you will need to adjust the RUN command below accordingly):
sudo mkdir -p /opt/dvr-agent/{config,media,commands}
sudo chown -R myuser /opt/dvr-agent/*
You need to expose the port 8090 for the web user interface. The ports 3478 (STUN) and 50000 - 50010 (TURN) are needed for the webRTC video connection:
docker run -it -p 8090:8090 -p 3478:3478/udp -p 50000-50010:50000-50010/udp \
-v /opt/dvr-agent/config/:/agent/Media/XML/ \
-v /opt/dvr-agent/media/:/agent/Media/WebServerRoot/Media/ \
-v /opt/dvr-agent/commands:/agent/Commands/ \
-e TZ=Europe/Berlin \
--name agent-dvr agent-dvr:latest
This command runs the container process attached to your terminal and allows you to spot eventual error messages. To run the container in the background and make sure that it is restarted automatically if needed use the following command:
docker run --restart=unless-stopped -d -p 8090:8090 -p 3478:3478/udp -p 50000-50010:50000-50010/udp \
-v /opt/dvr-agent/config/:/agent/Media/XML/ \
-v /opt/dvr-agent/media/:/agent/Media/WebServerRoot/Media/ \
-v /opt/dvr-agent/commands:/agent/Commands/ \
-e TZ=Europe/Berlin \
--name agent-dvr agent-dvr:latest
You can kill the container with the following command:
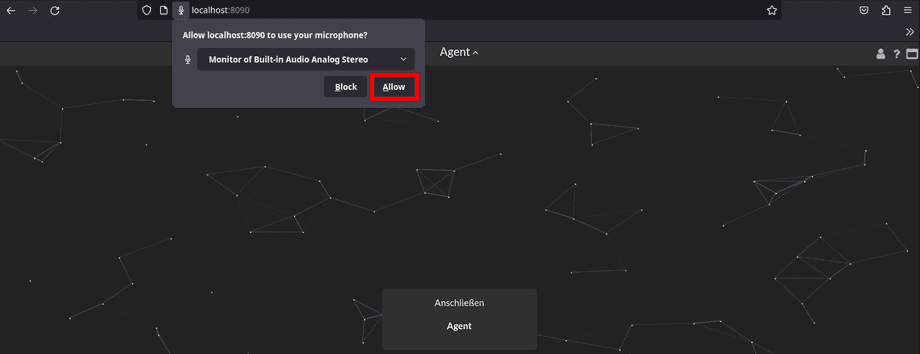
docker rm -f agent-dvrYou can visit the webUI in your browser on http://localhost:8090 and allow Agent to access your media devices:
Adding your INSTAR 2k+ WQHD Camera
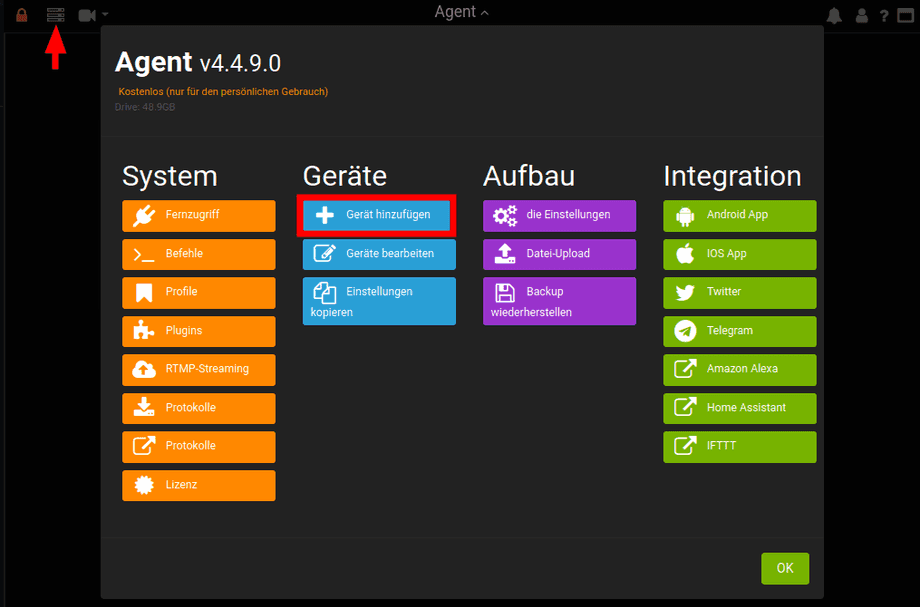
Open the Server Menu and click to add a new device:
Select a display slot:
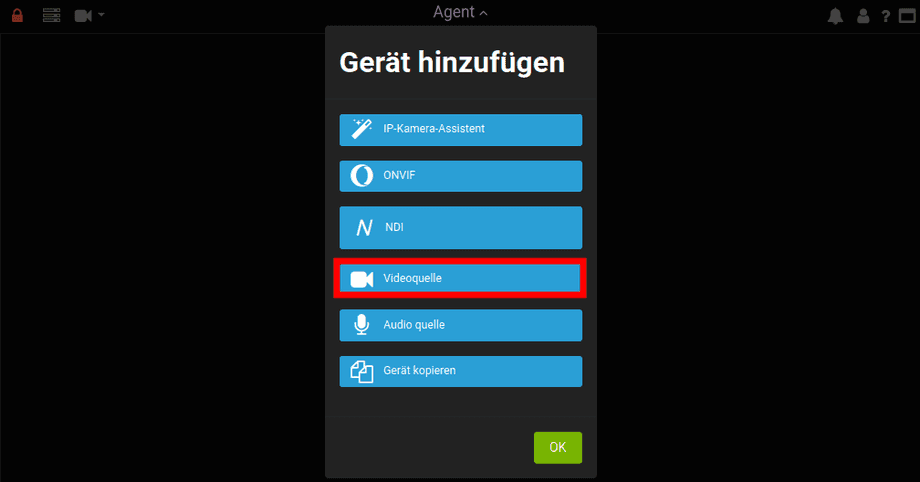
Here you can add a new device - choose to add a new Video Source:
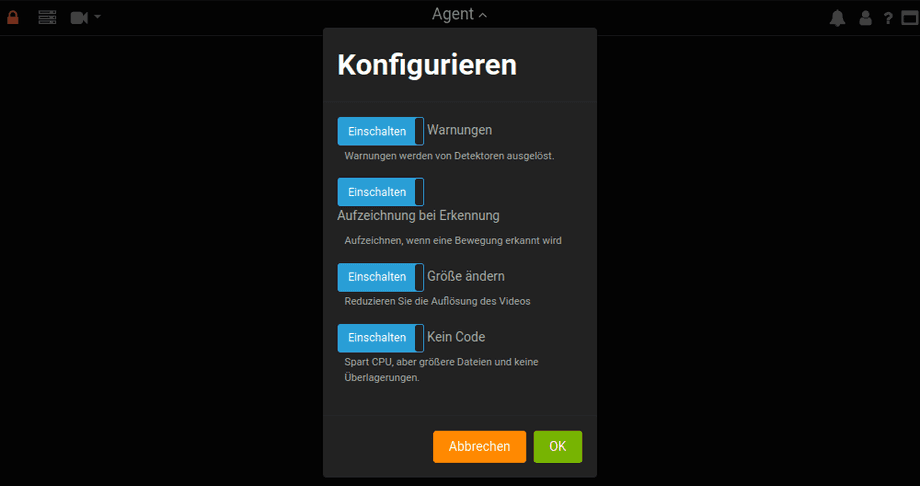
Configure the video source according to your needs:
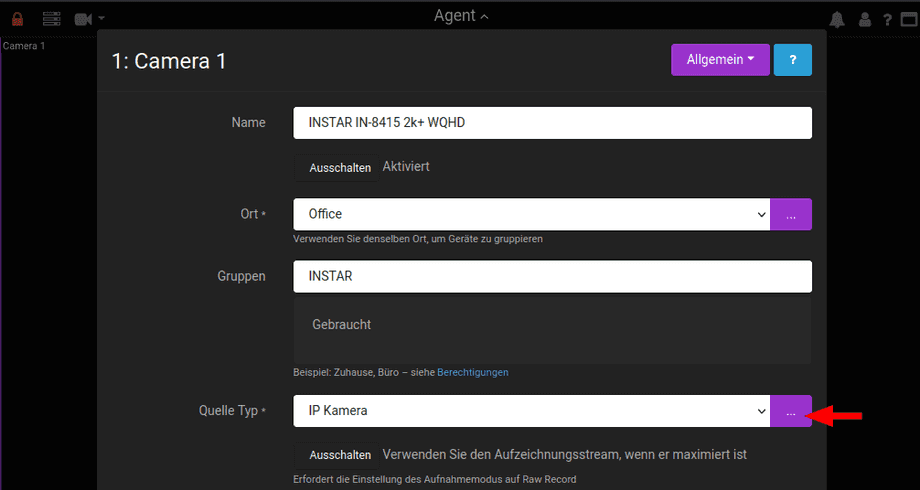
Give your video source a name and assign it to a Location and Group. As Source Type select an IP Camera and click the three dots to configure it:
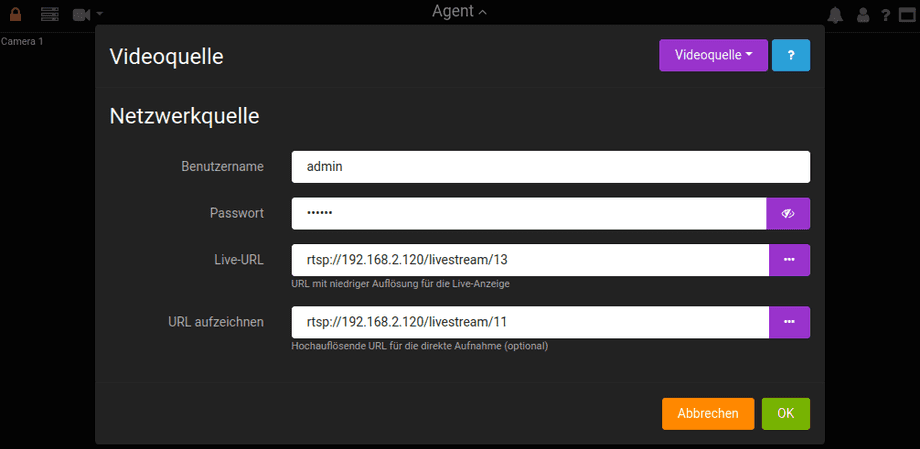
The DVR Agents needs your camera login as well as the RTSP URL of your camera:
- HD Cameras:
rtsp://user:password@192.168.x.x:/[11-13] - Full HD Cameras:
rtsp://user:password@192.168.x.x:/[11-13] - WQHD Cameras:
rtsp://user:password@192.168.x.x:/livestream[11-13]
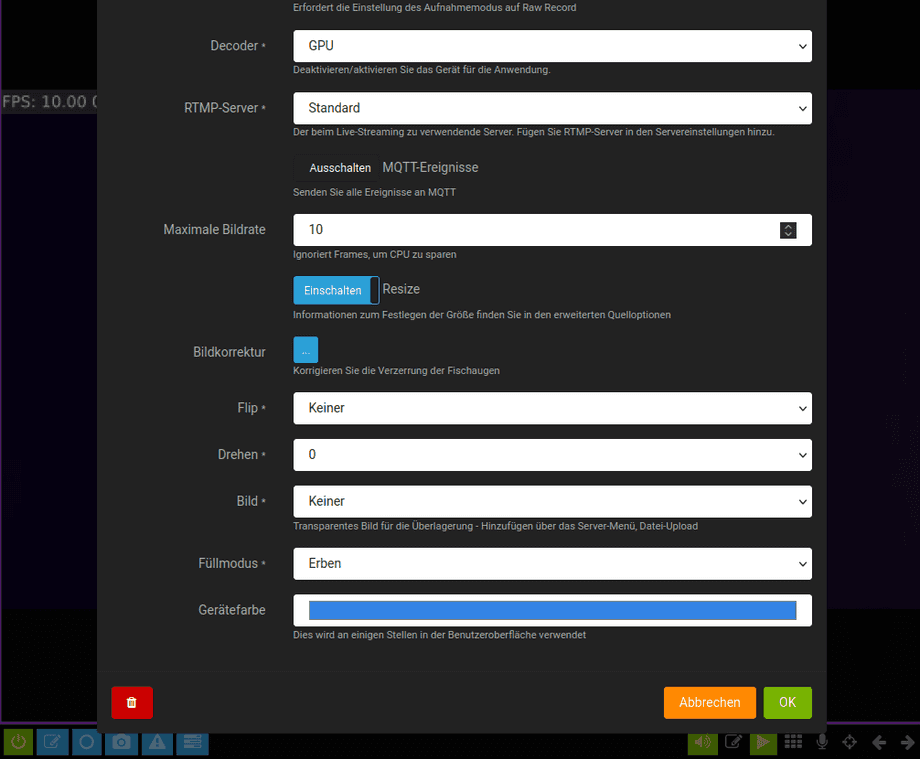
Configure the video source according to your needs:
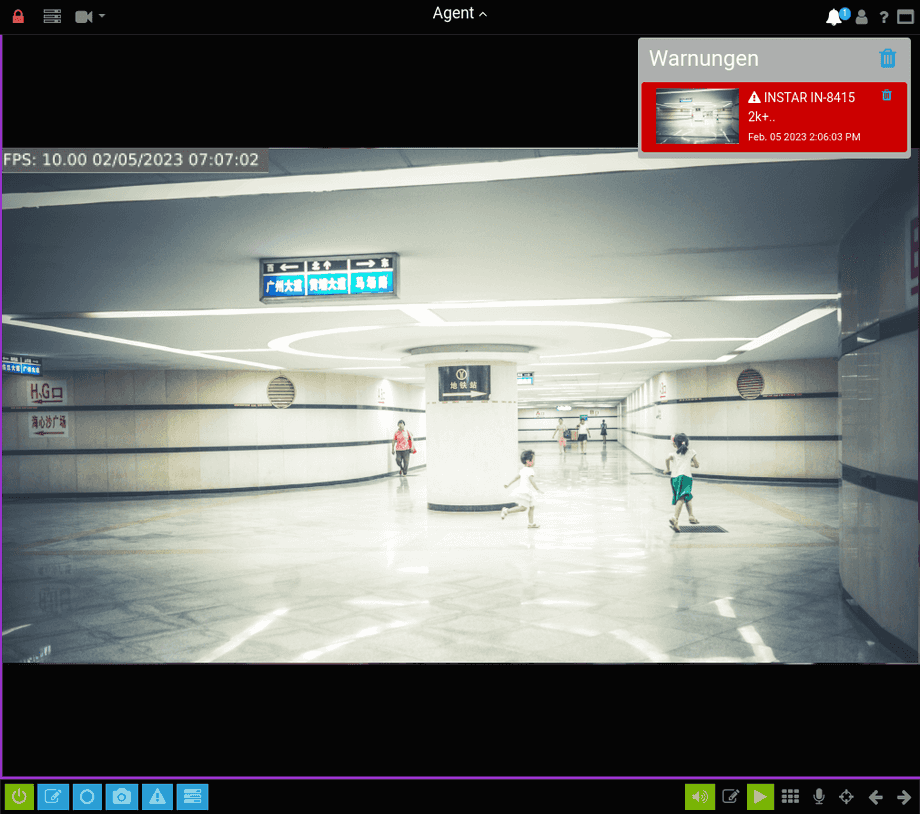
Close the configuration menu and check if the video stream was added:
Adding MQTT Events
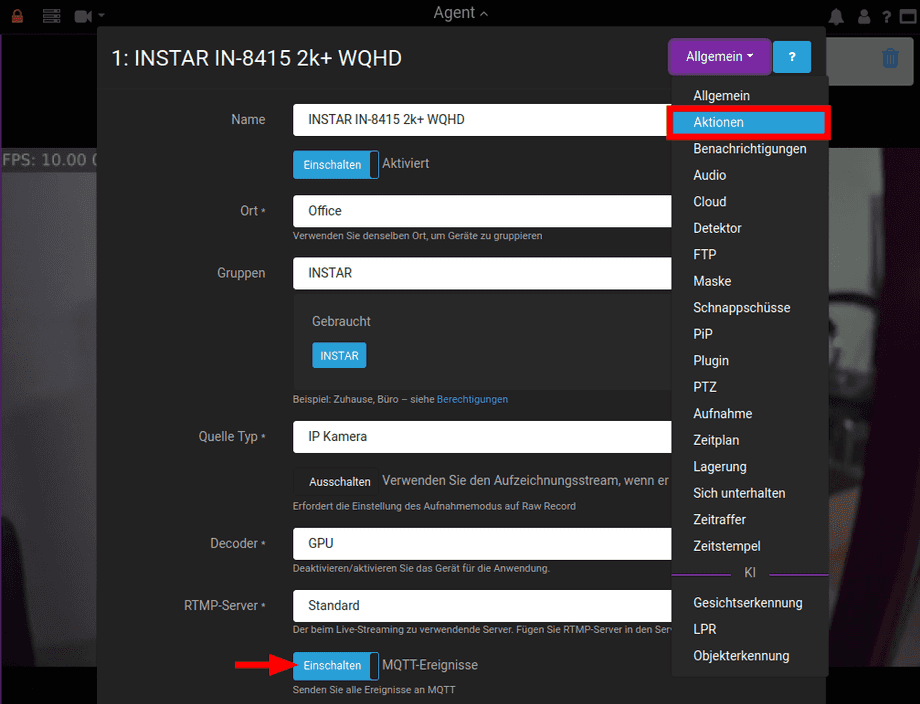
The DVR Agent can be connected to an MQTT Broker in your network to update MQTT topics in case of a variety of events. One example is sending an alarm notification when motion was detected in your camera's live stream. You can activate this option in your camera configuration:
But to be able to send updates we first have to connect the Agent to our MQTT Broker - for example the INSTAR MQTT Broker on your camera. To do this first switch to the Actions configuration tab (see image above) and add an MQTT Action for your camera:
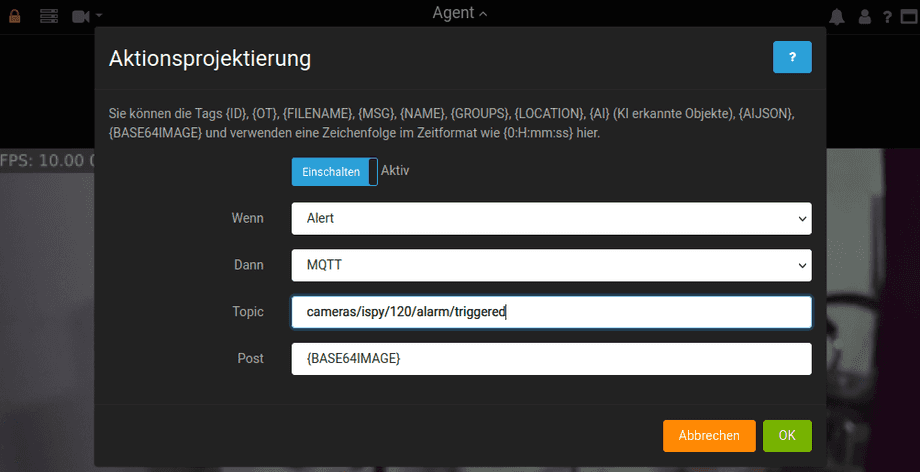
In the following example we tell the Agent to update an MQTT Topic in case of an alert. And to use a base64 encoded snapshot of your camera as payload - this image can be embedded in web interfaces (e.g. the dashboard from your smarthome) so every time an alert is triggered a fresh snapshot from your camera is displayed:
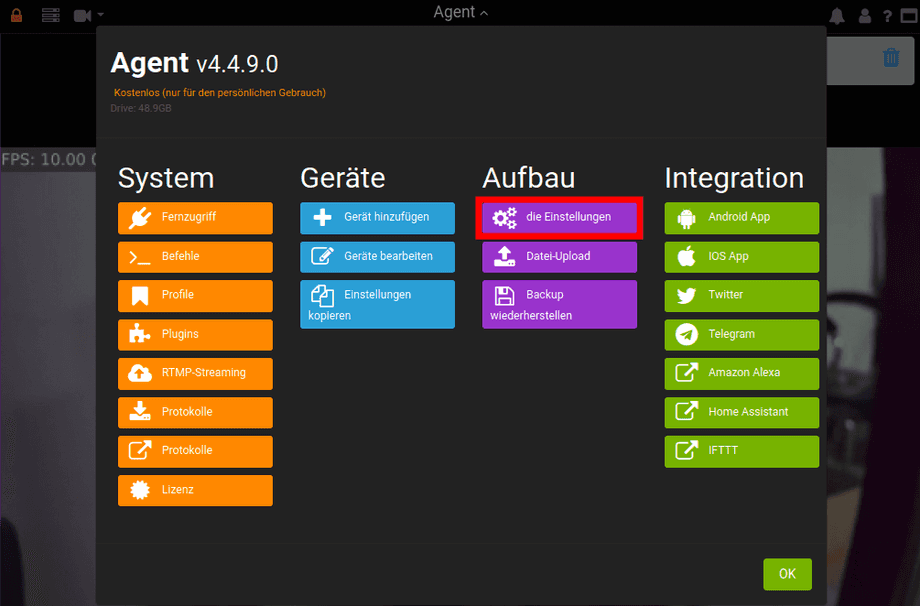
Now to adding your MQTT Broker - open the Software Settings:
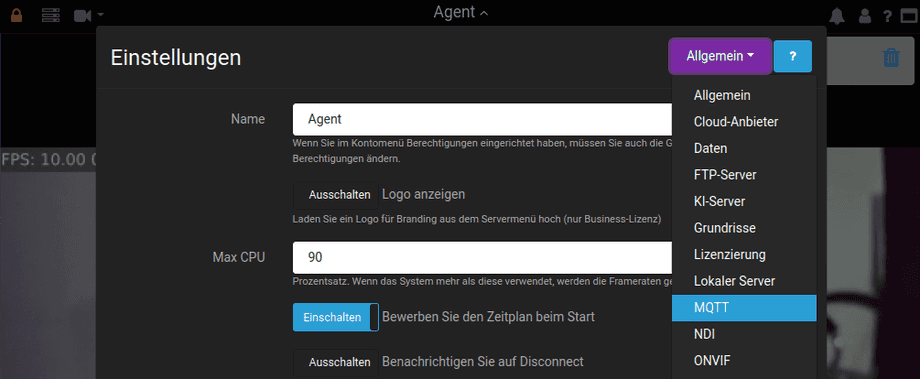
Switch to the MQTT Tab:
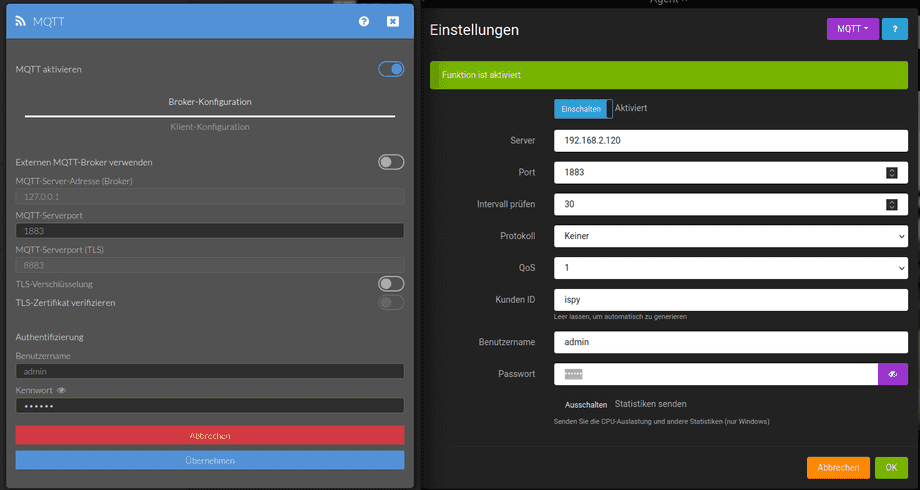
And add the address and login from your camera's MQTT Broker:
Now every time an alert is triggered you additionally receive an MQTT update on the configured topic and the base64 encoded snapshot of the potential intruder:
