IN-6001 HD Quick Installation Guide

Schließen Sie zuerst die Kamera am Netzteil an. Wenn Sie die Kamera nur per LAN Kabel betreiben möchten, springen Sie bitte zu Schritt 4.
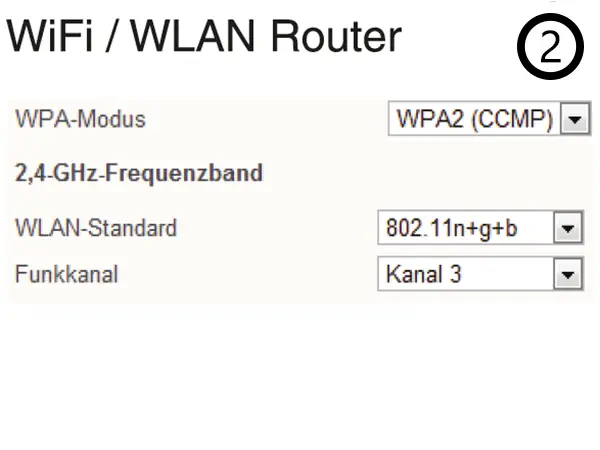
Wir empfehlen, dass Sie einen möglichst freien WLAN Kanal in Ihrem Router wählen und die WPA2 (AES bzw. CCMP) Verschlüsselung einstellen (nicht TKIP).
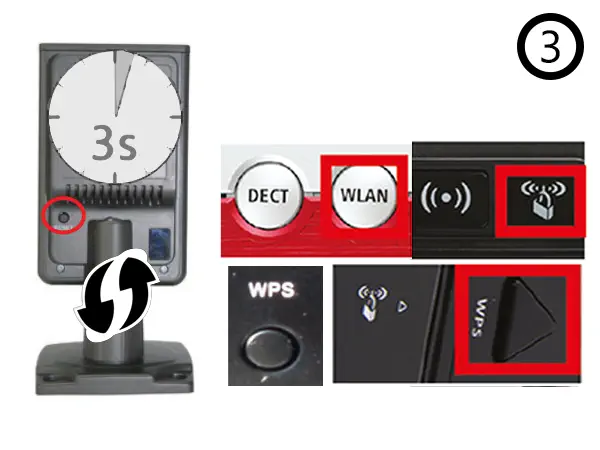
- A Drücken Sie den WPS Button auf Ihrem Router (s. o.).
- B Drücken Sie den Reset Taster der Kamera für 3s (länger als 10s führt zu einem Werksreset!).
- C Die Kamera wird sich danach automatisch mit Ihrem WLAN verbinden. Springen Sie zu Schritt 7 (PC or Mac) oder Schritt 11 (Smartphone).

Stecken Sie das Netzwerkkabel in den (Anschluss s. #12) im hinteren Teil der Kamera um eine LAN Verbindung aufzubauen (auch für WLAN benötigt, wenn kein WPS vorhanden s. #4).

Stecken Sie das andere Ende des Netzwerkkabels in einen freien LAN Port Ihres Internet Routers.
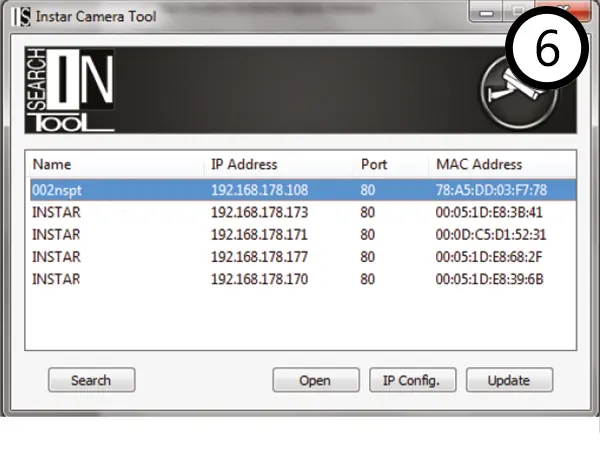
Starten Sie das IP Camera Tool von der Software CD und führen Sie einen Doppelklick auf den Namen der Kamera aus.

Standard Logins Benutzer/Kennwort: admin / instar für Administratoren, user / instar für normale Nutzer und guest / instar für Gäste.

Aktivieren Sie das WLAN der Kamera in der Weboberfläche mittels des WLAN- Scanners. Nach der Eingabe und Speicherung des WLAN Passwortes muss das LAN Kabel gezogen und die Kamera neugestartet werden.
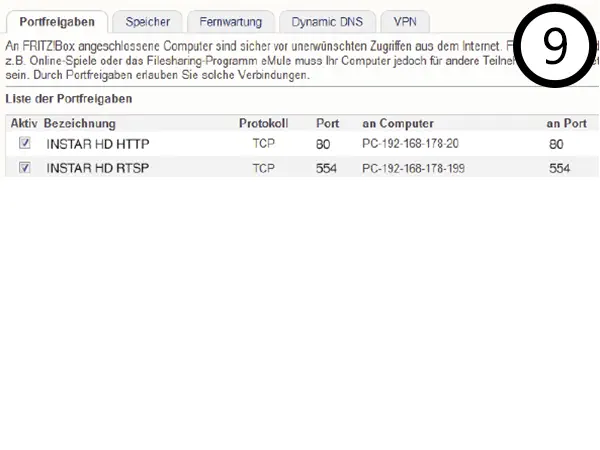
Für den Zugriff über das Internet ist eine Portweiterleitung des HTTP Ports (Standard “80”) in Ihrem Router notwendig. Für den Zugriff auf den Flash Videostream (z.B. über das Flash Plugin im Webbrowser) benötigen Sie noch die Weiterleitung des RTMP Ports (Standard “1935”). siehe auch #14

Sie können jetzt unsere kostenlose Windows Phone, Windows Metro, Android, iPhone, iPad oder Blackberry App nutzen um auf die Kamera über das Internet zuzugreifen.
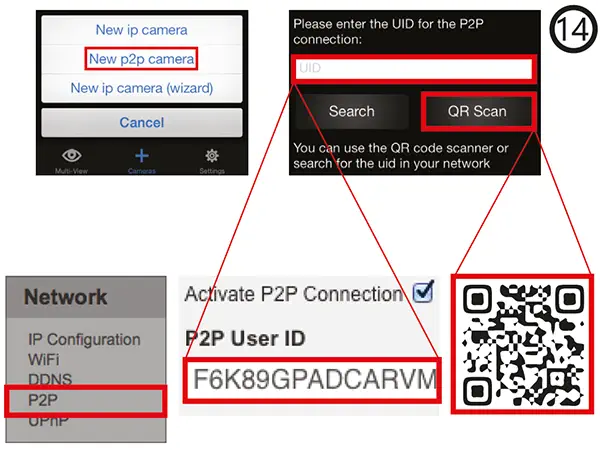
Wenn Sie keinen Port für den DDNS-Dienst der Kamera öffnen können, können Sie weiterhin den Point-2-Point Dienst nutzen, um mit unserer Windows Phone, Windows Metro, Android, iPhone, iPad oder Blackberry App auf die Kamera zuzugreifen.