Using BlueIris v5 with your WQHD Camera
Q: The 9420 replaces my 9020, which could be perfectly integrated into blue iris without any problems. After a bit of "trial and error", I managed to get the camera stream in blue iris. Unfortunately, however, no setting for the PTZ function works. Is there already an update or a description of how the 9420 can also be integrated into blue iris?
A: The PTZ commands for the new 2K+ WQHD series have been expanded compared to the older models - see CGI documentation. Those commands are not yet added to the BlueIris software.
Add your Camera
There might be an update in the future - but you can already add those commands manually. Start by adding your camera:
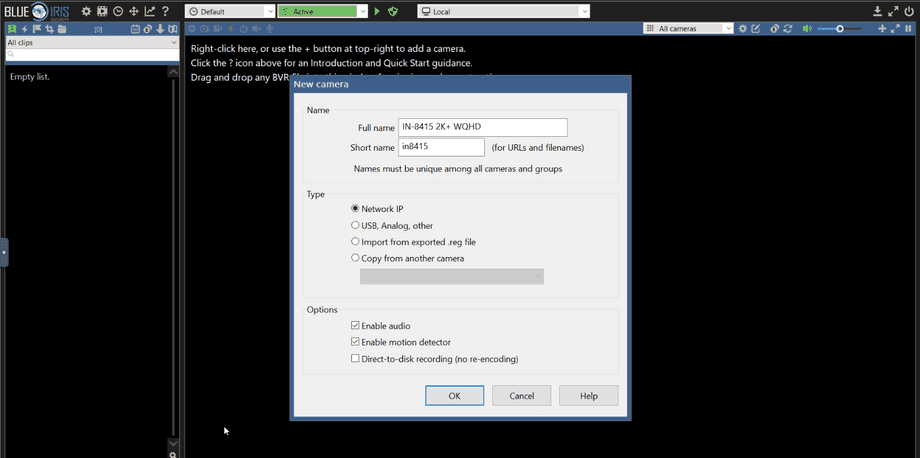
Give your camera a name and select Network IP camera:
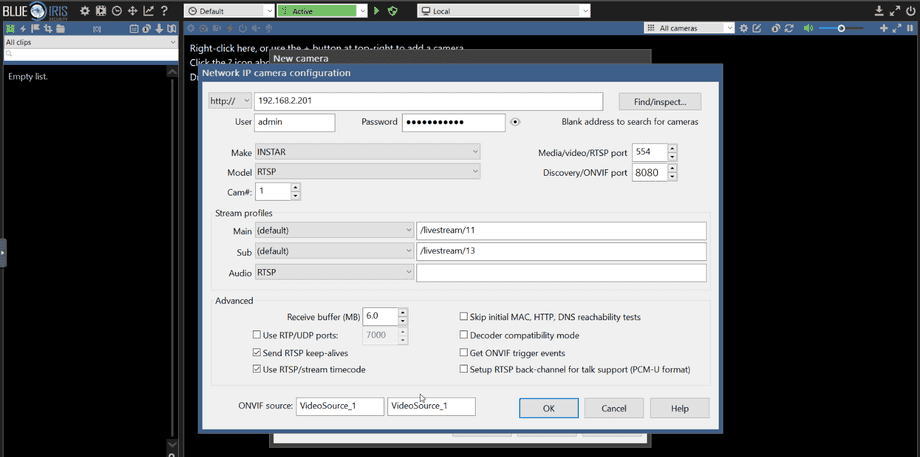
Add your cameras IP address and your admin camera login. The camera RTSP stream urls are /livestream/11, /livestream/12 and /livestream/13 for the 3 available resolution. For Full HD cameras those were just /11 - /13. You can choose the 11 stream as main and 13 stream as sub stream:
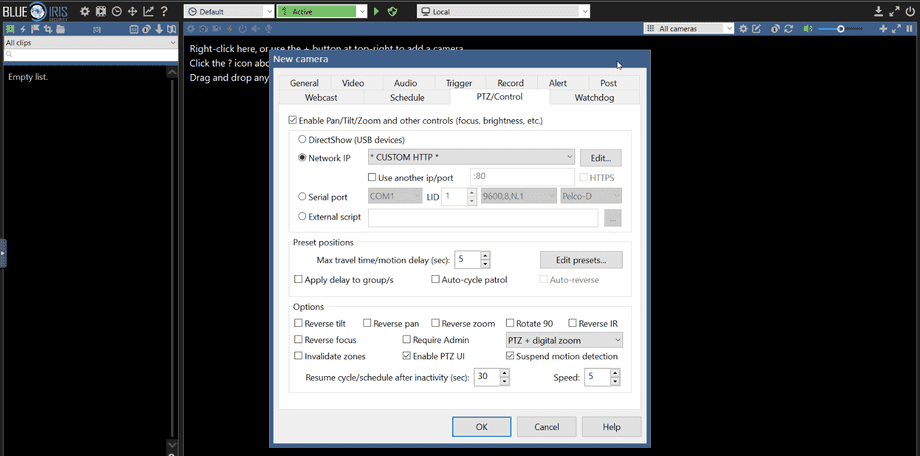
Save those settings and enter the PTZ Menu. Choose the INSTAR (NEW) preset for Full HD Kameras and everything should be set. For 2K+ WQHD cameras we currently need to choose Custom HTTP and click Edit to manually add the new commands:
CGI Commands
The following are the most important commands that you can add to control your camera through BlueIris interface. BlueIris also offers slots for image parameters like brightness and contrast - if you want to add them you can find them in our CGI documentation.
Note: that the following examples cannot be used by every camera model and are marked accordingly. For more details check out the FAQ 2K+ WQHD Extended PTZ Command Set
- Move Left
/param.cgi?cmd=ptzmove&left=10(only for indoor cameras e.g. IN-8415 2K+ WQHD)/param.cgi?cmd=ptzmove&left=0&timeout=1(for all cameras e.g. IN-8415 2K+ WQHD, IN-9420 2K+ WQHD)
- Move Right
/param.cgi?cmd=ptzmove&right=10(only for indoor cameras e.g. IN-8415 2K+ WQHD)/param.cgi?cmd=ptzmove&right=0&timeout=1(for all cameras e.g. IN-8415 2K+ WQHD, IN-9420 2K+ WQHD)
Here I am setting the number of steps per button press to 10 you can adjust them to your needs. It is also possible to use a timeout in seconds instead of number of steps if that is more suitable for your usecase.
- Move Up
/param.cgi?cmd=ptzmove&up=10(only for indoor cameras e.g. IN-8415 2K+ WQHD)/param.cgi?cmd=ptzmove&up=0&timeout=1(for all cameras e.g. IN-8415 2K+ WQHD, IN-9420 2K+ WQHD)
- Move Down
/param.cgi?cmd=ptzmove&down=10(only for indoor cameras e.g. IN-8415 2K+ WQHD)/param.cgi?cmd=ptzmove&down=0&timeout=1(for all cameras e.g. IN-8415 2K+ WQHD, IN-9420 2K+ WQHD)
- Up Left
/param.cgi?cmd=ptzmove&up=10&left=10(only for indoor cameras e.g. IN-8415 2K+ WQHD)/param.cgi?cmd=ptzmove&up=0&timeout=1&left=0&timeout=1(for all cameras e.g. IN-8415 2K+ WQHD, IN-9420 2K+ WQHD)
- Up Right
/param.cgi?cmd=ptzmove&up=10&right=10(only for indoor cameras e.g. IN-8415 2K+ WQHD)/param.cgi?cmd=ptzmove&up=0&timeout=1&right=0&timeout=1(for all cameras e.g. IN-8415 2K+ WQHD, IN-9420 2K+ WQHD)
- Down Left
/param.cgi?cmd=ptzmove&down=10&left=10(only for indoor cameras e.g. IN-8415 2K+ WQHD)/param.cgi?cmd=ptzmove&down=0&timeout=1&left=0&timeout=1(for all cameras e.g. IN-8415 2K+ WQHD, IN-9420 2K+ WQHD)
- Down Right
/param.cgi?cmd=ptzmove&down=10&right=10(only for indoor cameras e.g. IN-8415 2K+ WQHD)/param.cgi?cmd=ptzmove&down=0&timeout=1&right=0&timeout=1(for all cameras e.g. IN-8415 2K+ WQHD, IN-9420 2K+ WQHD)
- Down Right
/param.cgi?cmd=ptzmove&down=10&right=10(only for indoor cameras e.g. IN-8415 2K+ WQHD)/param.cgi?cmd=ptzmove&down=0&timeout=1&right=0&timeout=1(for all cameras e.g. IN-8415 2K+ WQHD, IN-9420 2K+ WQHD)
- Home
/param.cgi?cmd=gotoRelPosition&pan=50&tilt=50(only for indoor cameras e.g. IN-8415 2K+ WQHD)
You can use a relative position to define your home position. The value range here is 0-100. The example shown above will center your camera.
- Zoom In
/param.cgi?cmd=ptzmove&zoomin=10
- Zoom Out
/param.cgi?cmd=ptzmove&zoomout=10
- Focus Near
/param.cgi?cmd=ptzmove&focusin=10
- Focus Far
/param.cgi?cmd=ptzmove&focusout=10
- Preset Position 1
/param.cgi?cmd=getptzpreset&act=goto&index=1
- Preset Position 2
/param.cgi?cmd=getptzpreset&act=goto&index=2
- Preset Position 1
/param.cgi?cmd=getptzpreset&act=goto&index=3
- Preset Position 2
/param.cgi?cmd=getptzpreset&act=goto&index=4
- Preset Position 1
/param.cgi?cmd=getptzpreset&act=goto&index=5
- Preset Position 2
/param.cgi?cmd=getptzpreset&act=goto&index=6
- Preset Position 1
/param.cgi?cmd=getptzpreset&act=goto&index=7
- Preset Position 2
/param.cgi?cmd=getptzpreset&act=goto&index=8
- IR LEDs On
/param.cgi?cmd=setinfrared&infraredstat=1
- IR LEDs Off
/param.cgi?cmd=setinfrared&infraredstat=0
- IR LEDs Auto
/param.cgi?cmd=setinfrared&infraredstat=2
Here I am using the Infrared Status command to to turn the IR LEDs on/off or to activate the automatic mode. Alternatively, you can also use the Set Infrared Command to switch your camera from day to night mode with: infraredcutstat: IRcut filter - 0 (off), 1 (on), 2 (auto).
Livestream
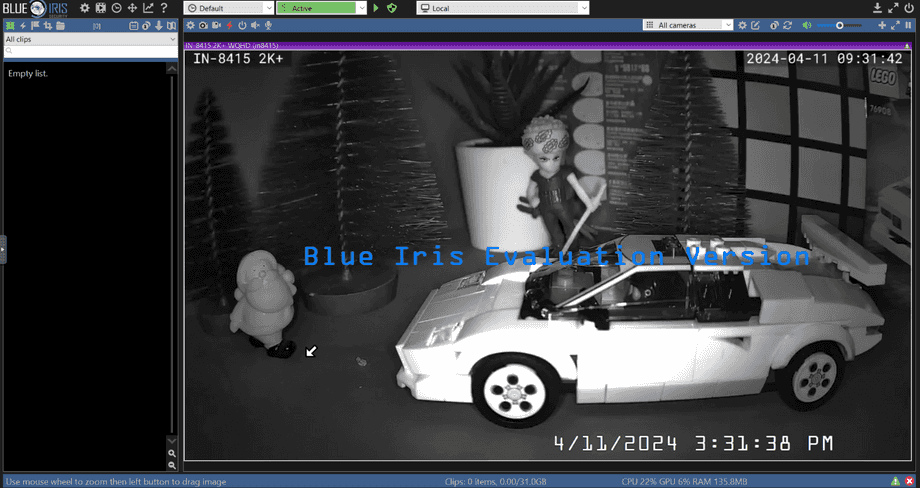
Save your settings and close the settings menu to access your cameras live video. Hover your mouse cursor over the live video to the left, righ, top, bottom as well as the 4 corners and the cursor should change to an arrow - click your left mouse button to move your PTZ camera in that direction:


