Homebridge in Node-RED for Apple Homekit
Q: The Homebridge Tutorial showed how to add buttons and switches to Homebridge so that I am now able to to control my camera through Homebridge in my Homekit App on my iPhone. Is it possible to combine this with Node-RED to be able to write small scripts and automation ?
Control your camera with Alexa terminal

We offer both a INSTAR Cloud Skill and a INSTAR Camera Skill in the Alexa Skill Store. For the INSTAR Cloud Skill, all you need is an INSTAR Cloud account and an Alexa device with a display. Add the Skill on your Alexa device and use it directly.
Control your camera with your iPhone or iPad

The connection to the Homekit service is available from firmware version 3.2(361) (June 2021) for all Full HD models. You can upgrade the firmware of your camera directly via the Web interface.
A: Yes! Start by installing node-red-contrib-homekit-bridged from your Node-Red Palette menu:

Search for homekit-bridged and click on install:

Note that you can also use a pre-configured Docker container from Docker-HUB as an alternative.
Homebridge
Now start the Homebridge device that we build according to this Homebridge Tutorial:
docker run \
  --net=host \
  --name=homebridge \
  --privileged \
  --restart=always \
  --rm \
  -e PUID=0 -e PGID=0 \
  -e TZ=Europe/Berlin \
  -e HOMEBRIDGE_CONFIG_UI=1 \
  -e HOMEBRIDGE_CONFIG_UI_PORT=8080 \
  -e HOMEBRIDGE_INSECURE=1 \
  -v /opt/homebridge:/homebridge \
  oznu/homebridge
And login to the Hombridge UI on port 8080 with the default login admin/admin.
Creating a Device in Node-RED
I now start by importing an example switch to Node-RED:

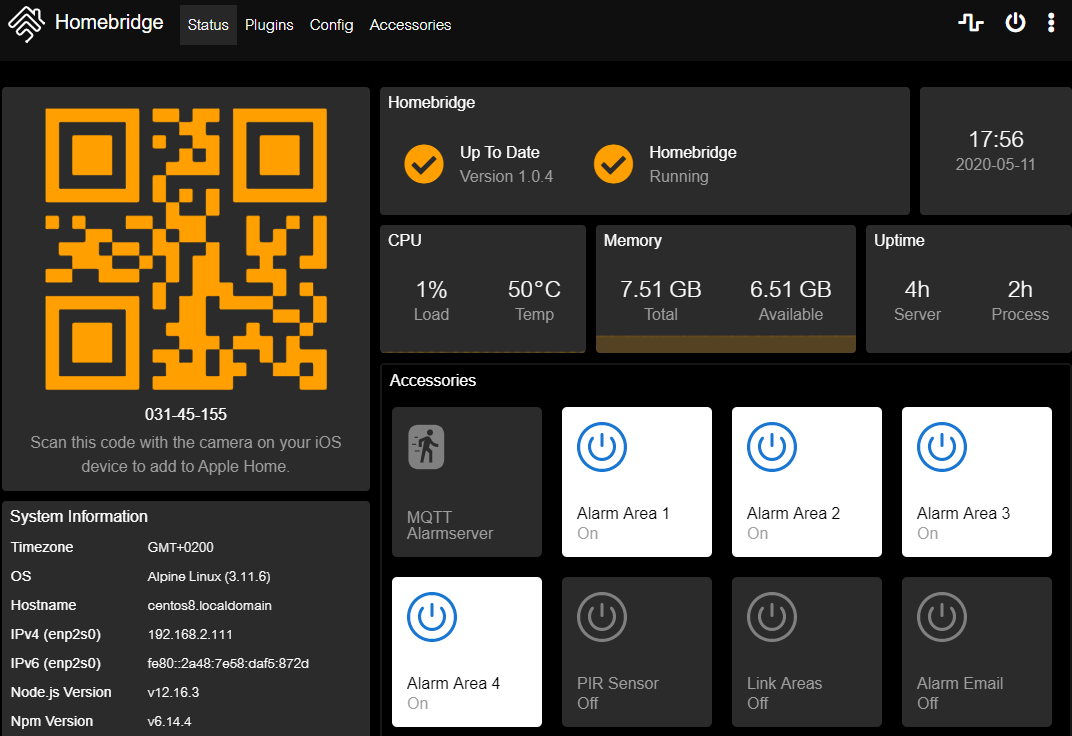
I now need to copy my Bridge PIN from the Homebridge UI:

Now add a new bridge to the Homekit Node:

And copy your personal PIN into the Pin Code field::

Deploy your changes to Node-RED and try out the Inject nodes - they either inject false or true to your Homebridge device:

You can check the Accessories tab in Homebridge. There should be a button now that reflects the state that you are injecting in Node-RED:

Practical Example
We are now able to connect a pair of MQTT In/Out Nodes to an Homekit Node and start controlling our camera though it's MQTT API like in our previous tutoria. Let's now use Node-RED to write a slightly more complex script to interact with our camera and Homebridge.
Start by adding a new Homekit Node but this time choose MotionSensor as the service template:

The complete Flow looks like this and can be imported from the JSON code below:

[{"id":"783862e2.45477c","type":"homekit-service","z":"9a6bd5e7.967408","isParent":true,"bridge":"4132a771.850788","parentService":"","name":"MQTT Alarmserver","serviceName":"MotionSensor","topic":"","filter":false,"manufacturer":"INSTAR","model":"IN-8015 FHD","serialNo":"000001","cameraConfigVideoProcessor":"","cameraConfigSource":"","cameraConfigStillImageSource":"","cameraConfigMaxStreams":"","cameraConfigMaxWidth":"","cameraConfigMaxHeight":"","cameraConfigMaxFPS":"","cameraConfigMaxBitrate":"","cameraConfigVideoCodec":"","cameraConfigAudioCodec":"","cameraConfigAudio":false,"cameraConfigPacketSize":"","cameraConfigVerticalFlip":false,"cameraConfigHorizontalFlip":false,"cameraConfigMapVideo":"","cameraConfigMapAudio":"","cameraConfigVideoFilter":"","cameraConfigAdditionalCommandLine":"","cameraConfigDebug":false,"cameraConfigInterfaceName":"","characteristicProperties":"{}","x":559,"y":51,"wires":[["4d9c9a3c.69a0d4"],[]]},{"id":"8f35f643.8ca9e8","type":"mqtt in","z":"9a6bd5e7.967408","name":"Alarm Server","topic":"instar/10D1DC218F96/status/alarm/triggered","qos":"1","datatype":"auto","broker":"fbc900bc.b83bb","x":90,"y":51,"wires":[["7dc6d773.751818"]]},{"id":"7dc6d773.751818","type":"change","z":"9a6bd5e7.967408","name":"{\"MotionDetected\":true}","rules":[{"t":"set","p":"payload","pt":"msg","to":"{\"MotionDetected\":true}","tot":"json"}],"action":"","property":"","from":"","to":"","reg":false,"x":286,"y":51,"wires":[["783862e2.45477c","d7eb0fd1.103b5"]]},{"id":"d7eb0fd1.103b5","type":"delay","z":"9a6bd5e7.967408","name":"15s Delay","pauseType":"delay","timeout":"15","timeoutUnits":"seconds","rate":"1","nbRateUnits":"1","rateUnits":"second","randomFirst":"1","randomLast":"5","randomUnits":"seconds","drop":false,"x":229,"y":97,"wires":[["d2b769a7.b94af8"]]},{"id":"d2b769a7.b94af8","type":"change","z":"9a6bd5e7.967408","name":"{\"MotionDetected\":false}","rules":[{"t":"set","p":"payload","pt":"msg","to":"{\"MotionDetected\":false}","tot":"json"}],"action":"","property":"","from":"","to":"","reg":false,"x":418,"y":97,"wires":[["783862e2.45477c"]]},{"id":"eeaf38d9.a69958","type":"switch","z":"9a6bd5e7.967408","name":"","property":"payload","propertyType":"msg","rules":[{"t":"eq","v":"{\"MotionDetected\":true}","vt":"str"},{"t":"eq","v":"{\"MotionDetected\":false}","vt":"str"}],"checkall":"true","repair":false,"outputs":2,"x":864,"y":44,"wires":[["1b0e0bfe.ad8c94"],["a61efdfd.82e8f"]]},{"id":"b3e74d68.7f11c","type":"mqtt out","z":"9a6bd5e7.967408","name":"Preset Position","topic":"instar/10D1DC218F96/features/ptz/preset","qos":"1","retain":"false","broker":"fbc900bc.b83bb","x":1135,"y":40,"wires":[]},{"id":"4d9c9a3c.69a0d4","type":"json","z":"9a6bd5e7.967408","name":"","property":"payload","action":"","pretty":false,"x":740,"y":44,"wires":[["eeaf38d9.a69958"]]},{"id":"a61efdfd.82e8f","type":"change","z":"9a6bd5e7.967408","name":"Idle","rules":[{"t":"set","p":"payload","pt":"msg","to":"{\"val\":\"0\"}","tot":"str"}],"action":"","property":"","from":"","to":"","reg":false,"x":985,"y":61,"wires":[["b3e74d68.7f11c"]]},{"id":"1b0e0bfe.ad8c94","type":"change","z":"9a6bd5e7.967408","name":"Alarm","rules":[{"t":"set","p":"payload","pt":"msg","to":"{\"val\":\"1\"}","tot":"str"}],"action":"","property":"","from":"","to":"","reg":false,"x":984,"y":24,"wires":[["b3e74d68.7f11c"]]},{"id":"4132a771.850788","type":"homekit-bridge","z":"","bridgeName":"Homebridge","pinCode":"031-45-155","port":"","allowInsecureRequest":true,"manufacturer":"Default Manufacturer","model":"Default Model","serialNo":"Default Serial Number","customMdnsConfig":false,"mdnsMulticast":true,"mdnsInterface":"","mdnsPort":"","mdnsIp":"","mdnsTtl":"","mdnsLoopback":true,"mdnsReuseAddr":true,"allowMessagePassthrough":true},{"id":"fbc900bc.b83bb","type":"mqtt-broker","z":"","name":"192.168.2.117","broker":"192.168.2.117","port":"8883","tls":"70b691b5.003e5","clientid":"nodered","usetls":true,"compatmode":false,"keepalive":"60","cleansession":true,"birthTopic":"","birthQos":"0","birthPayload":"","closeTopic":"","closeQos":"0","closePayload":"","willTopic":"","willQos":"0","willPayload":""},{"id":"70b691b5.003e5","type":"tls-config","z":"","name":"8015Black","cert":"","key":"","ca":"","certname":"pcert.pem","keyname":"","caname":"","servername":"","verifyservercert":true}]On the left ond the right we have an MQTT In and Out Node with the MQTT Topics:
instar/10D1DC218F96/status/alarm/triggered
instar/10D1DC218F96/features/ptz/preset
Don't forget to replace the MQTT ID - 10D1DC218F96 - with your personal camera's ID!
When an alarm is triggered, the MQTT Alarmserver Topic status/alarm/triggered will be updated by our camera. In this case we will send a {"MotionDetected":true} message into the Homekit Node that will fall back to {"MotionDetected":false} after 15s. When the Motion Detection is set to be true our camera will move to preset position 2 and back to 1 again once the detection is false again.