FHEM with INSTAR WQHD Cameras
Q: I found your FHEM Installation Guide for a Raspberry Pi. Can I use this software together with the new WQHD camera models?
A: Yes, and the installation is basically identical to the Full HD camera installation.
Adding Timed Snapshots
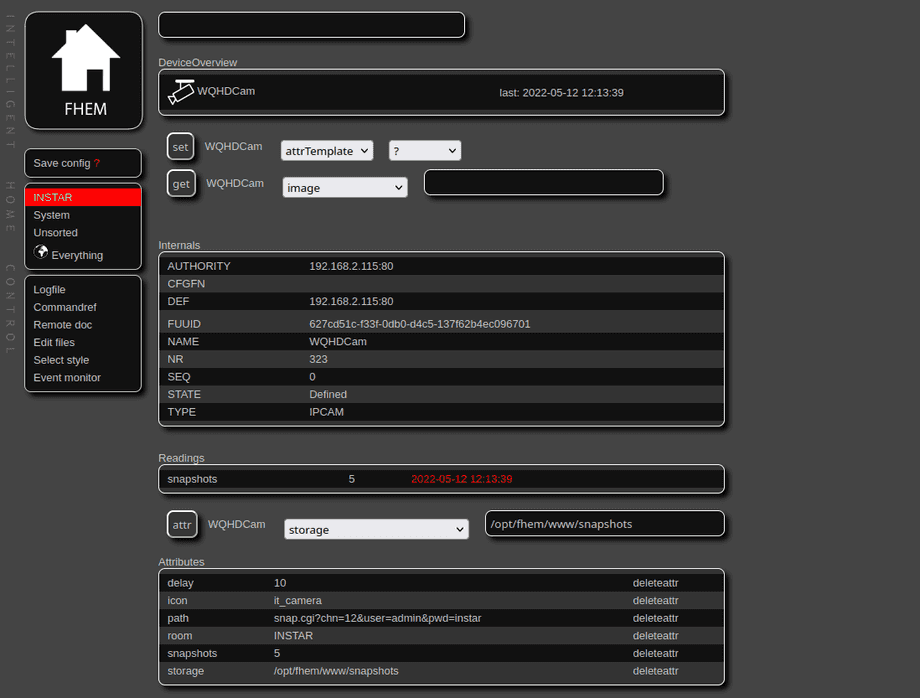
Start by adding your camera using the IPCAM module and add your cameras snapshot path, e.g. http://192.168.2.115:80/snap.cgi?chn=12&user=admin&pwd=instar:
define WQHDCam IPCAM 192.168.2.115:80
attr WQHDCam path snap.cgi?chn=12&user=admin&pwd=instar
attr WQHDCam delay 10
attr WQHDCam snapshots 5
attr WQHDCam storage /opt/fhem/www/snapshots
attr WQHDCam icon it_camera
This sets the snapshot folder to a /opt/fhem/www/snapshots. All the folders inside the /opt/fhem/www directory belong the the user/group 6061:
ls -la /opt/fhem/www

total 36
drwxr-x---  9 6061 6061 4096 May 12 17:55 .
drwxr-x--- 15 6061 6061 4096 May 12 17:39 ..
drwxr-x---  2 6061 6061 4096 Apr 25 07:09 codemirror
drwxr-x---  3 6061 6061 4096 Apr 25 07:09 frontend
drwxr-x---  2 6061 6061 4096 Apr 25 07:09 gplot
drwxr-x---  6 6061 6061 4096 Apr 25 07:09 images
drwxr-x---  2 6061 6061 4096 Apr 25 07:09 jscolor
drwxr-x---  3 6061 6061 4096 Apr 25 07:09 pgm2
So create the snapshots folder and modify it accordingly:
mkdir /opt/fhem/www/snapshots
chown 6061:6061 /opt/fhem/www/snapshots
To test if it is working we can hit the get image button:
Check the storage directory - it should now contain the 5 images:
ls -la /opt/fhem/www/snapshots

total 576
drwxr-xr-x 2 6061 6061  4096 May 12 18:13 .
drwxr-x--- 9 6061 6061  4096 May 12 17:55 ..
-rw-r----- 1 6061 6061 93529 May 12 18:12 WQHDCam_snapshot_1.jpg
-rw-r----- 1 6061 6061 93991 May 12 18:13 WQHDCam_snapshot_2.jpg
-rw-r----- 1 6061 6061 94439 May 12 18:13 WQHDCam_snapshot_3.jpg
-rw-r----- 1 6061 6061 94784 May 12 18:13 WQHDCam_snapshot_4.jpg
-rw-r----- 1 6061 6061 94689 May 12 18:13 WQHDCam_snapshot_5.jpg
-rw-r----- 1 6061 6061 94689 May 12 18:13 WQHDCam_snapshot.jpg
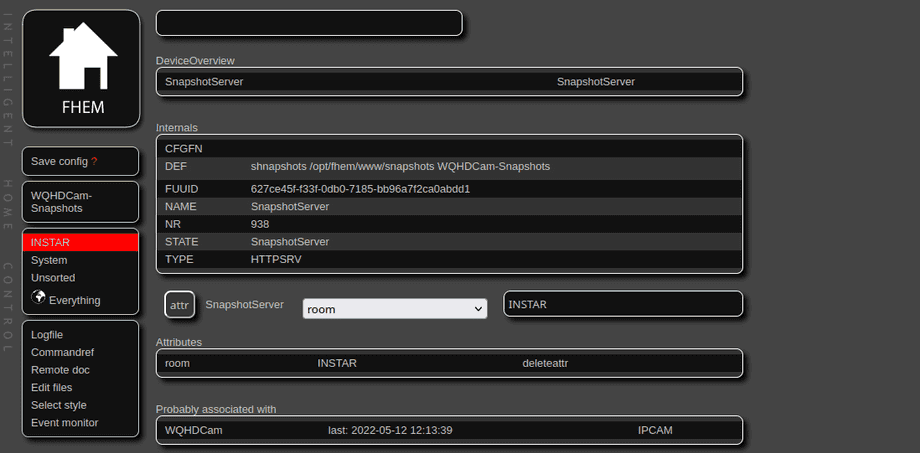
To be able to access those snapshots we can use the integrated webserver inside FHEM called HTTPSRV and tell it to serve the content of the storage directory define:
[name] HTTPSRV [infix] [directory] [friendlyname]- name: is a custom name for the device used by the FHEM UI.
- infix: a prefix for the FHEMWEB-Base-URL under which the content of the directory will be served.
- directory: the absolute path to the public snapshot directory you created earlier.
- friendlyname: the name that is used in the FHEM side navigation.
define SnapshotServer HTTPSRV snapshots /opt/fhem/www/snapshots WQHDCam-Snapshots
attr SnapshotServer icon dog_silhouette
Die oben angelegten Snapshots sind jetzt über den Browser erreichbar - z.B. mit /fhem/snapshots/WQHDCam_snapshot.jpg.
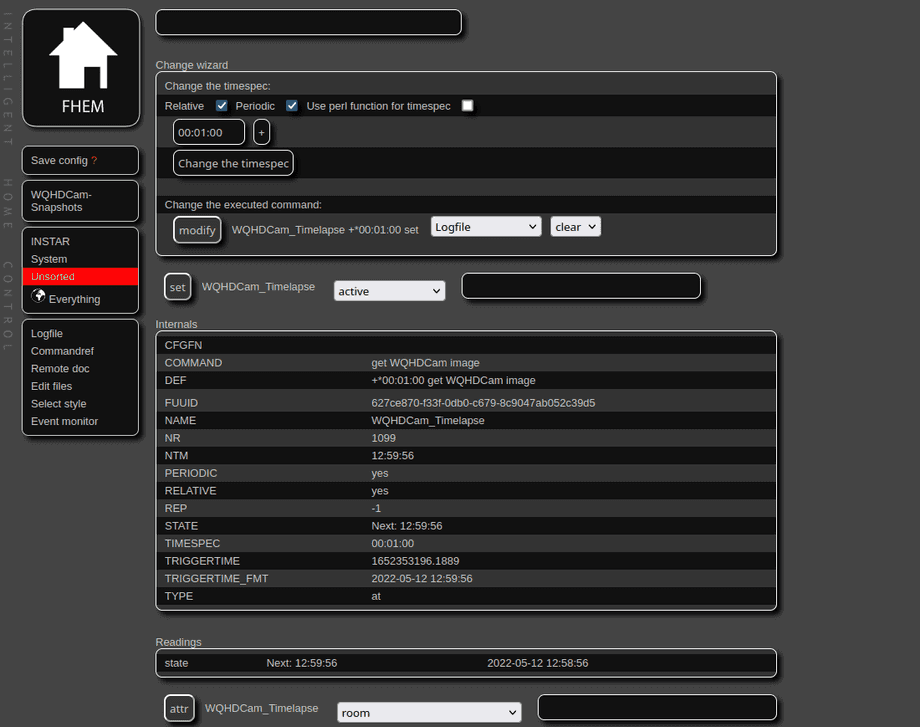
And now it all comes together. By creating a task that triggers the get image function once a minute we can embedd a 1-frame-per-minute livestream of our camera
define WQHDCam_Timelapse at +*00:01:00 get WQHDCam image
attr WQHDCam_Timelapse icon time_timer
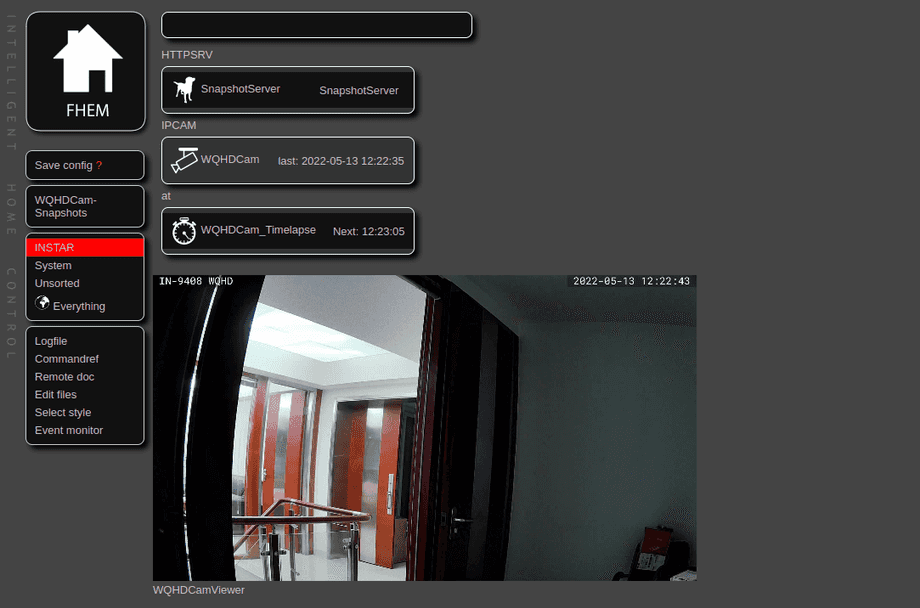
This image can be embedded inside a website. You can download this HTML code and unzip it to /opt/fhem/www/snapshots. This page will be hosted under /fhem/snapshots and show you the latest snapshot inside a jQuery lightbox (see also Timed Snapshots in FHEM).
Adding the Live Video
You can use the IFRAME module to add the cameras live video:
define WQHDCamViewer weblink iframe http://192.168.2.115:80/livestream/12?action=play&media=mjpeg&user=admin&pwd=instar
attr WQHDCamViewer htmlattr width="640" height="360" frameborder="0" marginheight="0" marginwidth="0"
attr WQHDCamViewer room INSTAR
attr WQHDCamViewer verbose 5
Adding an Alarnserver Webhook
I now want to use the cameras HTTP Alarmserver to contact FHEM in case of an alert and toggle a switch for me called AlarmServer:
define AlarmServer dummy
attr AlarmServer setList on off
attr AlarmServer room INSTAR
attr AlarmServer icon secur_alarm
This switch can now be toggled by sending a GET request to the following webhooks:
http://192.168.2.111:8083/fhem?cmd=set%20AlarmServer%20on&XHR=1
http://192.168.2.111:8083/fhem?cmd=set%20AlarmServer%20off&XHR=1
Note if calling the URL does not work and results in an HTTP ERROR 400 or just a white page, run the following command in the FHEM command line
attr WEB csrfToken noneand try again. See the FHEM Forum for more details.
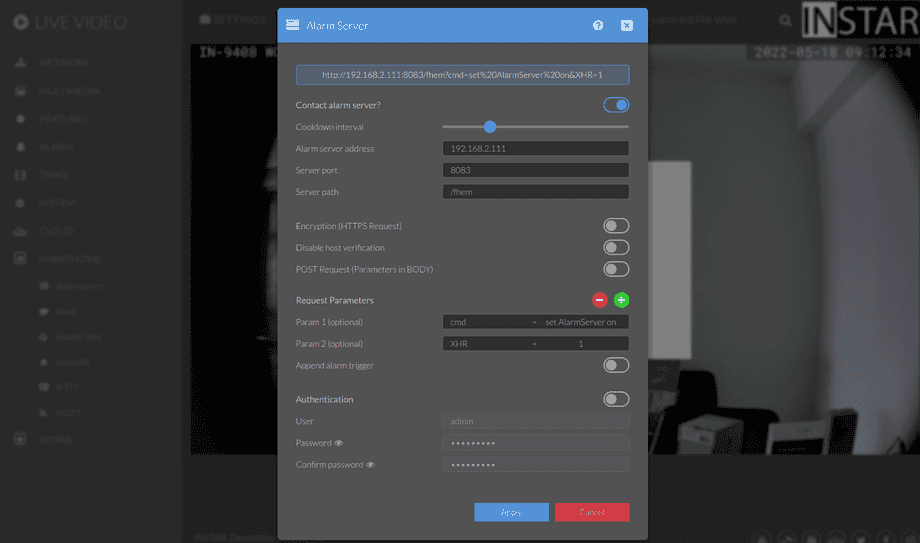
We now have a way to toggle a swith in FHEM when our cameras is triggered. All we need to do now is to add the FHEM Webhook we just created to the Alarmserver Configuration:
And the next steps will be specific to your personal setup. Use the switch to trigger a function and toggle it back to off to have it primed for the next alarm trigger.
Connecting to the MQTT Interface
You can use the camera internal MQTT Broker with the MQTT2 Client to connect FHEM with your camera:
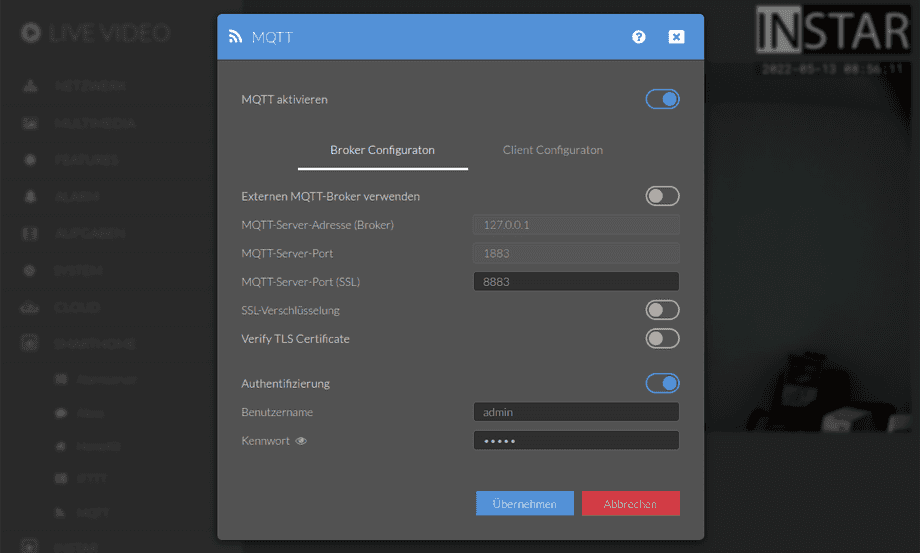
define [name] MQTT2_CLIENT [host]:[port]Start by activating the INSTAR MQTT Broker:
And define the MQTT Client with your camera IP and the MQTT Broker port:
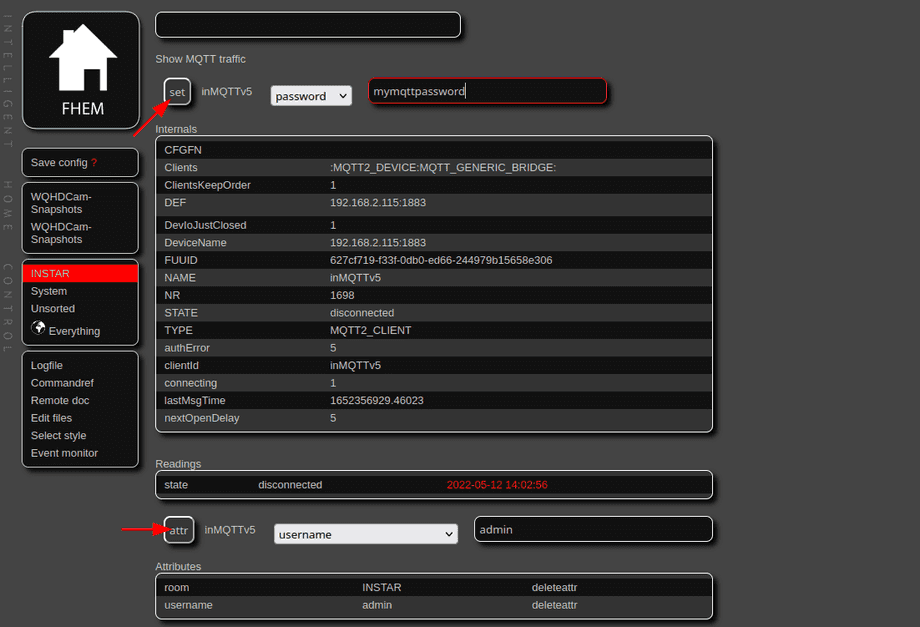
define inMQTTv5 MQTT2_CLIENT 192.168.2.115:1883Continue by adding your Broker login and click on connect to connect the client with your broker:
Forwarding FHEM Events through MQTT
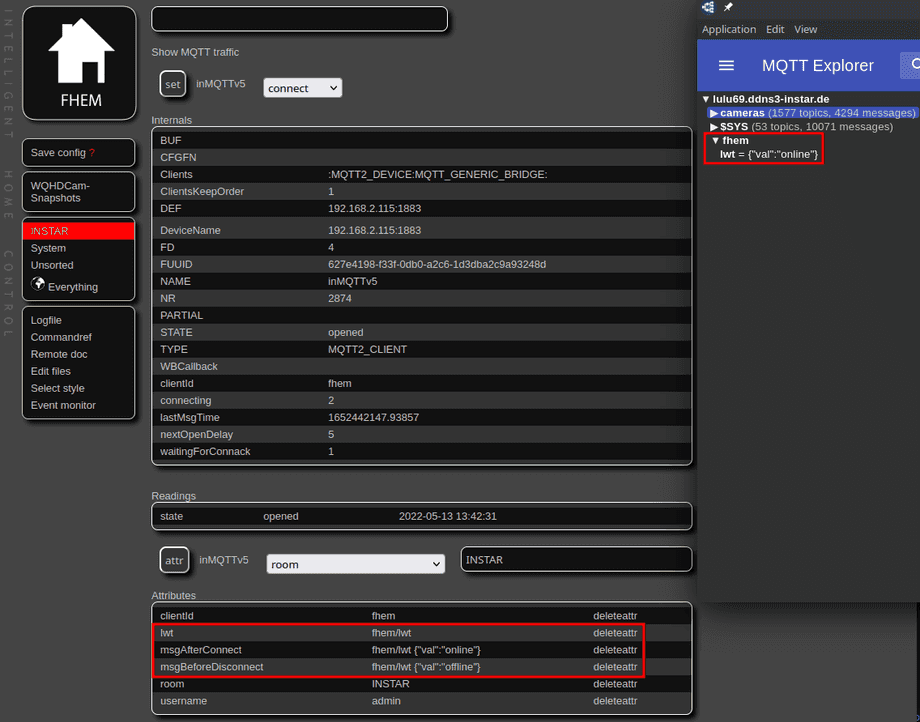
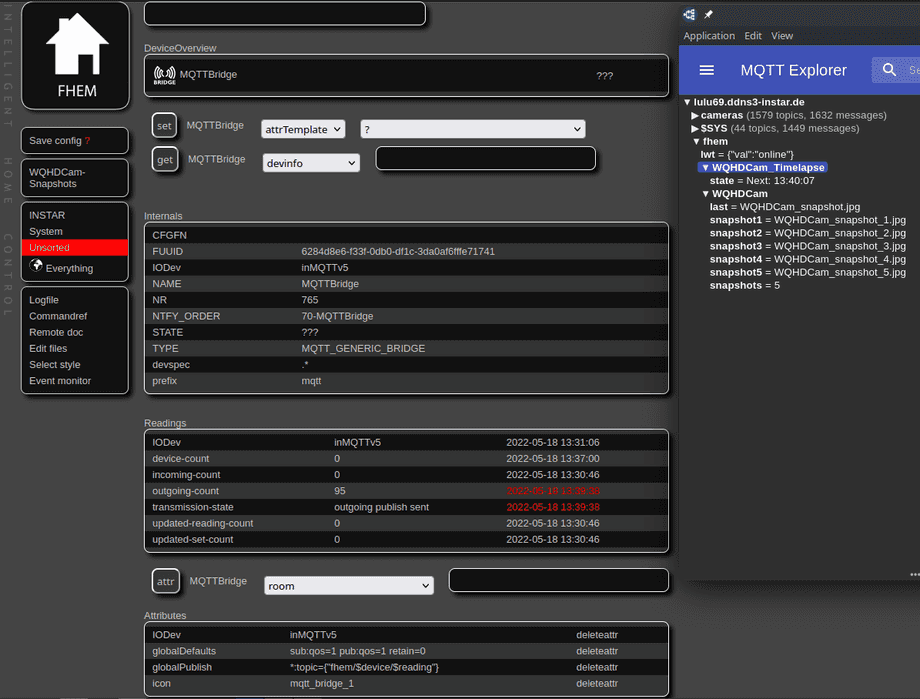
Define an MQTT Bridge to publish FHEM Events through the MQTT interface of your camera:
define MQTTBridge MQTT_GENERIC_BRIDGE
attr MQTTBridge IODev inMQTTv5
attr MQTTBridge globalDefaults sub:qos=1 pub:qos=1 retain=0
attr MQTTBridge globalPublish *:topic={"fhem/$device/$reading"}