Restore your VGA Camera after a faulty Firmware Upgrade
VGA Cameras
What do you need?
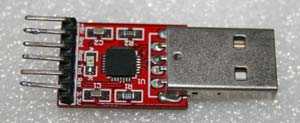
USB to serial UART Interface (3.3 logic needed) available online.
4x connection cable with female pins on both sided and 4 pin plugs.
- Software HyperTerminal (Windows XP) or Software TerraTerm (Vista/7/8):
- Hyperterminal / Windows XP: Start → Programs → Accessories → Communication → HyperTerminal
- Tera Term / Windows Vista/7/8: follow the link and download / install the program - CLICK HERE TO DOWNLOAD
- Download the newest firmware and web user interface from our download area. CLICK HERE TO DOWNLOAD YOUR FIRMWARE/WEBUI
- Download the linux-romfs.zip container and unpack it. FILE:LINUX-ROMFS.ZIP
How to prepare your Hardware?
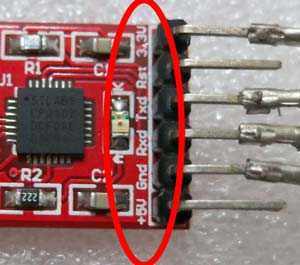
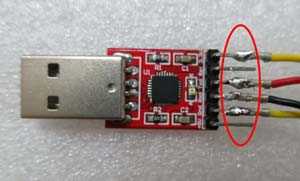
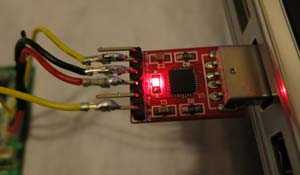
- Connect your USB to UART interface with the cable. Connect the plug to the GND, Rxd, Txd and 3.3u pins - you may want to solder them in place to make sure that the stay in place.
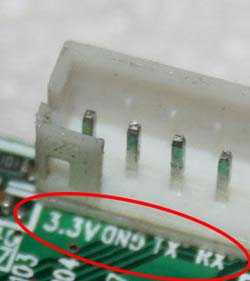
- Now connect the other side with the camera mainboard and solder them in place. Make the connection according to:
Pin #1 Ground → Ground Pin #2 Rxd → Txd Pin #3 Txd → Rxd Pin #4 3.3u → 3.3u
- Make sure that the connection is solid and that you don´t have a loose contact somewhere.
- The UART Status LED should light up after plugging in the USB connector (depends on the model you are using).
Operating System
For Windows XP-User - HyperTerminal
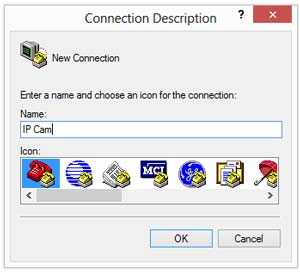
First you have to define a new connection after starting up the HyperTerminal. Type in any name and click on OK.
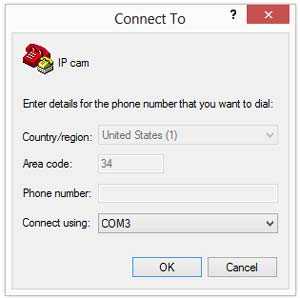
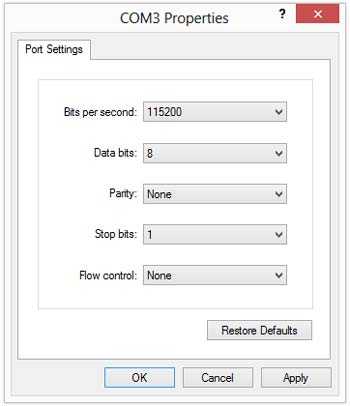
- Select the COM port of your UART interface and confirm with OK. You can check the COM port under Control Panel → Device Manager → Ports COM & LTP. Adjust the settings according to the following screenshot and click OK to confirm.
- Save your settings under File → Save As
- Now open the connection by double-clicking the shortcut on your desktop that was created in the previous step.
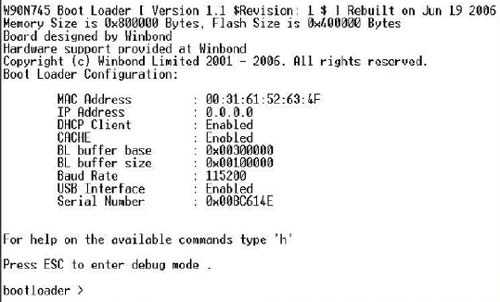
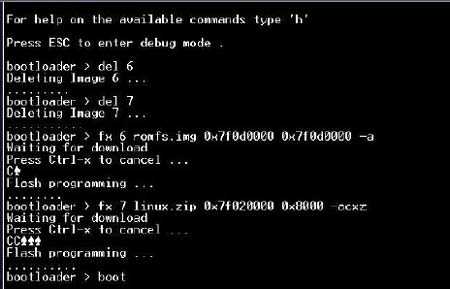
- The program should automatically launch the mainboards bootloader - then press ESC. You should now see the following screen.
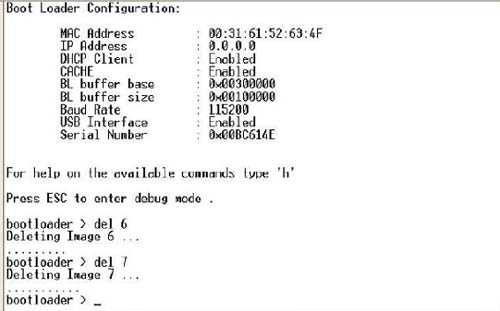
- Now type in the following two commands: del 6 Enter THEN del 7 Enter (Don´t forget the SPACE!!!)
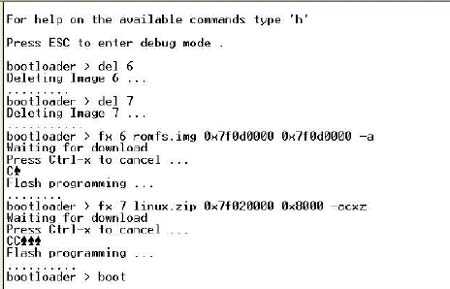
- Now type in the following: fx 6 romfs.img 0x7f0e0000 0x7f0e0000 -a Enter Waiting for download... will be displayed.
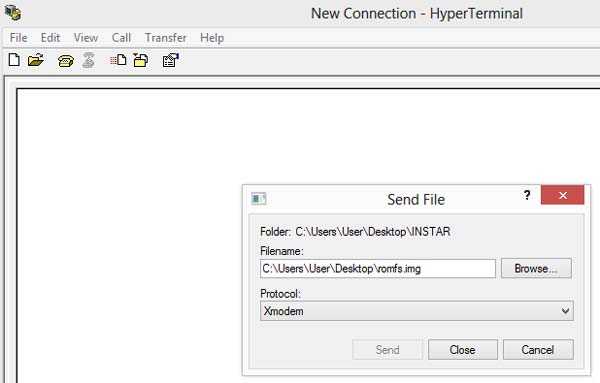
- Select the romfs.img file you downloaded earlier in Transfer → Send file → choose the romfs image file by browsing to the location you extracted it to earlier. Then set the protocol to Xmodem and click on Send.
- After the upload is completed repeat these steps for the Linux.zip file. Type in: fx 7 linux.zip 0x7f020000 0x8000 -acxz Enter
- Choose the file linux.zip from the earlier download and select the protocol Xmodem.
- Now type in boot and confirm with Enter.
- You can now reassemble your camera and check if you can connect it to your local cable network.
For Windows Vista/7/8 User - TeraTerm
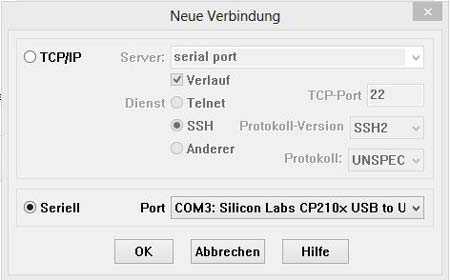
- After starting TeraTerm you first have to set up a new connection. Choose a serial connection (Seriell) and select the port the UART interface is connected to. Confirm these settings with OK. You can check the COM port under Control * Panel → Device Manager → Ports COM & LTP.
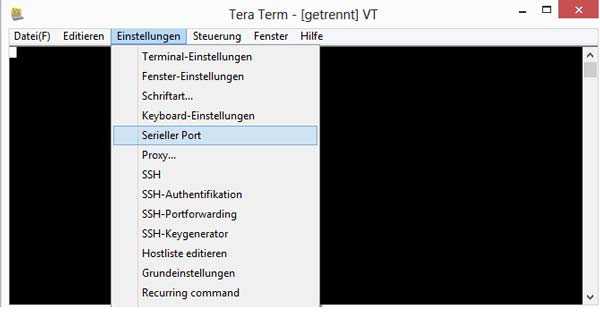
- Now go to Einstellungen (Settings) and choose Serieller Port (Serial Port).
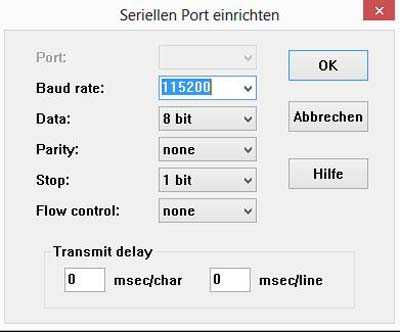
- Adjust the settings according to the following screenshot and click OK to confirm.
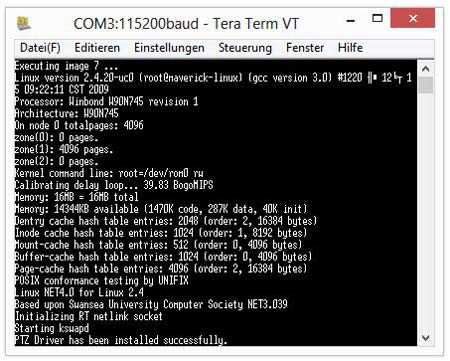
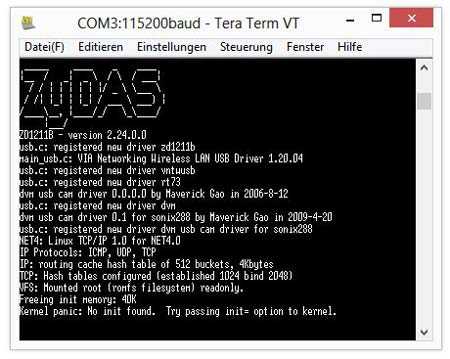
- The program should automatically launch the mainboards bootloader - then press ESC. You should now see the following screen.
- Now type in the following two commands: del 6 Enter THEN del 7 Enter (Don´t forget the SPACE!!!)
- Now type: fx 6 romfs.img 0x7f0e0000 0x7f0e0000 -a Enter . The program now waits for the file to transfer.
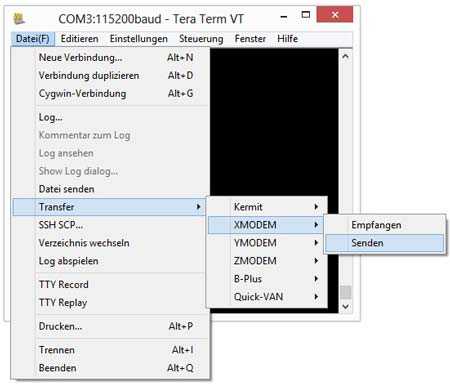
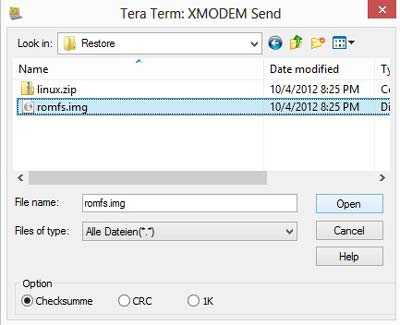
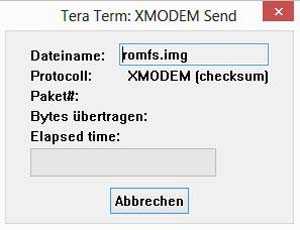
- Now go to Datei → Transfer → XMODEM → Senden and browse for the romfs.img you downloaded in the beginning. Click on Open to start the file transfer.
- Now we have to repeat those steps for the Linux.zip file. Type: fx 7 linux.zip 0x7f020000 0x8000 -acxz Enter . and choose the file linux.zip.
- Afterwards, type boot and confirm with Enter.
- You can now reassemble your camera and check if you can connect it to your local cable network.
