OpenHAB 3 Camera Widget
Machen Sie Ihrer Kamera zum Herzstück Ihres Smarthomes
Mithilfe der MQTT Schnittstelle Ihrer INSTAR Full HD Kameras können Sie diese zu einem bestehenden Smarthome-System (Home Assistant, OpenHAB, Node-RED, Athom Homey, Homematic, ioBroker, Loxone, homee) hinzufügen kann. Oder auch zum Haupt-Broker für Ihre MQTT Sensoren machen. MQTT ermöglicht es Ihnen ALLE Funktionen Ihrer Kamera zu automatisieren und mit anderen Diensten in Ihrem Smarthome zu verknüpfen.
Kontrollieren Sie Ihre Kamera über den IFTTT Online Dienst
Auf der IFTTT-Plattform stellten wir einen Dienst namens INSTAR zur Verfügung. Die INSTAR Applets bieten Ihnen die Möglichkeit, einige Einstellungen Ihrer INSTAR Kamera oder INSTAR Cloud mit IFTTT zu steuern. Sie können INSTAR mit Auslösern für Ort (Geo Location) und Datum & Zeit verbinden, Benachrichtigungen versenden und vieles mehr. Zum Beispiel können Sie die INSTAR Applets mit dem IFTTT-Ortungsdienst verbinden und automatisch den Alarm deaktivieren lassen, wenn Sie zu Hause ankommen. Sie können die INSTAR-Applets auch verwenden, um Ihre eigene Automatisierung zu erstellen und sie mit anderen Applets von Drittanbietern zu verbinden.
Erstellen der Kamera
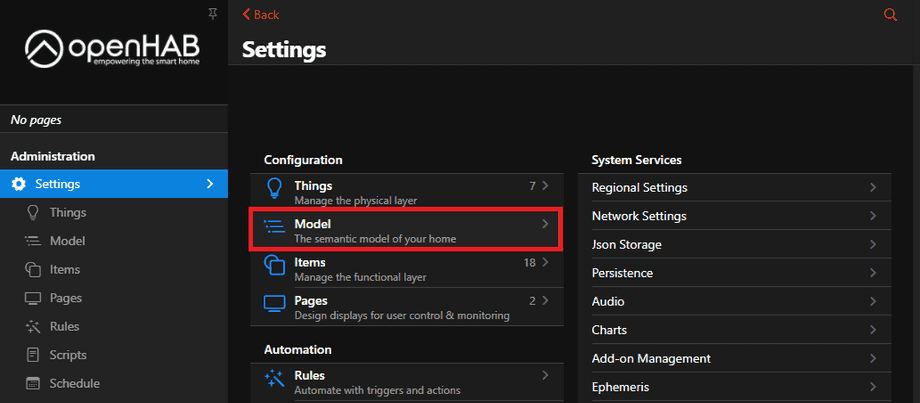
Zuerst müssen wir unsere Kamera als Equipment hinzufügen. Gehen Sie dazu auf Settings und klicken Sie auf Model:
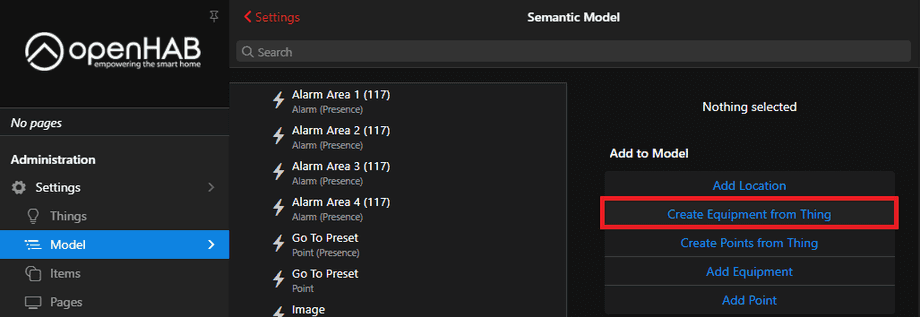
Klicken Sie dort auf Create Equipment from Thing:
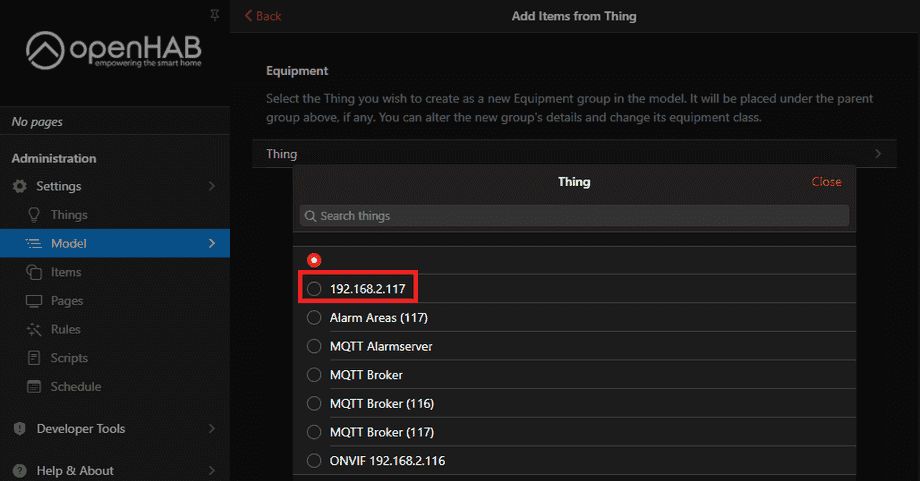
Und wählen Sie Ihre Kamera, die Sie mit dem Camera Binding hinzugefügt hatten:
Achten Sie darauf, dass Sie auf show advanced klicken, um alle Kanäle zu sehen und mindestens die Kanäle Pan, Tilt, Zoom, GoToPreset und MJPEG URL auswählen.
Erstellen des Widget Templates
Momentan (12.01.2021) ist das Kamera-Widget noch nicht Teil der Standard-OpenHAB-Widgets und muss manuell erstellt werden. Dafür müssen wir unseren Widget-Code über das Menü Developer Tools hinzufügen. Klicken Sie auf Create Widget und kopieren Sie den folgenden Code in das Eingabefeld:
uid: ClickablePTZCamera
props:
  parameters:
    - context: item
      label: Select the Camera to Control
      name: camera
      required: true
      type: TEXT
    - context: item
      label: Item for Switch
      name: switchItem
      required: false
      type: TEXT
    - label: Invert Tilt Controls
      name: invertTilt
      required: true
      type: BOOLEAN
    - label: Show Discrete Controls
      name: showControls
      required: true
      type: BOOLEAN
  parameterGroups: []
timestamp: Dec 29, 2020, 11:56:36 AM
component: f7-card
config:
  class: no-margin
  expandable: true
  style:
    border-radius: 6px
    --f7-card-margin-horizontal: 0px
    width: 16rem
    height: 9rem
slots:
  default:
    - component: f7-card-content
      config:
        class: card-opened-fade-out
        style:
          color: white
          background-image: ="url('"+items[props.camera + "_MJPEGURL"].state+"')"
          background-size: 17rem 10rem
          background-repeat: no-repeat
          border-radius: 6px
          z-index: -1
    - component: f7-card-content
      config:
        class: card-opened-fade-in
        style:
          color: white
          background-image: ="url('"+items[props.camera + "_MJPEGURL"].state+"')"
          background-size: 100% auto
          background-position: center
          background-repeat: no-repeat
          z-index: -1
    - component: oh-link
      config:
        class: card-prevent-open
        style:
          margin: 0em 0.2em
          color: "=(items[props.switchItem].state === 'ON') ? 'cyan' : 'white'"
          opacity: "=(items[props.switchItem].state === 'ON') ? '0.4' : '0.3'"
        visible: =props.switchItem !== undefined
        iconF7: power
        iconSize: 22
        action: toggle
        actionItem: =props.switchItem
        actionCommand: ON
        actionCommandAlt: OFF
    - component: oh-link
      config:
        class: card-prevent-open
        style:
          margin: 0 0.2em
          color: white
          opacity: 0.3
        visible: =props.showControls === true
        iconF7: arrow_left
        iconSize: 22
        action: command
        actionItem: =props.camera + "_Pan"
        actionCommand: INCREASE
    - component: oh-link
      config:
        class:
          - card-prevent-open
        style:
          margin: 0 0.2em
          color: white
          opacity: 0.3
        visible: =props.showControls === true
        iconF7: arrow_up
        iconSize: 22
        action: command
        actionItem: =props.camera + "_Tilt"
        actionCommand: "=(props.invertTilt) ? 'INCREASE' : 'DECREASE'"
    - component: oh-link
      config:
        class: card-prevent-open
        style:
          margin: 0 0.2em
          color: white
          opacity: 0.3
        visible: =props.showControls === true
        iconF7: arrow_down
        iconSize: 22
        action: command
        actionItem: =props.camera + "_Tilt"
        actionCommand: "=(props.invertTilt) ? 'DECREASE' : 'INCREASE'"
    - component: oh-link
      config:
        class: card-prevent-open
        style:
          margin: 0 0.2em
          color: white
          opacity: 0.3
        visible: =props.showControls === true
        iconF7: arrow_right
        iconSize: 22
        action: command
        actionItem: =props.camera + "_Pan"
        actionCommand: DECREASE
    - component: oh-link
      config:
        class: card-prevent-open
        style:
          margin: 0 0.2em
          color: white
          opacity: 0.3
        visible: =props.showControls === true
        iconF7: plus
        iconSize: 22
        action: command
        actionItem: =props.camera + "_Zoom"
        actionCommand: INCREASE
    - component: oh-link
      config:
        class:
          - card-prevent-open
        style:
          margin: 0 0.2em
          color: white
          opacity: 0.3
        visible: =props.showControls === true
        iconF7: minus
        iconSize: 22
        action: command
        actionItem: =props.camera + "_Zoom"
        actionCommand: DECREASE
    - component: oh-link
      config:
        class: card-prevent-open
        style:
          margin: 0 0.2em
          color: white
          opacity: 0.3
        iconF7: list_number
        iconSize: 22
        action: options
        actionItem: =props.camera + "_GoToPreset"
    - component: oh-link
      config:
        class: card-prevent-open
        style:
          margin: 0 0.2em
          color: white
          opacity: 0.3
        iconF7: gear_alt
        iconSize: 22
        action: group
        actionGroupPopupItem: =props.camera
    - component: oh-link
      config:
        style:
          position: absolute
          top: 7.8rem
          right: 0.2rem
          color: white
          opacity: "=(items[props.camera + '_MotionAlarm'].state === 'ON') ? '0.5' : '0'"
        iconF7: eye
        iconSize: 18
    - component: oh-link
      config:
        style:
          position: absolute
          top: 7.7rem
          left: 0rem
          color: white
          opacity: "=(items[props.camera + '_AudioAlarm'].state === 'ON') ? '0.5' : '0'"
        iconF7: ear
        iconSize: 18
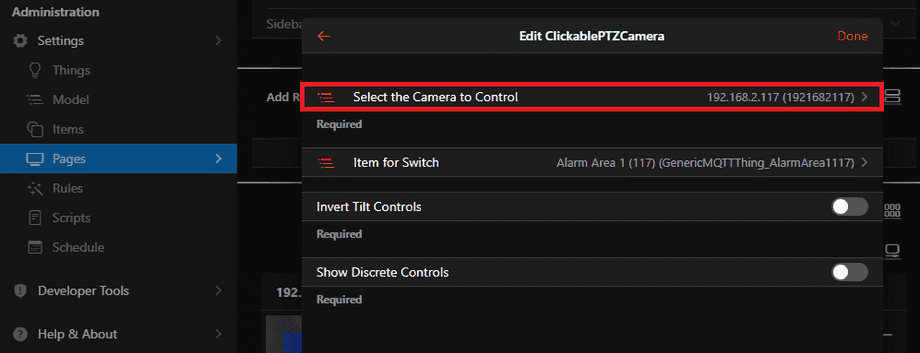
Wenn Sie nun Ihre OpenHAB Seite bearbeiten, haben Sie die Möglichkeit, ein Personal Widget mit dem Namen ClickablePTZCamera hinzuzufügen:
Wählen Sie unter Select the Camera to Control die Kamera aus, die Sie in Schritt 1 erstellt haben:
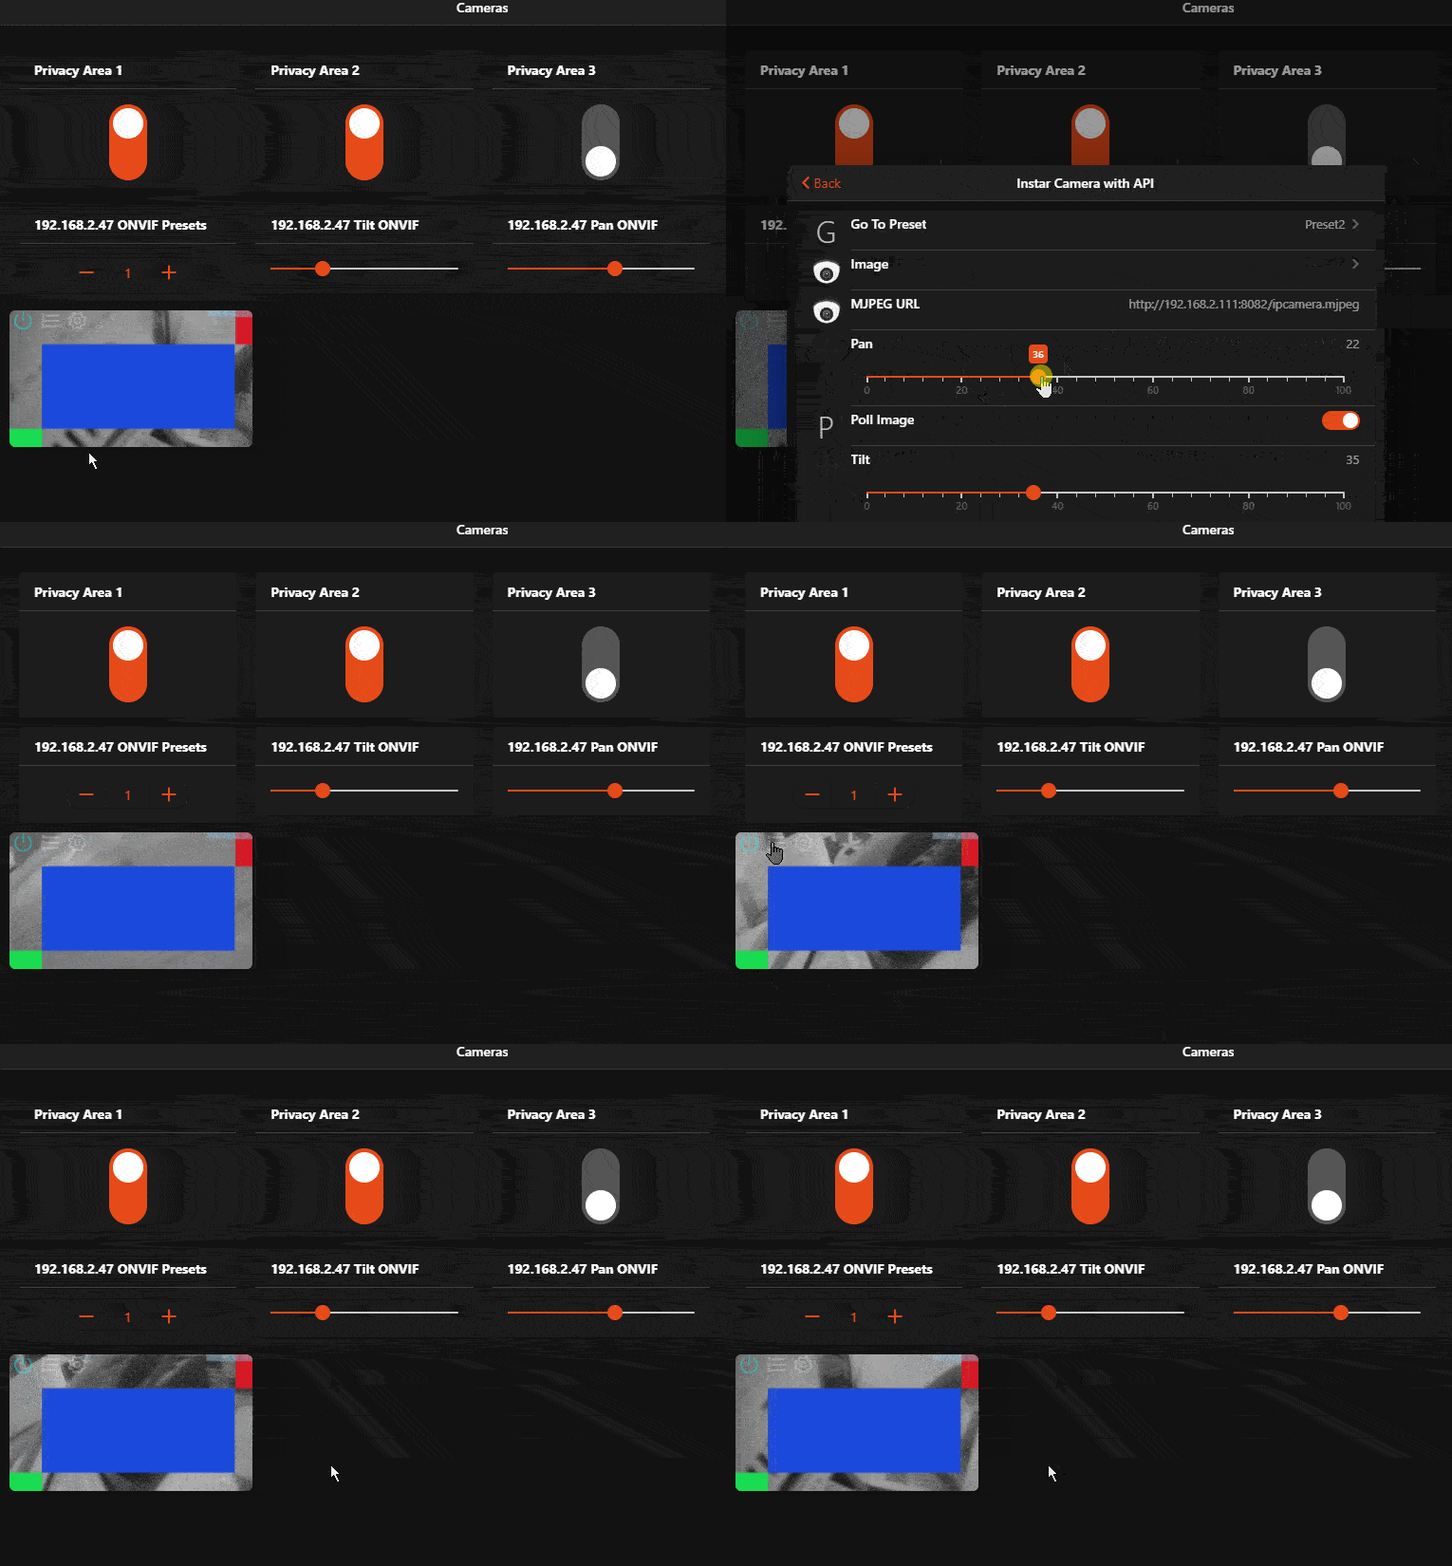
Mit dem Widget können Sie Ihre Kamera schwenken und neigen sowie auf das Live-Video Ihrer Kamera und alle Funktionen zugreifen, die Sie beim Erstellen Ihrer Kamera in Schritt 1 ausgewählt haben:
