Side Navigation - FTP Photoseries
This menu allows you to activate the software´s photo series function.
Schedule
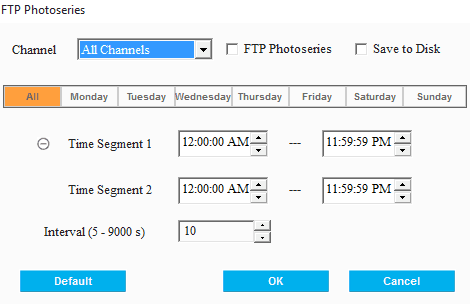
First select your camera - or keep All Channels selected to set all your camera´s at once - and check FTP Photoseries to start a continuous snapshot recording within the selected time window. Clicking on Default will activate a 24/7 alarm schedule. You can adjust this schedule by first selecting the day of the week you want to change and then select a time window below. You can either select two time windows - e.g. from 12 at night to 7am and from 6pm to 11:59pm to keep an eye on your office over the off-hours. Or hide the second timeline to cover a continuous time period. Please make sure that the first time value always has to be earlier then the second and the time window has to be contained by the 24h day - e.g. Time Segment 1 08:00:00AM - 06:00:00AM and Time Segment 2 08:00:00PM - 06:00:00AM would NOT be valid entries.
Photoseries
InstarVision can be used to take snapshots with an interval between 5s and 900s. Snapshots taken will be named by a time stamp and uploaded to a FTP server (please check the Save to Disk box to save of those snapshots locally). Please go to the Record FTP settings to set up a connection to your FTP server first! You can also upload images directly to your website. To do so, you should set a fixed file name in the FTP settings and then upload it to your webserver. Add the snapshot to your website with an image tag - this way you will always have an up-to-date image on your homepage.
How to create a Timelapse Video from a Photoseries in Windows?
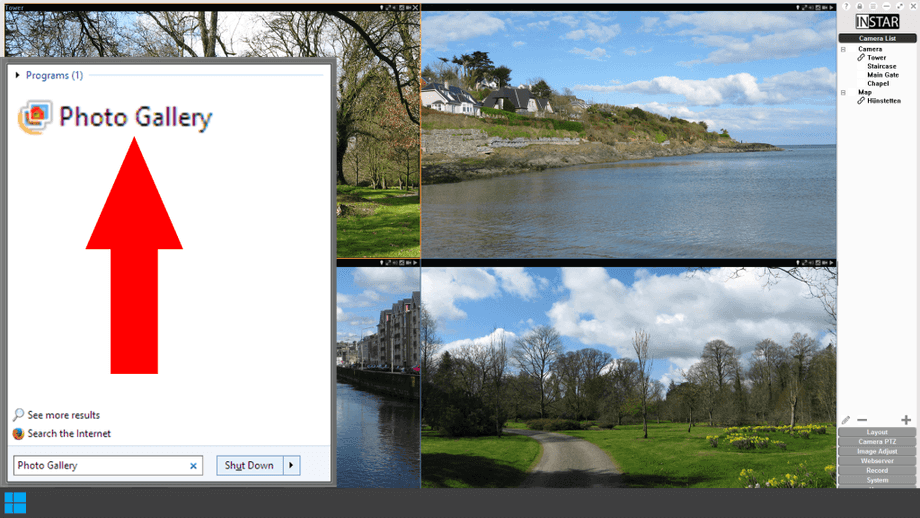
1 - Open the Start Menu and search for the Windows App Photo Gallery. In Windows 8 just open the Charm Bar on the right of your display and use the Search function embedded there. Start the software.
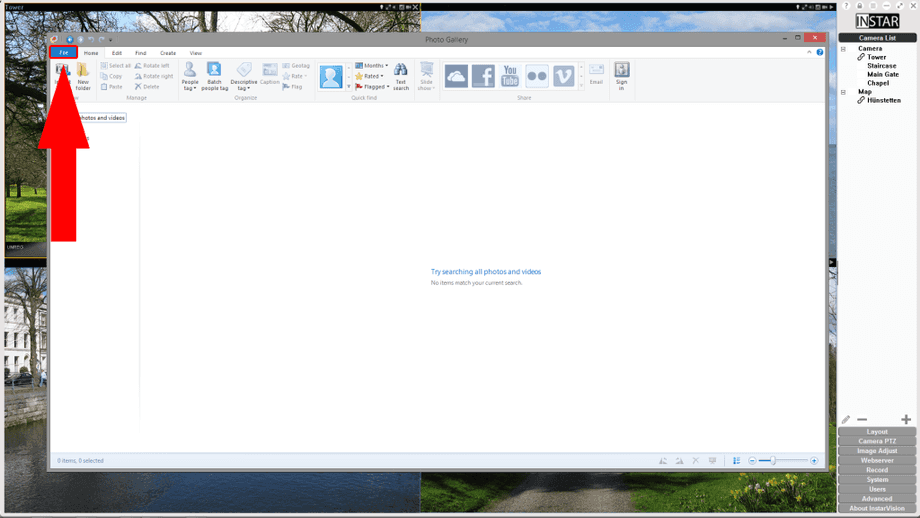
2 - If you saved your snapshots in a default photo directory, the Gallery app should already display them - you can skip to step 5. Otherwise open the File Menu to add the directory that contains the images from your Photoseries.
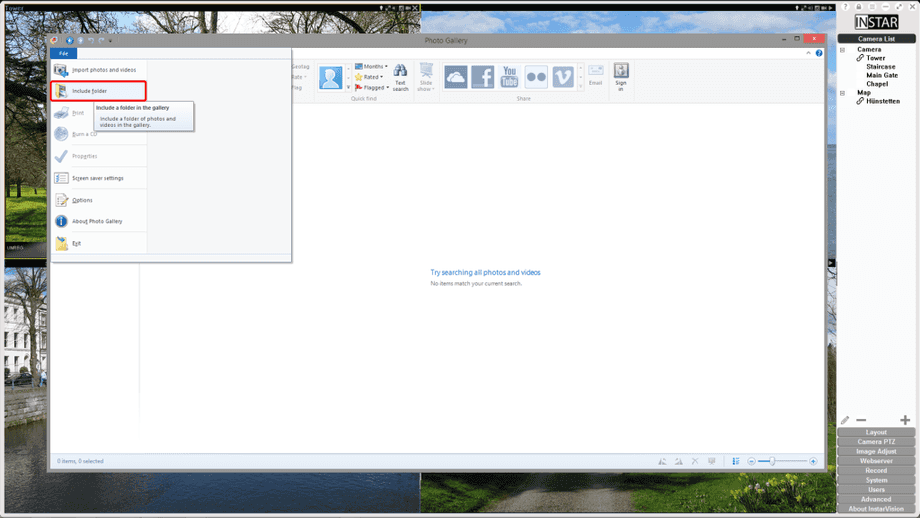
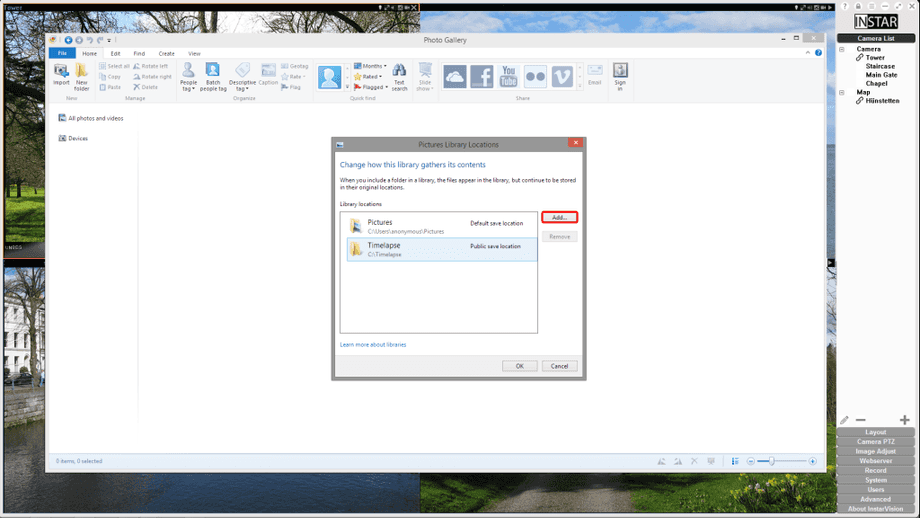
3 - To add your photoseries folder to the selection, choose to Include a Folder in the File menu. This will open the Add Directory dialogue for you.
4 - - Click on Add to include your Photoseries folder in the selection. Navigate to the folder where you saved your snapshots and select it. Then click OK.
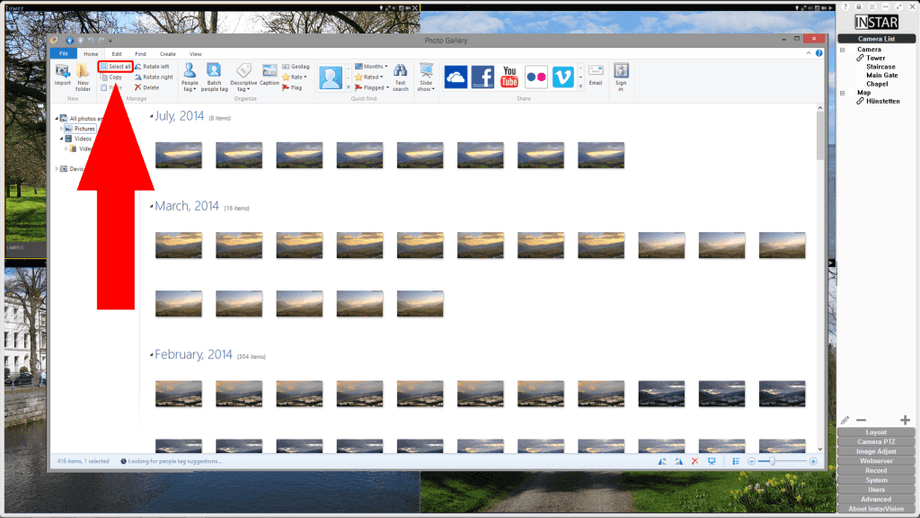
5 - The software will now display the content of your Photoseries folder. Click on Select All to do some global adjustments to the image.
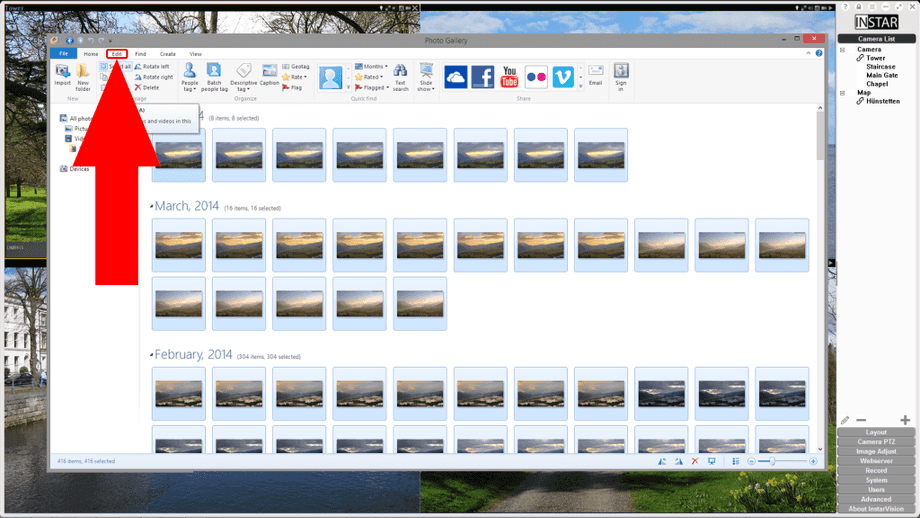
6 - Open the edit menu to get access to the photo editing tools available in the Photo Gallery app. If you apply those tools now, they will be applied to all images equally. You might want to select some of the images to do individual adjustments. Please be aware that the overall look of images close to each other has to be similar (see also step 7).
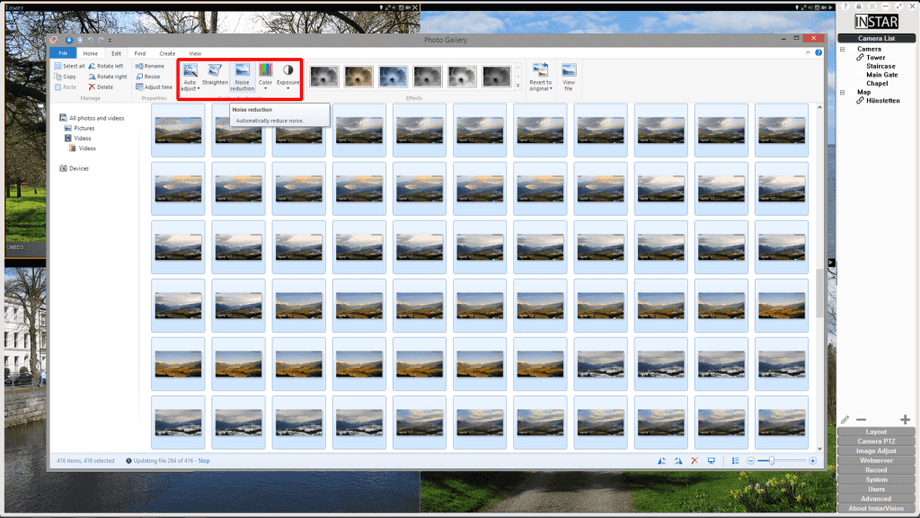
7 - You can adjust the Contrast and Saturation as well as reduce the image noise ("graininess"). If there are stark differences in brightness between two images next to each other, it is recommended to go through them one by one and equalize them - otherwise they will show up as a annoying flicker in the final movie!
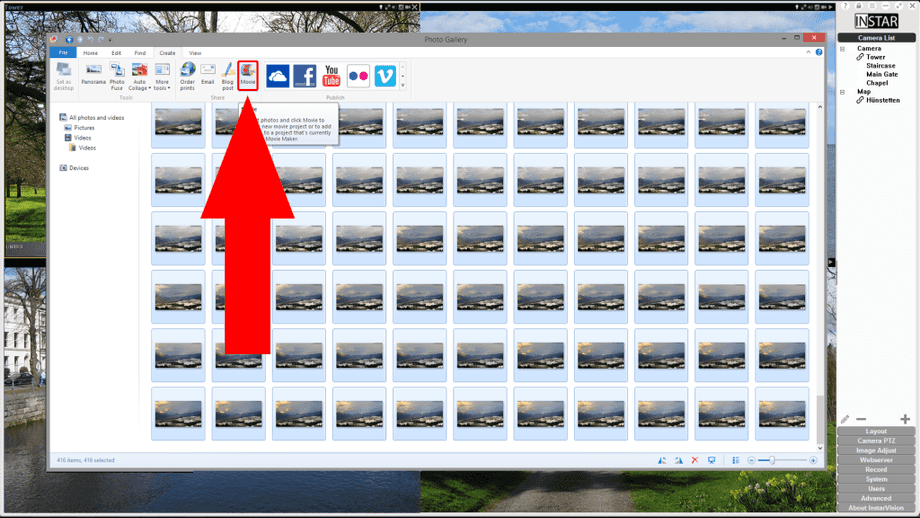
8 - Now open the Create menu and choose the Movie icon. This will open the Movie Maker and load all your selected images from the Gallery into a movie timeline for you.
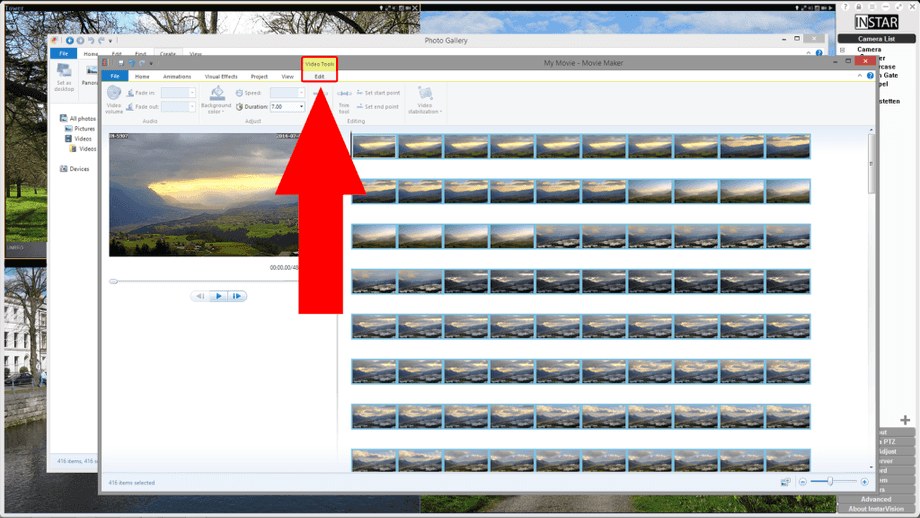
9 - Now open the Video Tools to Edit your Video Properties.
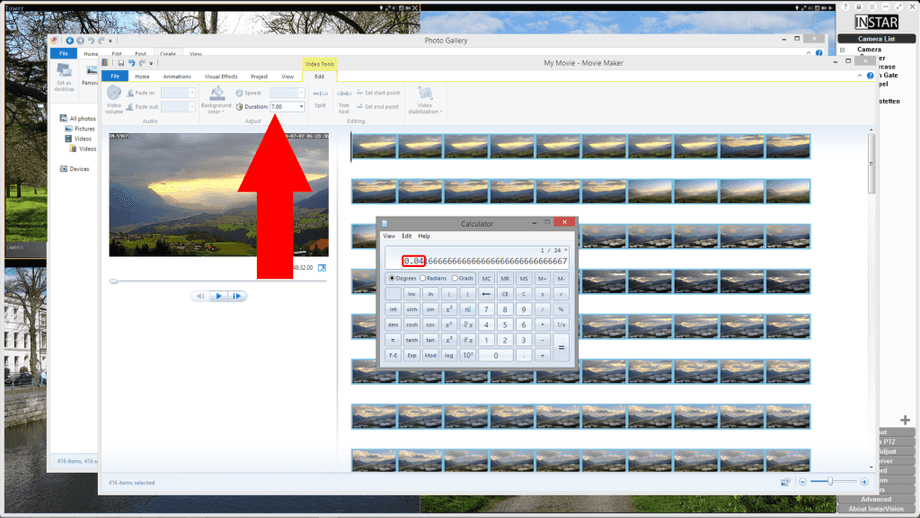
10 - To get a movie in Cinema Quality, you will want to aim for a 24 images per second. You have to set the Duration to 0.04s. If you have a small amount of images for your timelapse, you might want to consider to type in a higher number (0.06s - 0.2s) here - or the timelapse will end up to be very short.
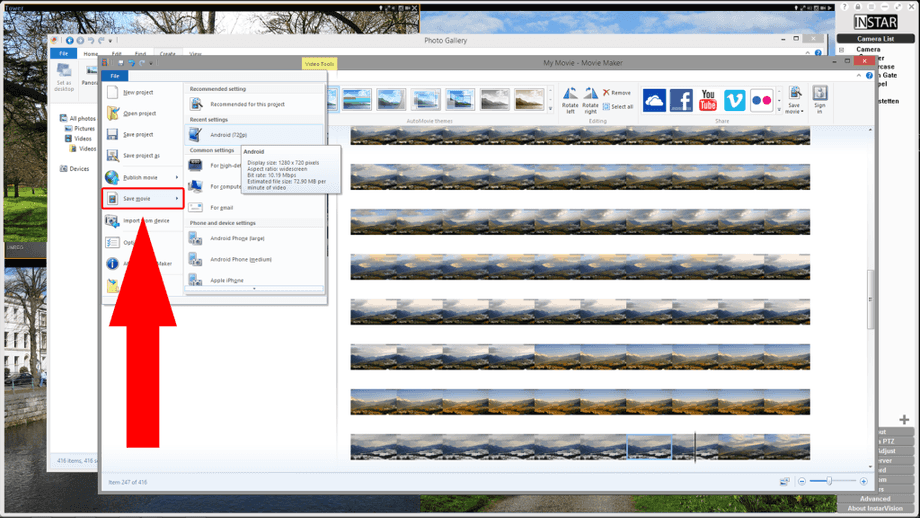
11 - Now open the File Menu and choose a preset to save your movie in. It is recommended to choose a 720p Preset for your HD camera and a VGA preset for your VGA camera.
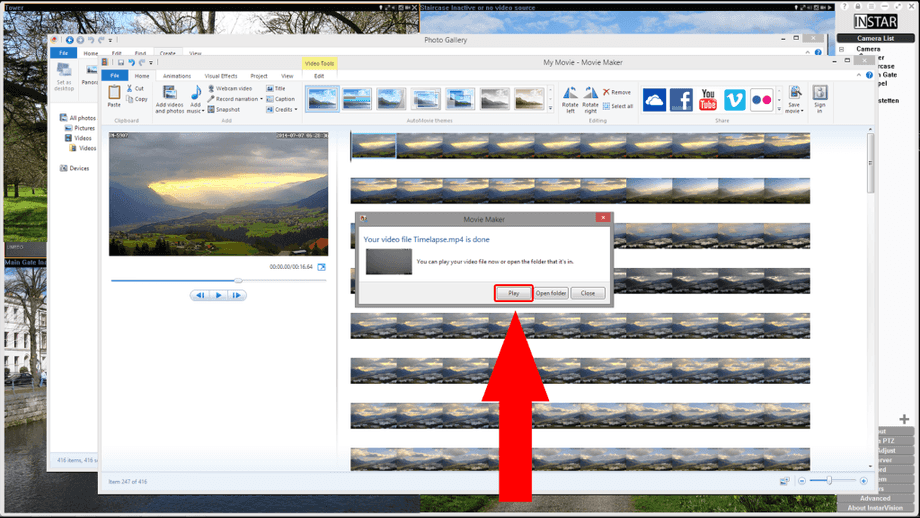
12 - After processing - just push play to watch your timelapse!

