Software
Other
QNAP Surveillance Station
The Surveillance Station is professional network surveillance Video Management System (VMS). Being one of the Turbo NAS standard applications, the Surveillance Station can be activated on the QTS App Center to turn the Turbo NAS into a professional Network Video Recorder (NVR) system for real-time monitoring, recording, playback, alarm notifications, Intelligent Video Analytics's (IVA), and management to safeguard your assets and property when used with supported IP cameras.
In order to integrate your INSTAR IP camera in the QNAP Surveillance Station we recommend you to download the latest version from QNAP app store.
Add a HD Camera
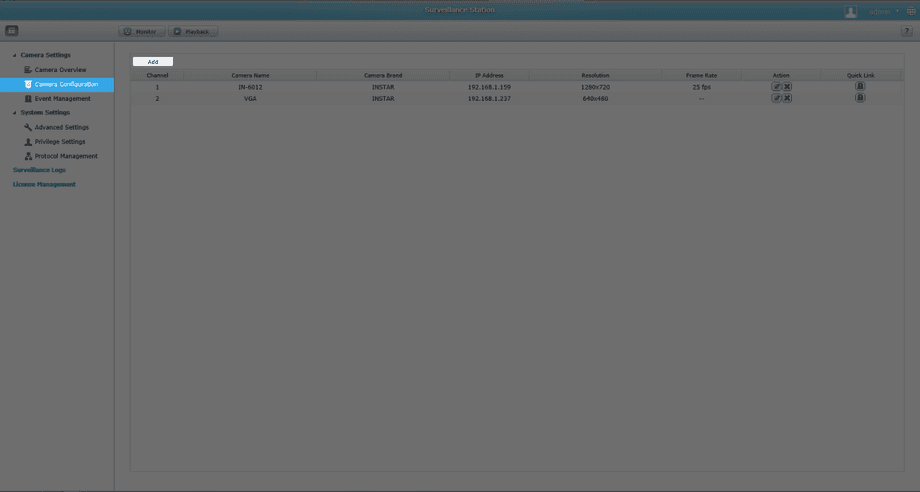
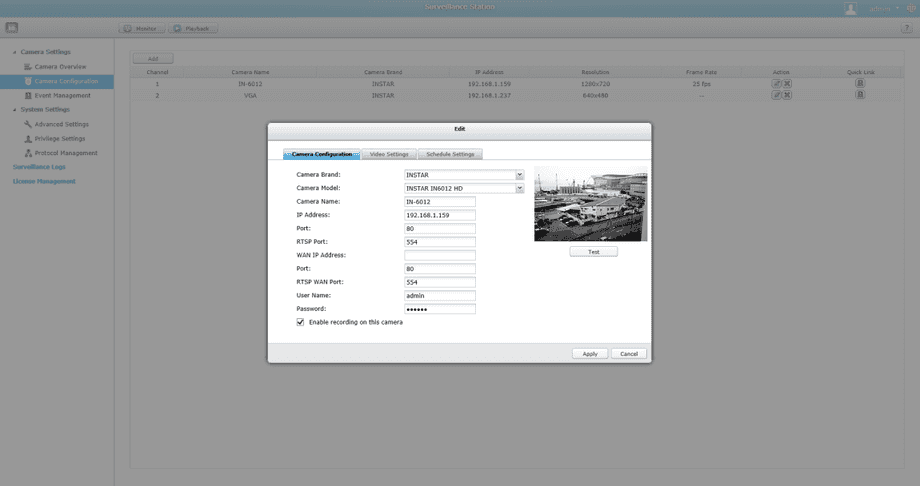
Start the Surveillance App from the QNAP web interface and click on the Add button. Now choose type in the address for your local HD camera, the HTTP & RTSP port and your login credentials.
Fig1. Start the Surveillance App from the QNAP web interface and click on the Add button.
Fig2. Type in the camera´s local IP address and your login credentials.
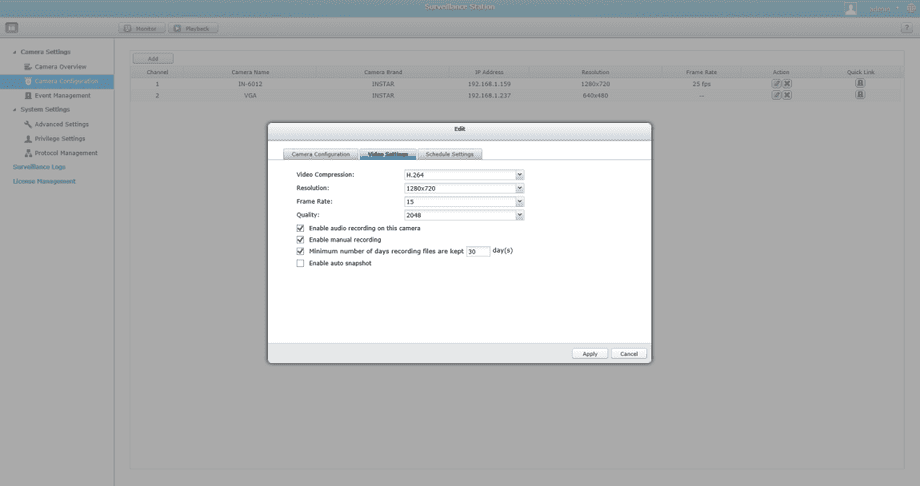
Fig3. Adjust the video quality of the camera´s live stream to fit your needs.
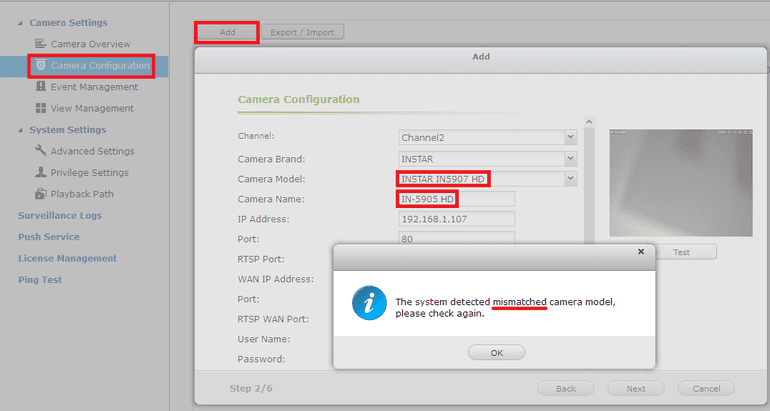
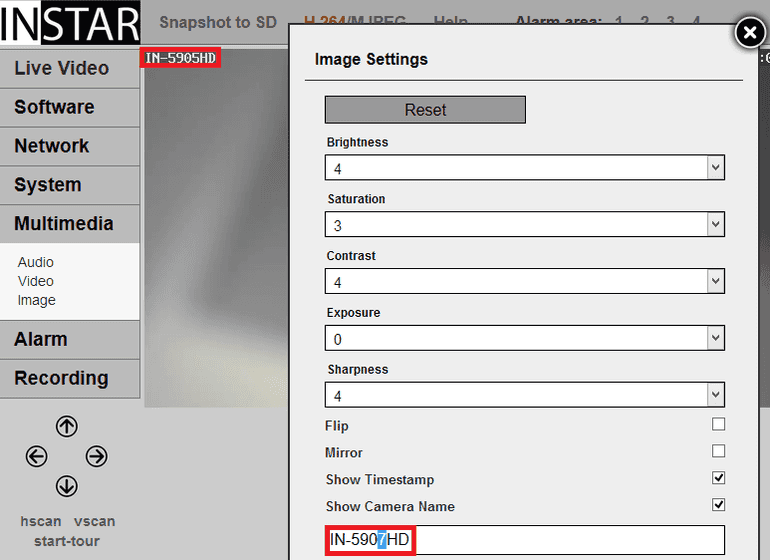
What to do in case of a model mismatch?
Fig4. If you want to integrate a model that is not supported by the Surveillance Station yet, you will be faced with a Model Mismatch error.
Fig5. Simply change the camera name under Multimedia/Image to a supported camera model and retry.
Add a VGA Camera
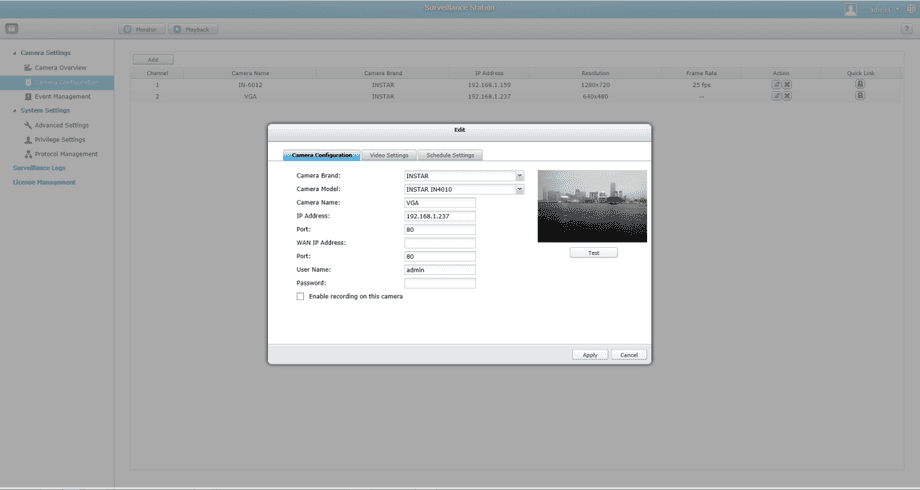
Start the Surveillance App from the QNAP web interface and click on the Add button. Now choose type in the address for your local VGA camera, the HTTP port and your login credentials.
Fig6. Start the Surveillance App from the QNAP web interface and click on the Add button.
Fig7. Type in the camera´s local IP address and your login credentials.
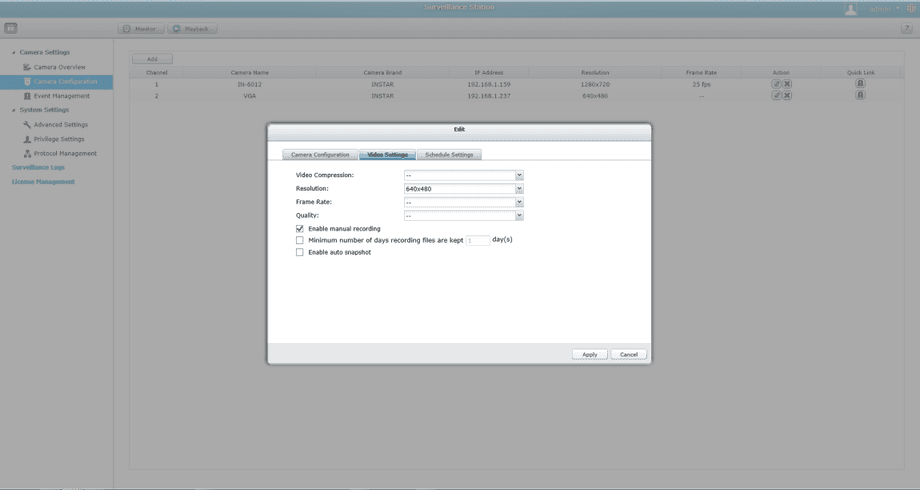
Fig8. Adjust the video quality of the camera´s live stream to fit your needs.
Fig9. Both cameras are now available after confirming your settings.
Event Management
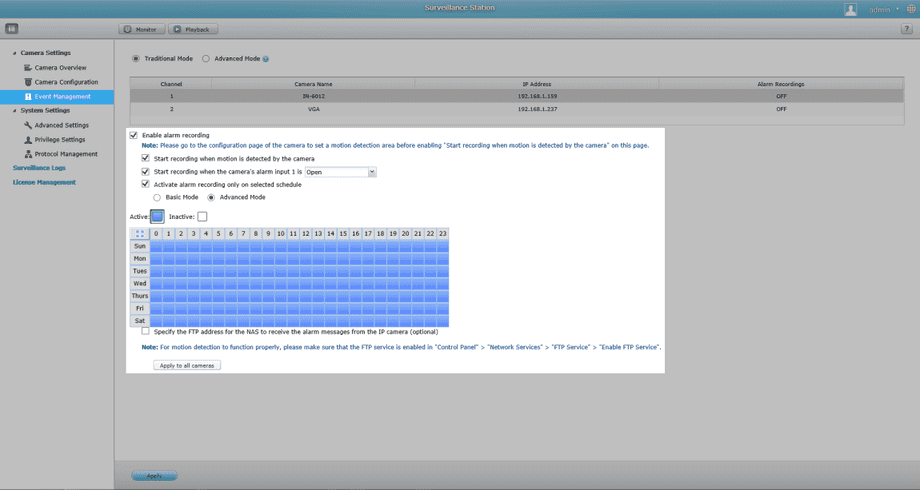
Open the event manager to activate the alarm recording in case of a motion detection event or bind the recording function to the external alarm input - so that an external sensor (e.g. a PIR motion detector) can trigger an alarm recording. Go to Advanced settings to adjust the length of the alarm recording and for a simple storage management.
Fig10. Set your camera to record a video in case of an alarm trigger event.
Monitor and Playback
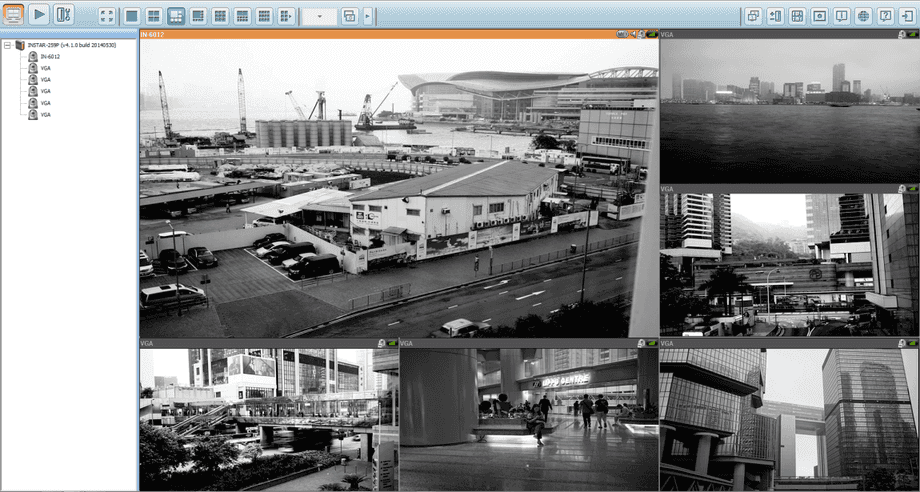
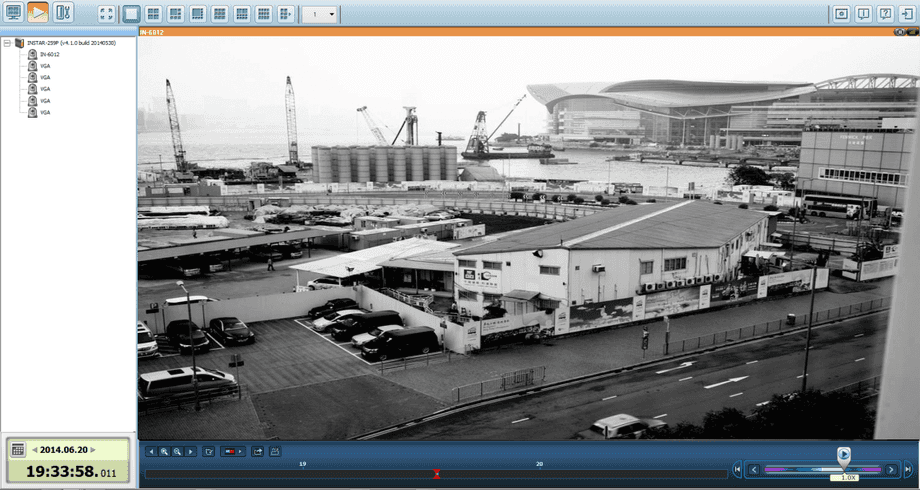
Use the Monitor window to keep an eye on your cameras real-time feeds from your INSTAR cameras. Whenever a suspicious event is found, take a snapshot to keep a record and take immediate actions accordingly. The Playback window allows you to quickly find videos of suspicious incidents on the Surveillance Station with the support of an intuitive timeline, image preview, Intelligent Video Analytics's (IVA), and more.
Fig11. Use live-view to watch real-time feeds from the IP cameras.
Fig12. Quickly find videos of suspicious incidents on the Surveillance Station with the support of an intuitive timeline.
Discuss this article on the INSTAR Forum !
