IN-5905 HD Quick Installation Guide

Connect the WiFi antenna with the SMA connector of your camera.

Plug in the power adapter connect it with the power connector on your camera´s cable tree.

It is recommended to set your routers WiFi channel to an unoccupied number, and set the encryption to WPA2/AES (or CCMP).
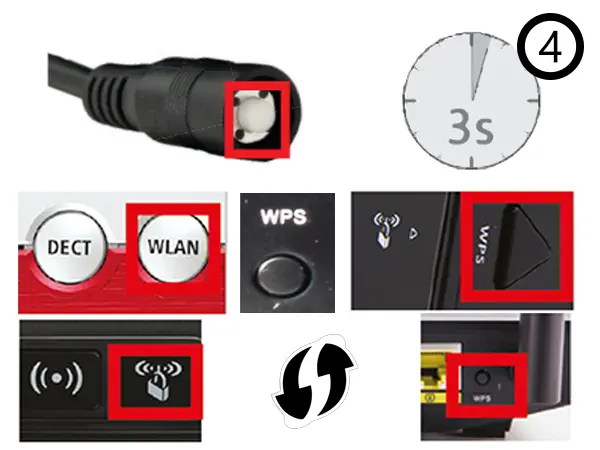
- A Press the WPS button (s. above) on your router.
- B Press the camera´s reset button for 3s (image on the left). Be aware that holding it for longer than 10s will result in a camera reset.
- C The camera will now automatically connect to your WiFi network. Please skip to step 7 (for PC or Mac) or 14 (for smartphone).

To establish a LAN connection, plug in the Ethernet cable to the RJ-45 on your cameras cable tree.

Plug the other end of the Ethernet cable into a free LAN port of your router or switch.

Start our IP Camera Tool from the Software CD and double click on the name of the camera.

Default Logins User/Password: admin / instar for the administrator, user / instar for normal users and guest / instar for restricted users. Our INSTALLATION WIZARD will lead you through the rest of the installation process.

Activate the WiFi card of your camera inside the webUI and start searching for WiFi signals. Select your WiFi, add your key and safe the settings. Restart your camera and unplug the LAN cable.
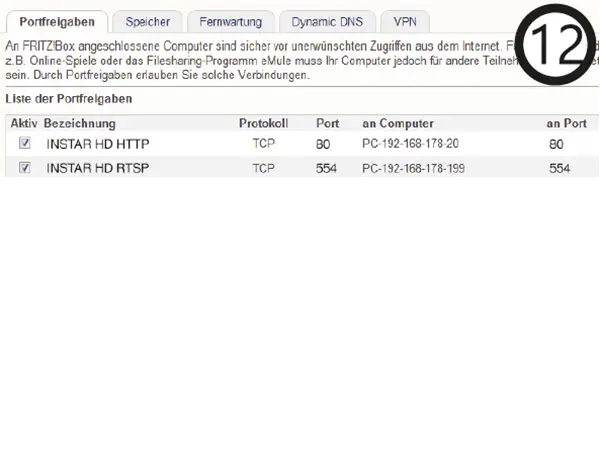
To access your camera over the internet, you have to forward the HTTP Port inside your router (default “80”) To access the Adobe Flash Plugin inside the WebUI, you also have to forward the RTMP Port (Standard “1935”).

Now you can enter your camera´s DDNS information to our free Windows Phone, Windows Metro, Android, iPhone, iPad or Blackberry App.
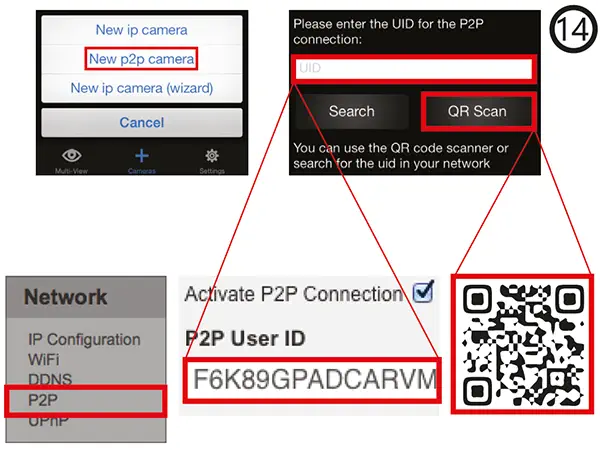
If you cannot open a port for camera´s DDNS service, you can still use the Point-2-Point Service instead with our Windows Phone, Windows Metro, Android, iPhone, iPad or Blackberry App.