Pirelli Router
This is the 2nd step of the Port Forwarding, click here to get to Step I.
Step 1
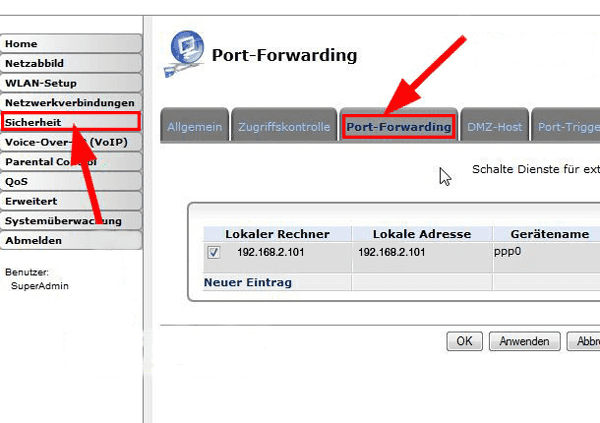
Access the user interface of your router in your browser (click here for more information) and type in your login credentials (click here for more information). Navigate to the Portforwarding in the Sicherheit menu. Click on Neuer Eintrag to add a port forwarding rule for your camera.
Step 2
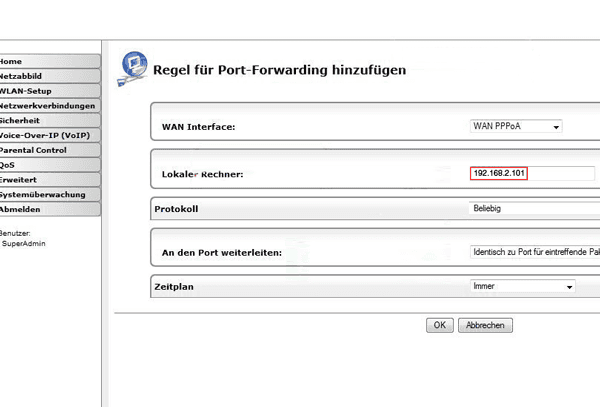
Type your camera´s IP-address into the field Lokaler Rechner. You can find your cameras IP address using our IP Camera Tool. Click on Ok to save your settings.
Step 3
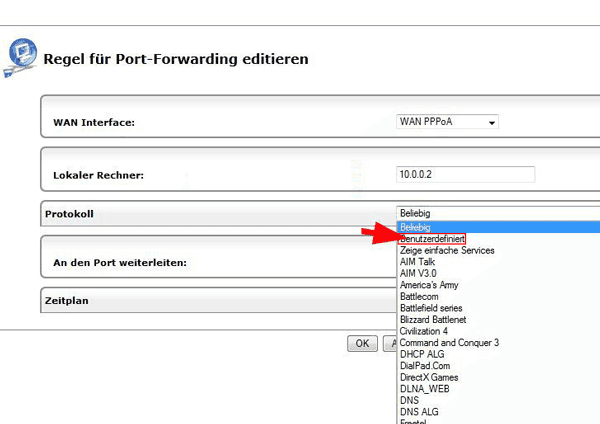
Set the Protokoll to Benutzerdefiniert.
Step 4
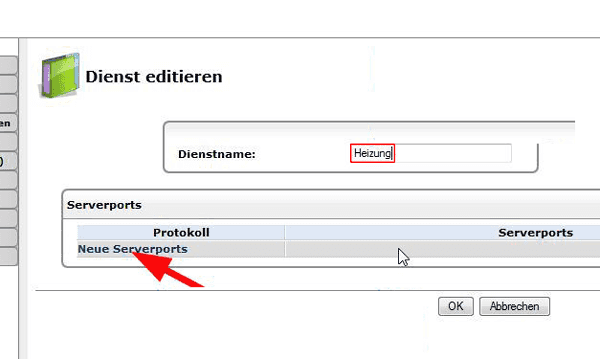
Give your camera a name and click on Neue Server Ports to add your camera´s port.
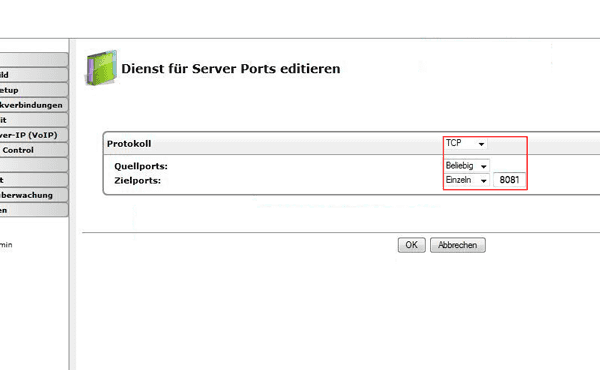
Choose TCP as your service protocol and set the Quellport to Beliebig. The destination Port Zielport is your camera´s internal port. Here you enter the port 8081 for your first camera, for your second camera enter 8082 etc.
Step 5
To be able to access the Flash Video as well, there has to be set a second Port Forwarding. Just follow the manual of this step, with the only difference to set the Flash (RTMP) Port instead. So for your first camera all ports are set to 1935, for your second camera it´s 1936, etc.
Now all Port Forwardings for your camera are set in the router. You can now continue with the next step:
Step III: The Camera´s DDNS-Address and the Remote-Access
Updated User Interface
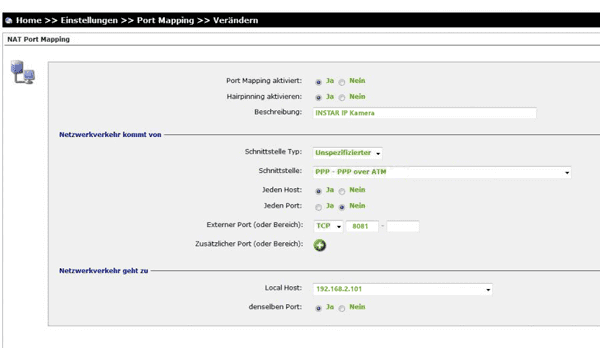
If your Pirelli router is using another WebUI, follow these instructions:
Setting | Select |
|---|---|
| Port Mapping aktiviert | Ja |
| Hairpinning aktivieren | Ja |
| Beschreibung | choose a name for your camera, for example _Camera Entrance |
| Schnittstelle Typ | Unspezifizierter |
| Schnittstelle | PPP - PPP over ATM |
| Jeden Host | Ja |
| Jeden Port | Nein |
| Externer Port | TCP - 8081 - 8081 (For your second camera choose 8082, etc.) |
| Local Host | Enter the local IP-address of your camera here |
| denselben Port | Ja |
Discuss this article on the INSTAR Forum !
