Port Forwarding
Netgear Router
This is the 2nd step of the Port Forwarding, click here to get to Step I.
Portweiterleitung bei einem Netgear Router.
Netgear routers have different interfaces. Here we present two interfaces, just follow the guide to the interface that corresponds to your model.
New Interface (e.g. WNR 2000v5)
Step 1
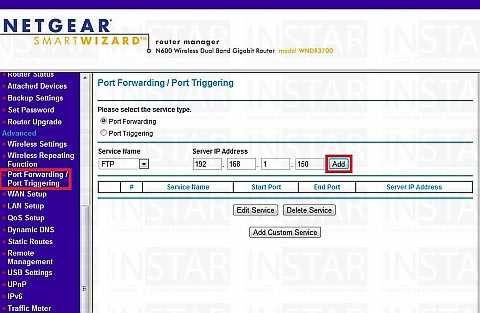
To access the user interface of your router, open the following address with your internet browser 192.168.1.1. The default login is username = admin and password = password. Navigate to the Port Forwarding/Port Triggering in the Advanced menu. Type your camera´s IP-address into the field Server IP Address. Click on Add to save the service.
Then enter the following data in the new window:
| Dienstname | Choose a name for your camera, for example Camera Input. |
| Protokoll | Choose TCP |
| Externer Portbereich | Enter the port of your camera here, i.e. 8081 for camera 1 as in step 1. If you add further cameras, then change the corresponding port for each of them (8082 for camera 2 etc.). |
| Interner Portbereich | Enter the same port here as in the previous field |
| Interne IP-Adresse | Enter the IP address of your camera here or select your camera from the list. |
Click on Apply above to activate port forwarding.
Step 2
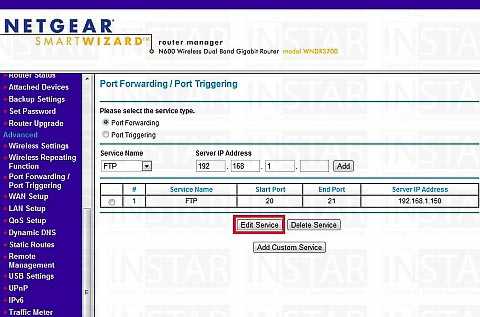
You will need to change both the start- and end-port to the port you want to operate your camera on. Click on Edit Service to customize the service.
Step 3
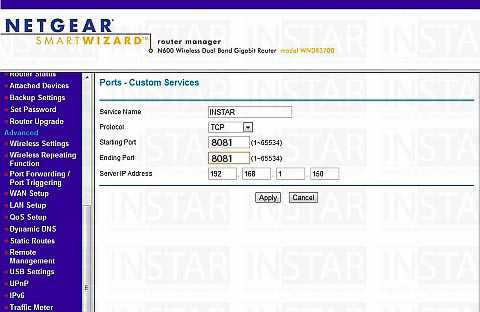
You can now choose a service name, set the protocol to TCP and choose your camera port for both the starting port and ending port. for your first camera the ports are 8081, for your second camera use the ports 8082 etc.
Step 4
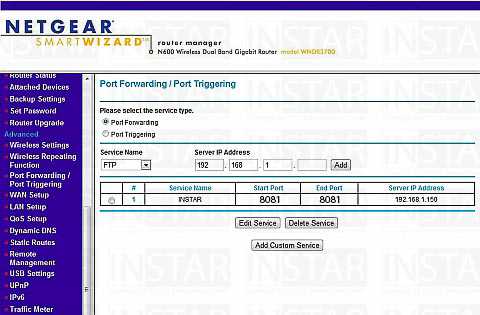
Click Apply to activate the service.
The rule is active after you applied the settings.
To be able to access the Flash Video as well, there has to be set a second Port Forwarding. Therefore, just follow the manual of this step, with the only difference to set the Flash (RTMP) Port instead. So for your first camera all ports are set to 1935, for your second camera it´s 1936, etc.
Now all Port Forwardings for your camera are set in the router. You can now continue with the next step:
Step III: The Camera´s DDNS-Address and the Remote-Access
Discuss this article on the INSTAR Forum !


